„Nitrokey“ konfigūravimas „Entra ID“ sistemai
Compatible Nitrokeys |
|||||||
|---|---|---|---|---|---|---|---|
✓ active |
✓ active |
⨯ inactive |
⨯ inactive |
⨯ inactive |
⨯ inactive |
⨯ inactive |
⨯ inactive |
The Nitrokey 3 and Nitrokey Passkey support provisioning credentials for Microsoft Entra for seamless employee on-boarding in enterprise scenarios.
Sąranka
Norint programiškai registruoti vartotojo prisijungimo duomenis, reikalinga „Microsoft Entra“ programa. Čia pateikiame jos nustatymo instrukciją, jei turite atitinkamas teises tai atlikti.
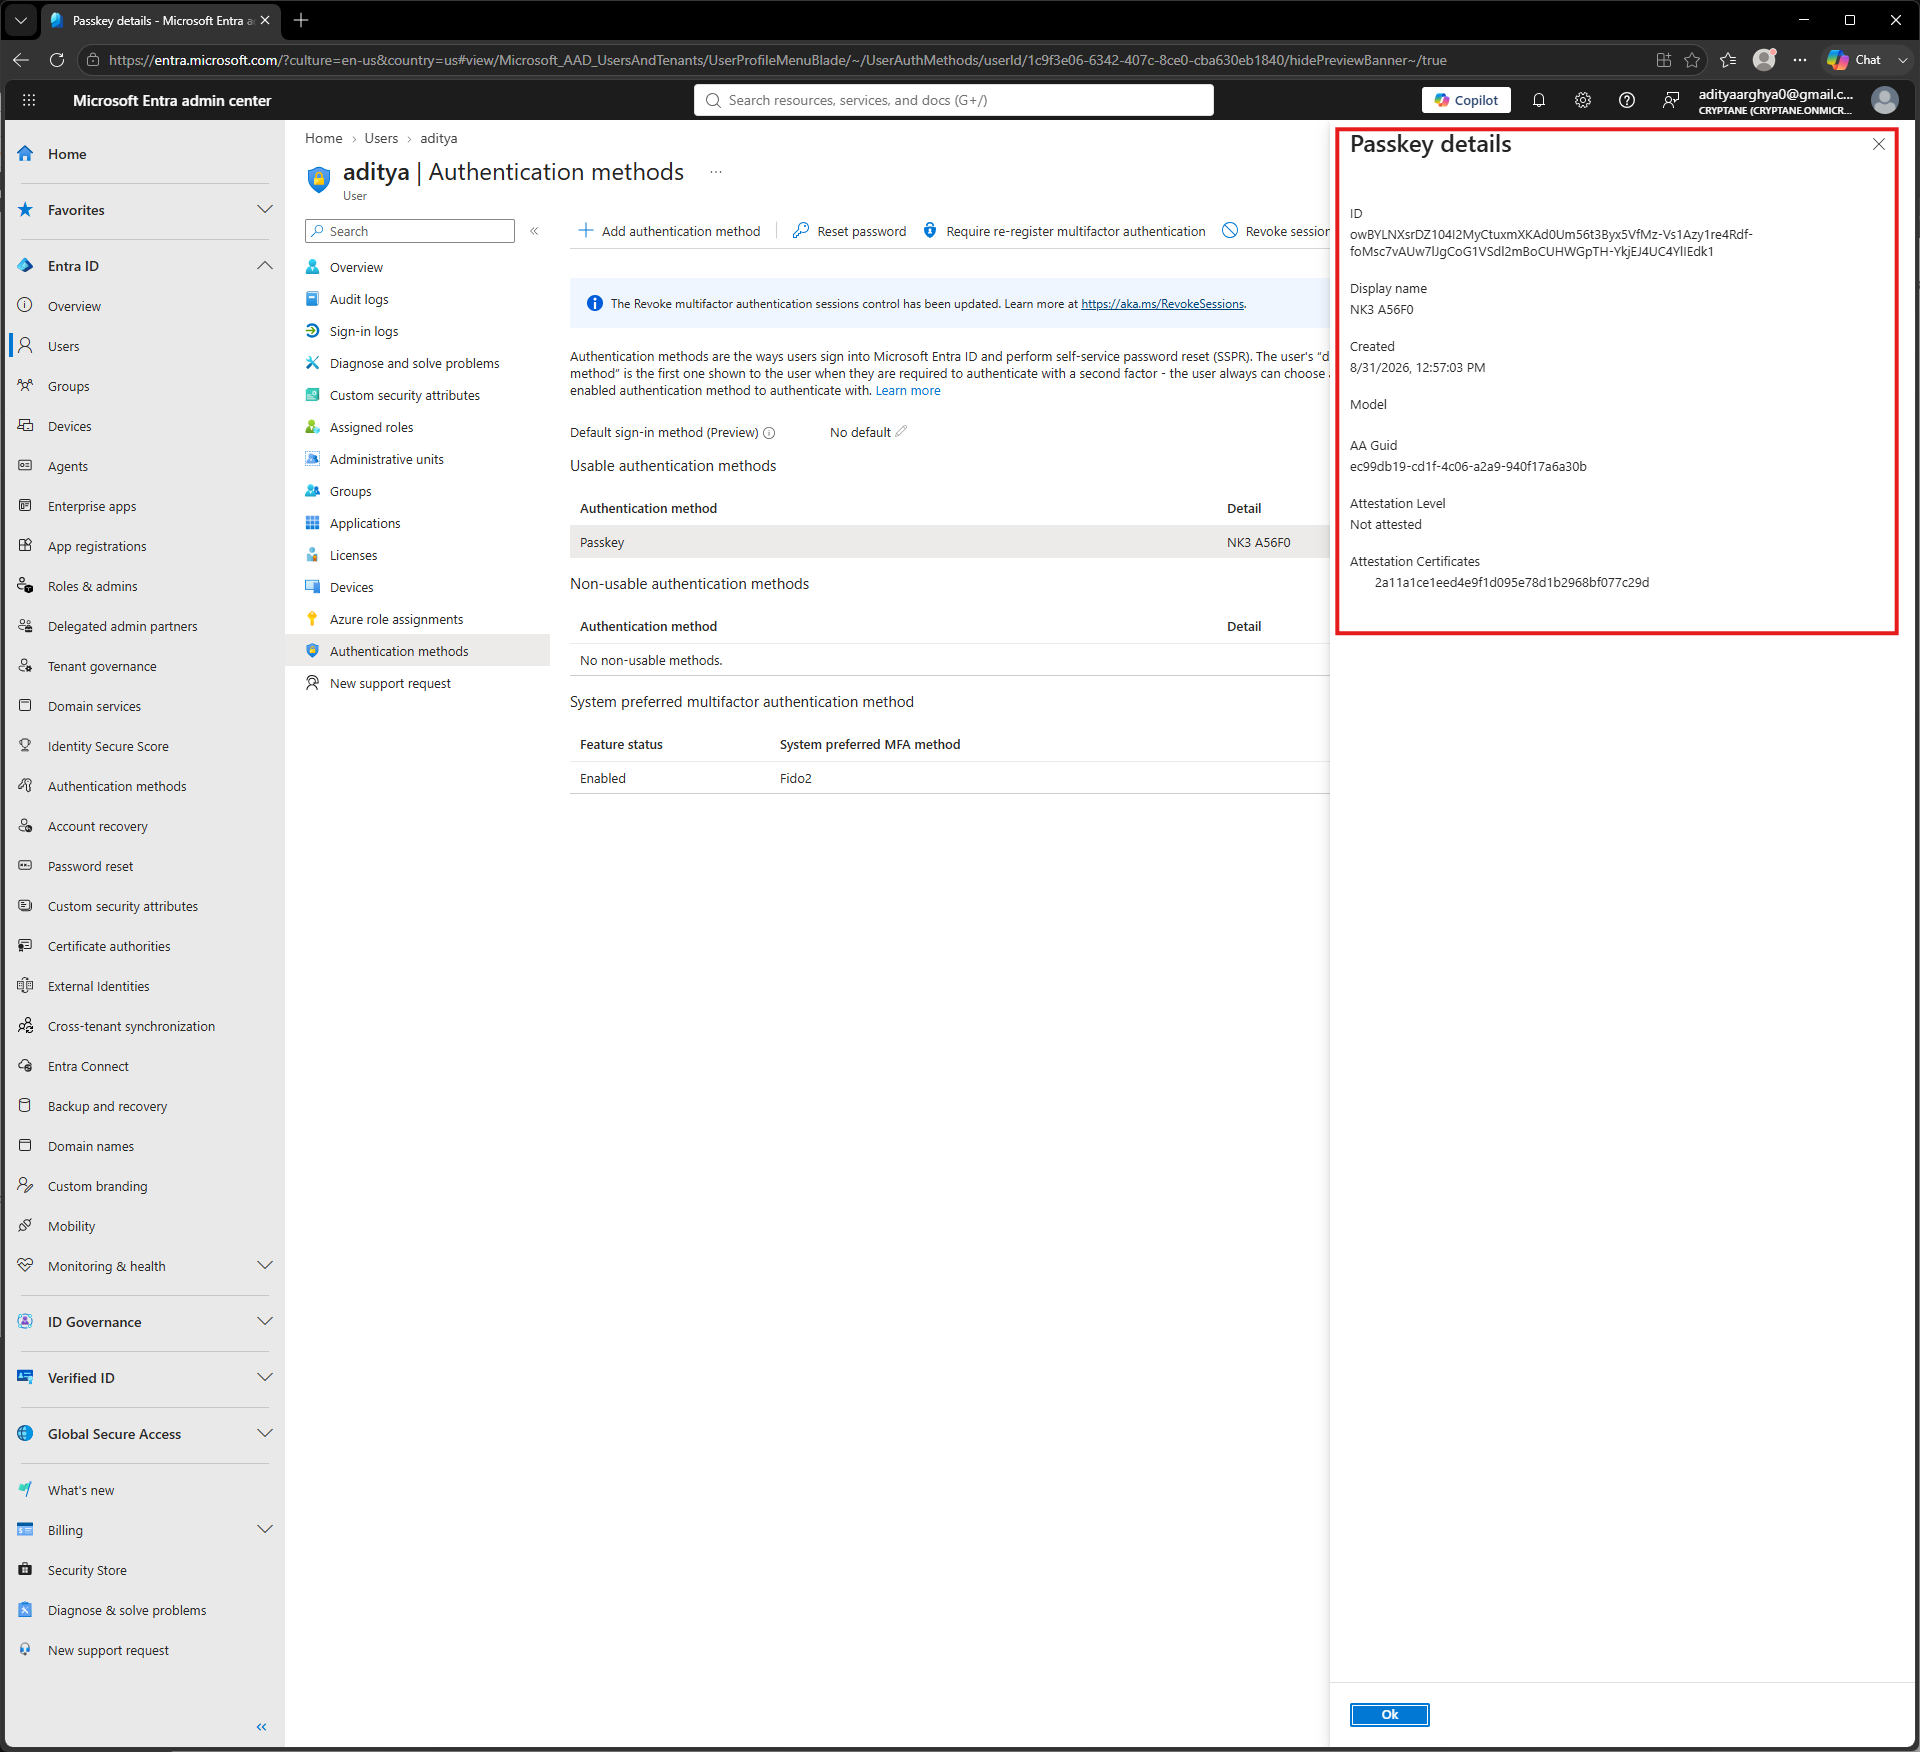
Login to Entra Admin portal. Take a note of the primary domain which you will need later. Go to App Registrations on the left blade.
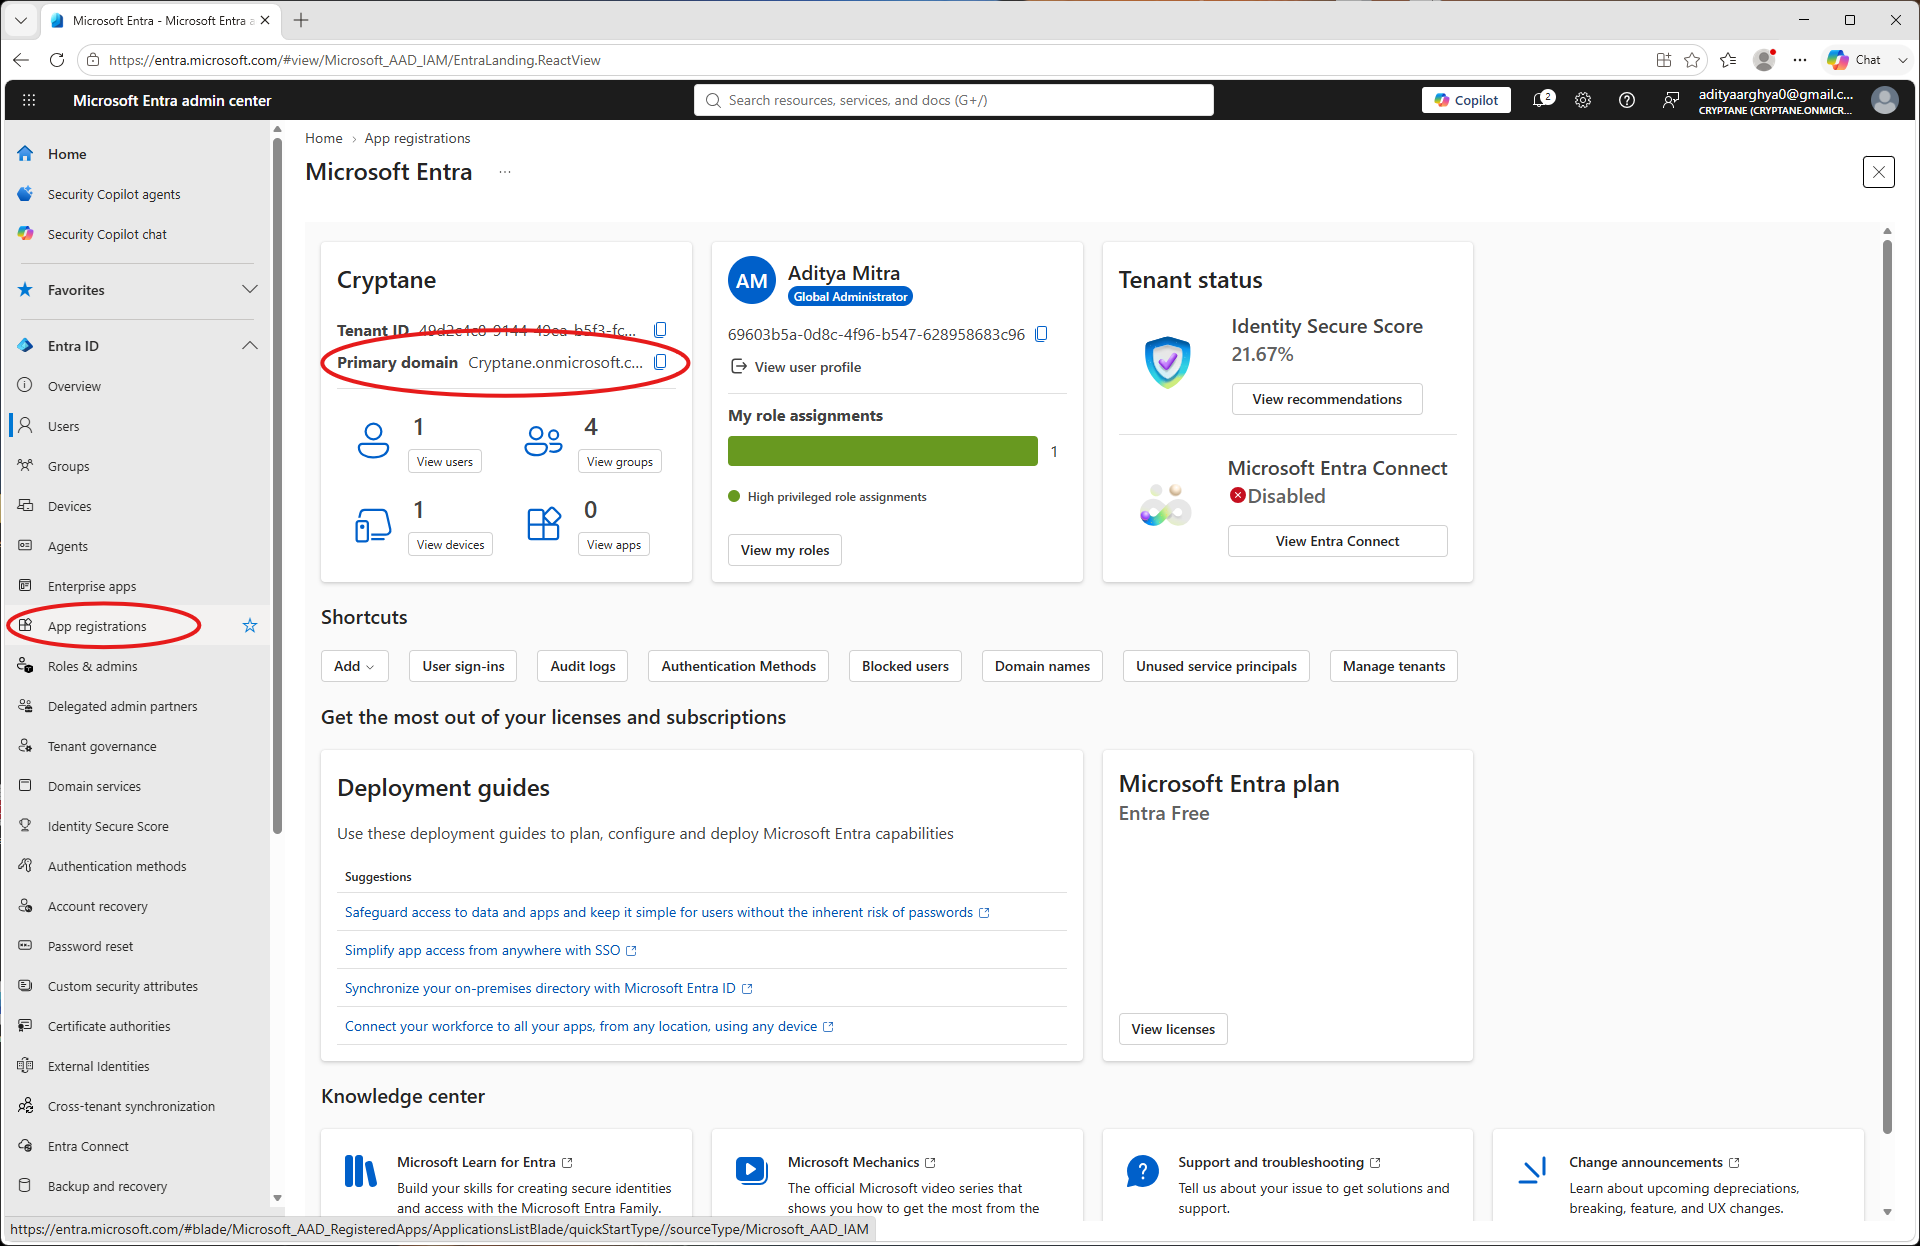
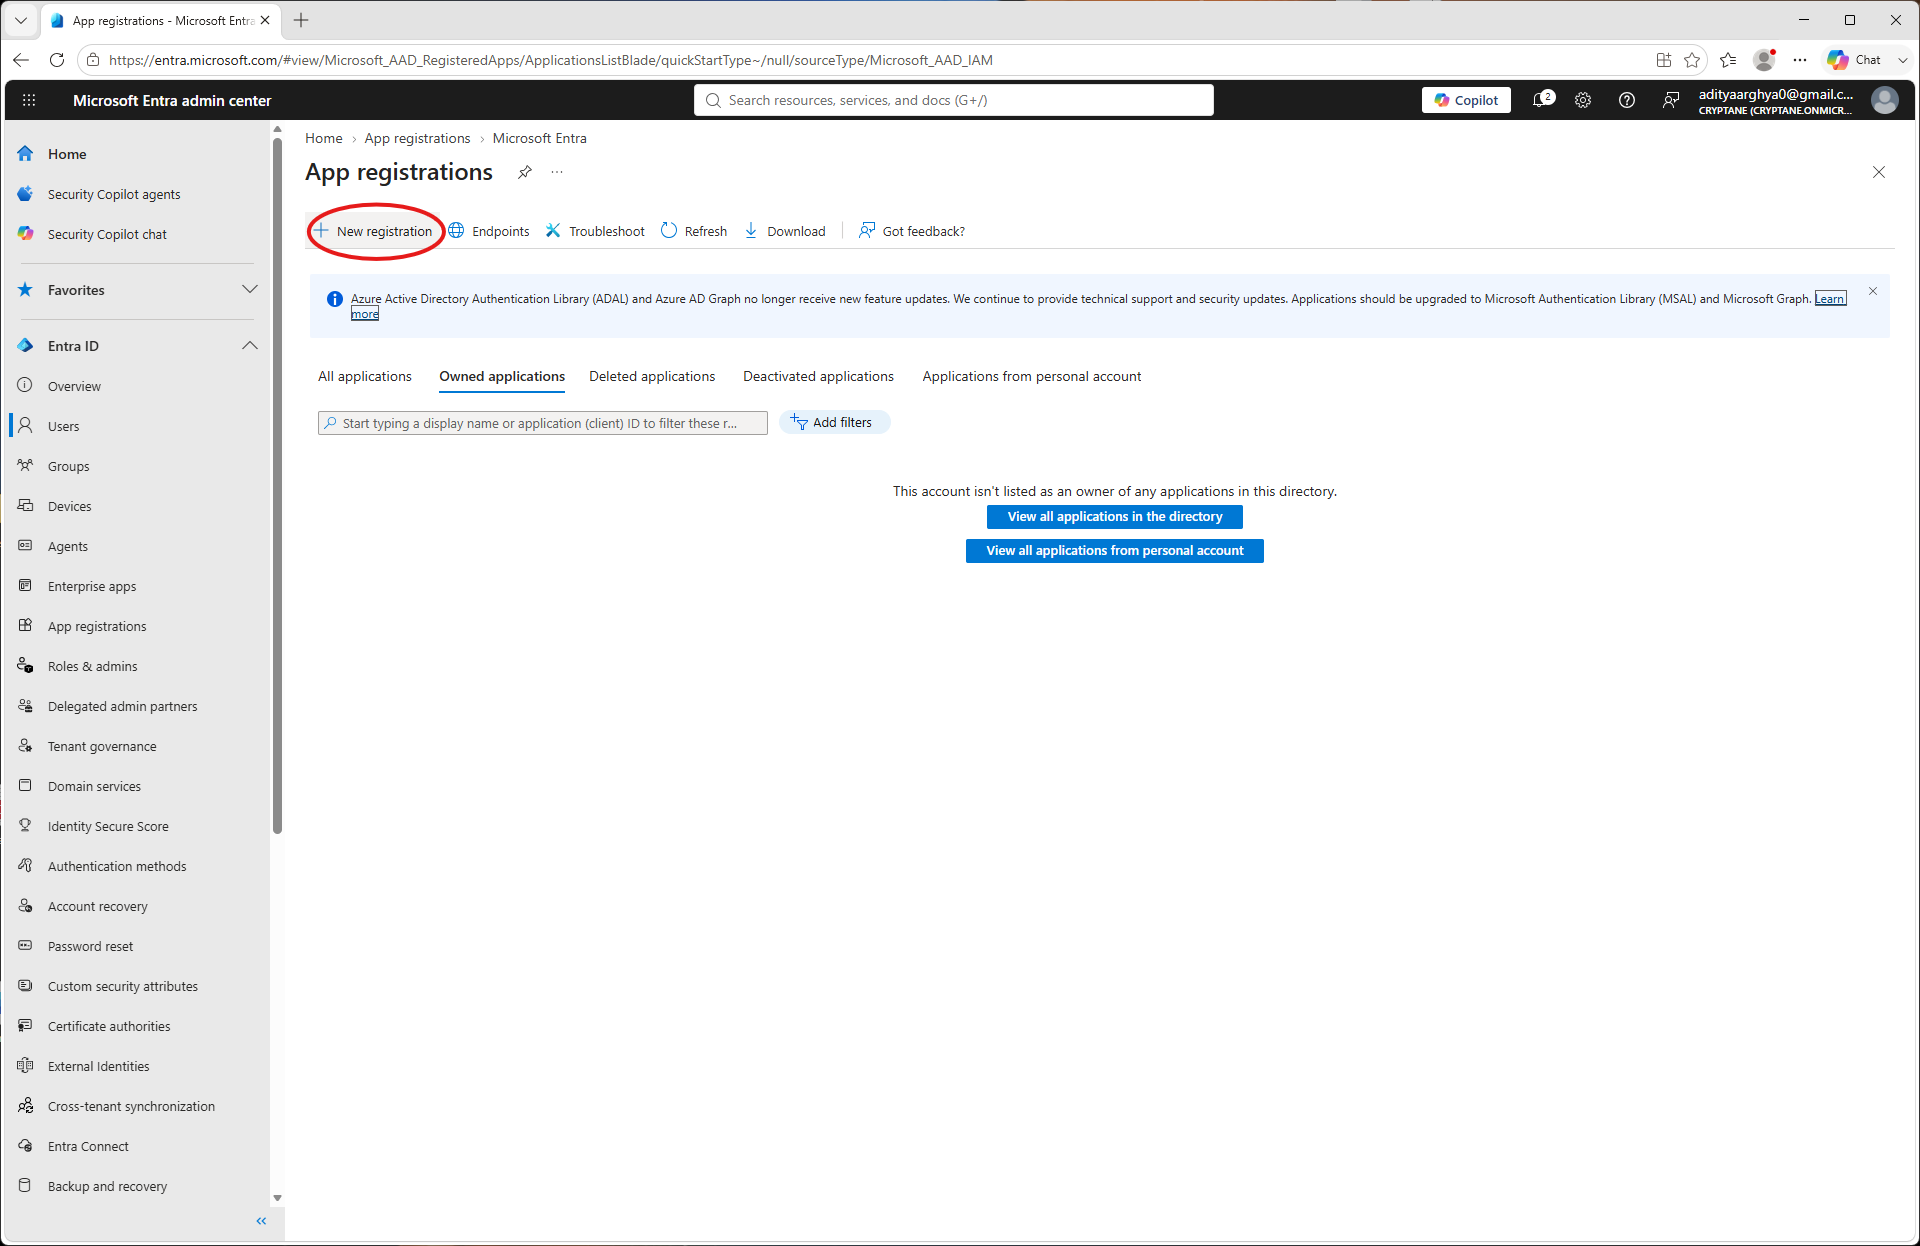
Pasirinkite „Nauja registracija“.
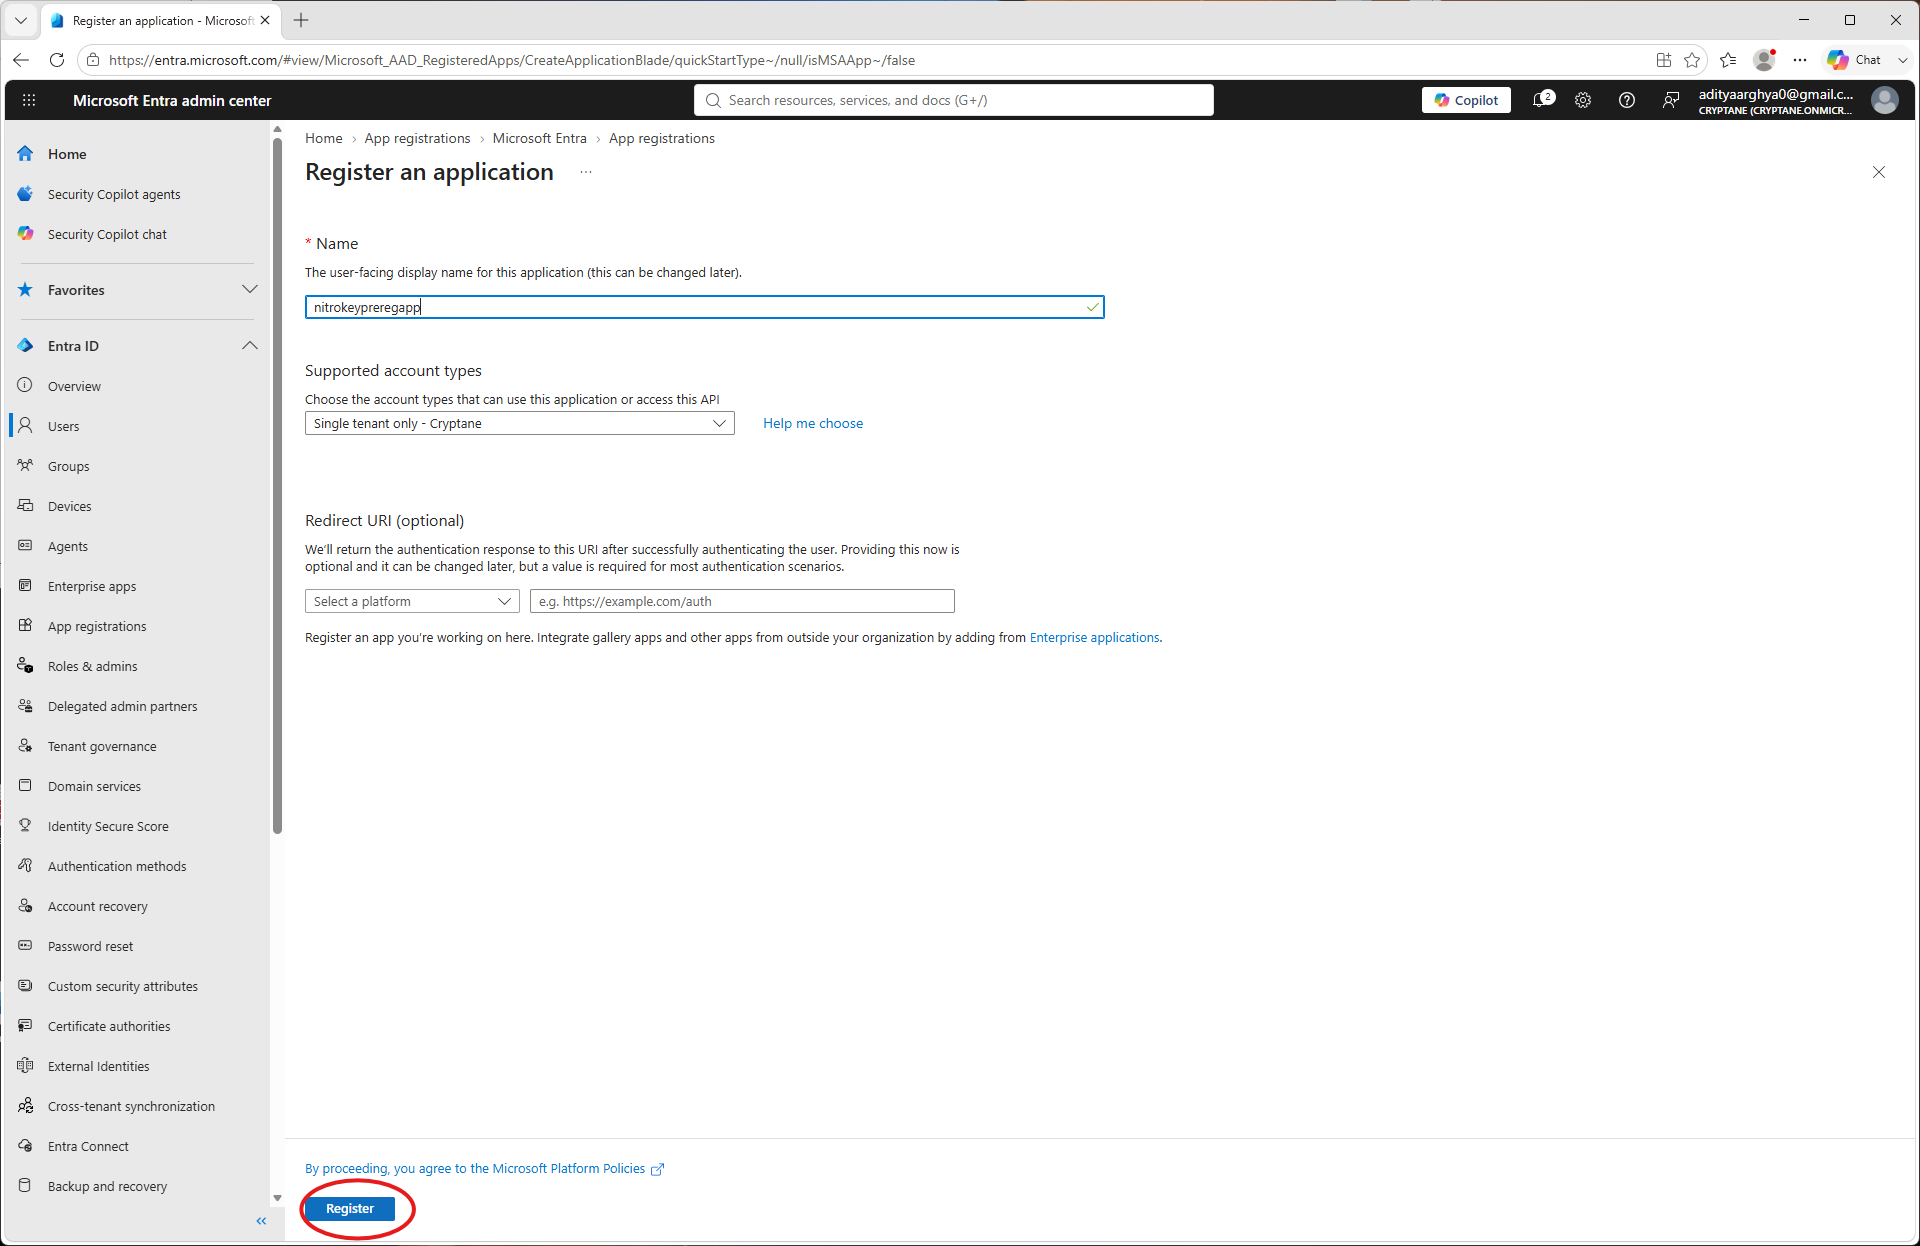
Sukurkite naują programėlę ir nurodykite jos pavadinimą. Spustelėkite „Registruotis“.
Čia užsirašykite kliento ID ir nuomininko ID. Jie jums prireiks vėliau. Aplikacijos skirtuke eikite į „API leidimai“.
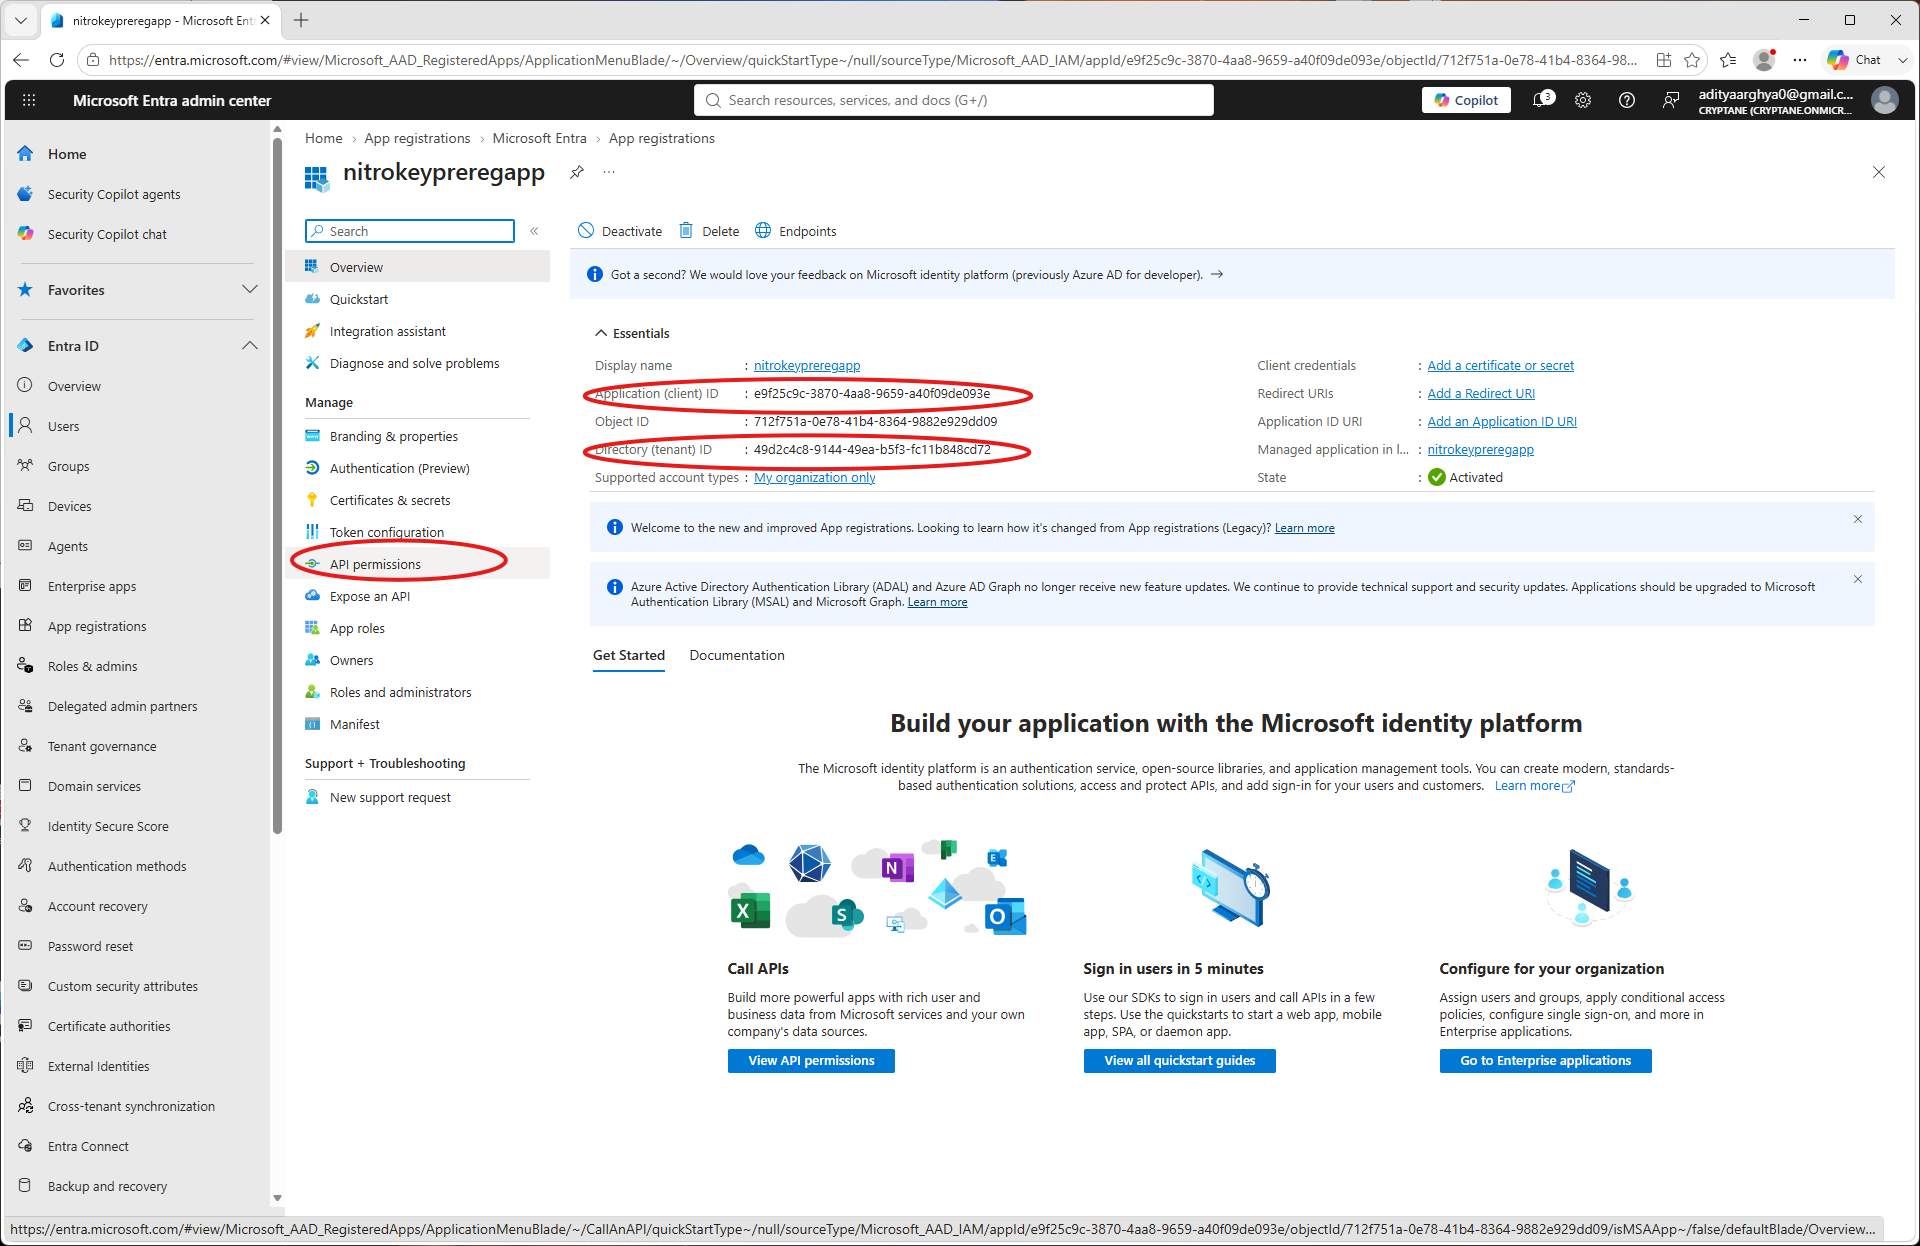
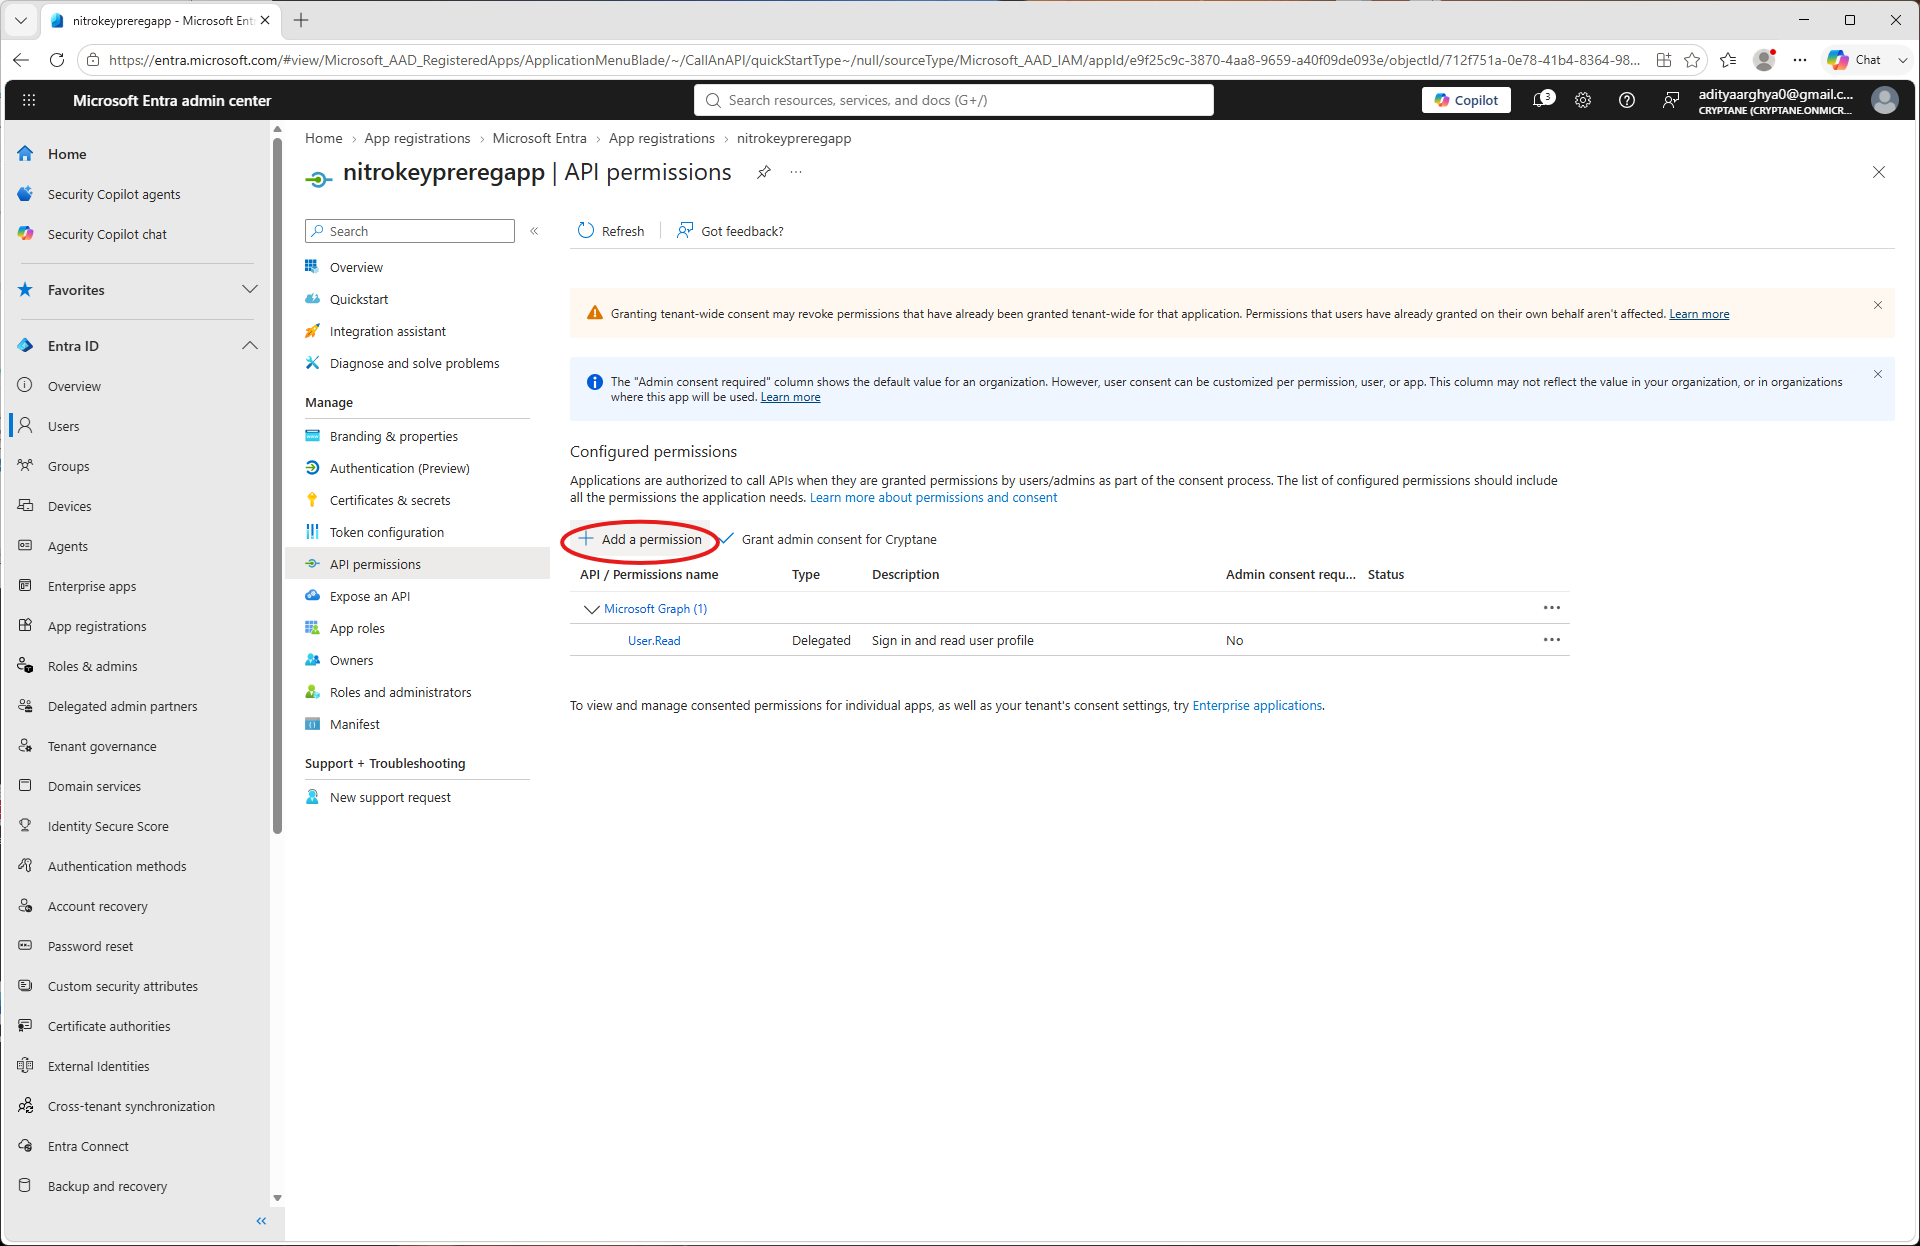
Click on Add a permission.
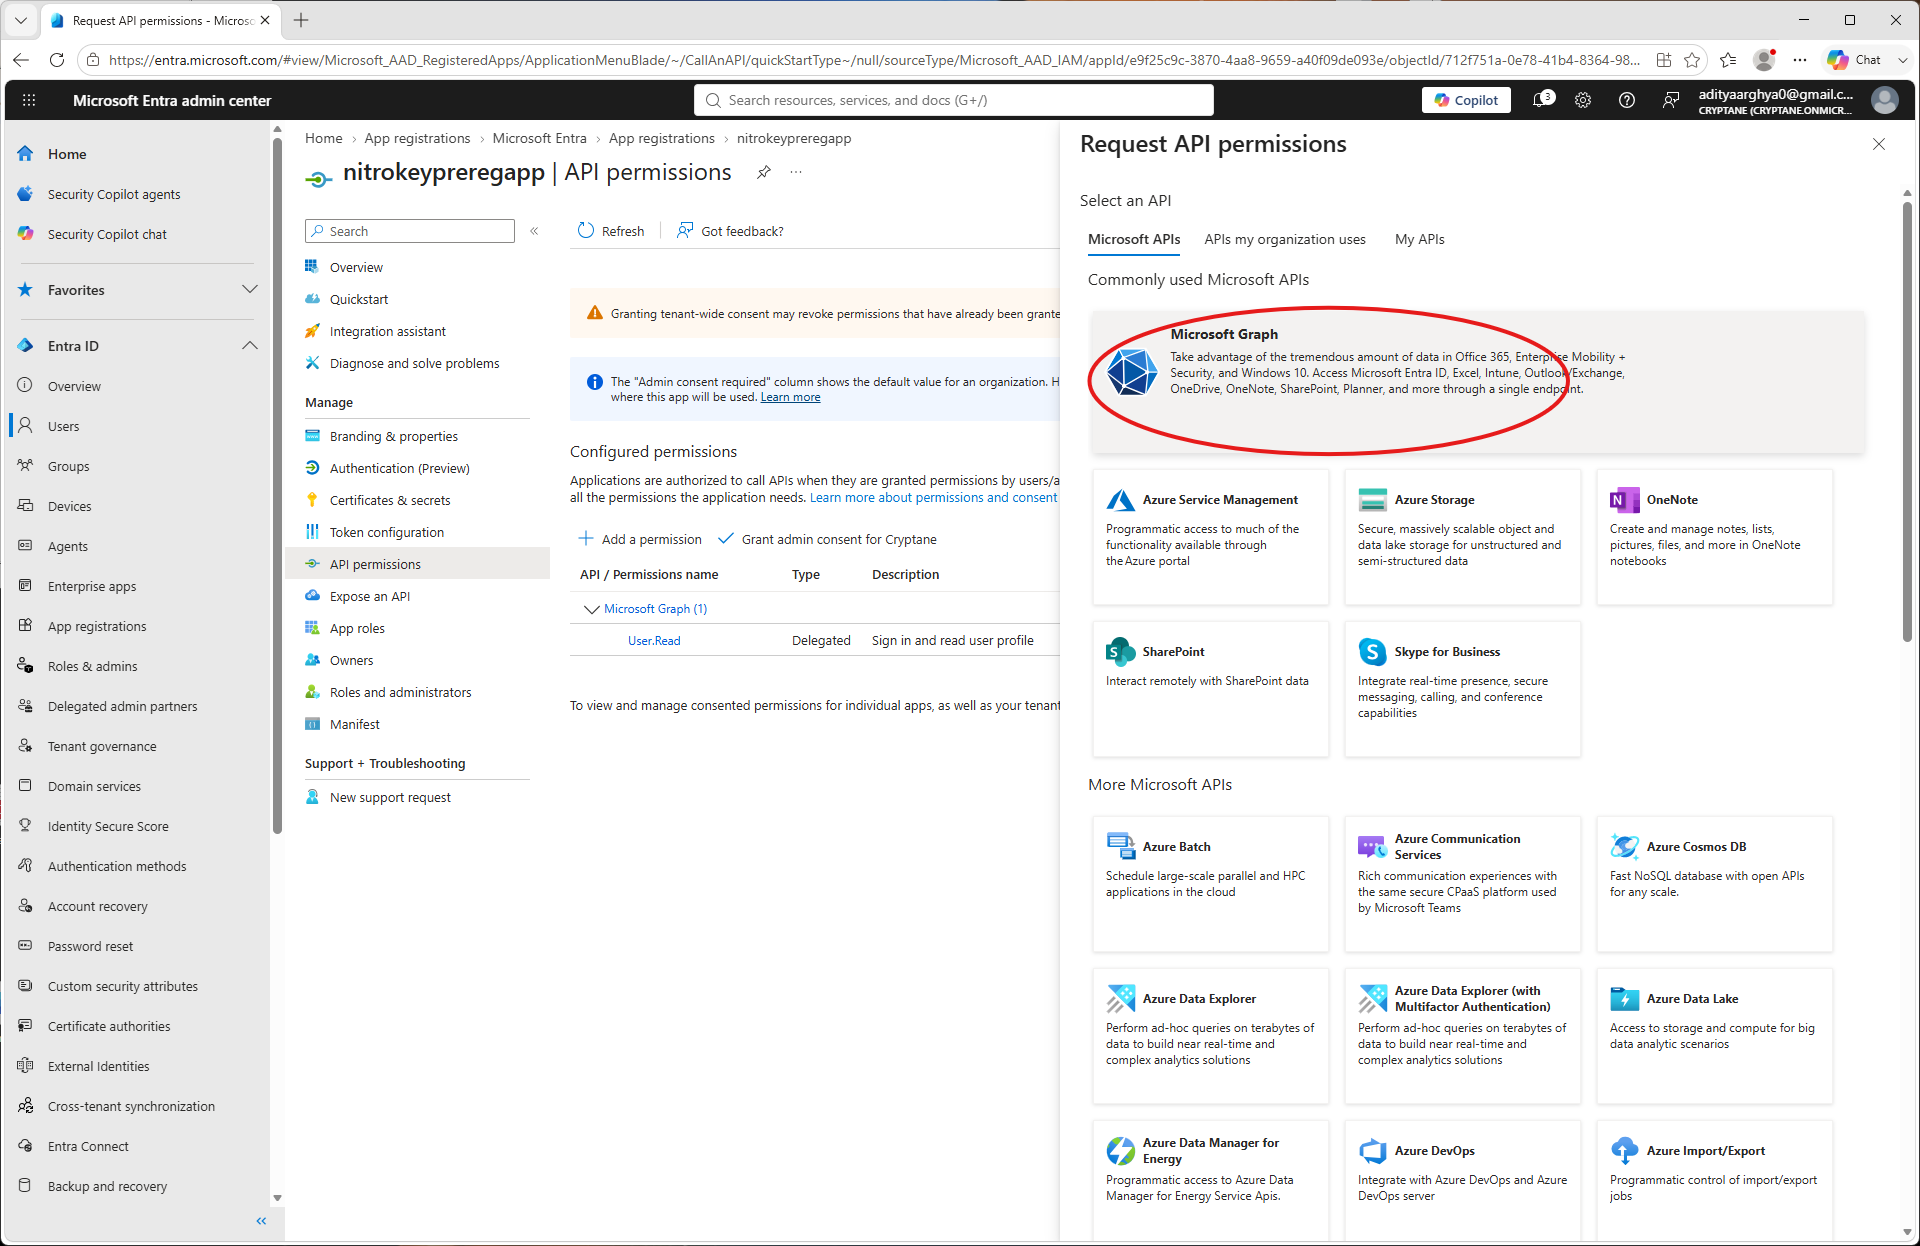
Select Microsoft Graph.
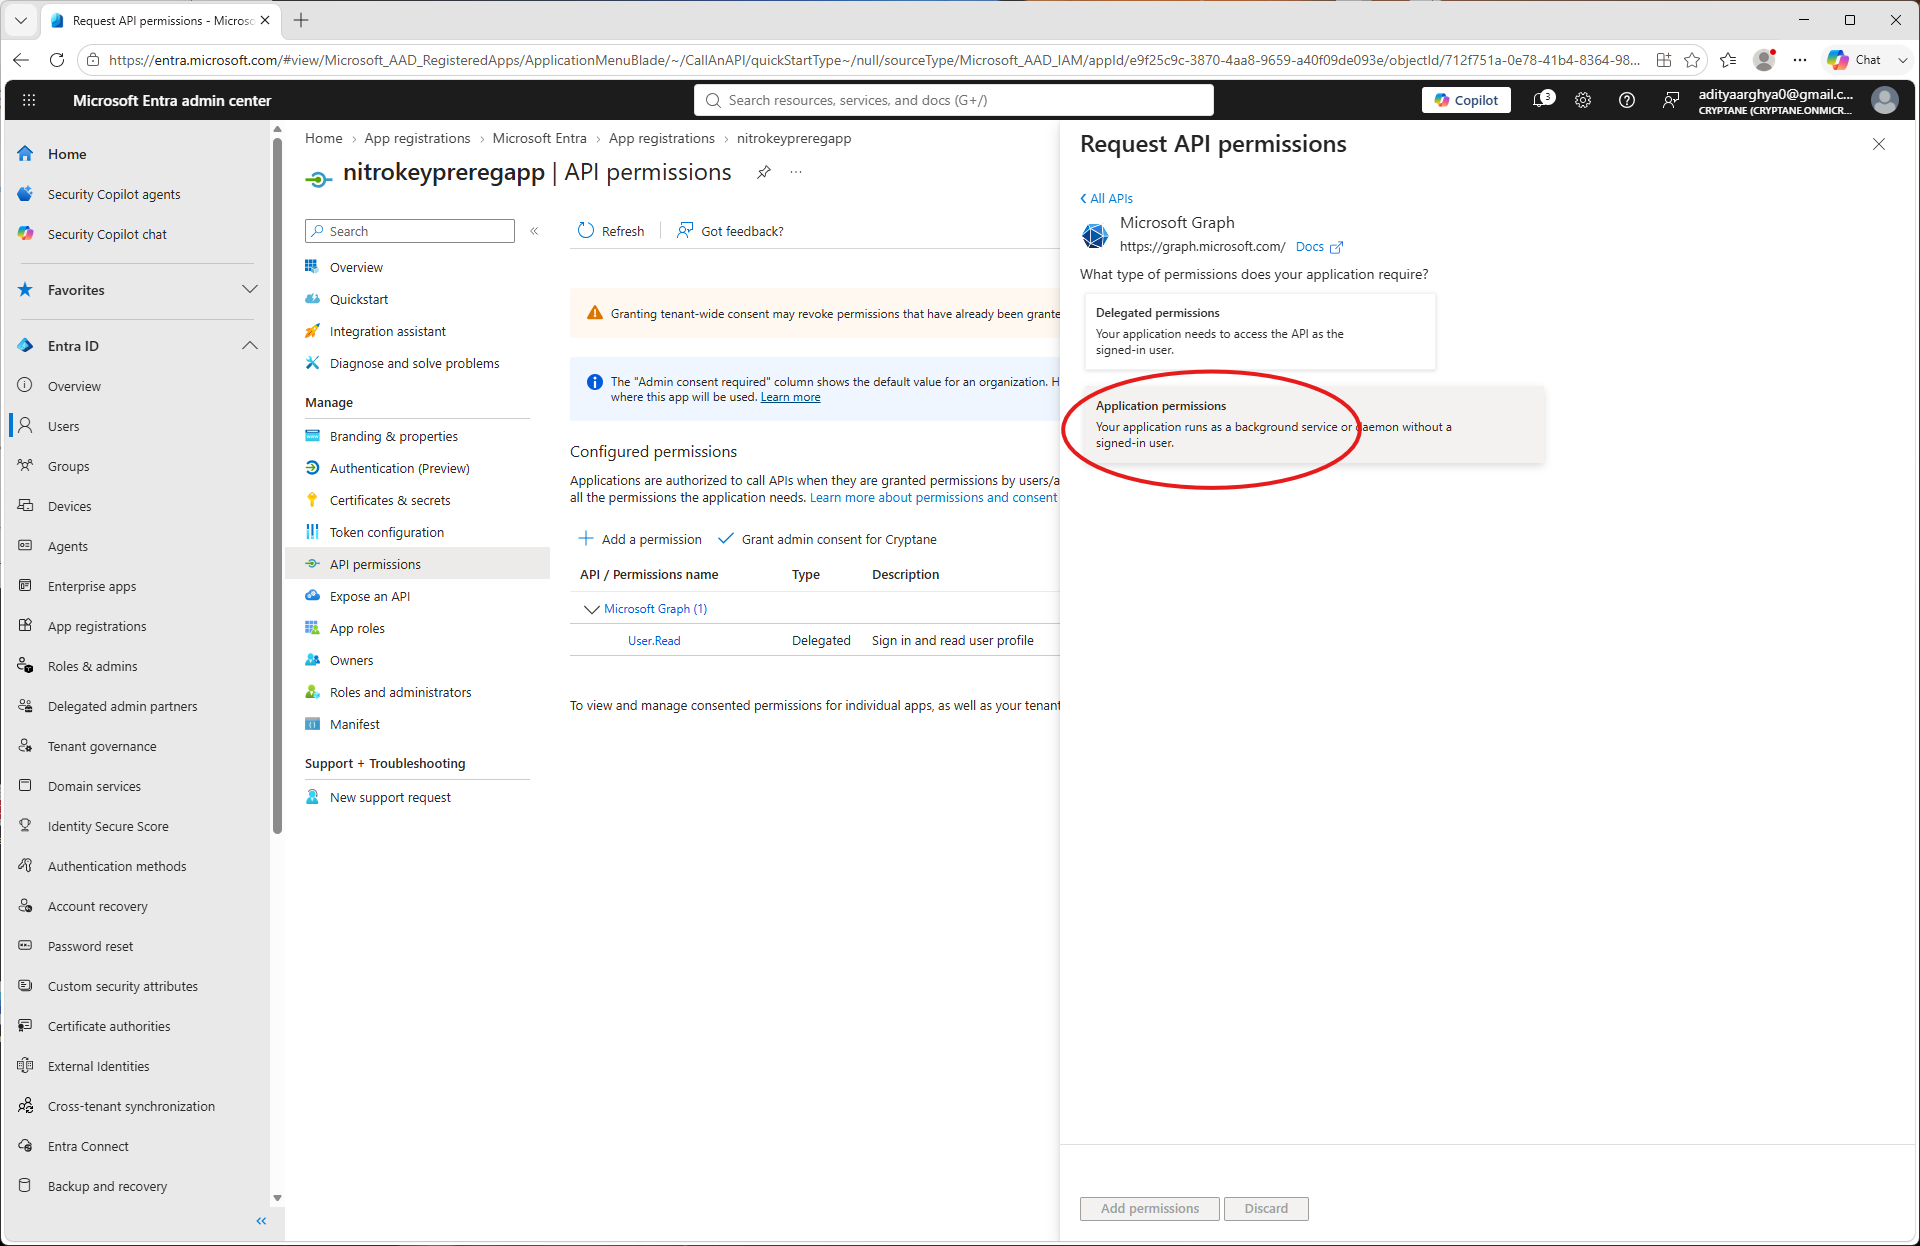
Pasirinkite „Programos leidimai“.
Search for
UserAuthenticationMethod.ReadWrite.Alland select it.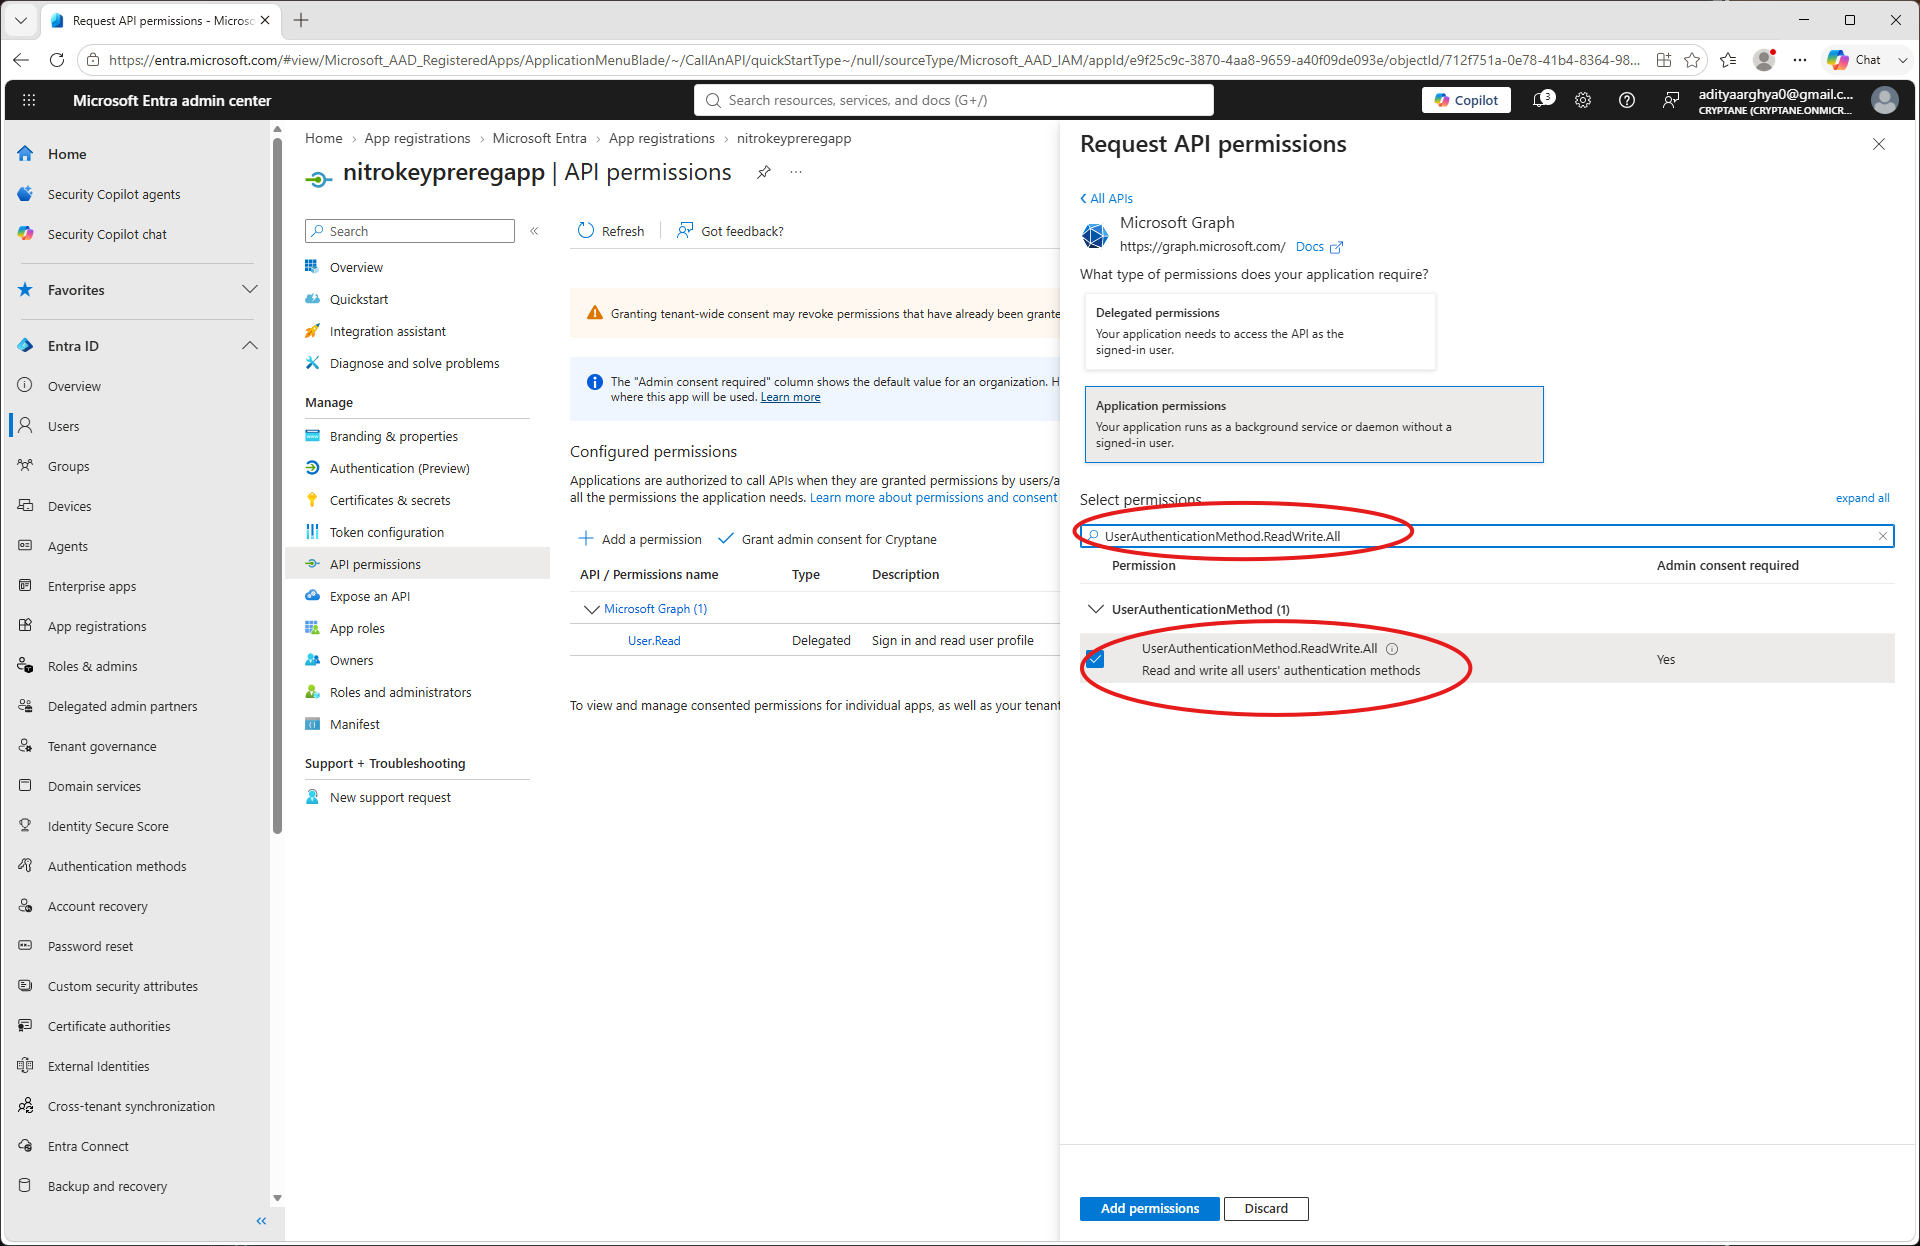
Search for
User.ReadWrite.Alland select it (Only if you want to be able to create users frompynitrokey). Click on the Add Permissions button.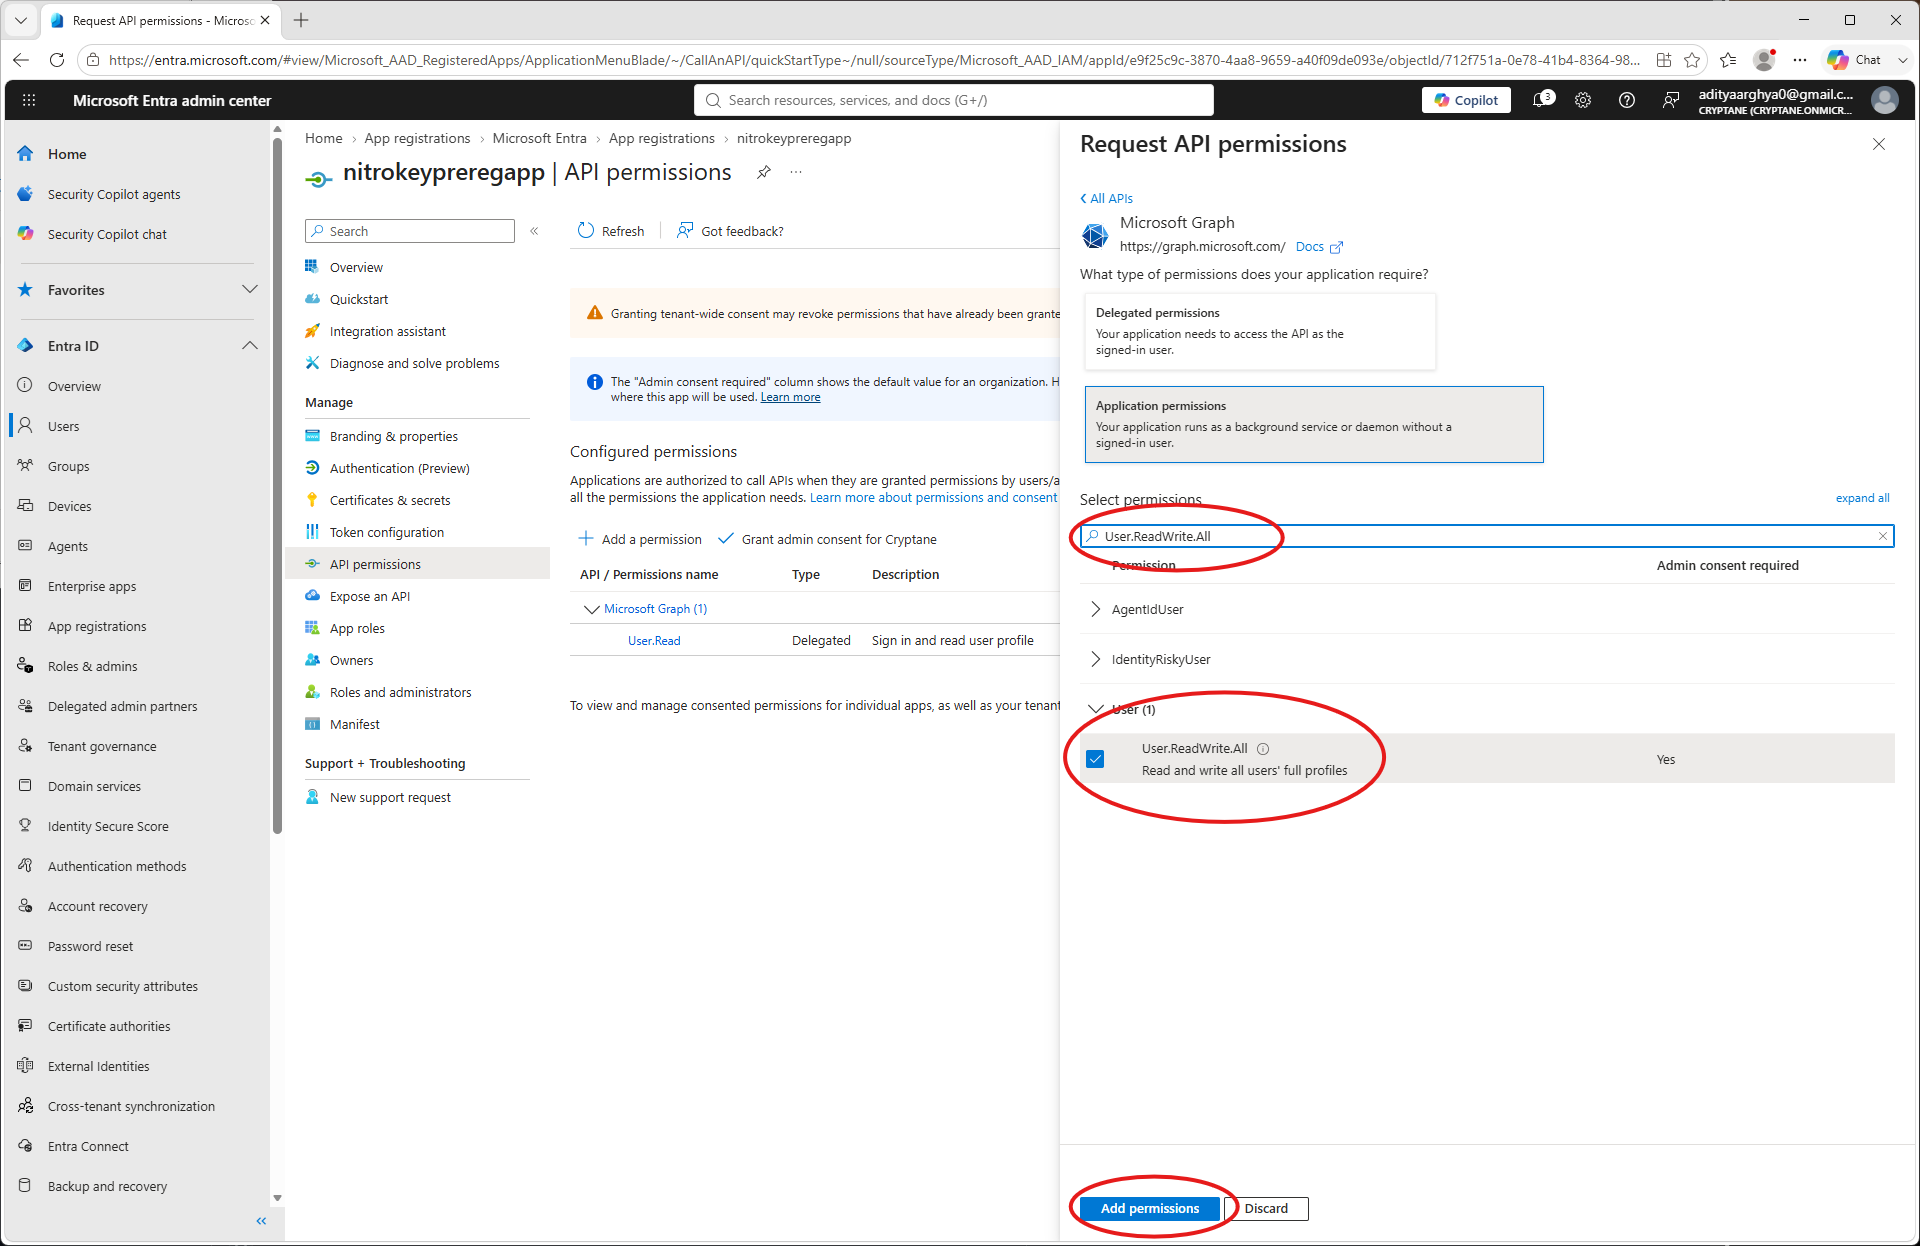
Patikrinkite suteiktus leidimus.
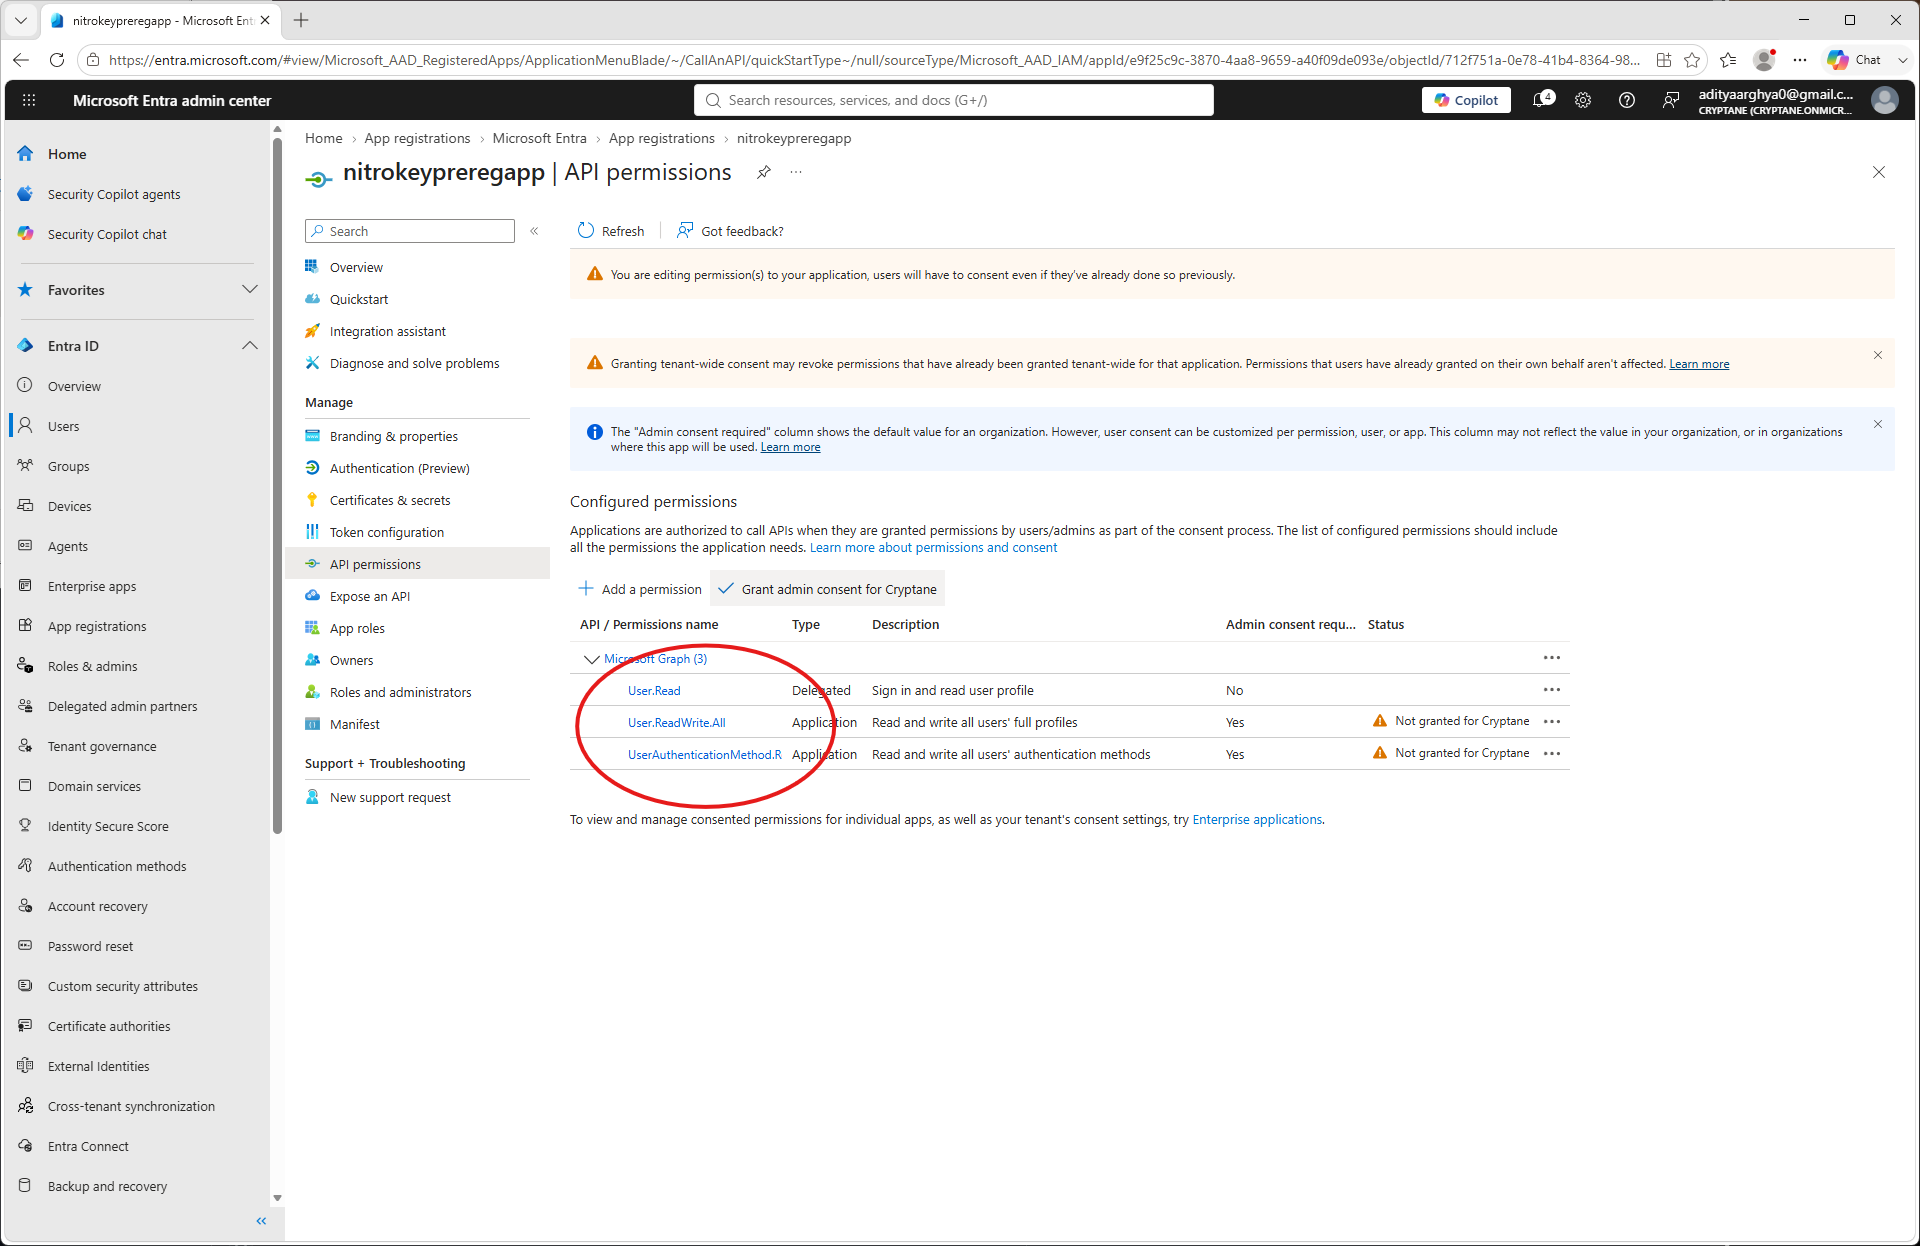
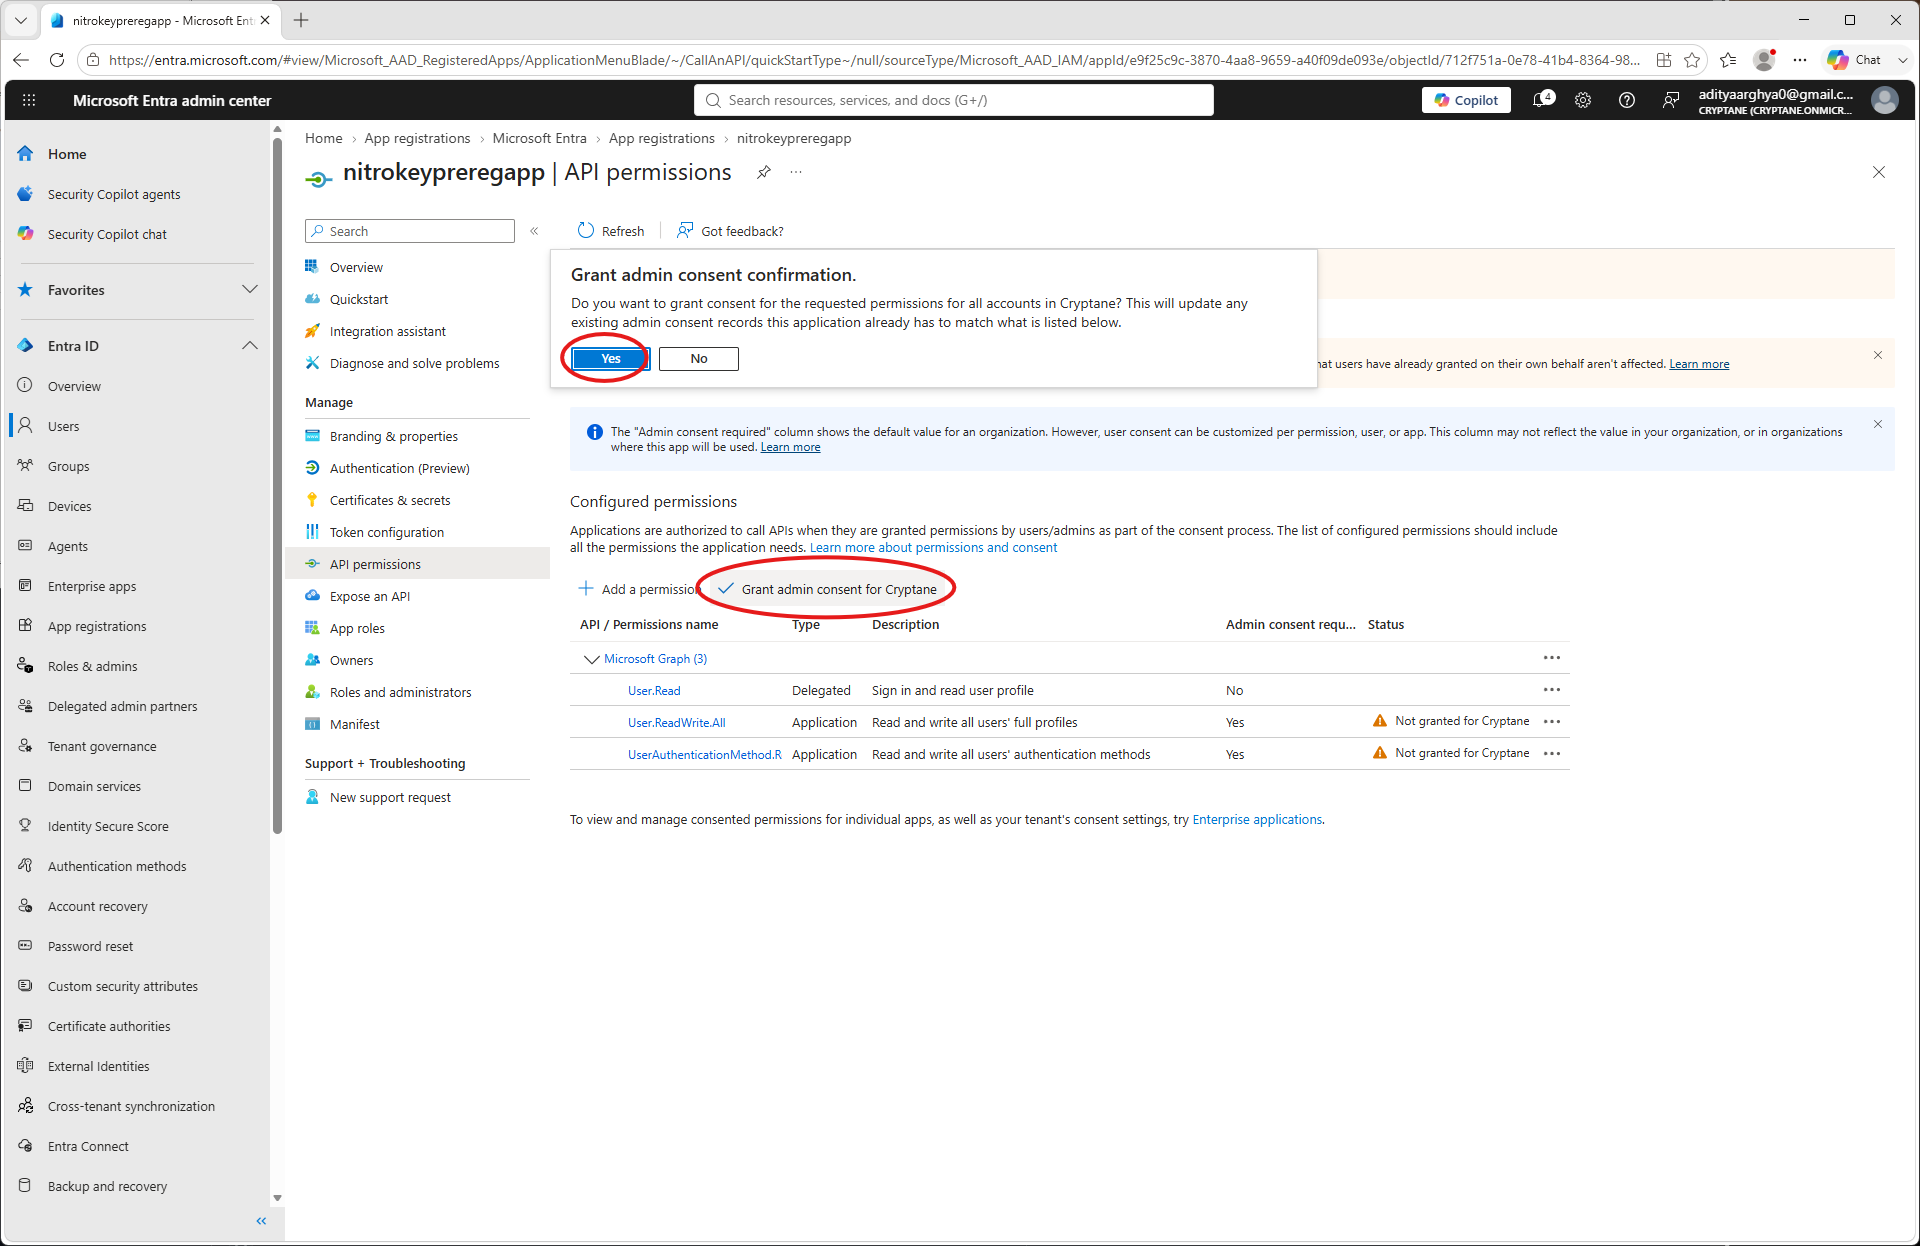
Spustelėkite „Suteikti administratoriaus sutikimą“ ir patvirtinkite jį.
Grįžkite į programėlės pagrindinį ekraną ir kairiajame meniu pasirinkite „Sertifikatai ir slaptažodžiai“
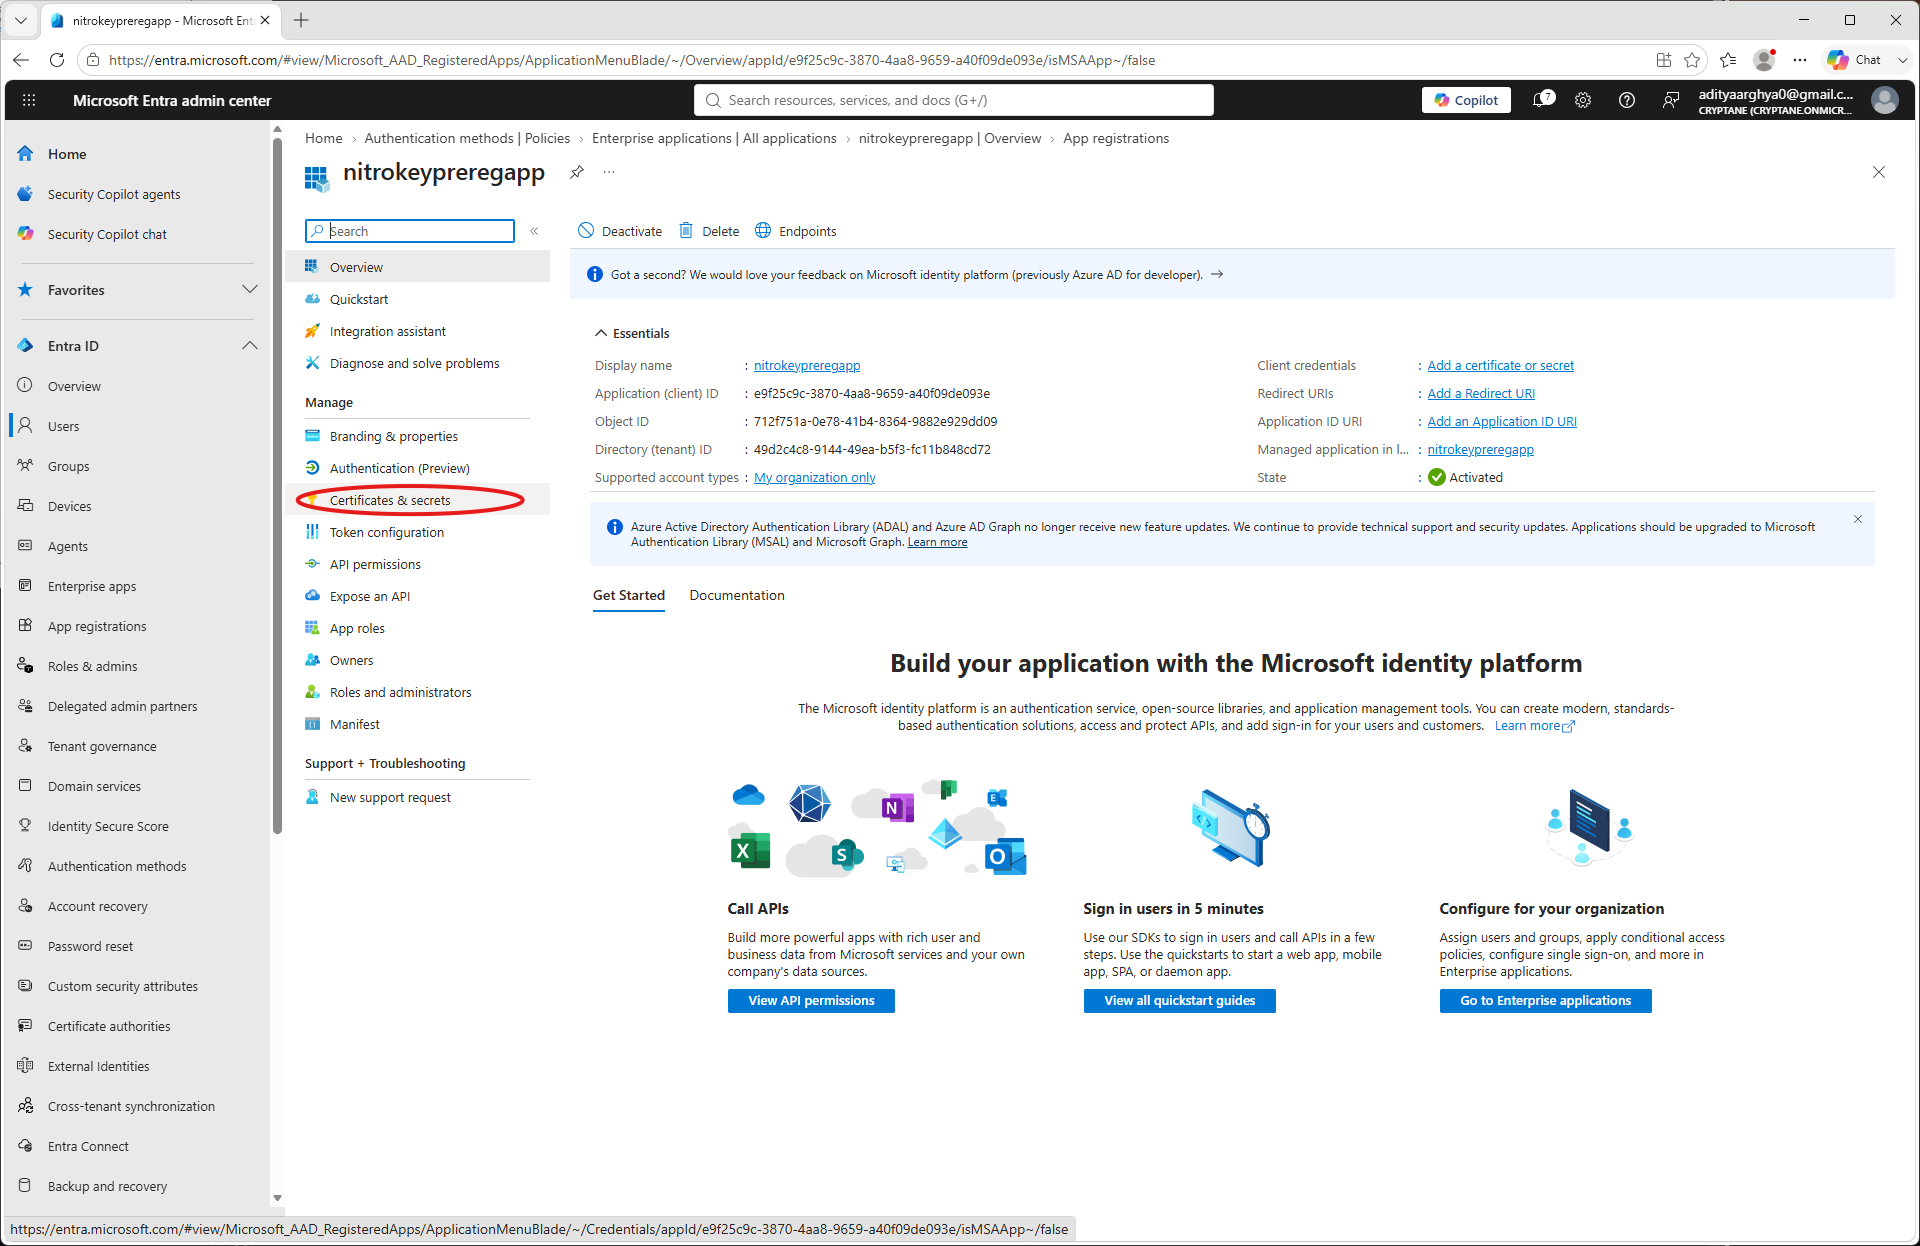
Spustelėkite „Naujas kliento slaptasis raktas“
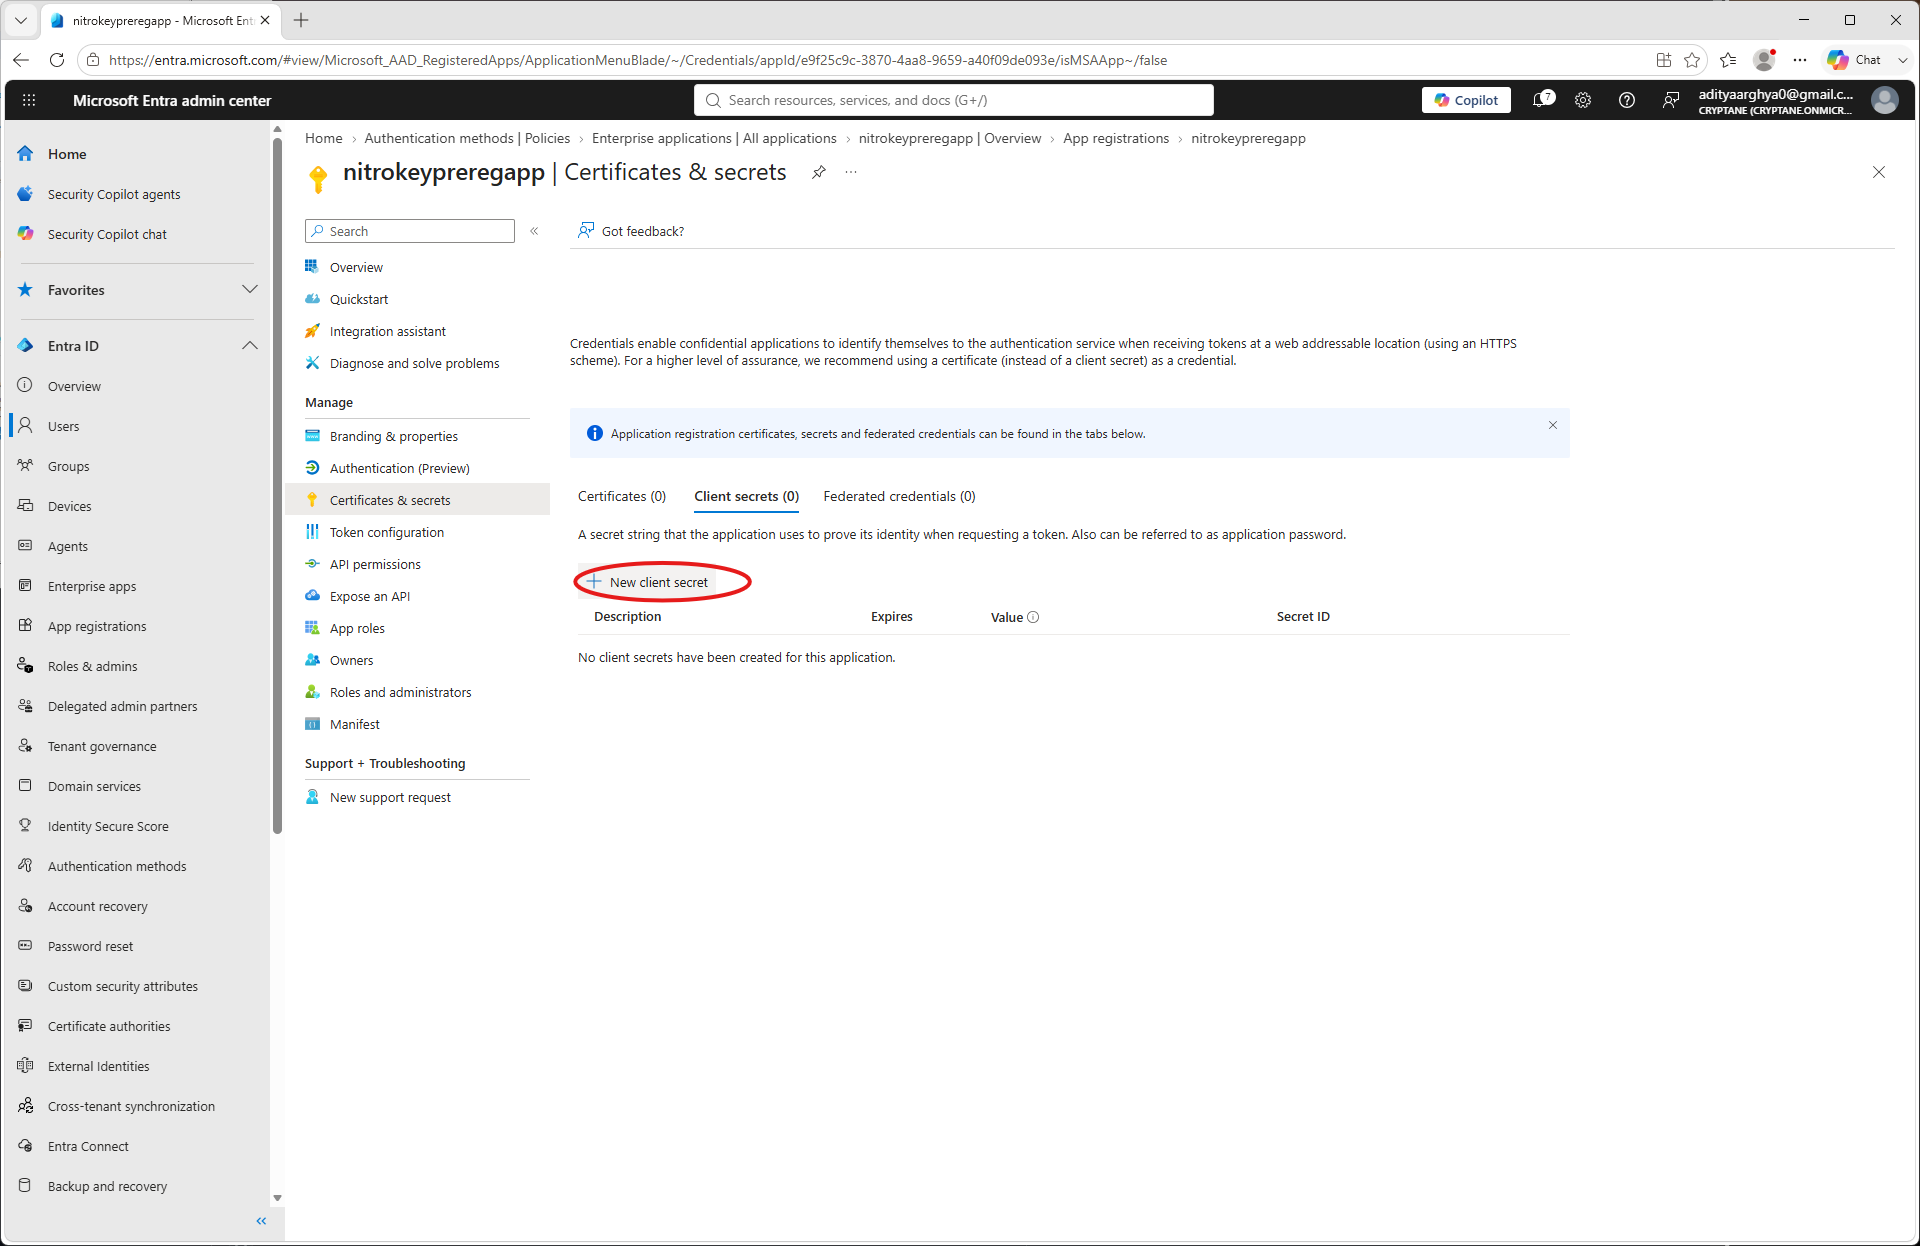
Įveskite pavadinimą ir galiojimo pabaigos datą, tada spustelėkite „Pridėti“
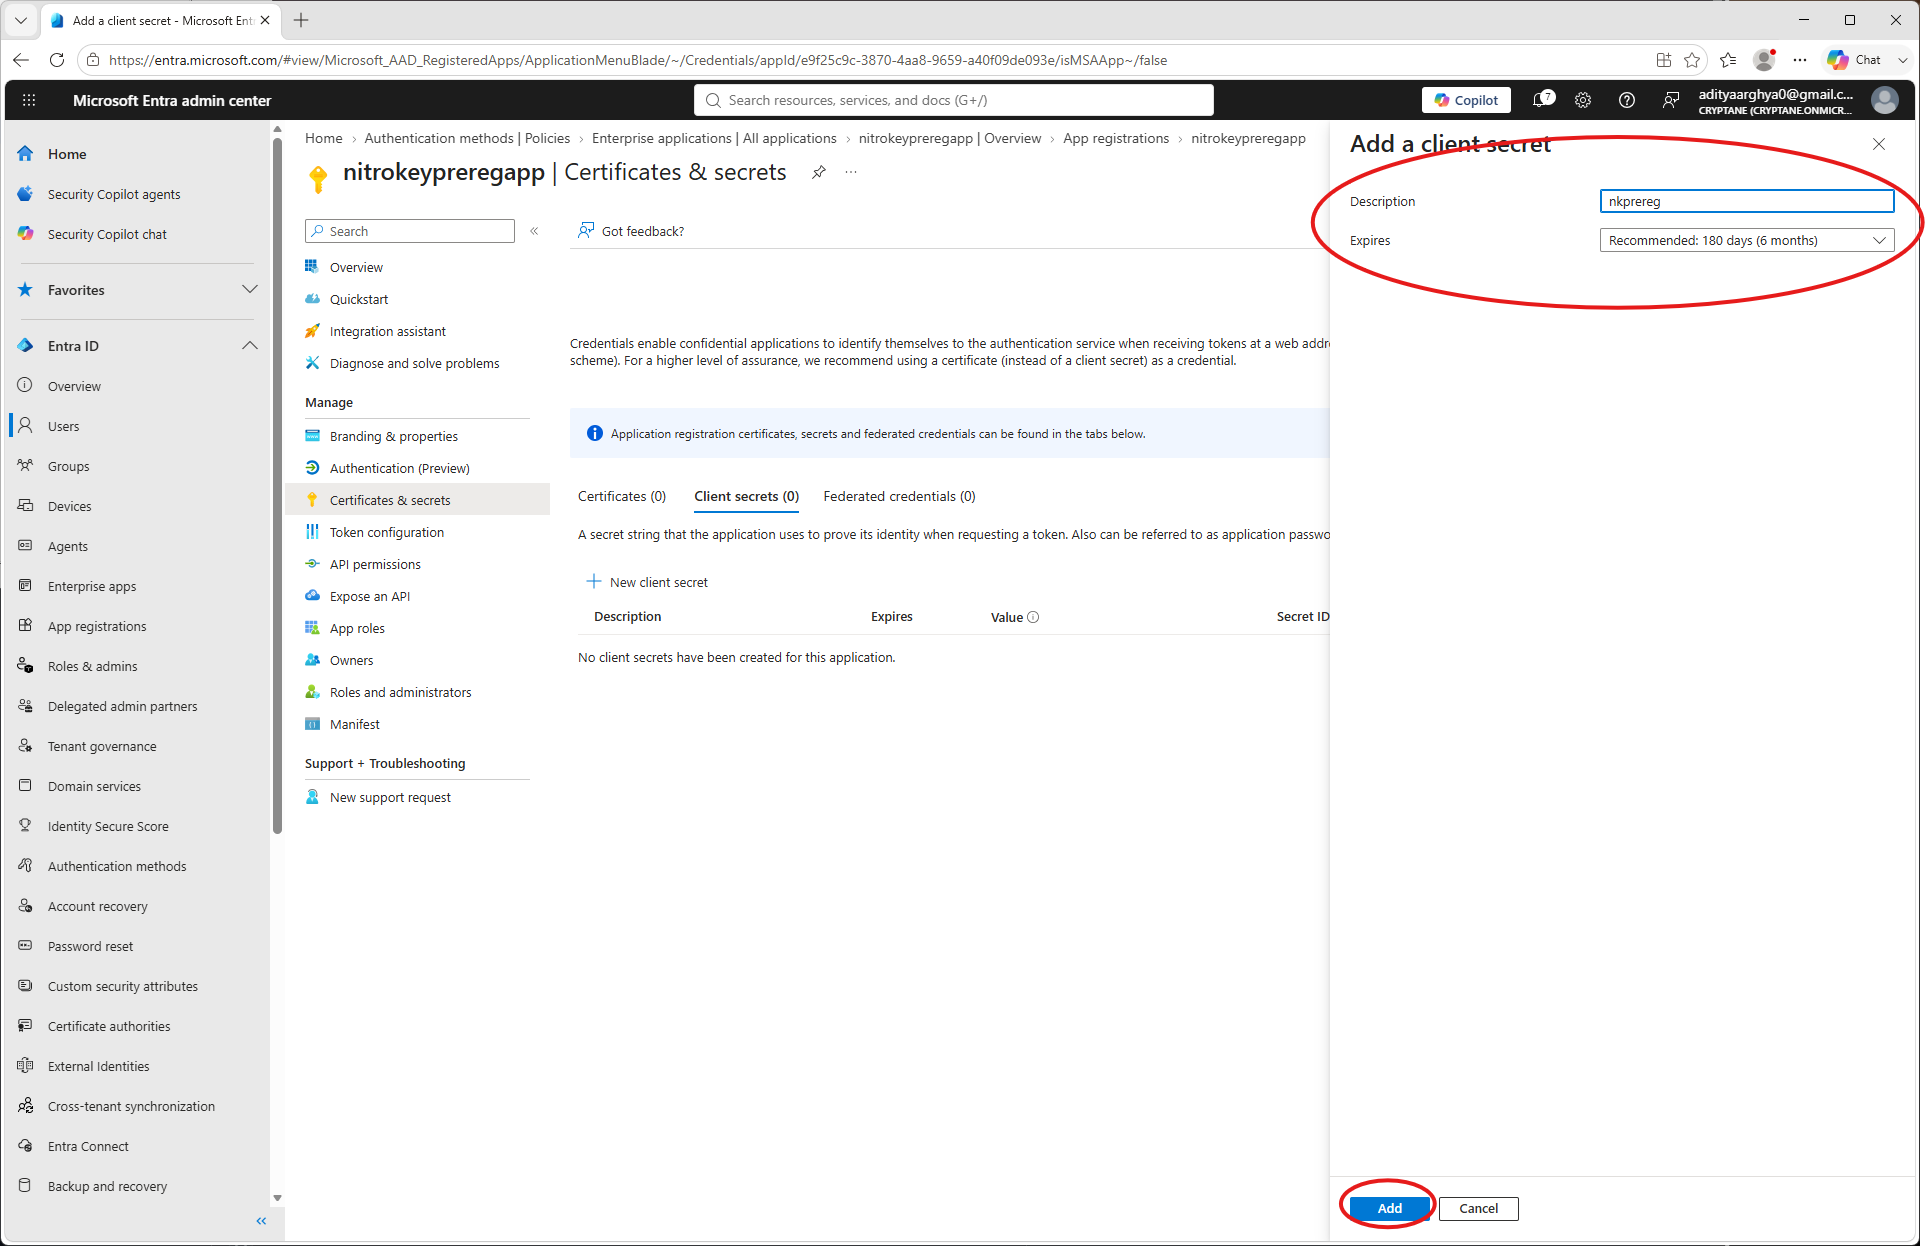
Užsirašykite kliento slaptažodį (vėliau jo nebegalėsite peržiūrėti).
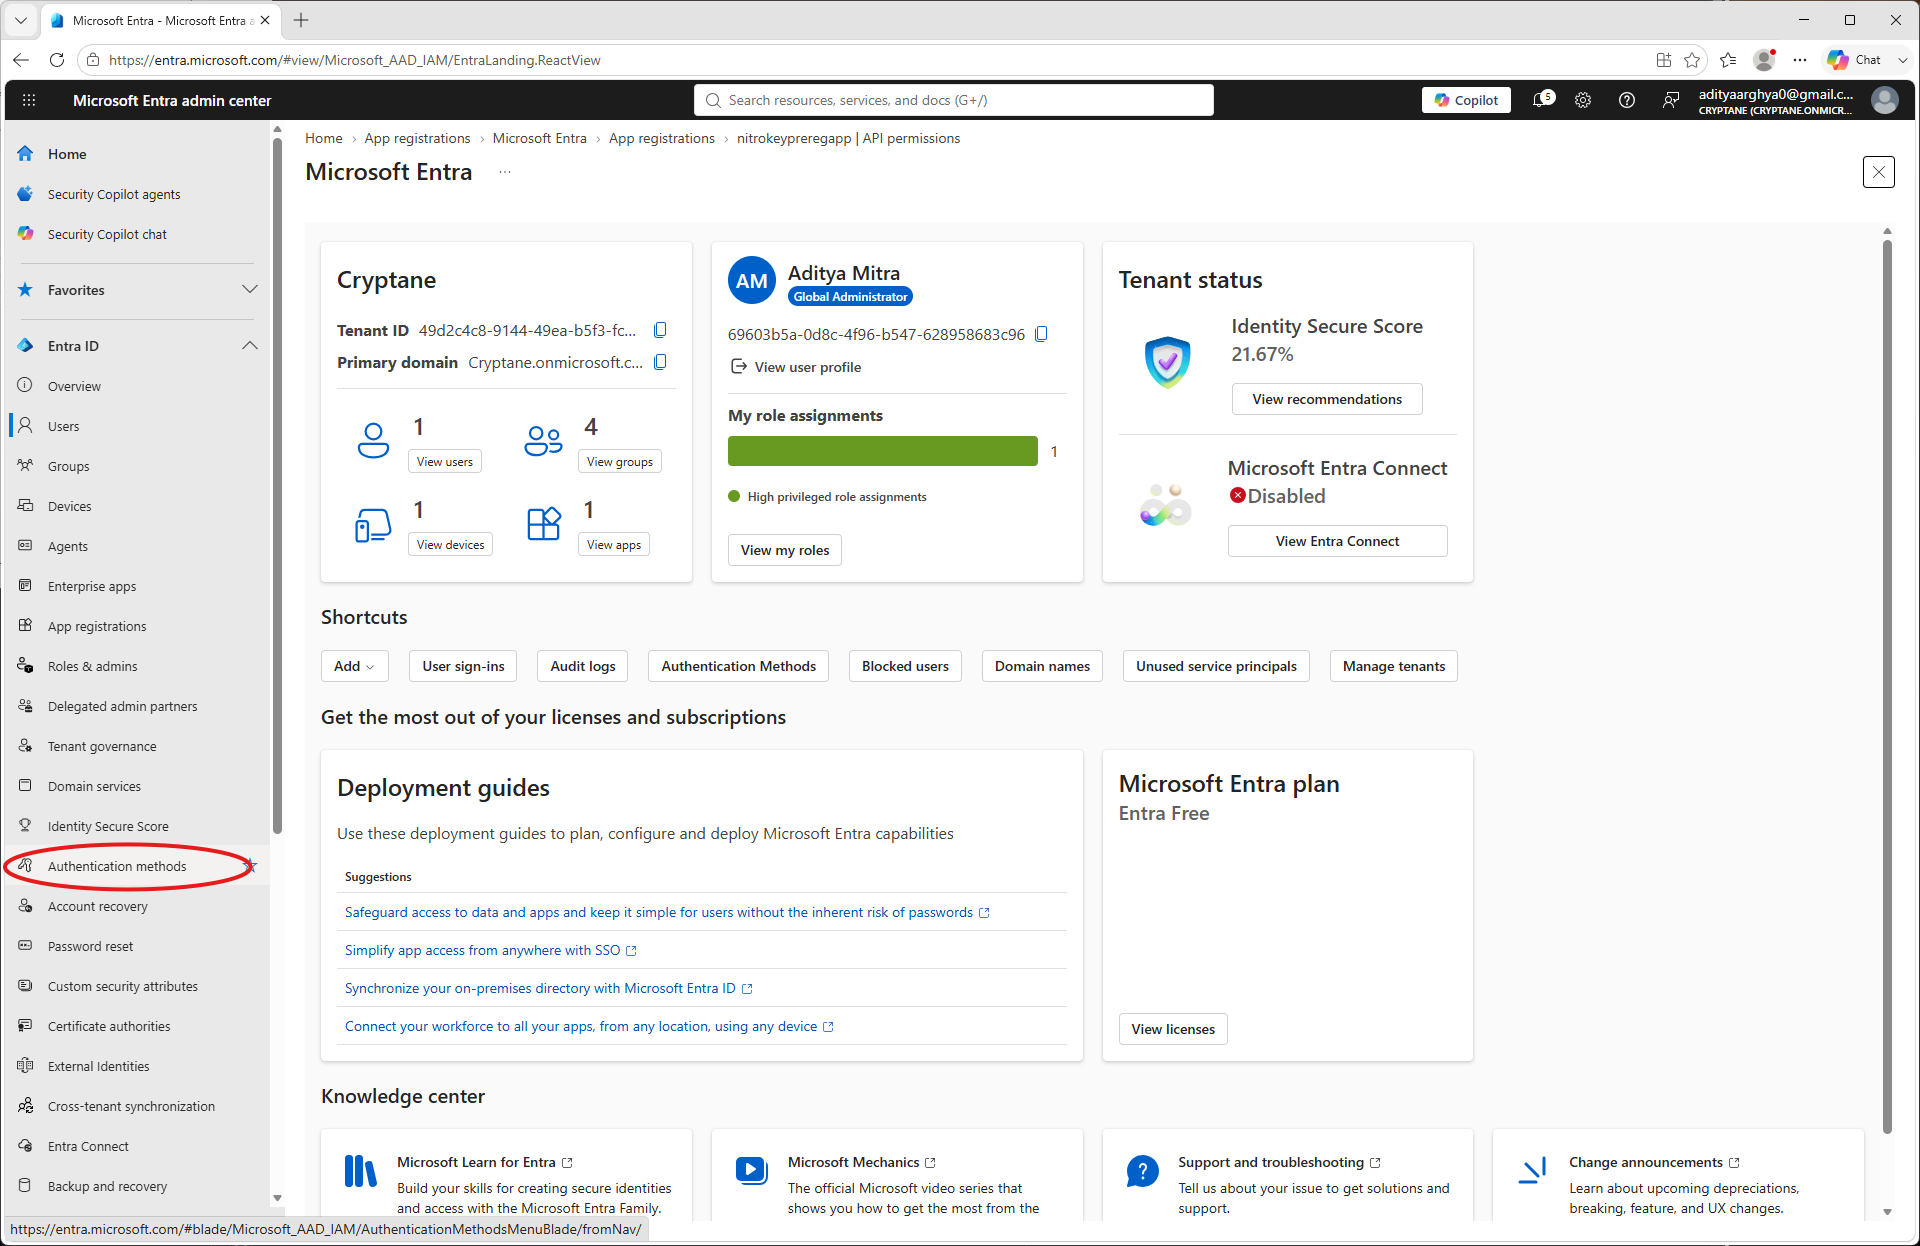
Kairiajame skydelyje spustelėkite „Autentifikavimo metodai“.
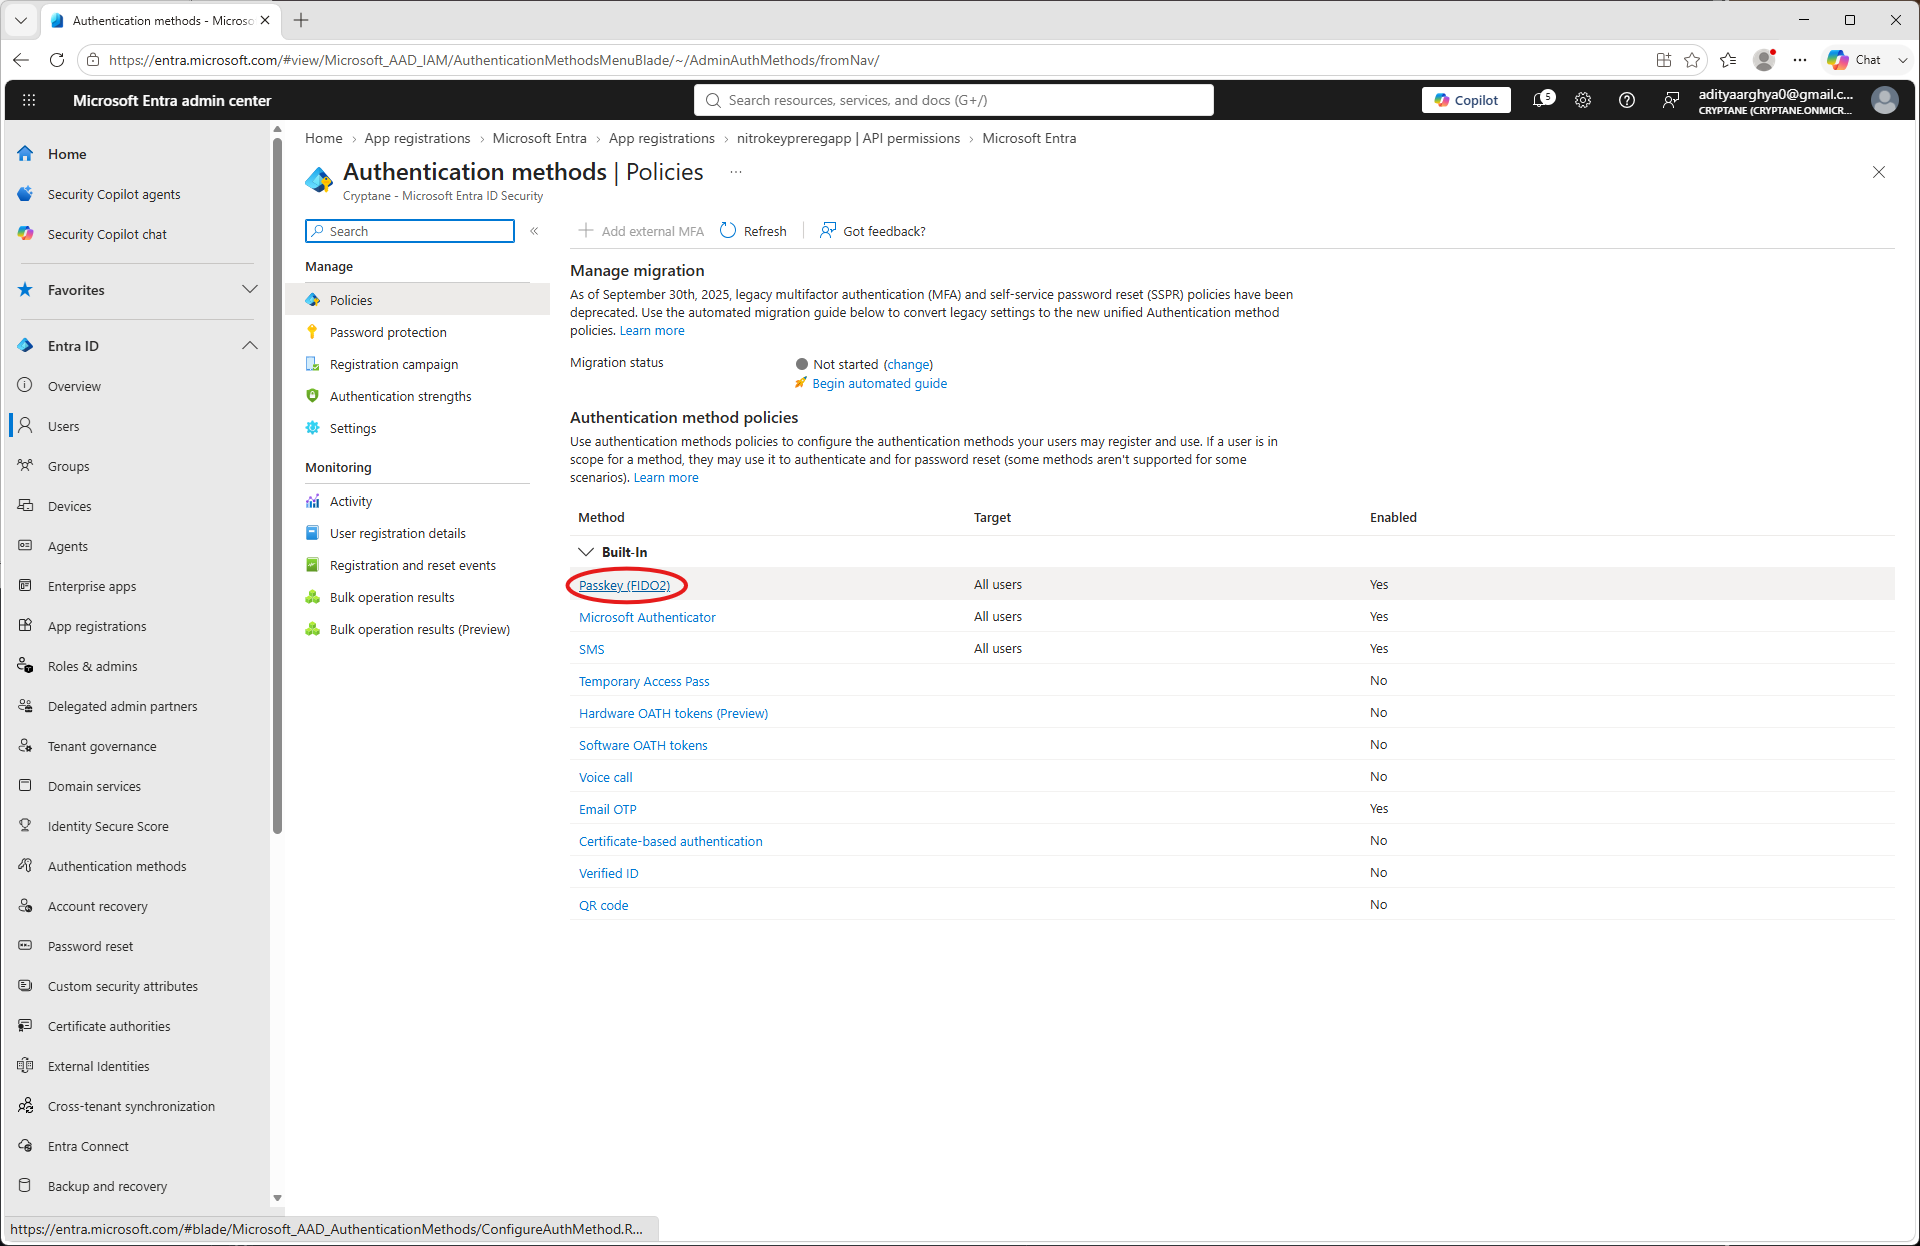
Select Passkey (FIDO2).
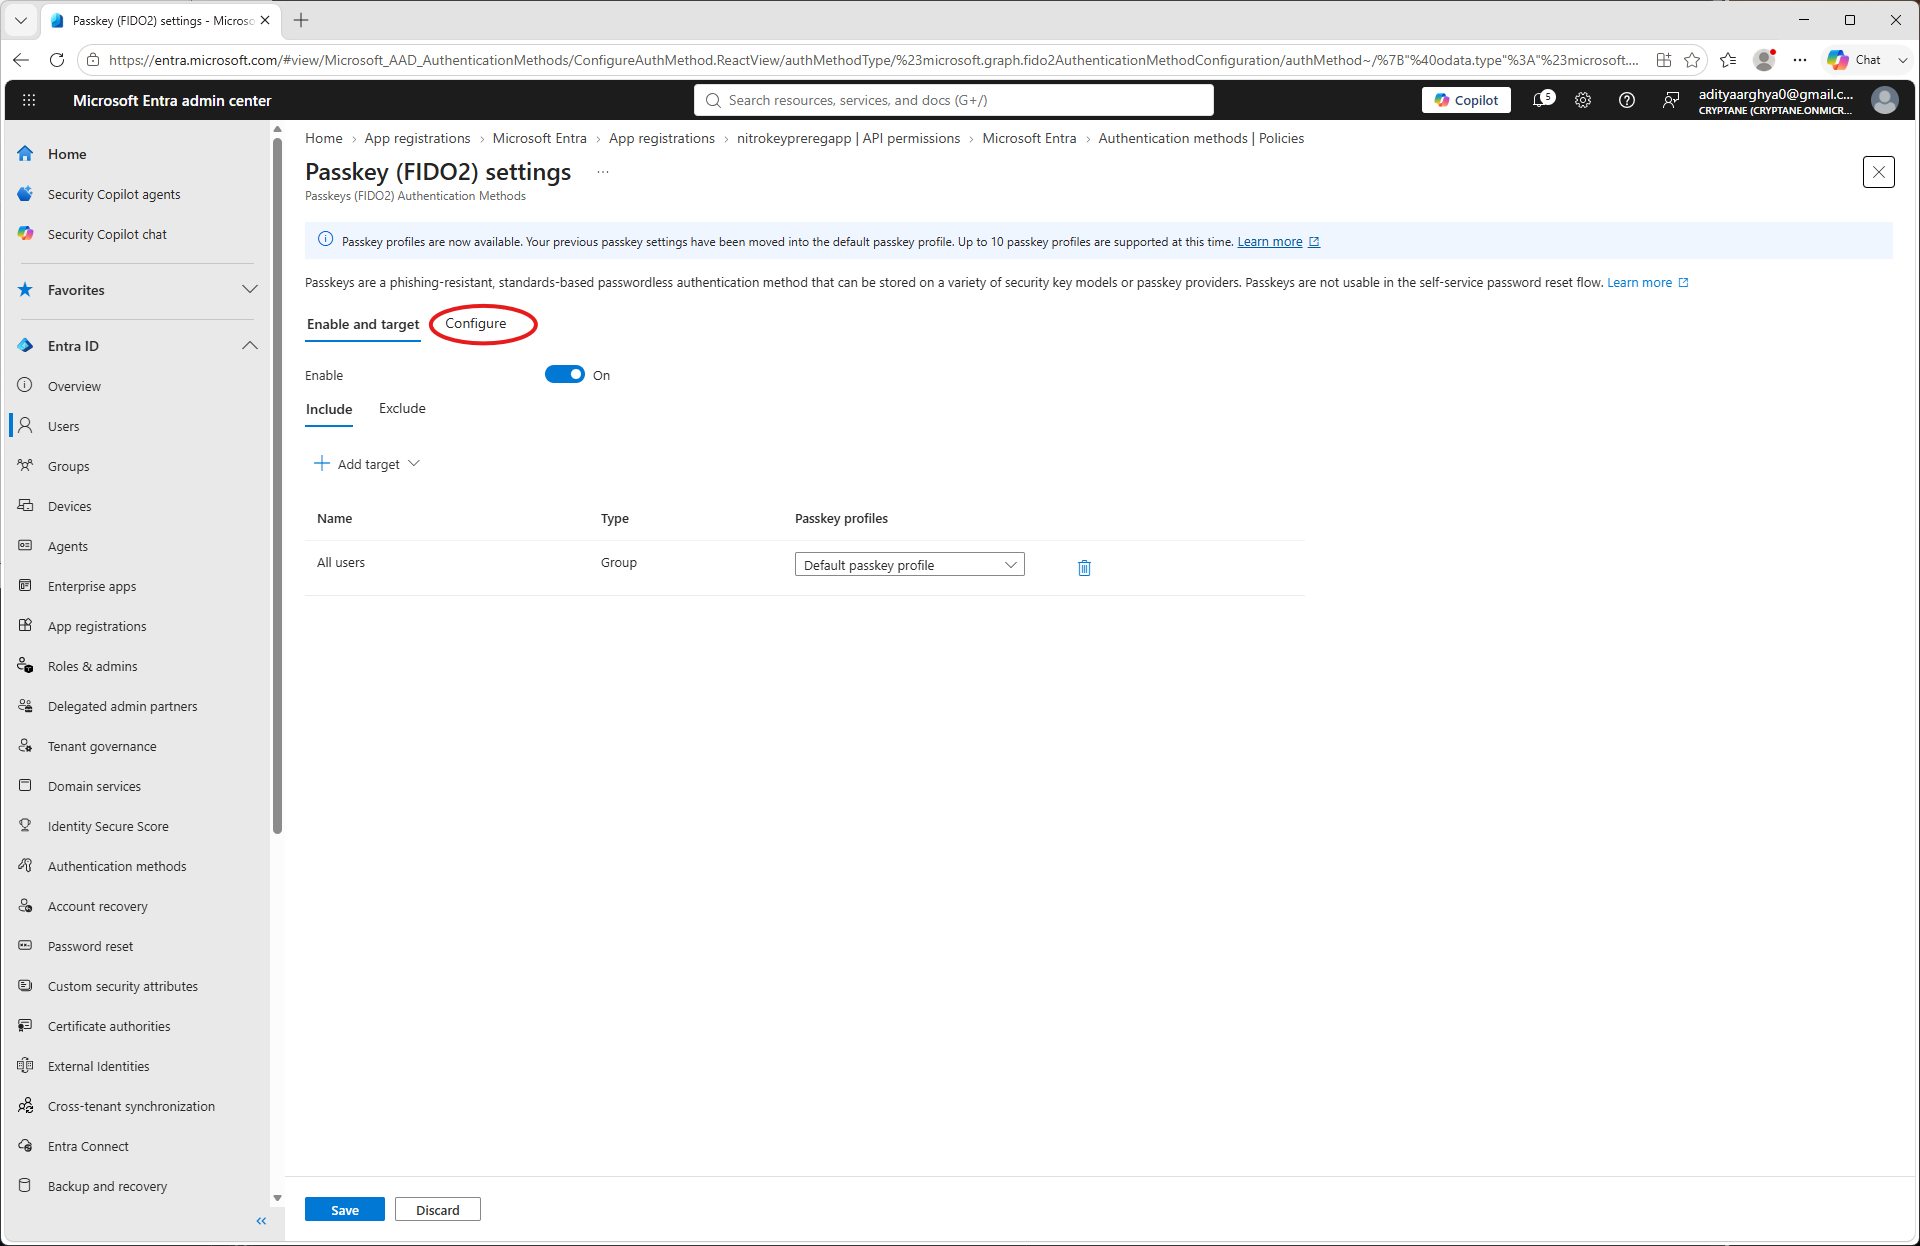
Click on the Configure tab.
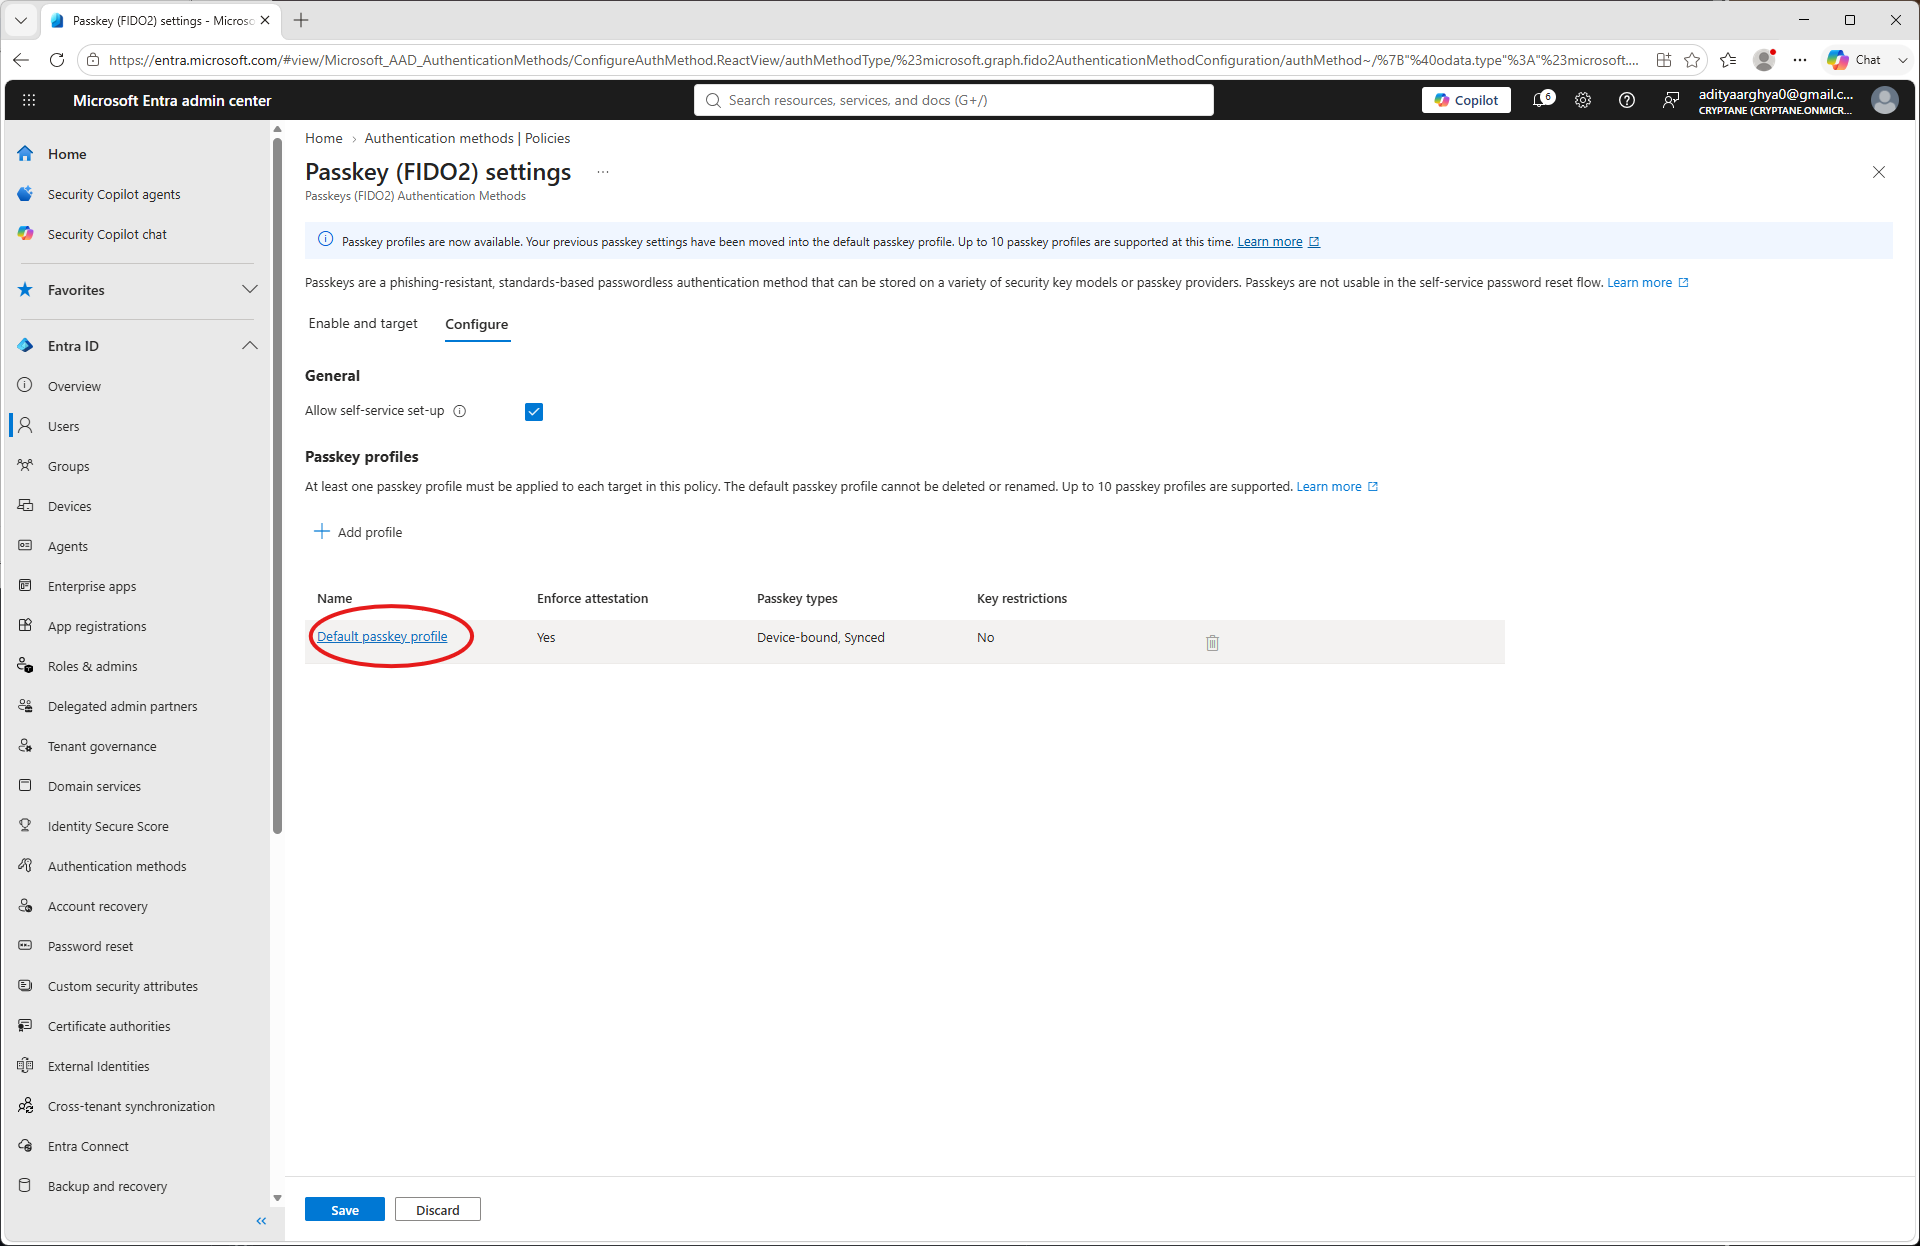
Click on Default Passkey profile
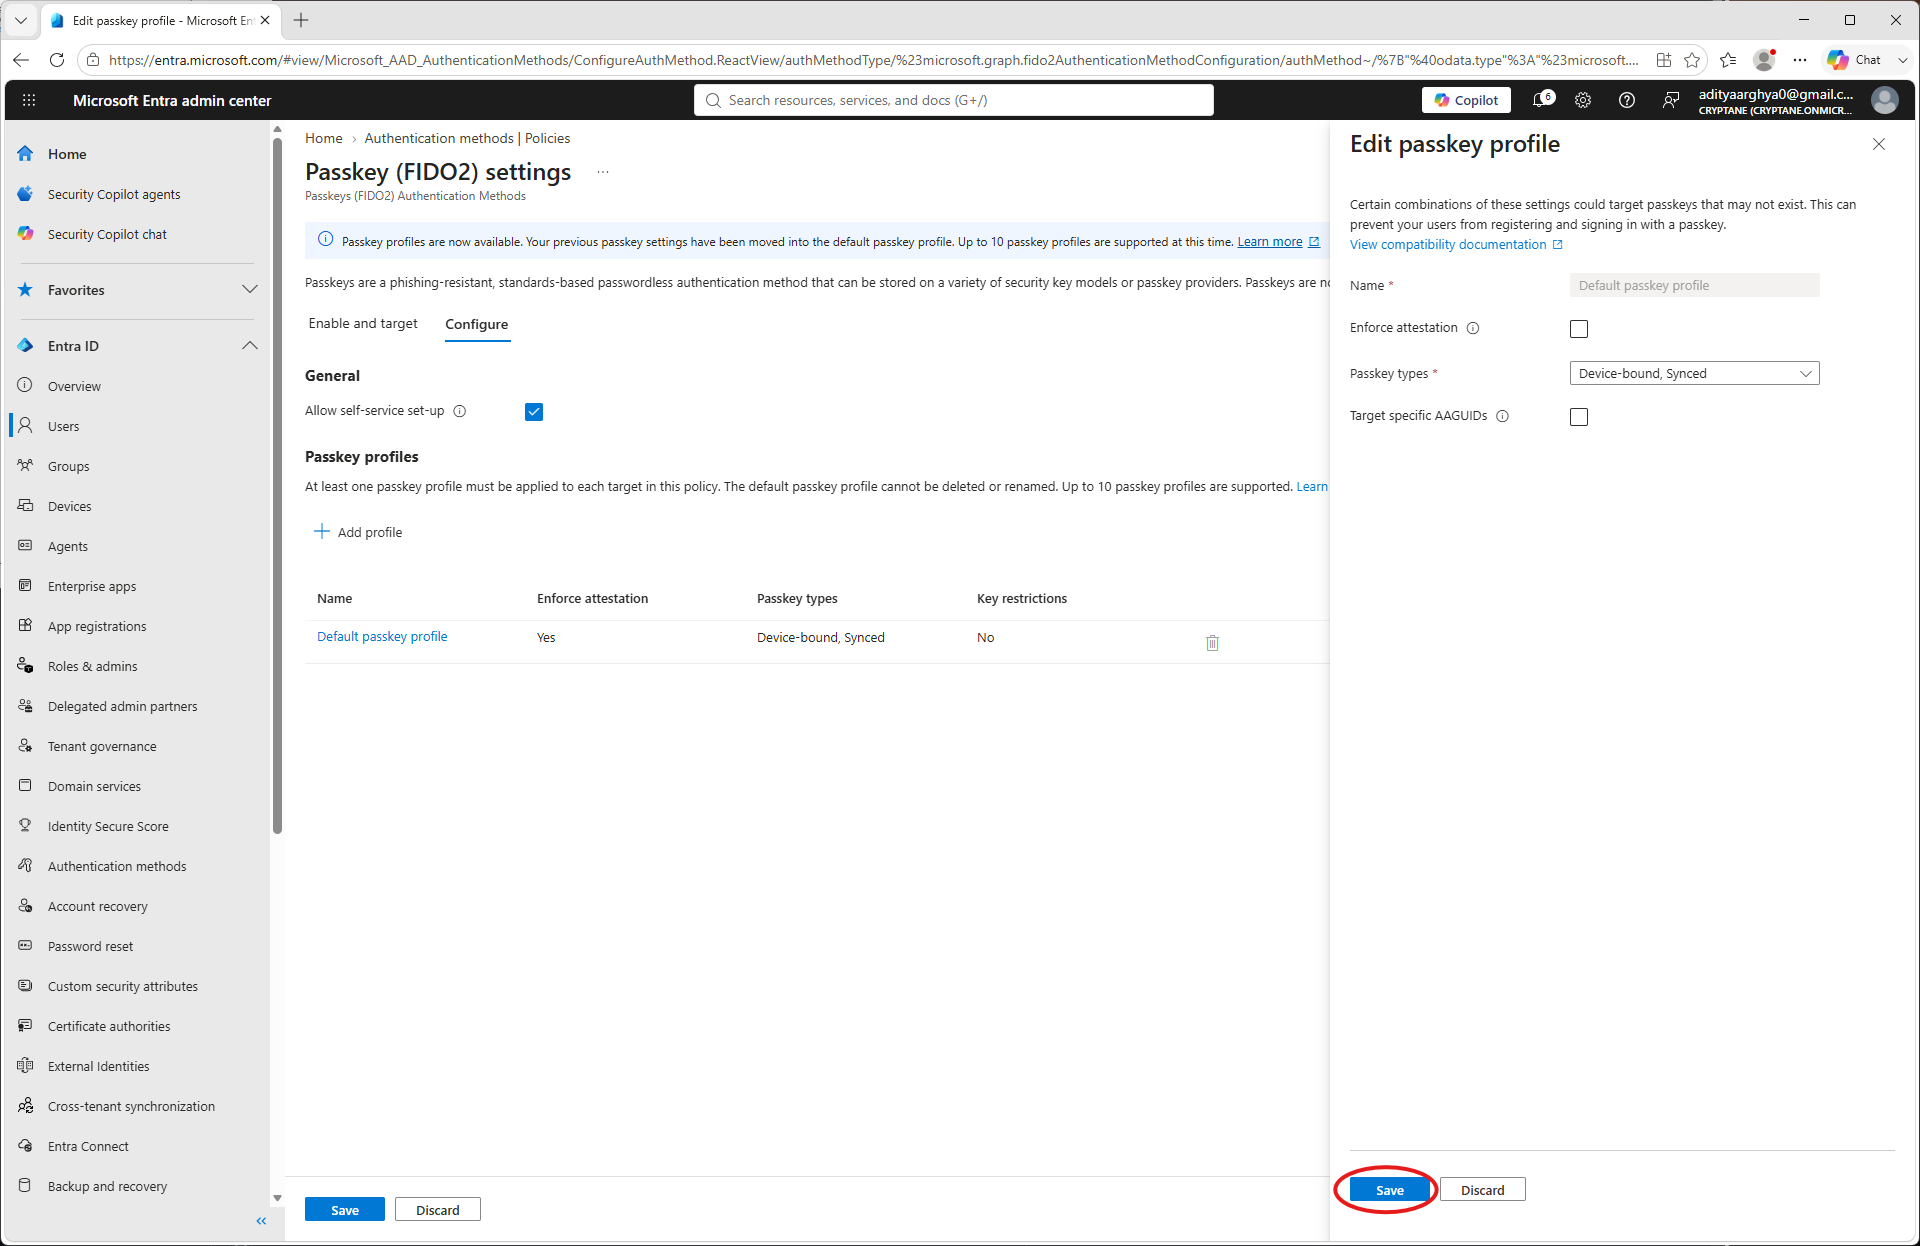
Pašalinkite žymę iš laukelio „Priversti patvirtinti“ (tik jei naudojate „Nitrokey“, neturintį FIDO Alliance sertifikato. Šio dokumento rengimo metu šį sertifikatą turi tik „Nitrokey 3A Mini“).
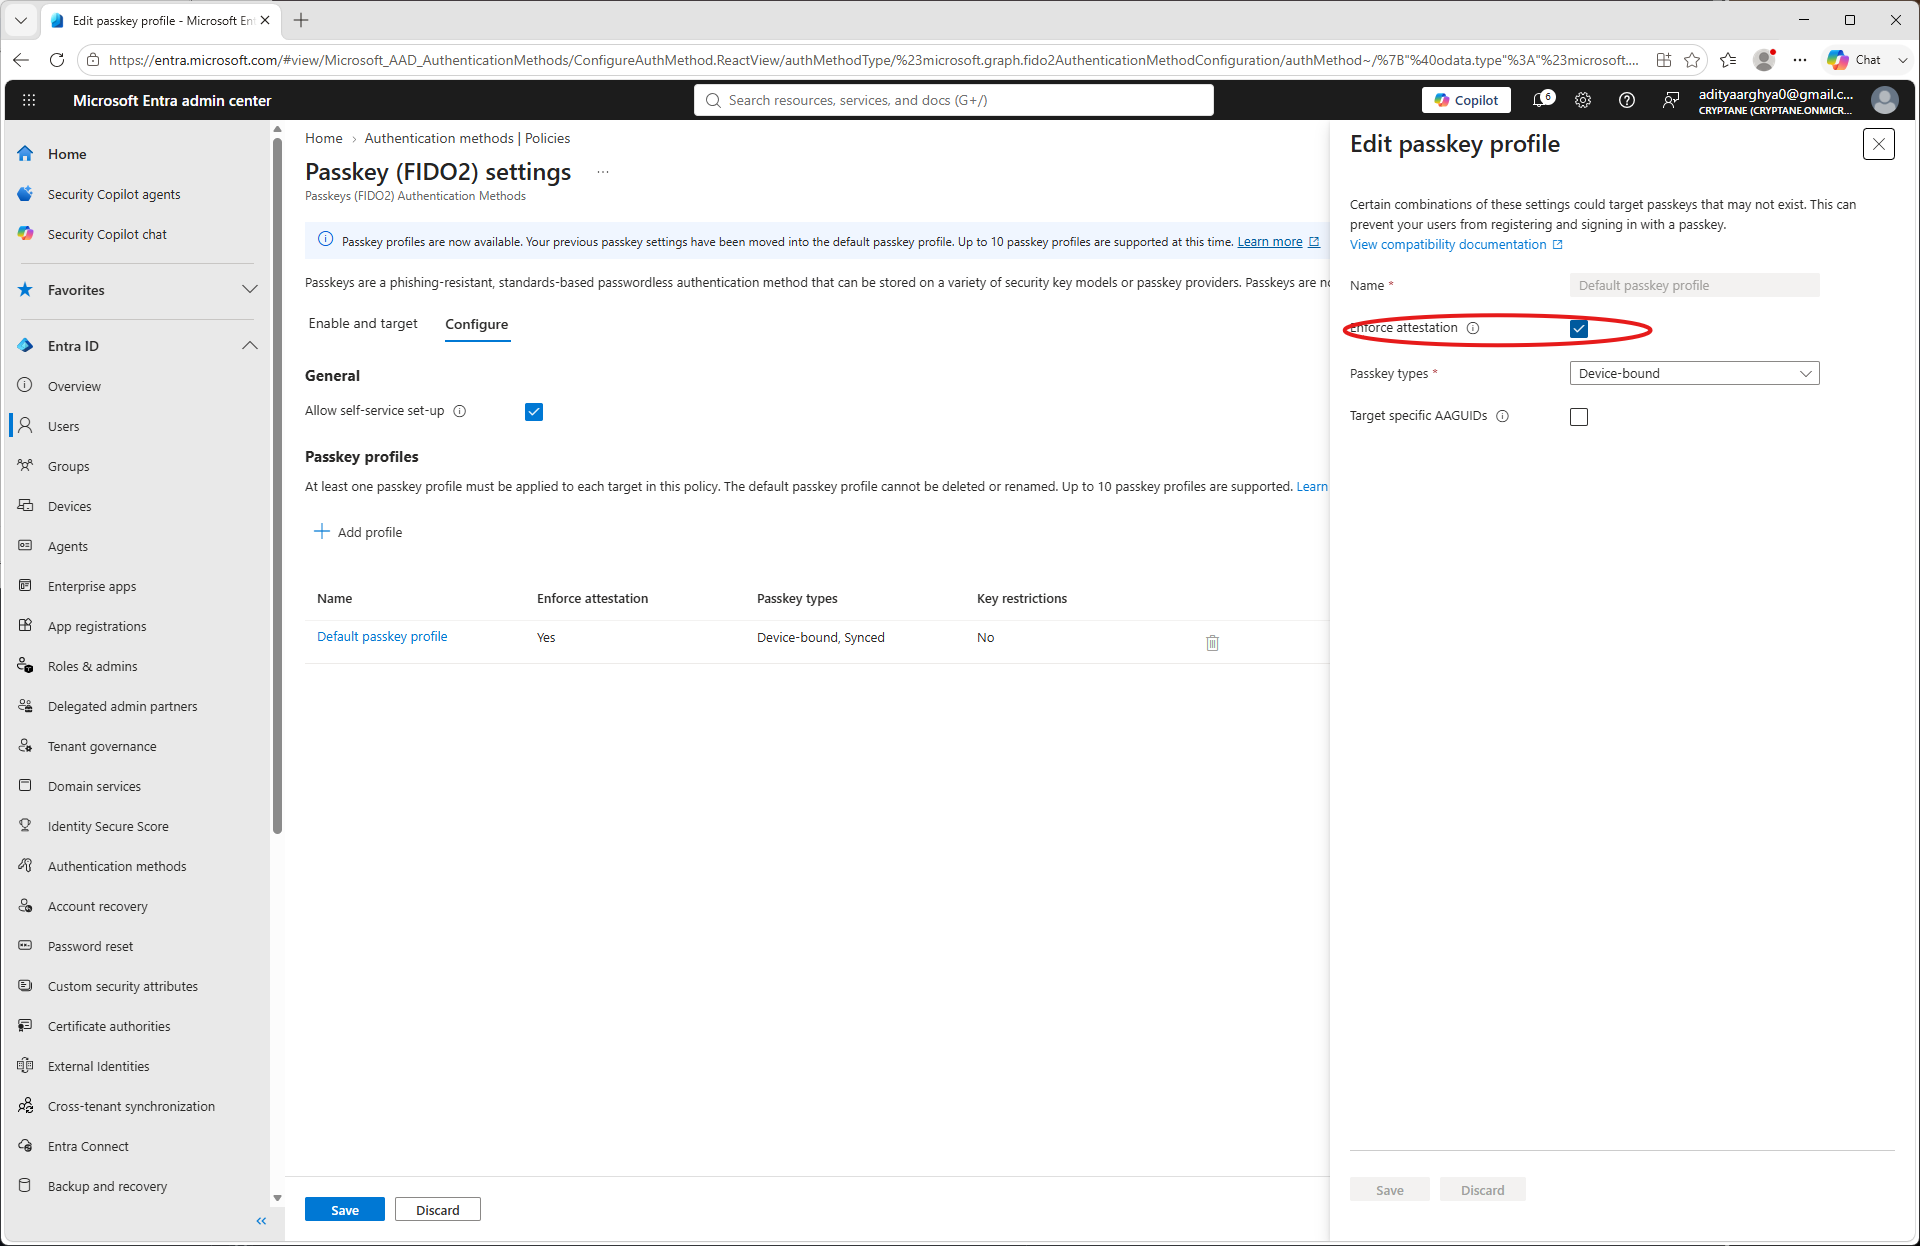
Click Save.
You have taken note of the Tenant ID, Client ID, Client Secret and Primary Domain as a part of the process. Make a
config.jsonfile with the information. An example is shown below.{ "tenant": "49d2c4c8-9144-49ea-b5f3-fc11b848cd72", "client": "e9f25c9c-3870-4aa8-9659-a40f09de093e", "secret": "************************************", "domain": "Cryptane.onmicrosoft.com" }
Naudojimas
You may use the pynitrokey utility to provision a Nitrokey for an user in your tenant.
nitropy fido2 provision-credential entra -c config.json <username> --create-user
Here the <username> could be the Email ID of the user (User principal in terms of Microsoft) or a part of it till before the @ sign.
The --create-user flag directs the tool to create the user if it does not exist in the Entra Tenant.
$ nitropy fido2 provision-credential entra -c config.json aditya --create-user
Command line tool to interact with Nitrokey devices 0.12.3
Warning: It is recommended to execute nitropy with admin privileges to be able to access Nitrokey 3 and Nitrokey FIDO 2 devices.
Waiting 5 secs for Graph API to update
User aditya created on Entra
Enter PIN:
Touch your authenticator device now...
Entra credential for aditya pre-registered on NK3 A56F0 with Credential ID owBYLNXsrDZ104I2MyCtuxmXKAd0Um56t3Byx5VfMz-Vs1Azy1re4Rdf-foMsc7vAUw7lJgCoG1VSdl2mBoCUHWGpTH-YkjEJ4UC4YlIEdk1.
Verification
Vartotojas gali naudoti naujai parengtą „Nitrokey“ prisijungti prie savo „Microsoft“ paskyros. Sekite nuorodą Pavyzdinis prisijungimas prie „Microsoft“ naudojant „Nitrokey“, norėdami prisijungti su šiuo naujai parengtu „Nitrokey“.
Galite patikrinti suteiktus prisijungimo duomenis „Entra“ administratorių portale, atlikdami toliau nurodytus veiksmus.
„Entra“ administravimo centro kairiajame skydelyje pereikite prie parinkties „Vartotojai“.
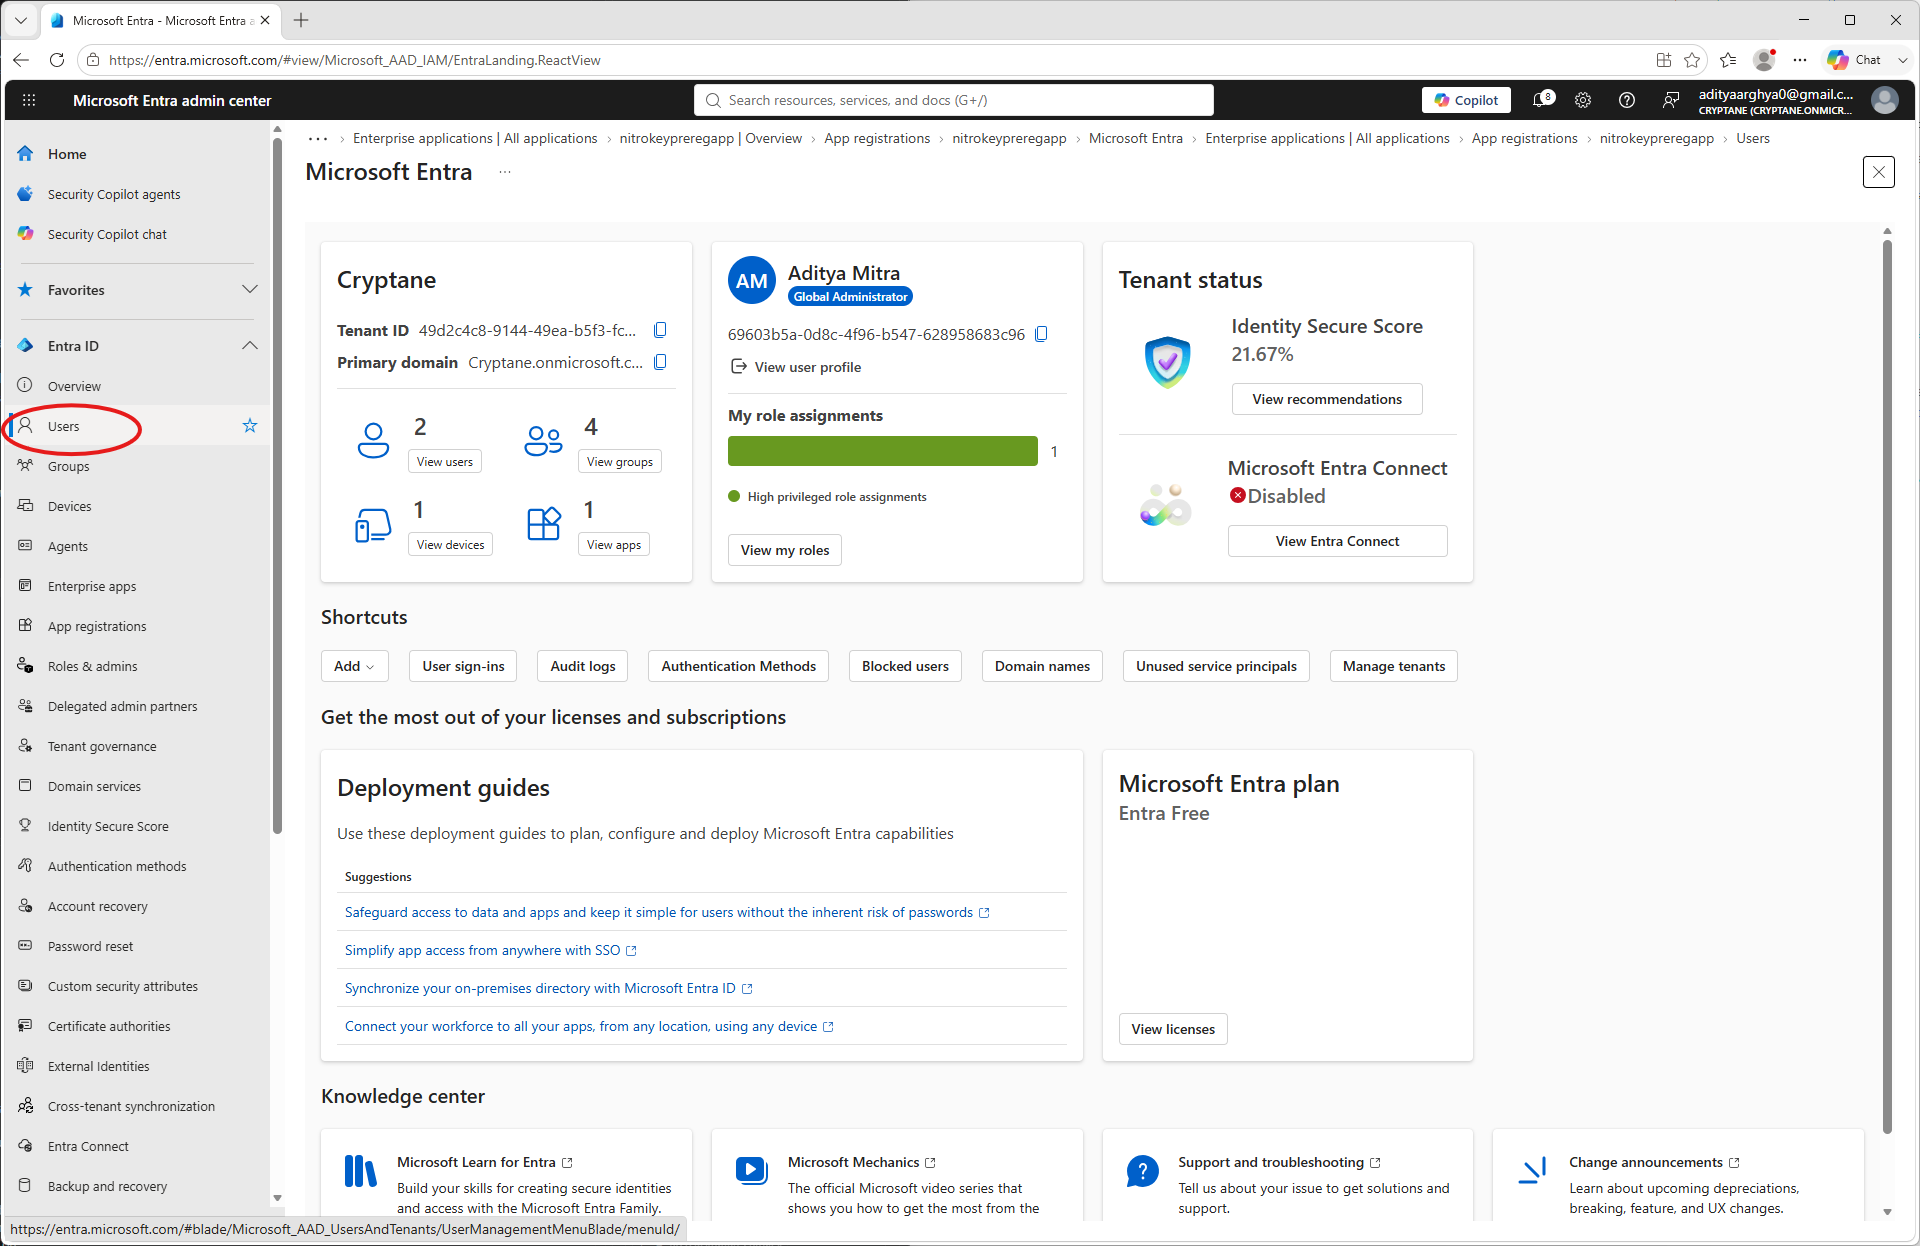
If the user was created with the
--create-userflag you may be able to find the entry on the list. If it is a pre-existing user, it would also be there. Click on the user to which the credential was enrolled.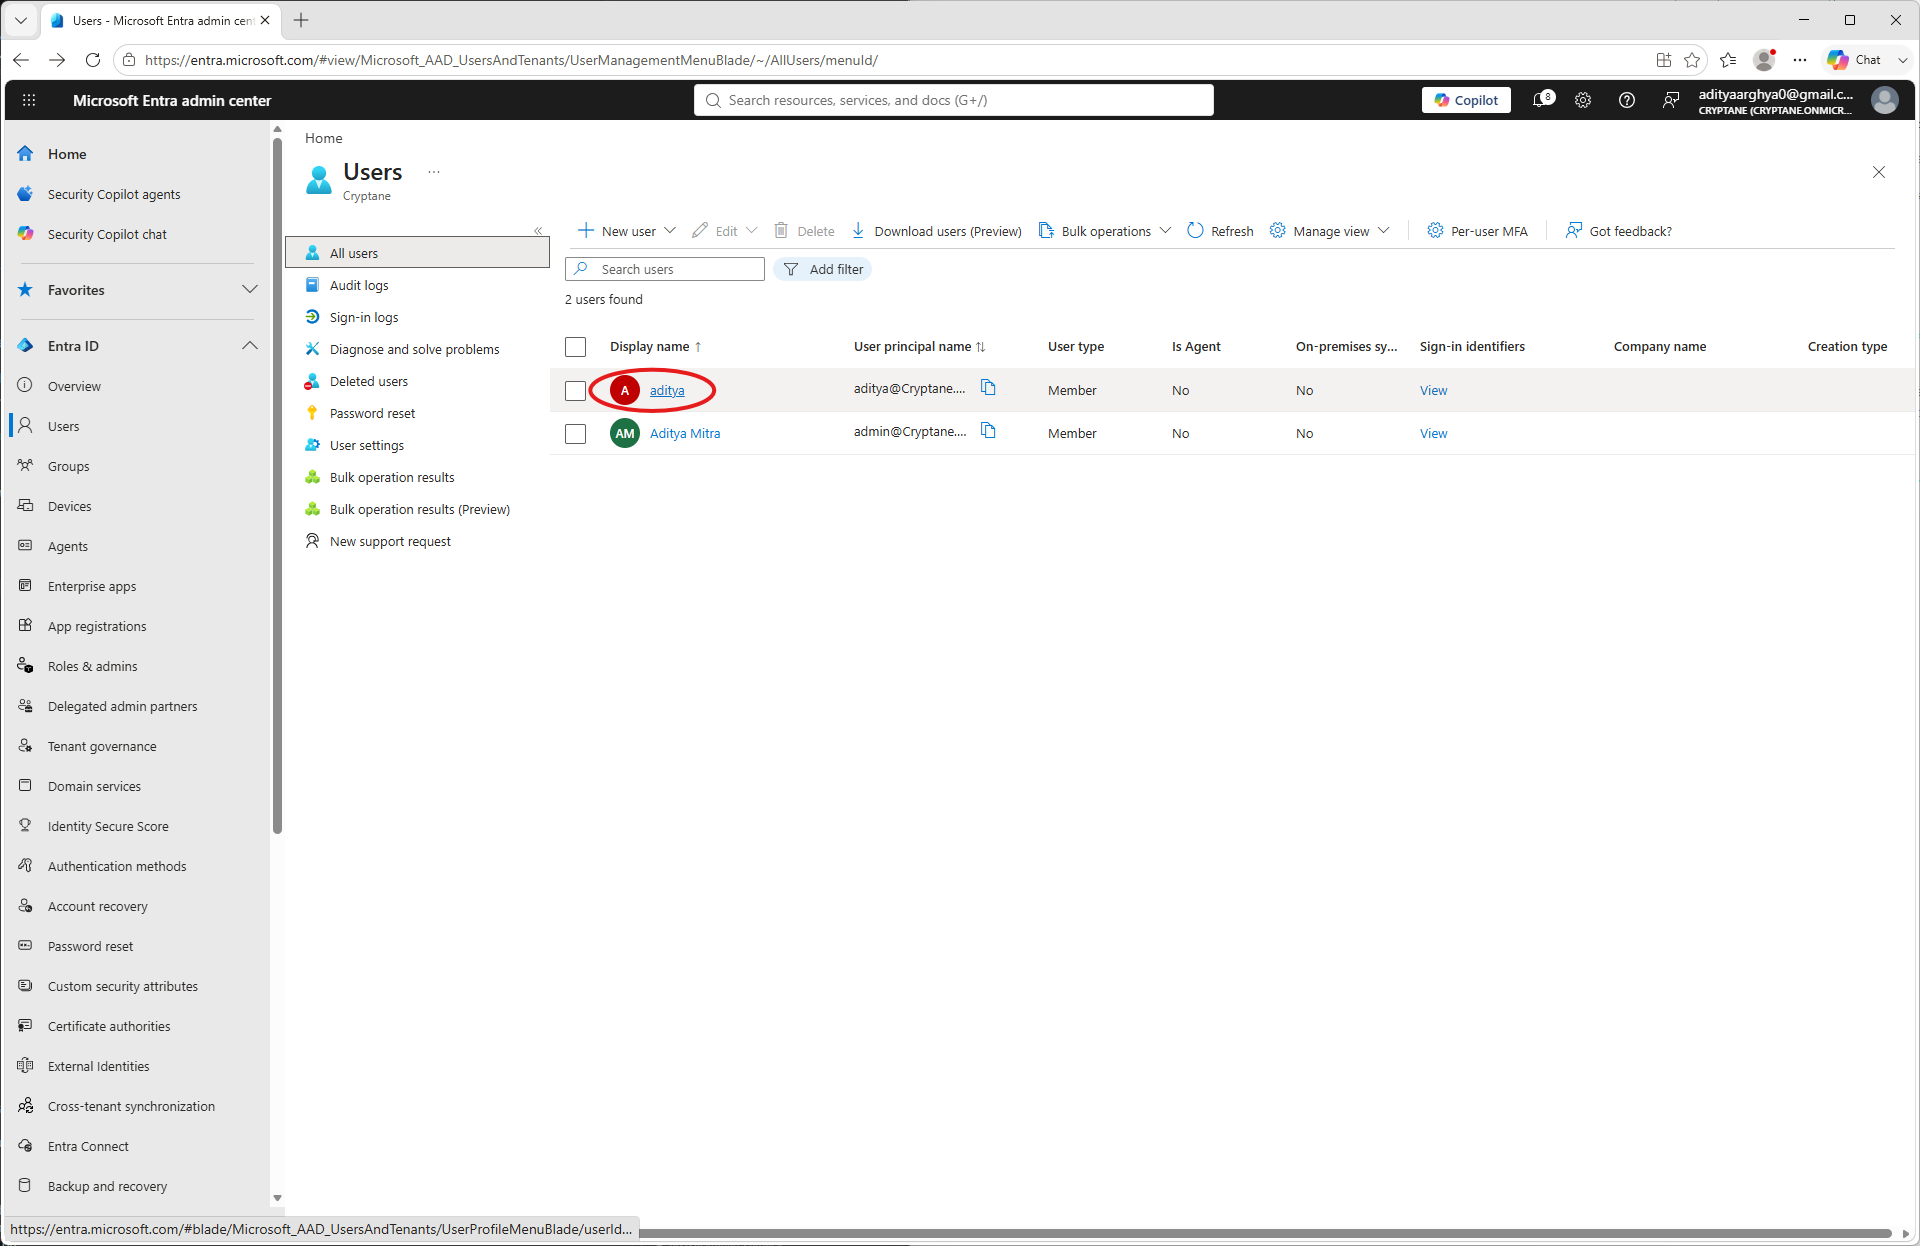
Click on Authentication methods on the user blade.
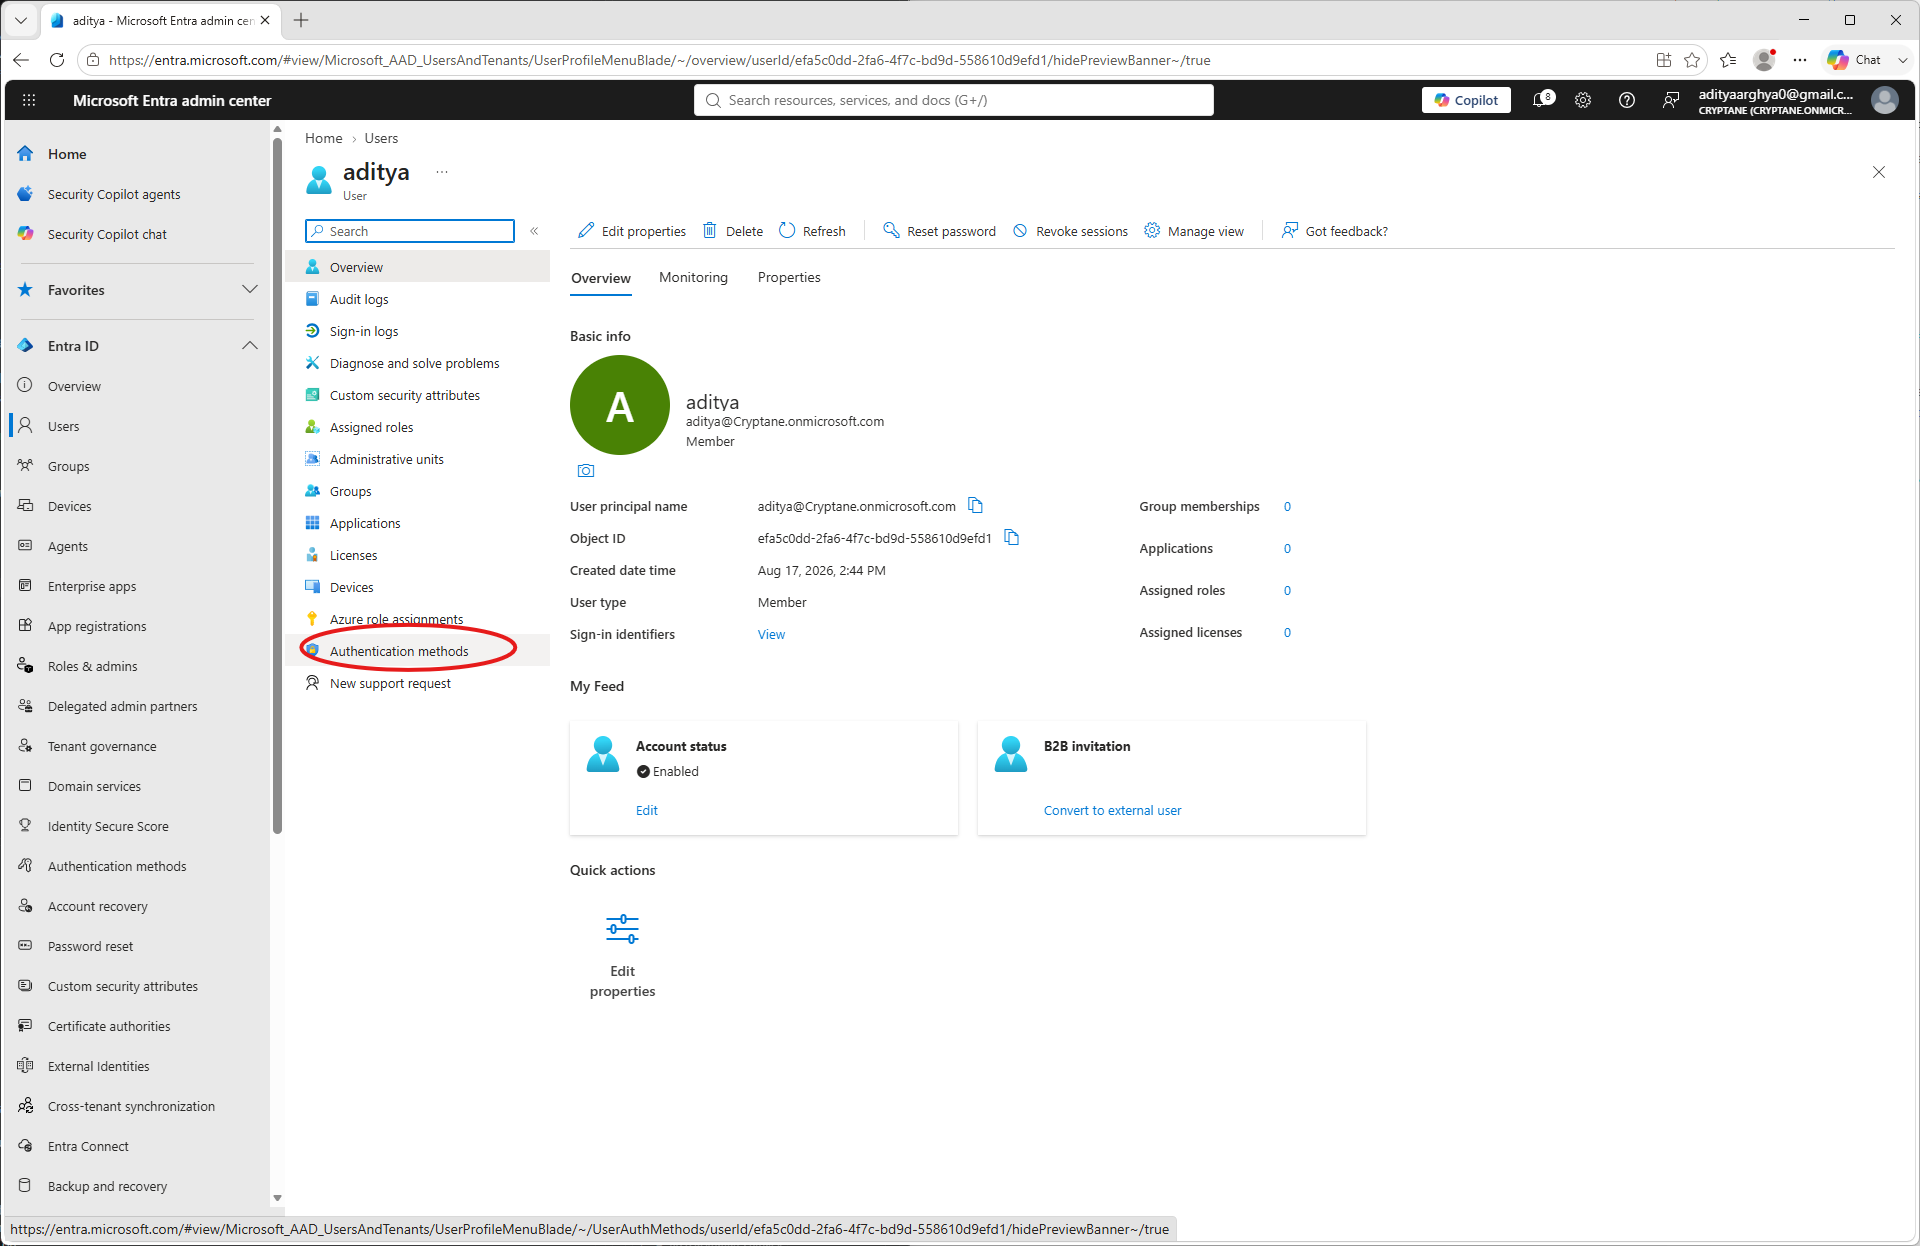
Bus rodomas užregistruotas prisijungimo duomenų rinkinys su pirmais 5 „Nitrokey“ UUID simboliais. Norėdami peržiūrėti išsamią informaciją apie užregistruotą prisijungimo duomenų rinkinį, spustelėkite tris taškelius ir tada pasirinkite „Peržiūrėti išsamią informaciją“.
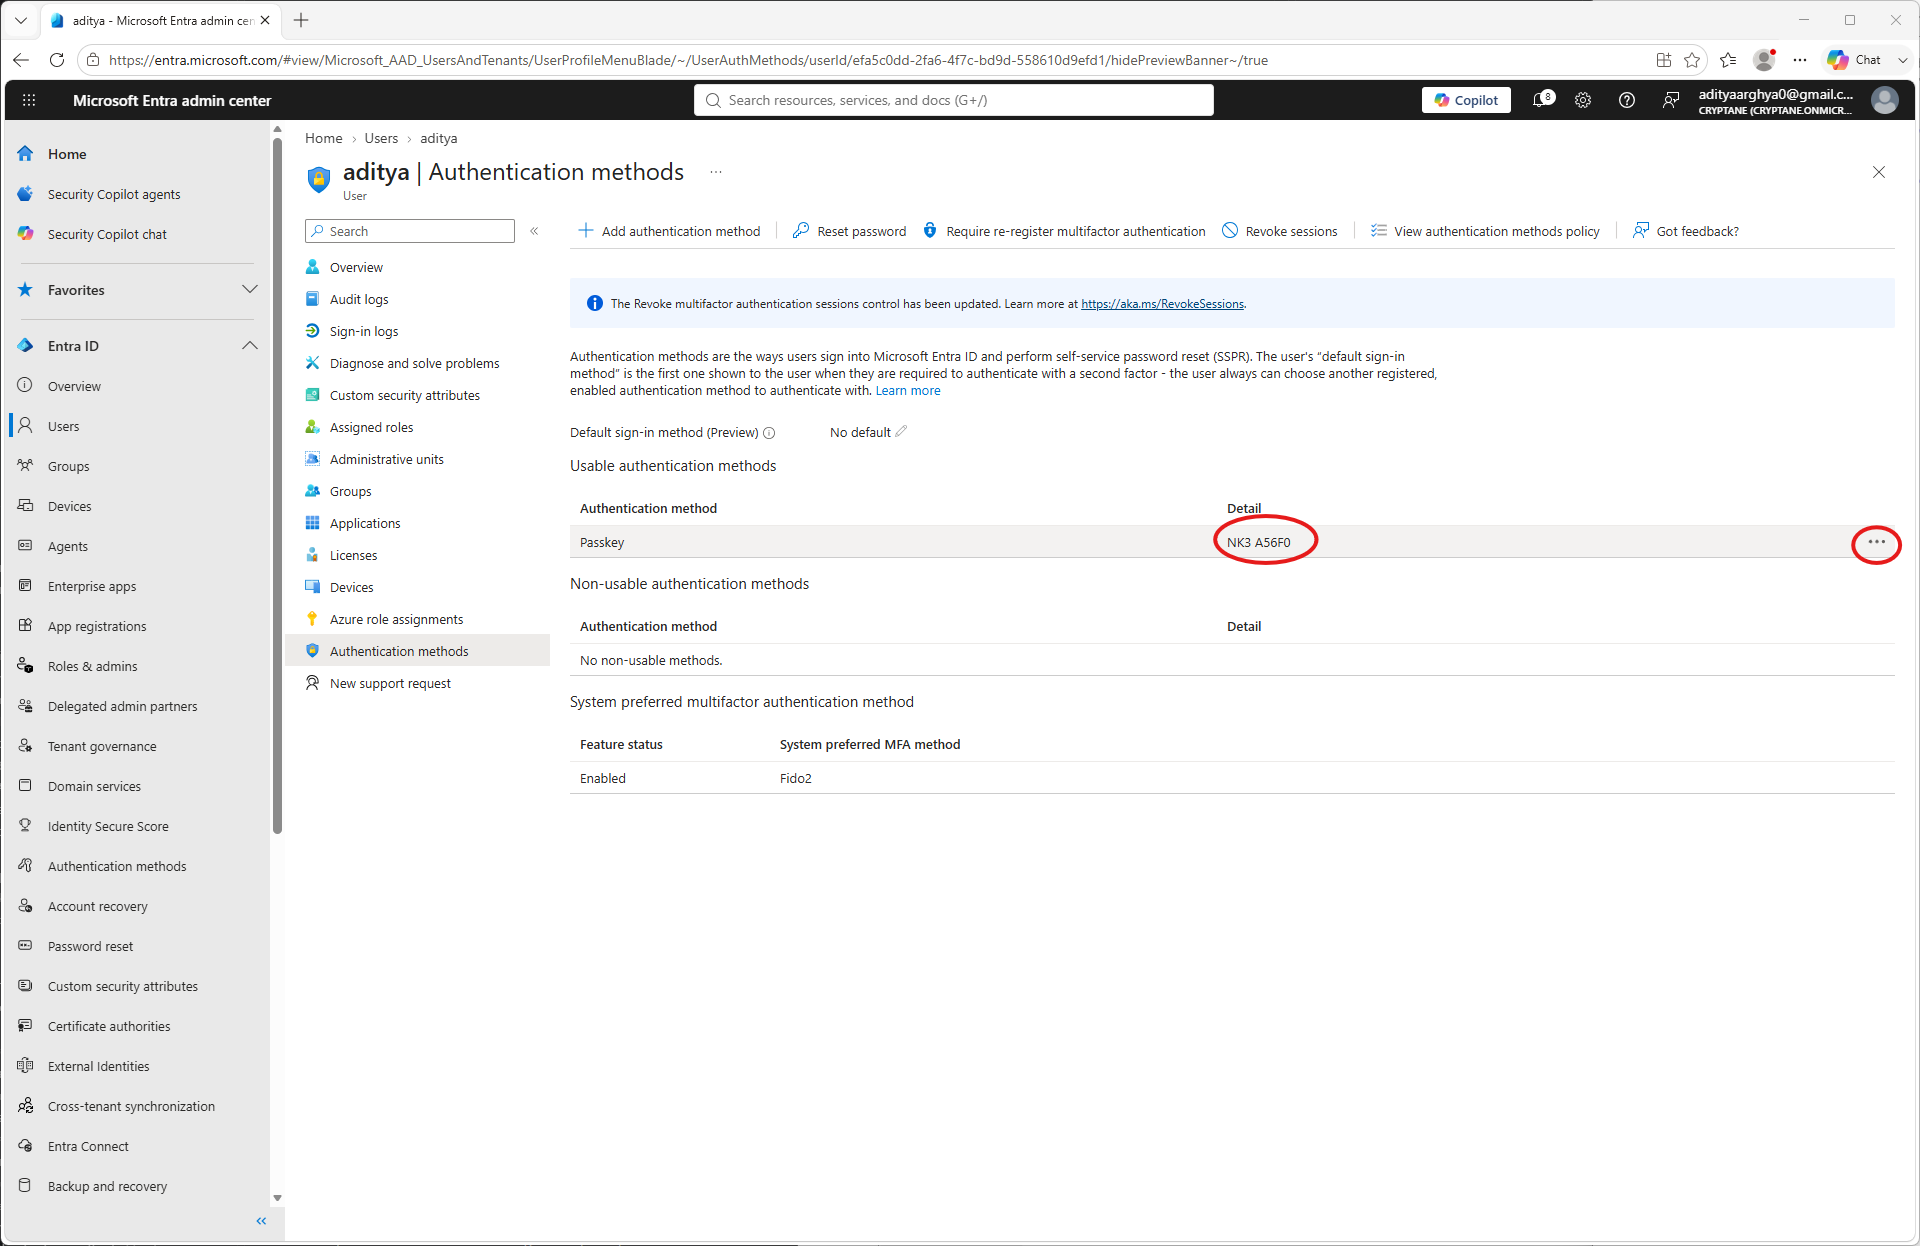
Bus rodomi papildomi duomenys apie šį tapatybės patvirtinimą. Juos galite patikrinti.