Configuration de la Nitrokey pour Entra ID
Compatible Nitrokeys |
|||||||
|---|---|---|---|---|---|---|---|
✓ active |
✓ active |
⨯ inactive |
⨯ inactive |
⨯ inactive |
⨯ inactive |
⨯ inactive |
⨯ inactive |
The Nitrokey 3 and Nitrokey Passkey support provisioning credentials for Microsoft Entra for seamless employee on-boarding in enterprise scenarios.
Mise en place
Une application Microsoft Entra est nécessaire pour permettre l’enregistrement programmatique des identifiants des utilisateurs. Nous vous proposons ici le guide de configuration de cette application, à condition que vous disposiez des droits d’accès requis.
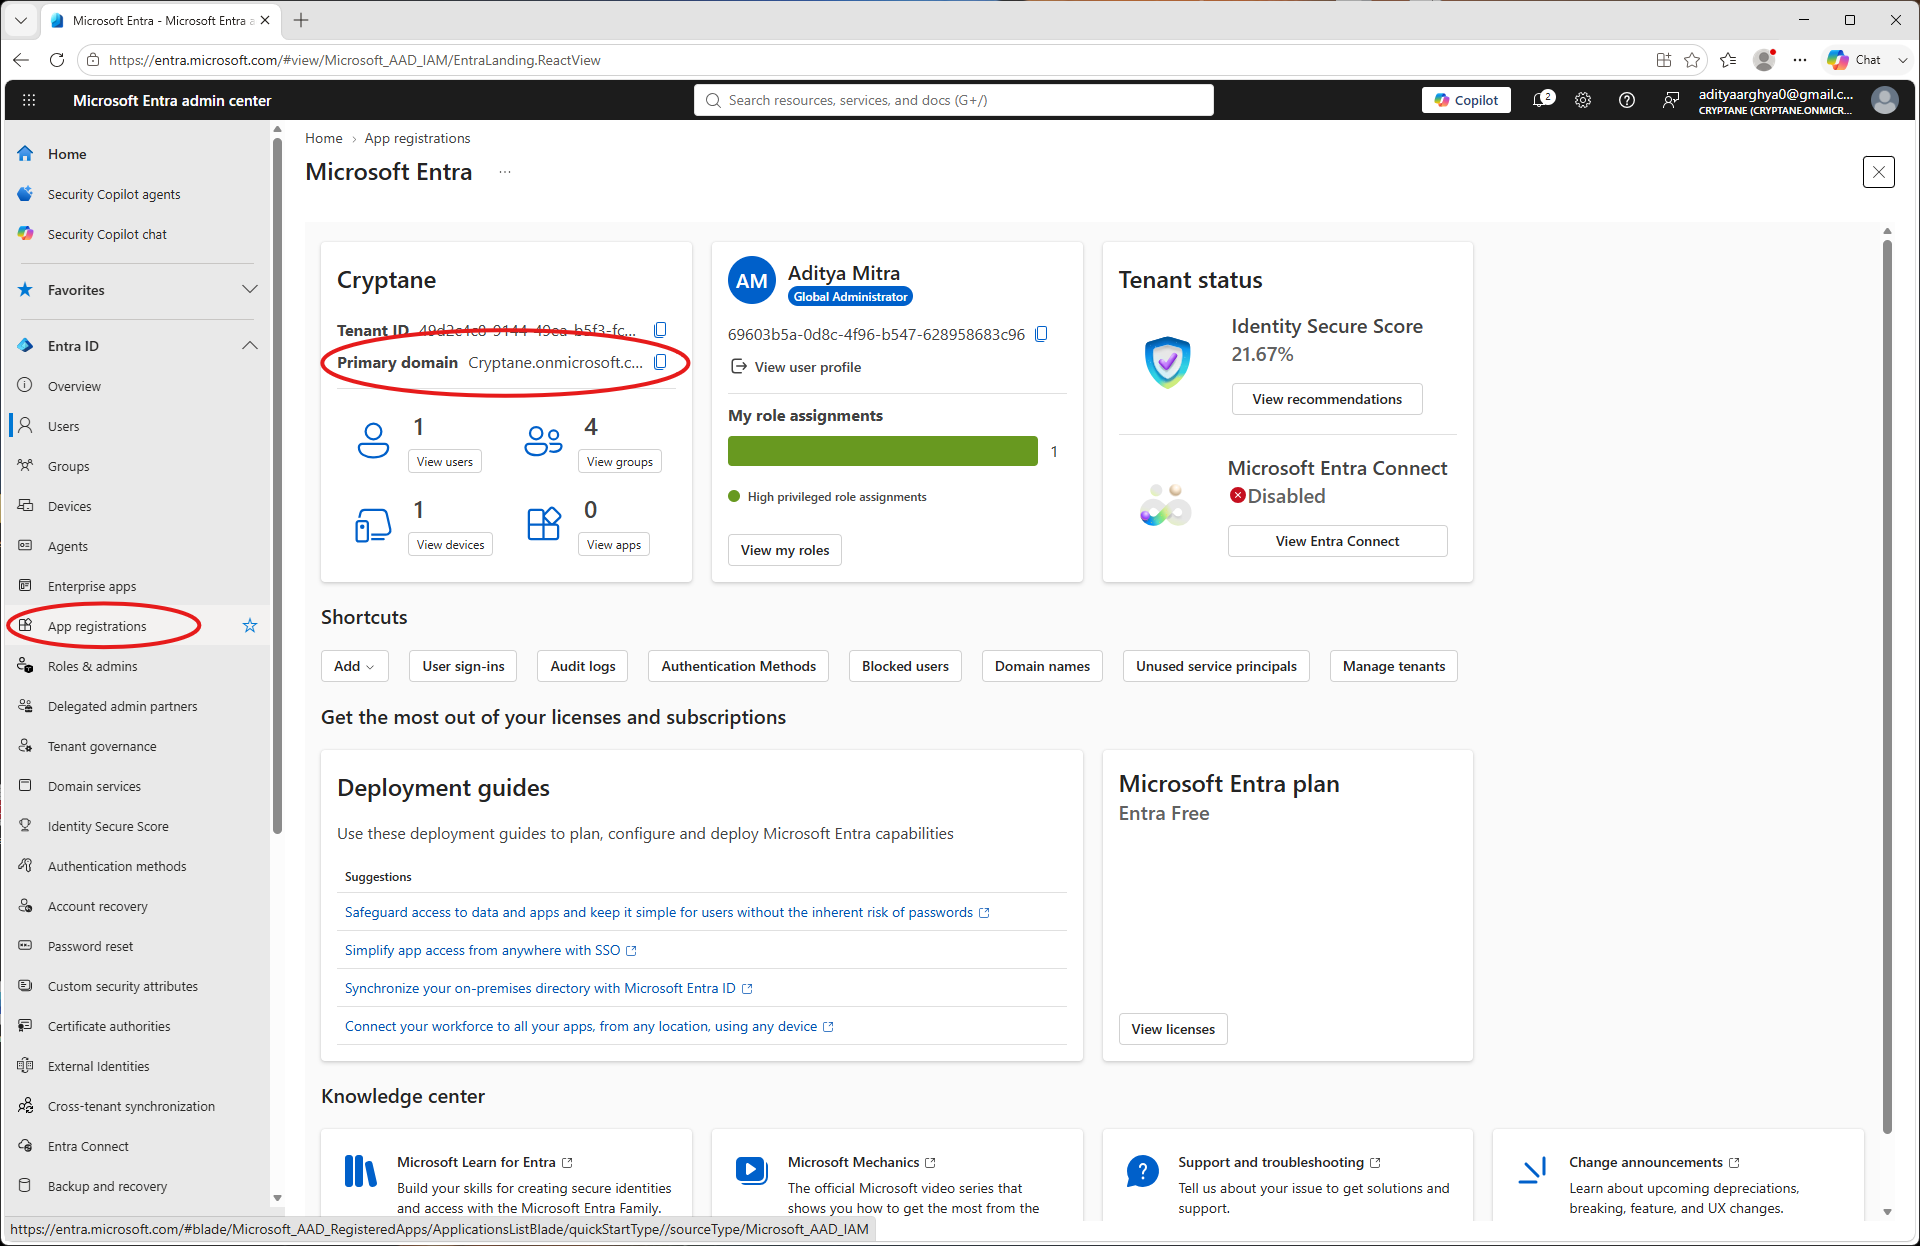
Login to Entra Admin portal. Take a note of the primary domain which you will need later. Go to App Registrations on the left blade.
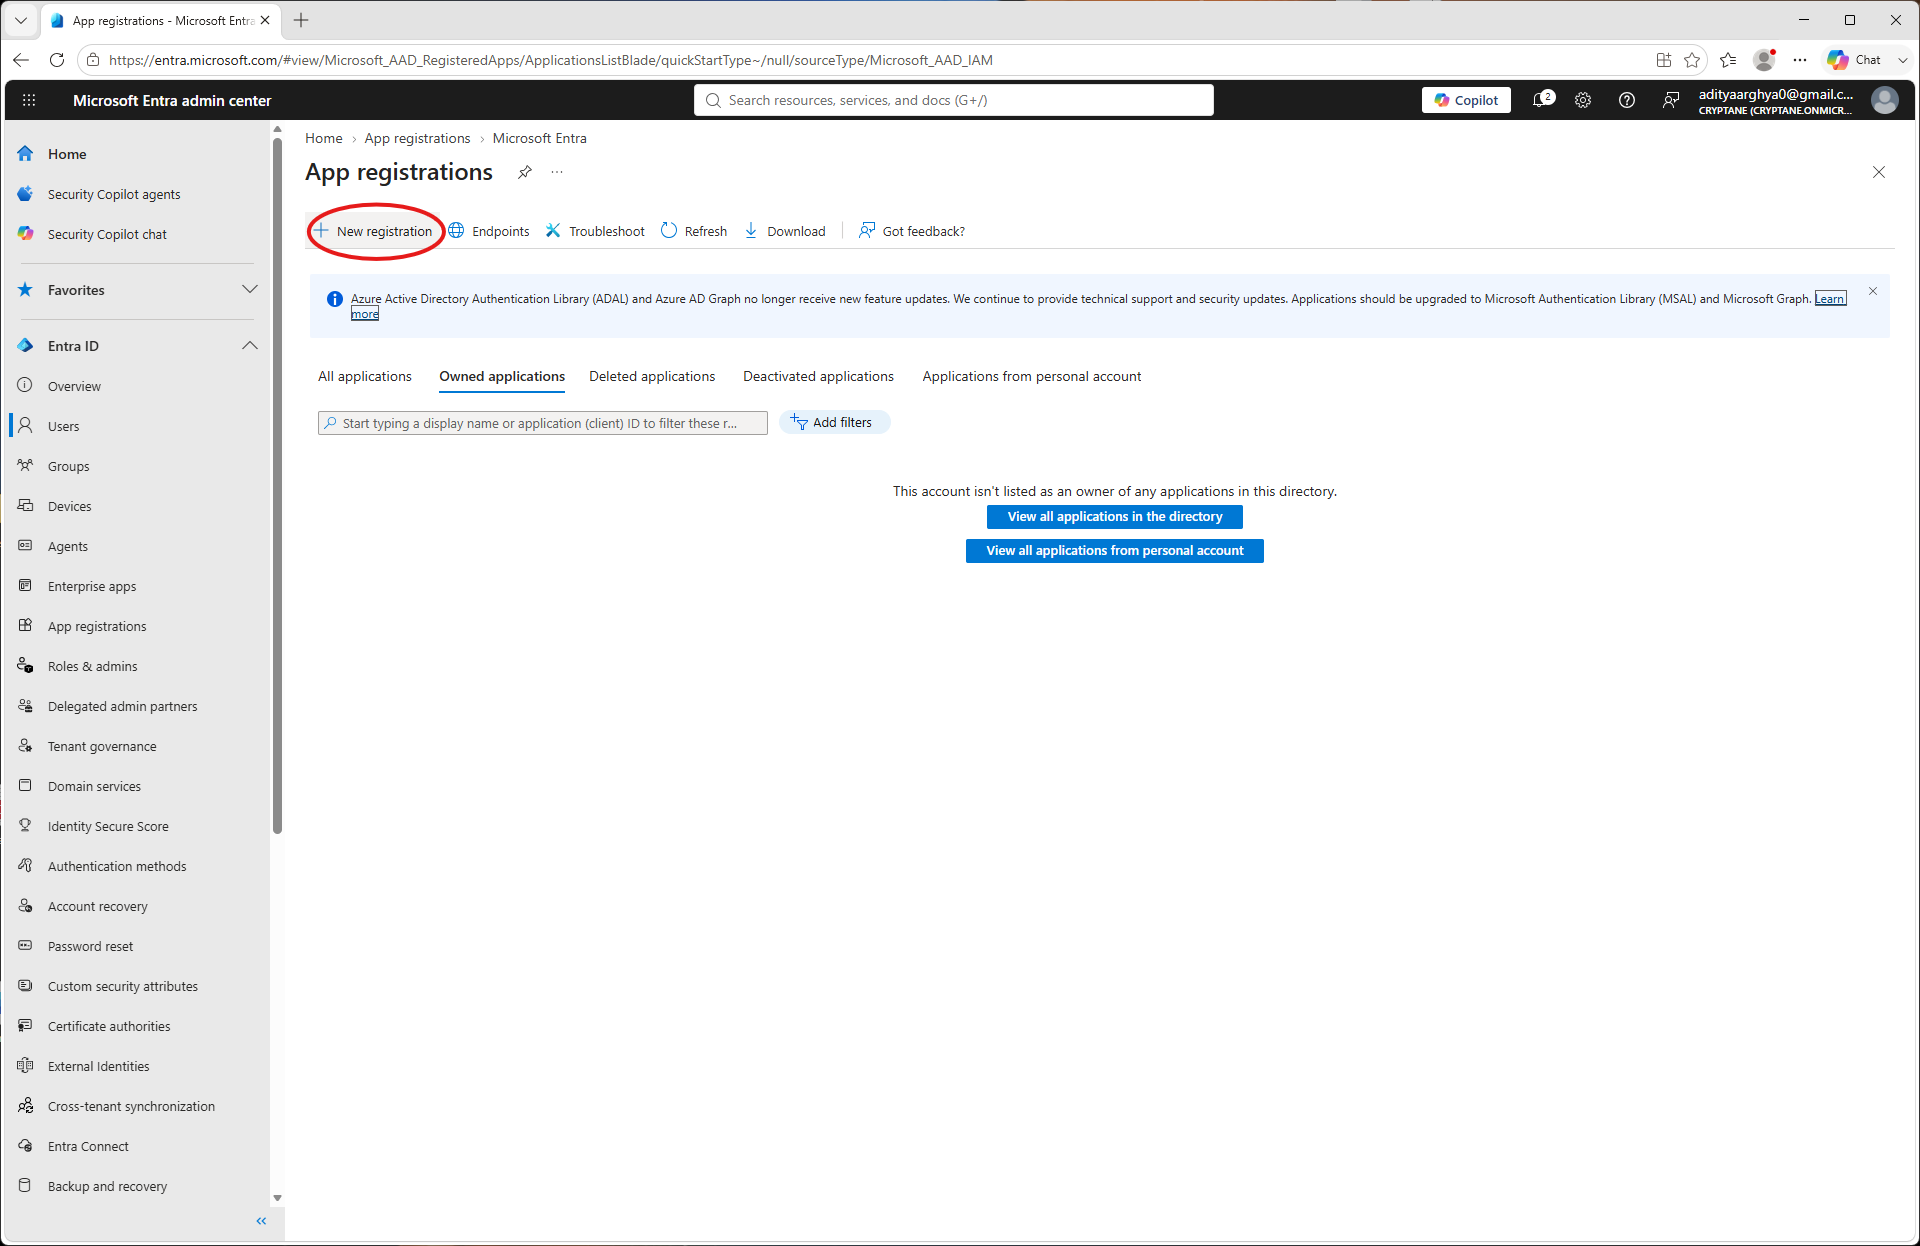
Sélectionnez « Nouvelle inscription ».
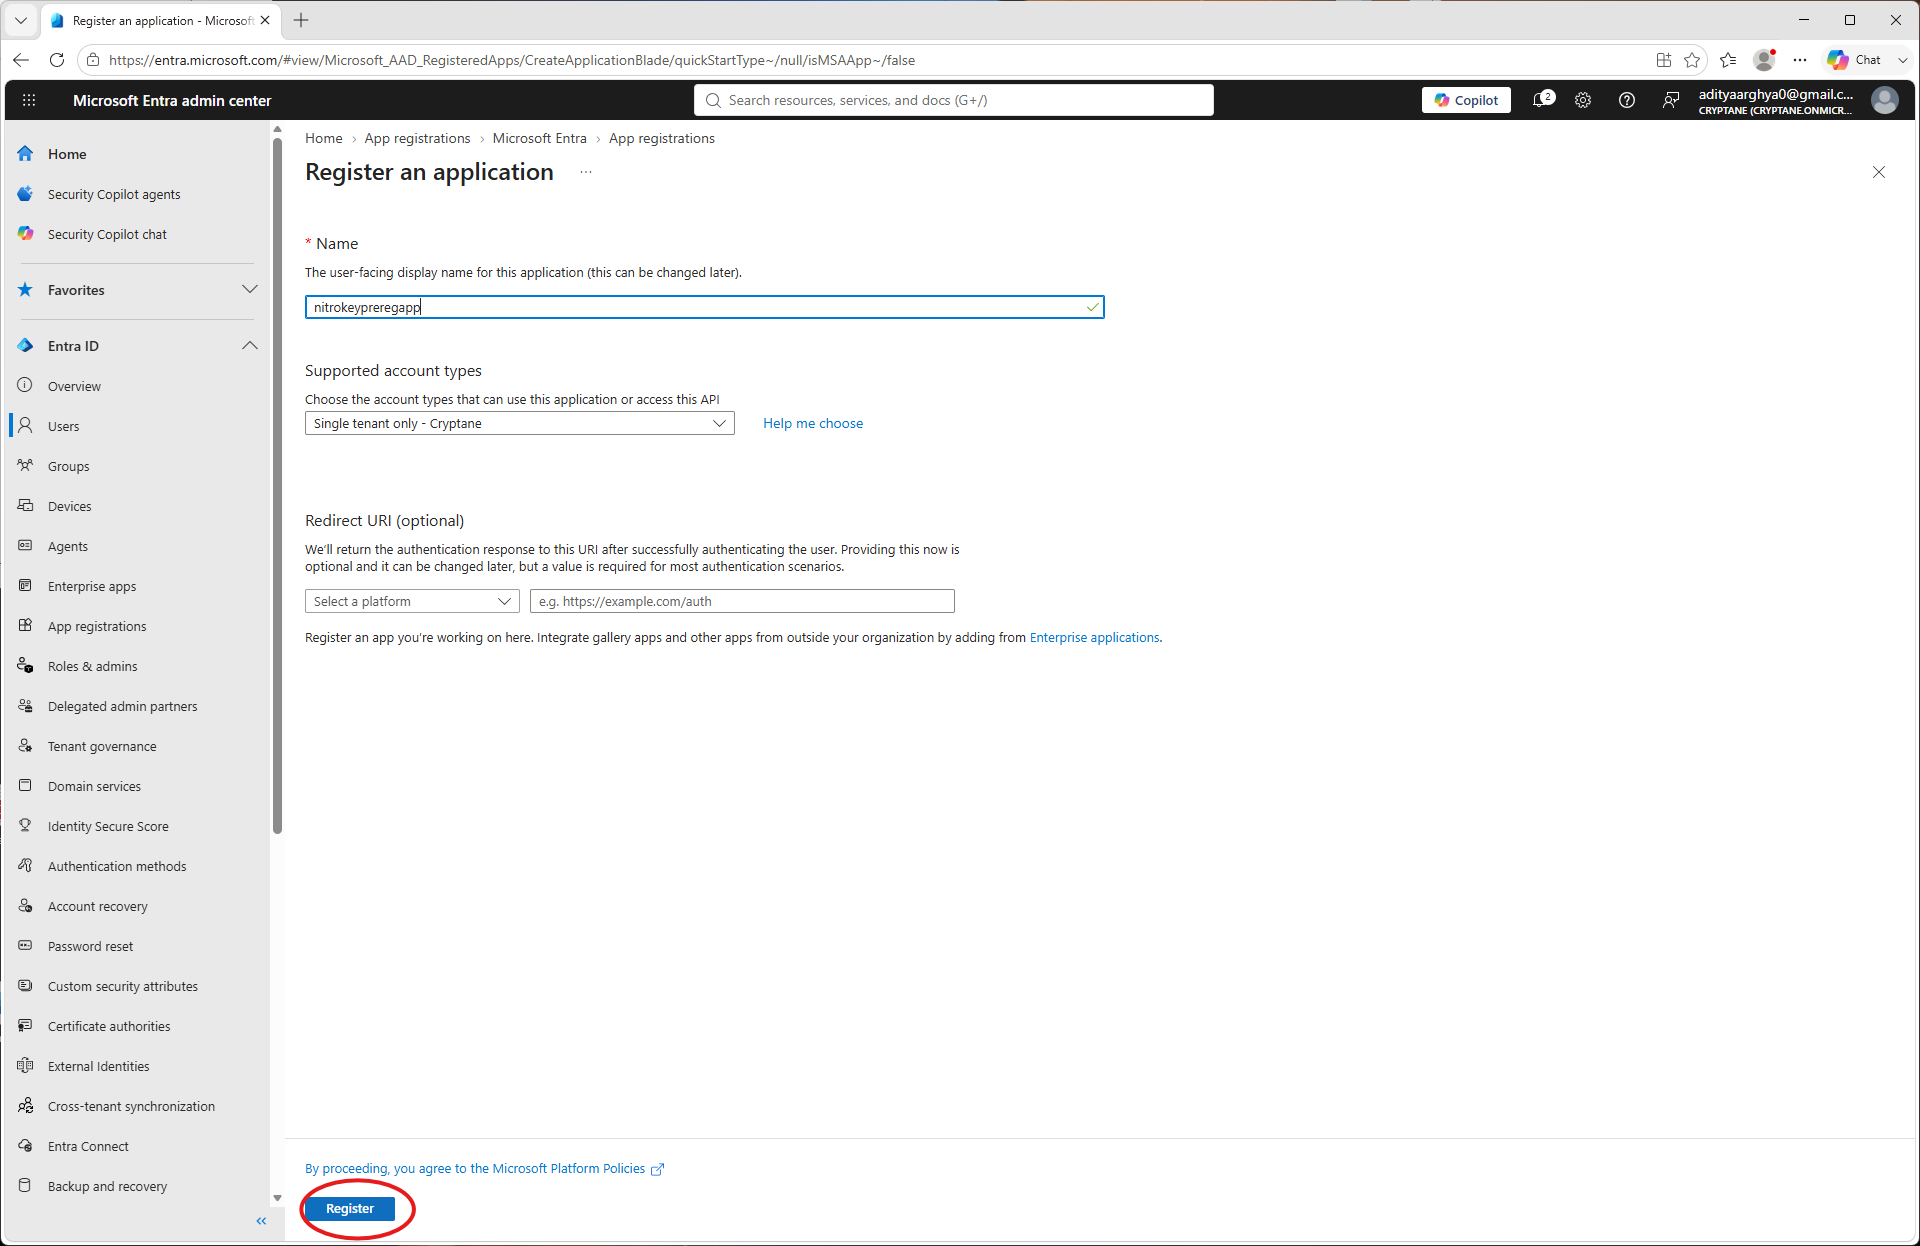
Créez une nouvelle application et donnez-lui un nom. Cliquez sur « S’inscrire ».
Notez ici l’ID client et l’ID locataire. Vous en aurez besoin plus tard. Accédez à la section « Autorisations API » dans le volet de l’application.
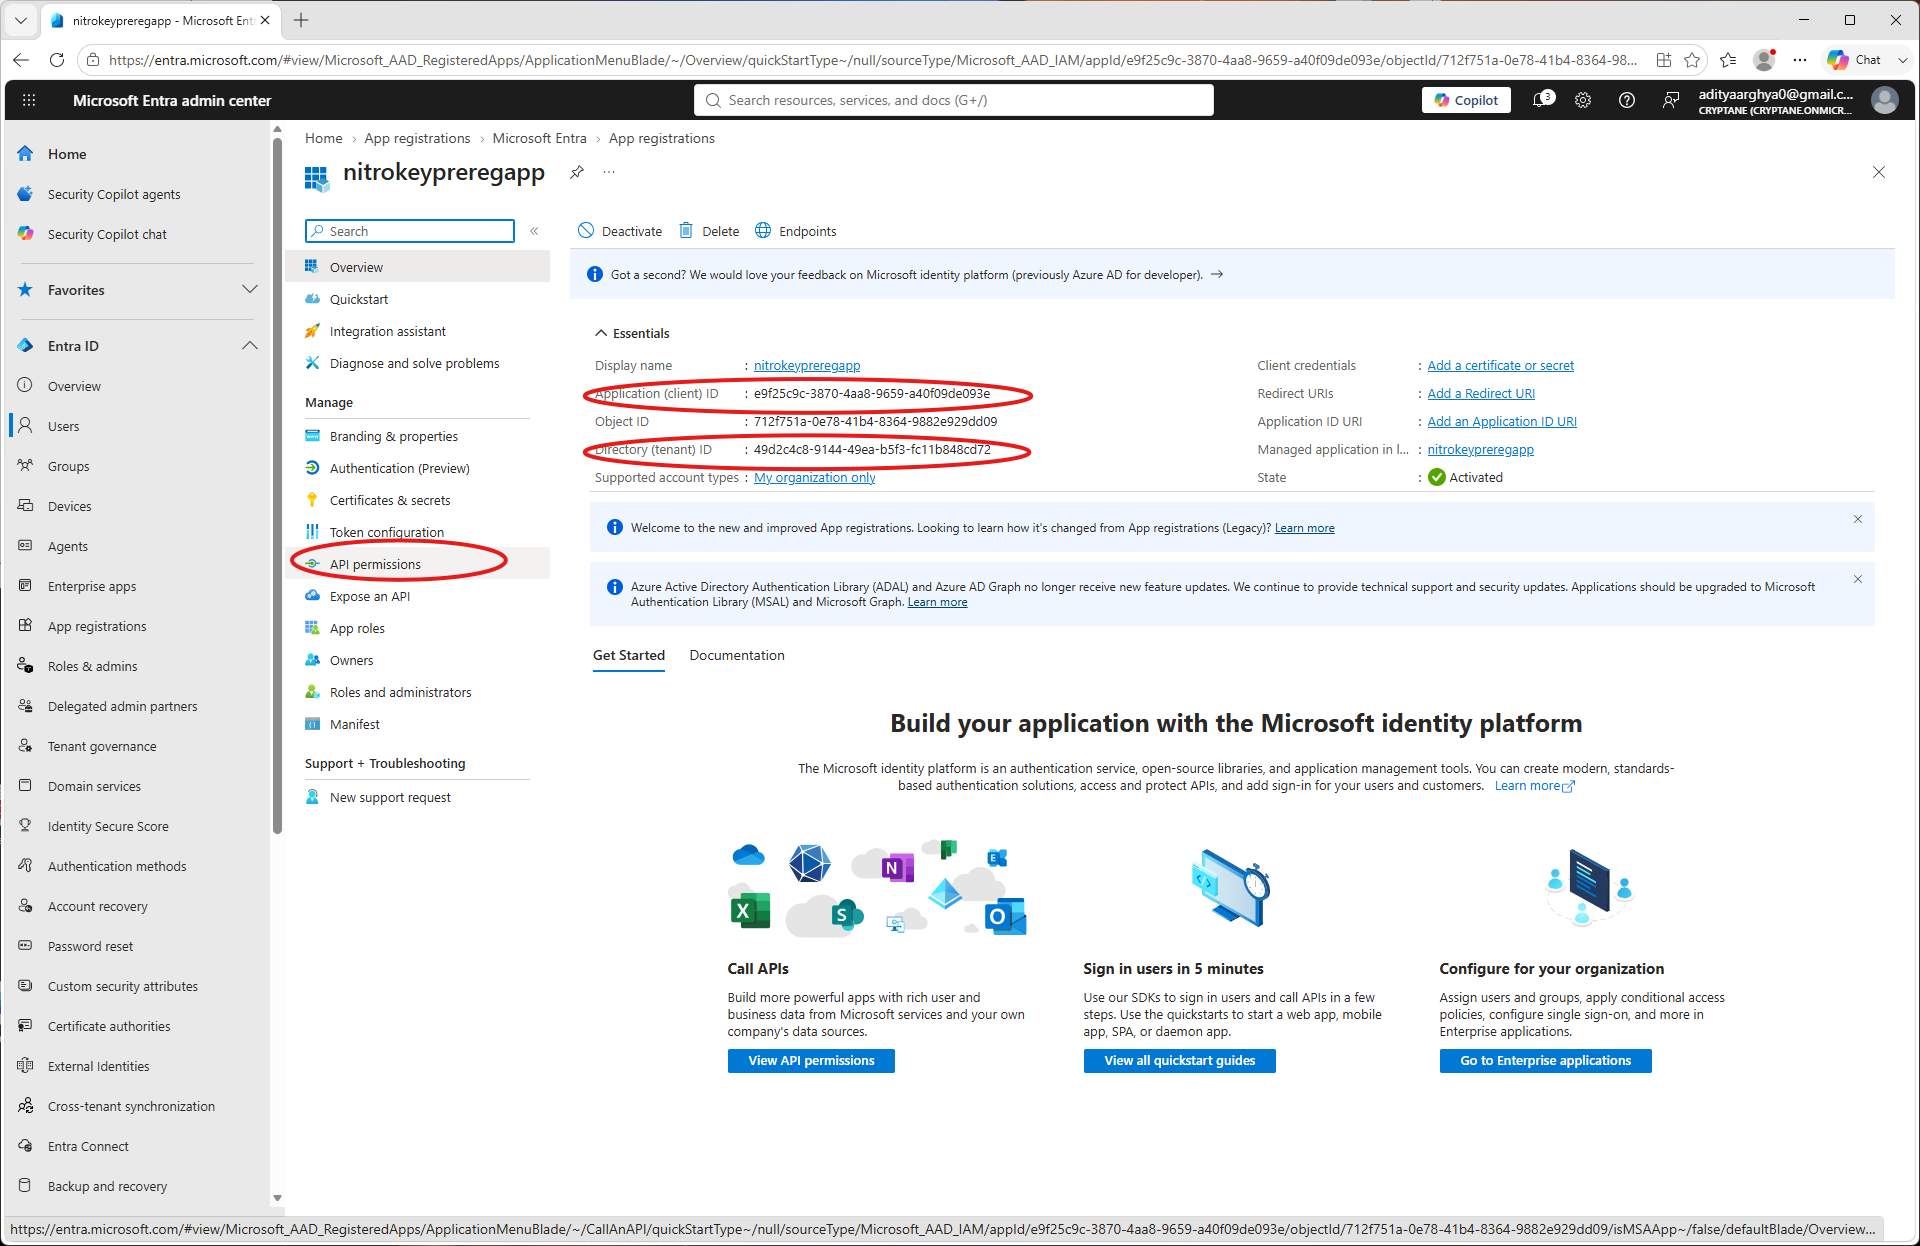
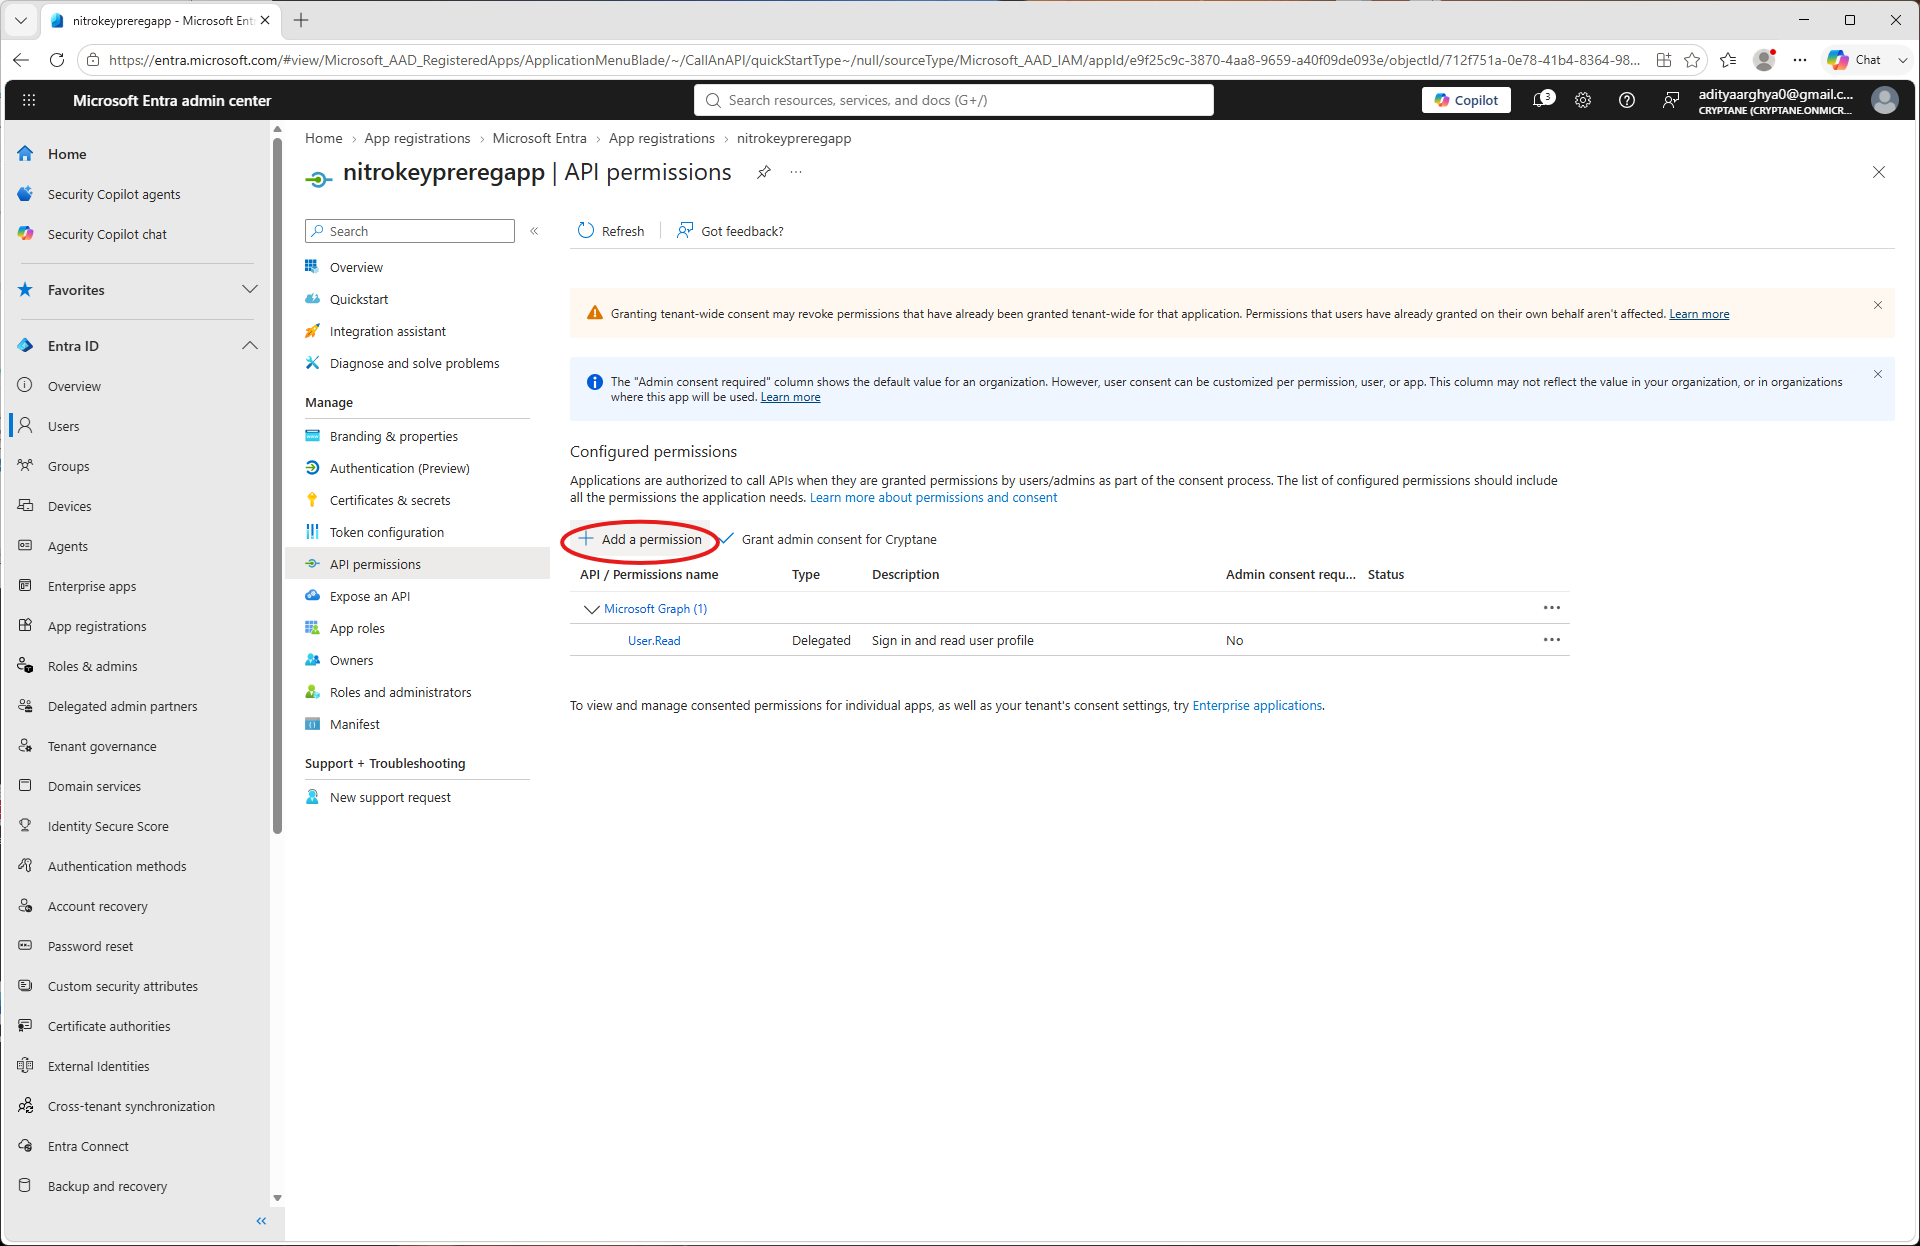
Click on Add a permission.
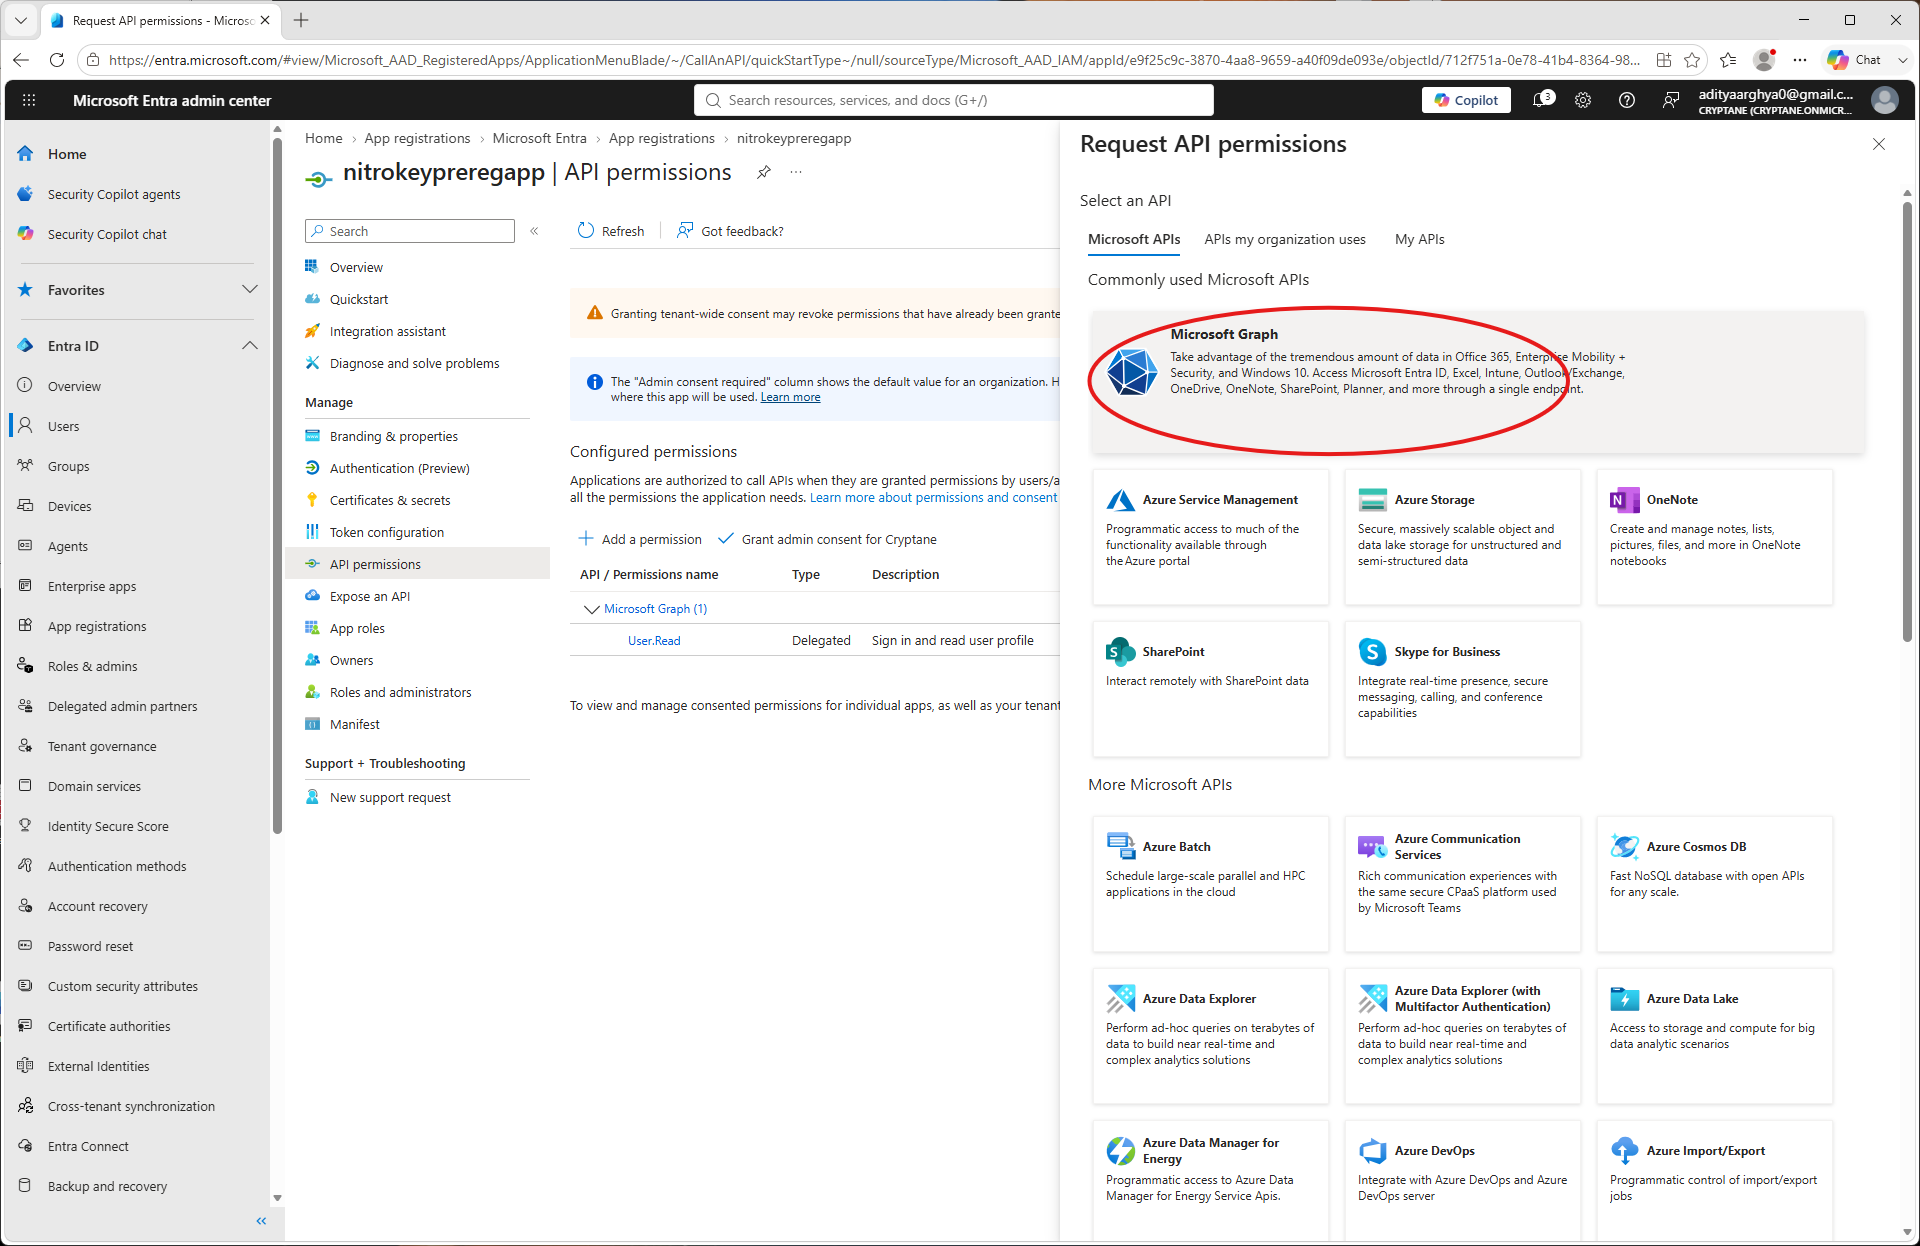
Select Microsoft Graph.
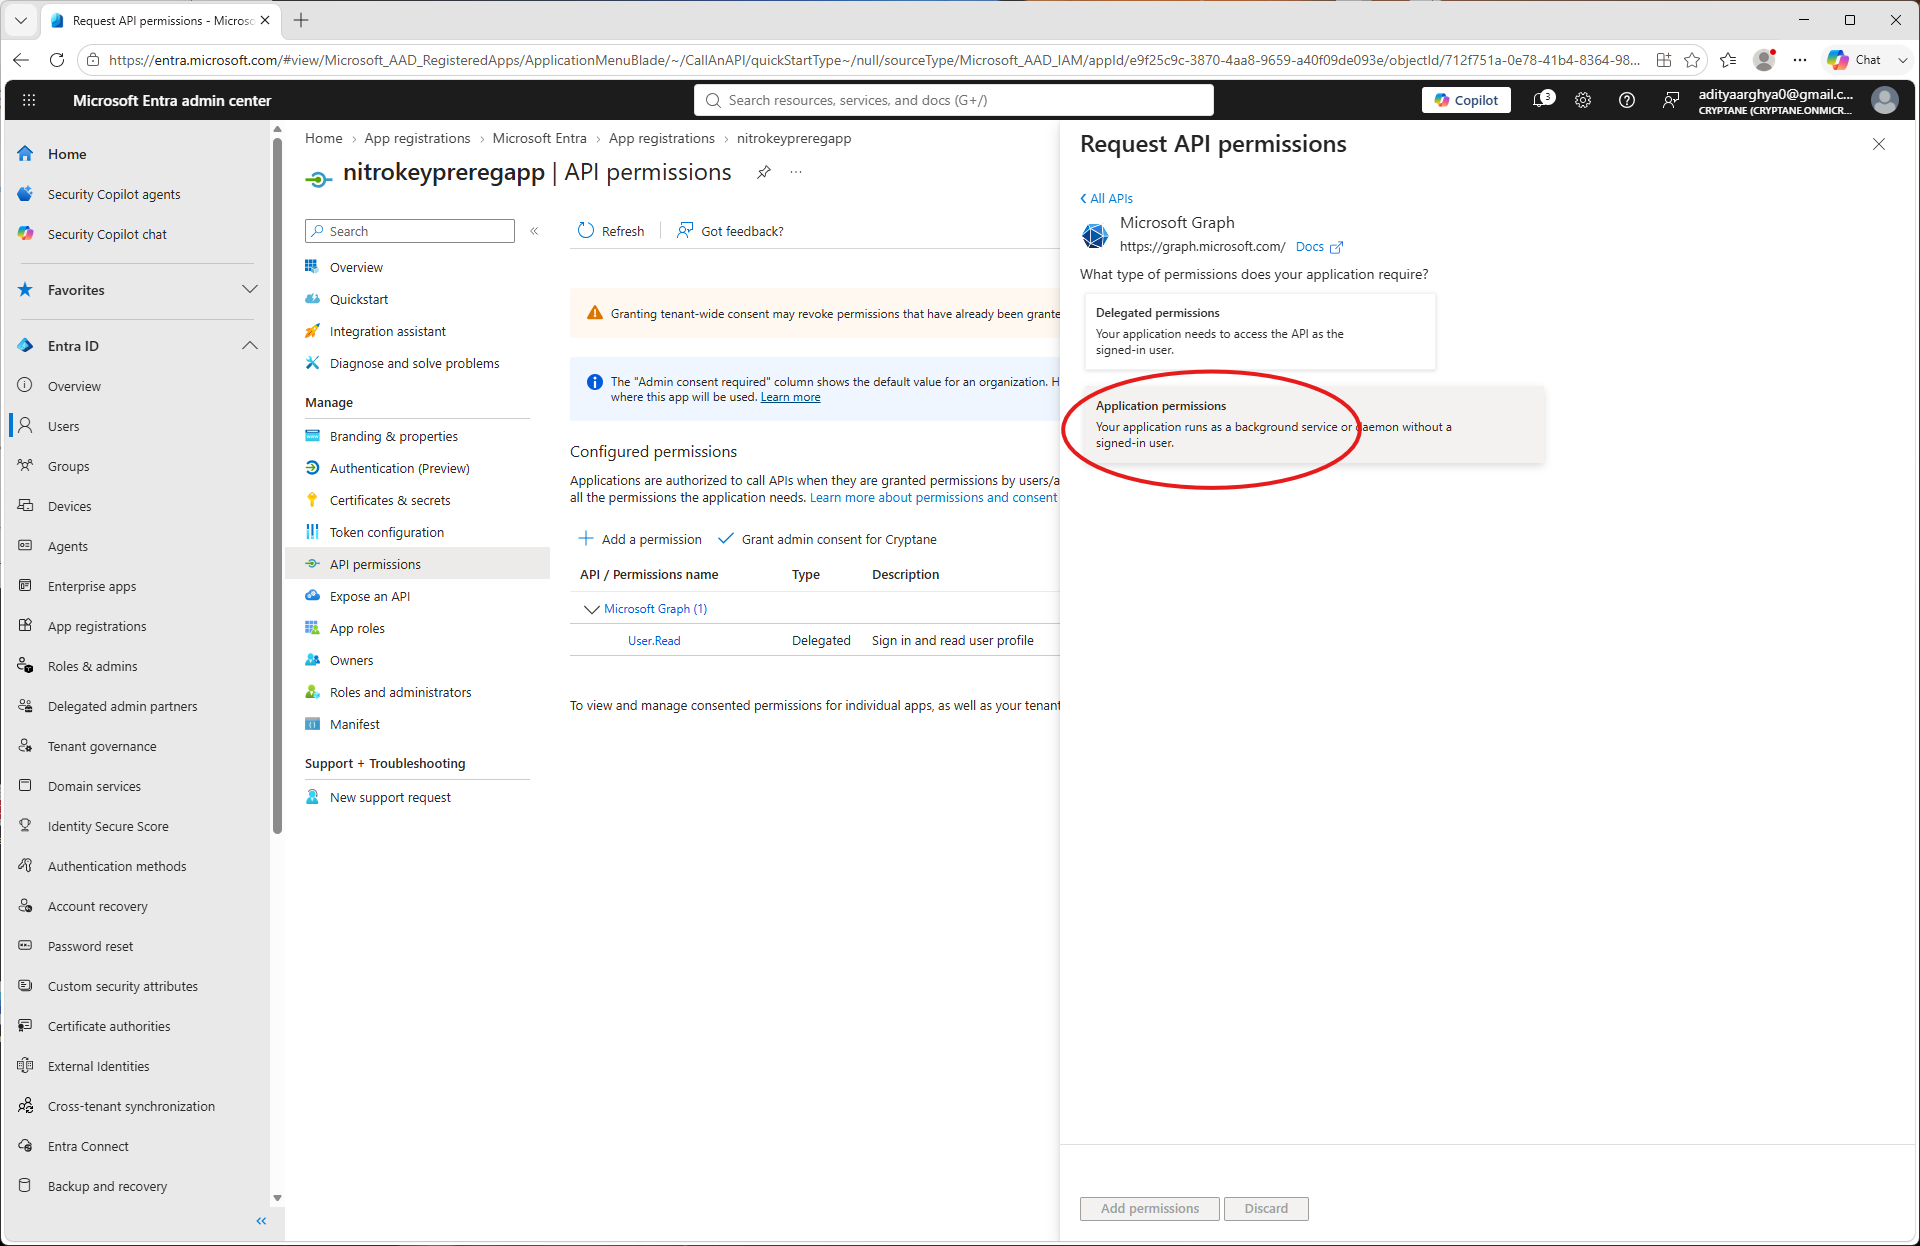
Sélectionnez « Autorisations de l’application ».
Search for
UserAuthenticationMethod.ReadWrite.Alland select it.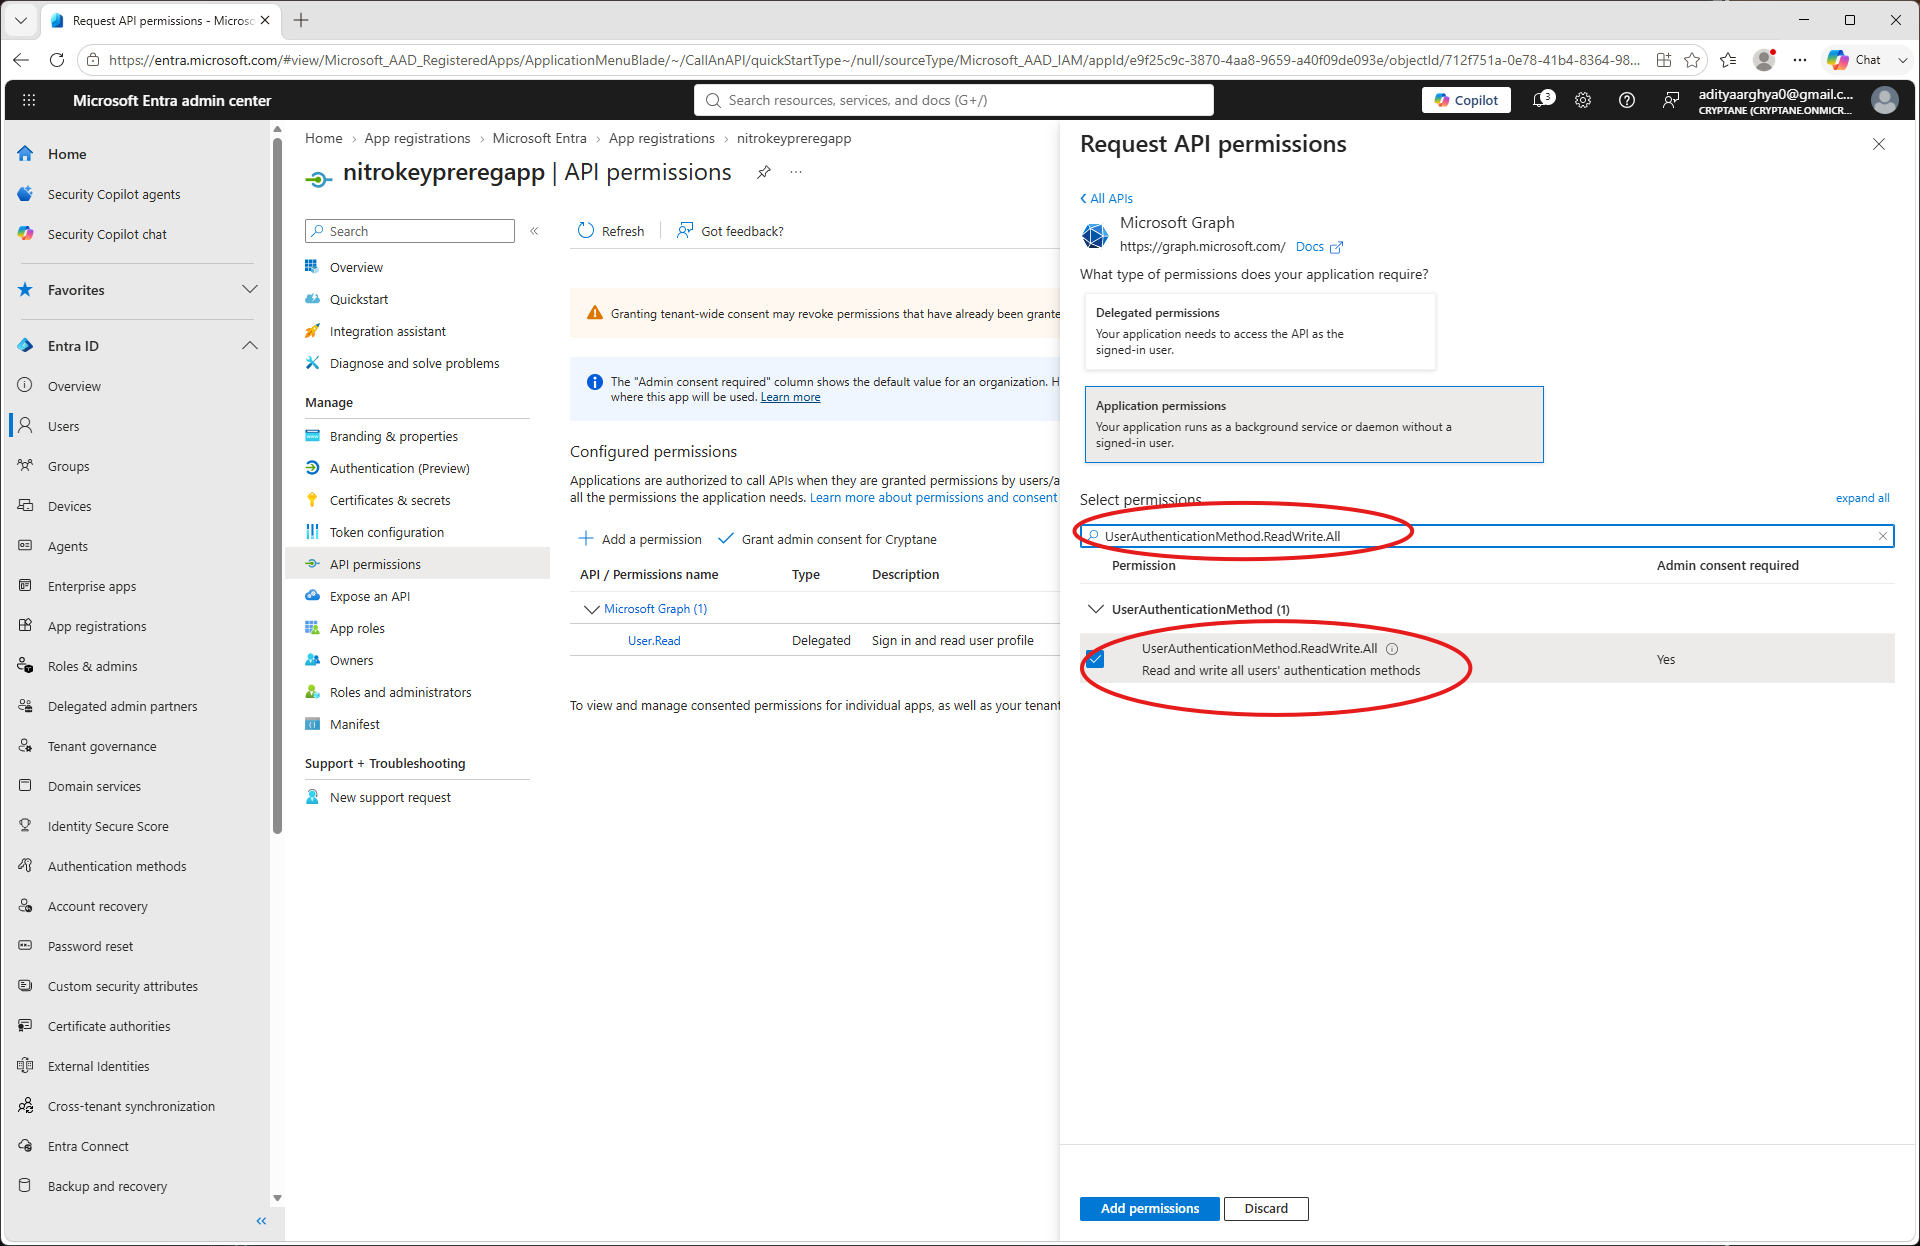
Search for
User.ReadWrite.Alland select it (Only if you want to be able to create users frompynitrokey). Click on the Add Permissions button.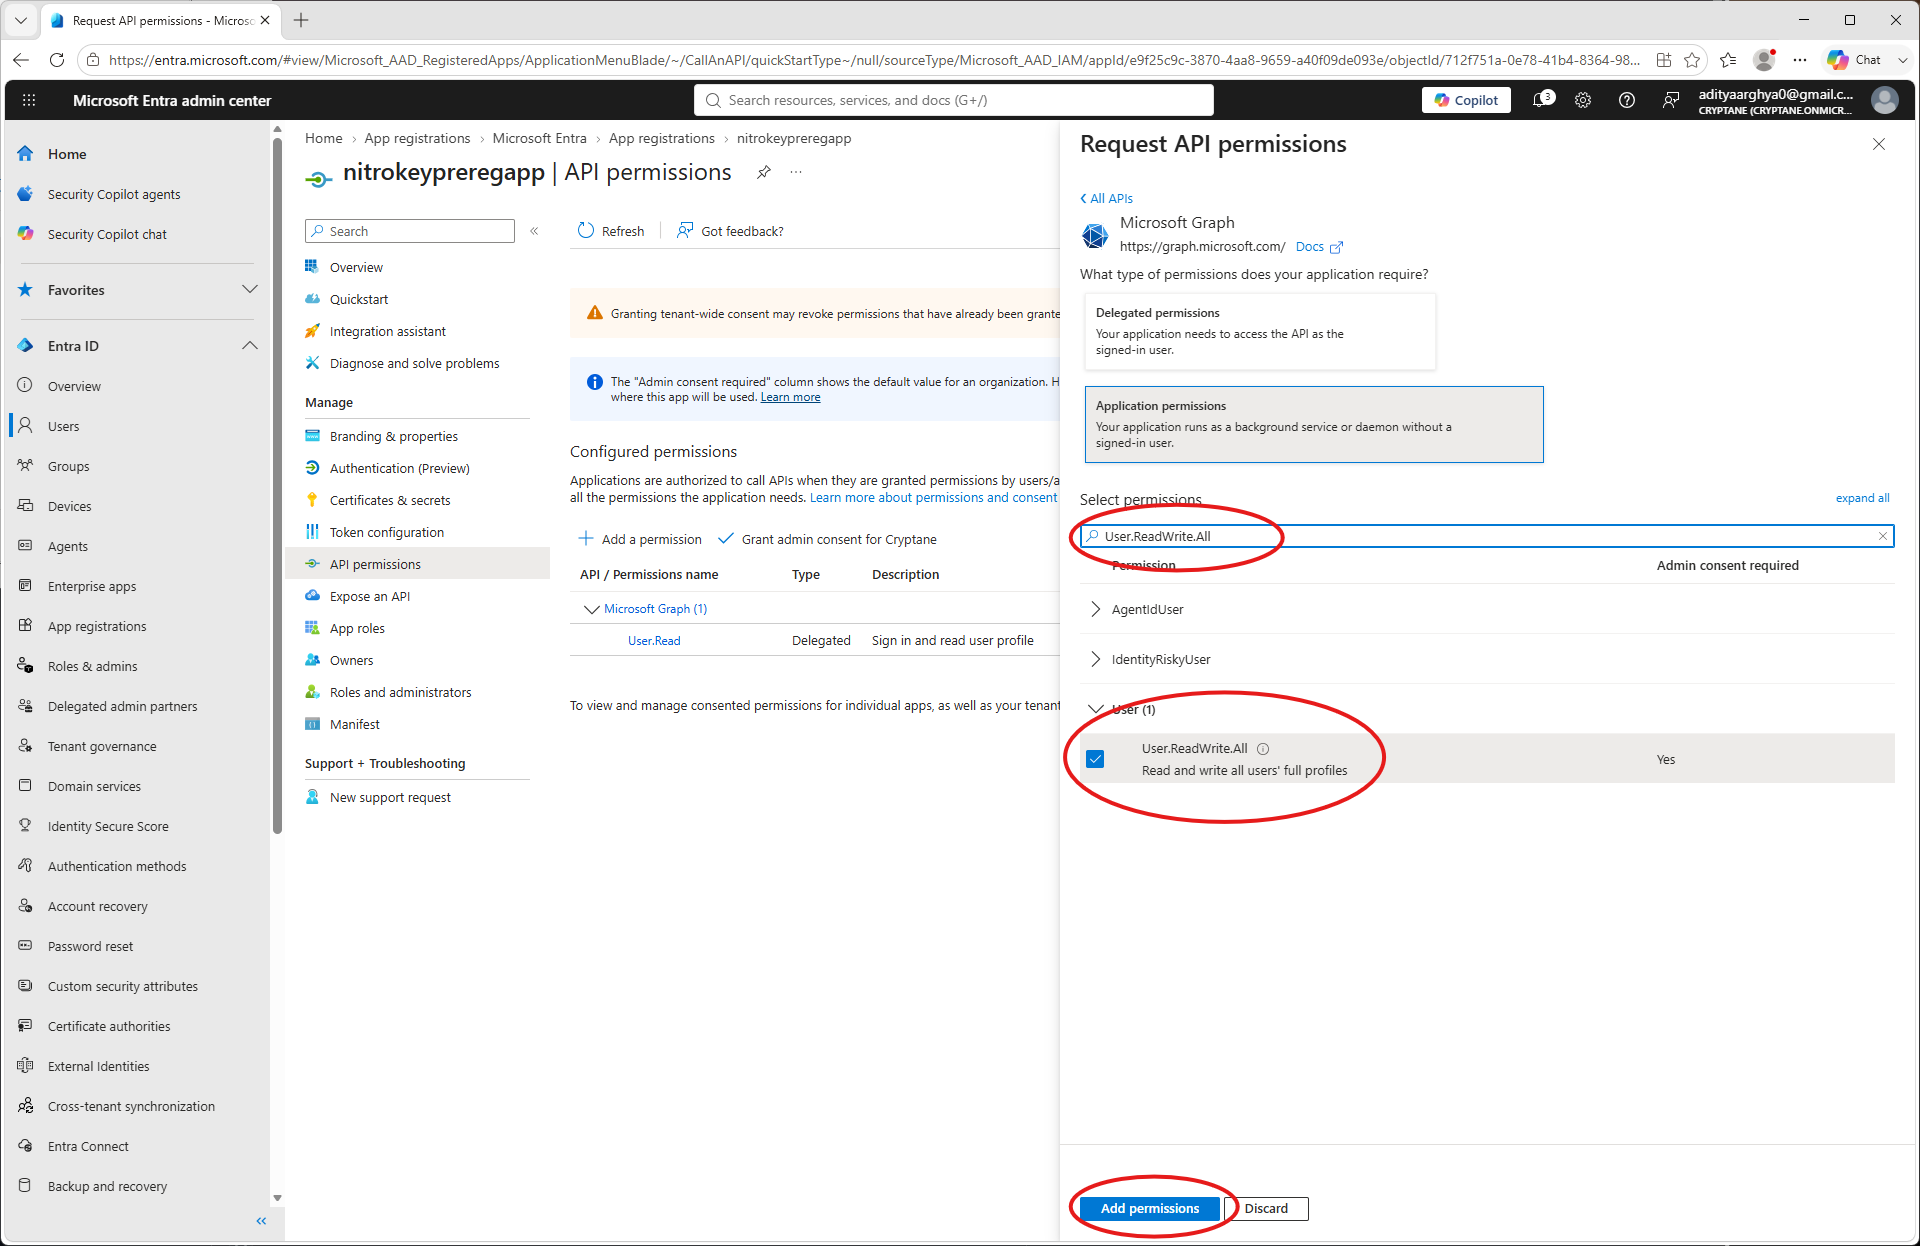
Vérifiez les autorisations accordées.
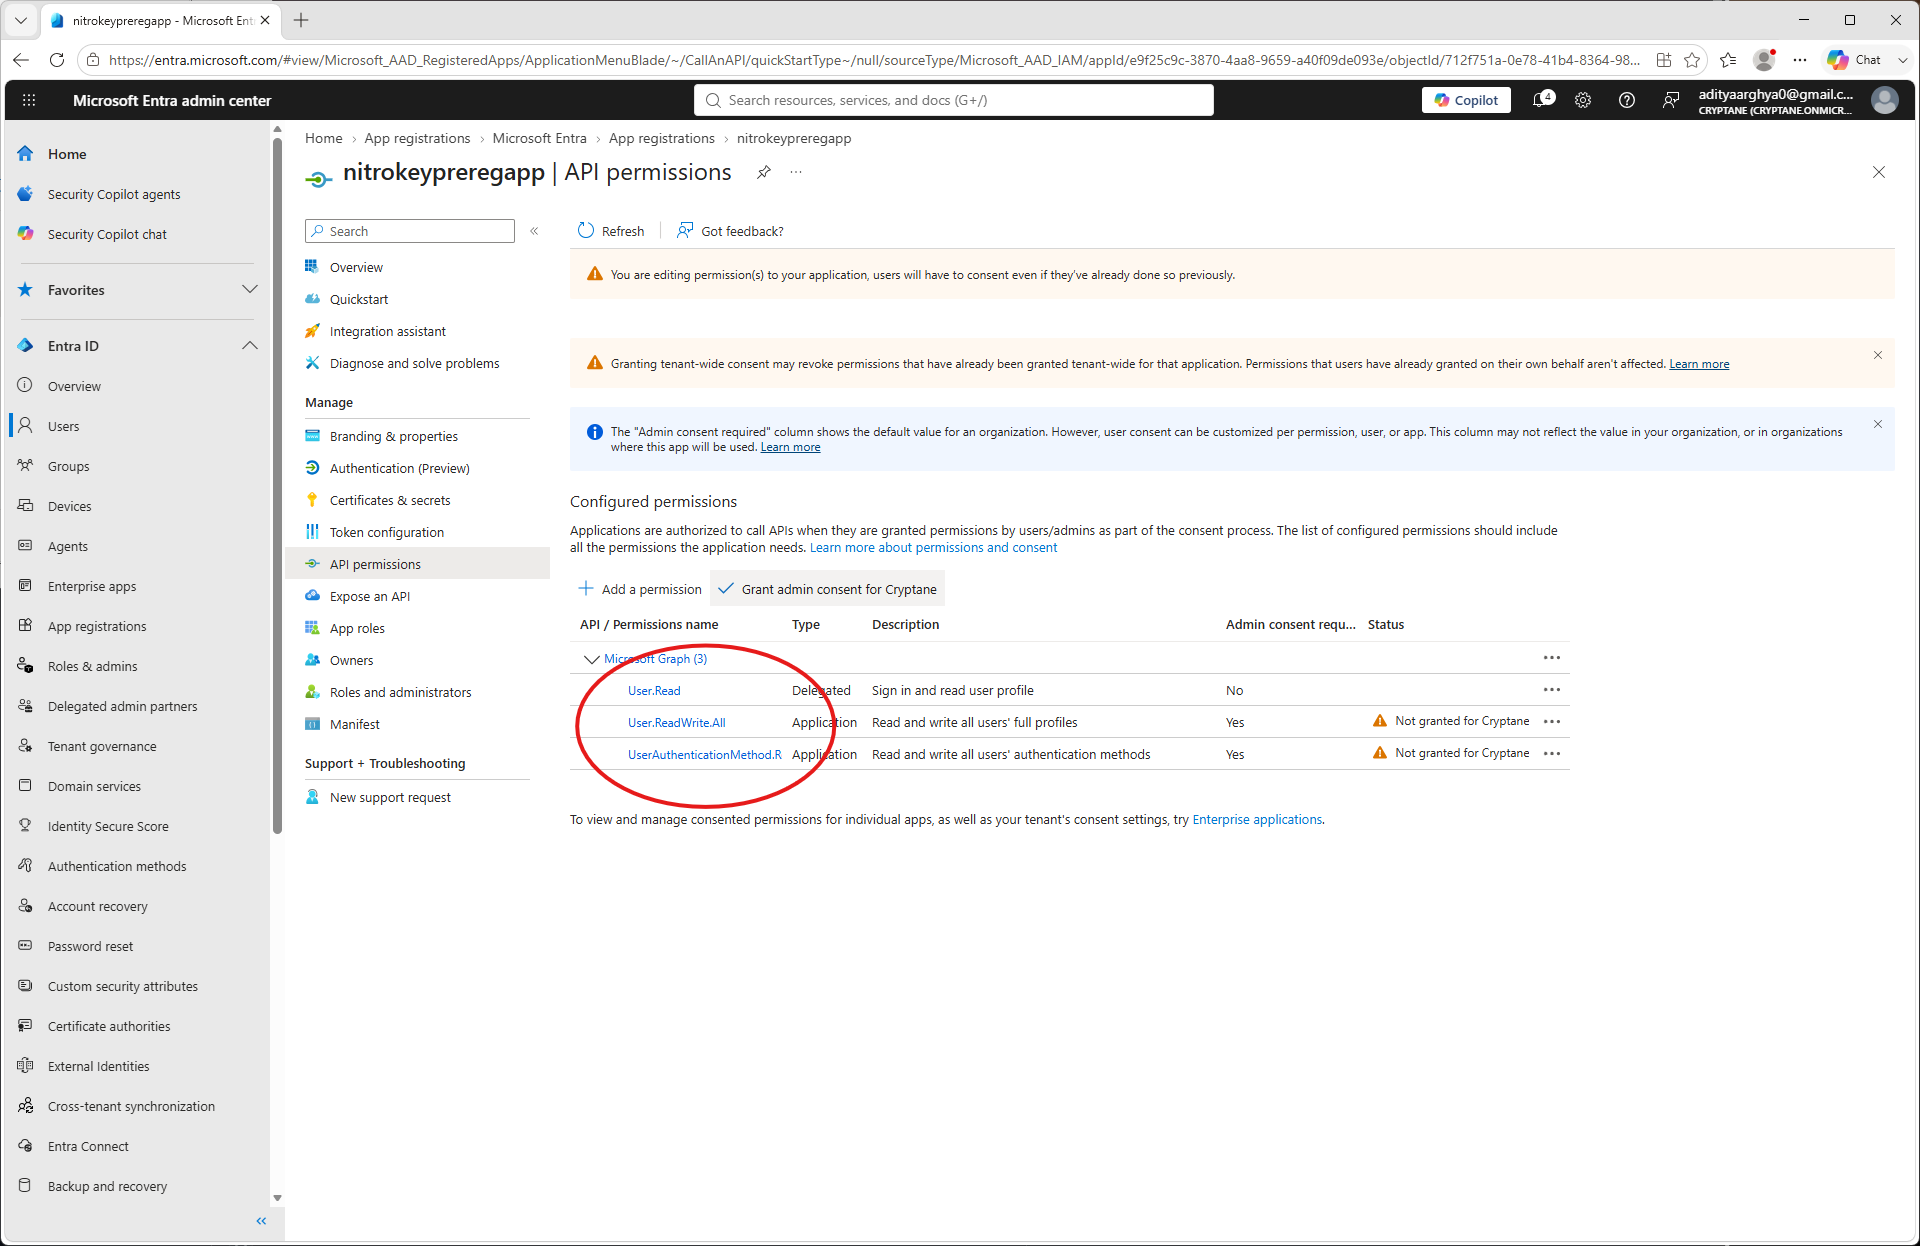
Cliquez sur « Accorder le consentement de l’administrateur » et validez.
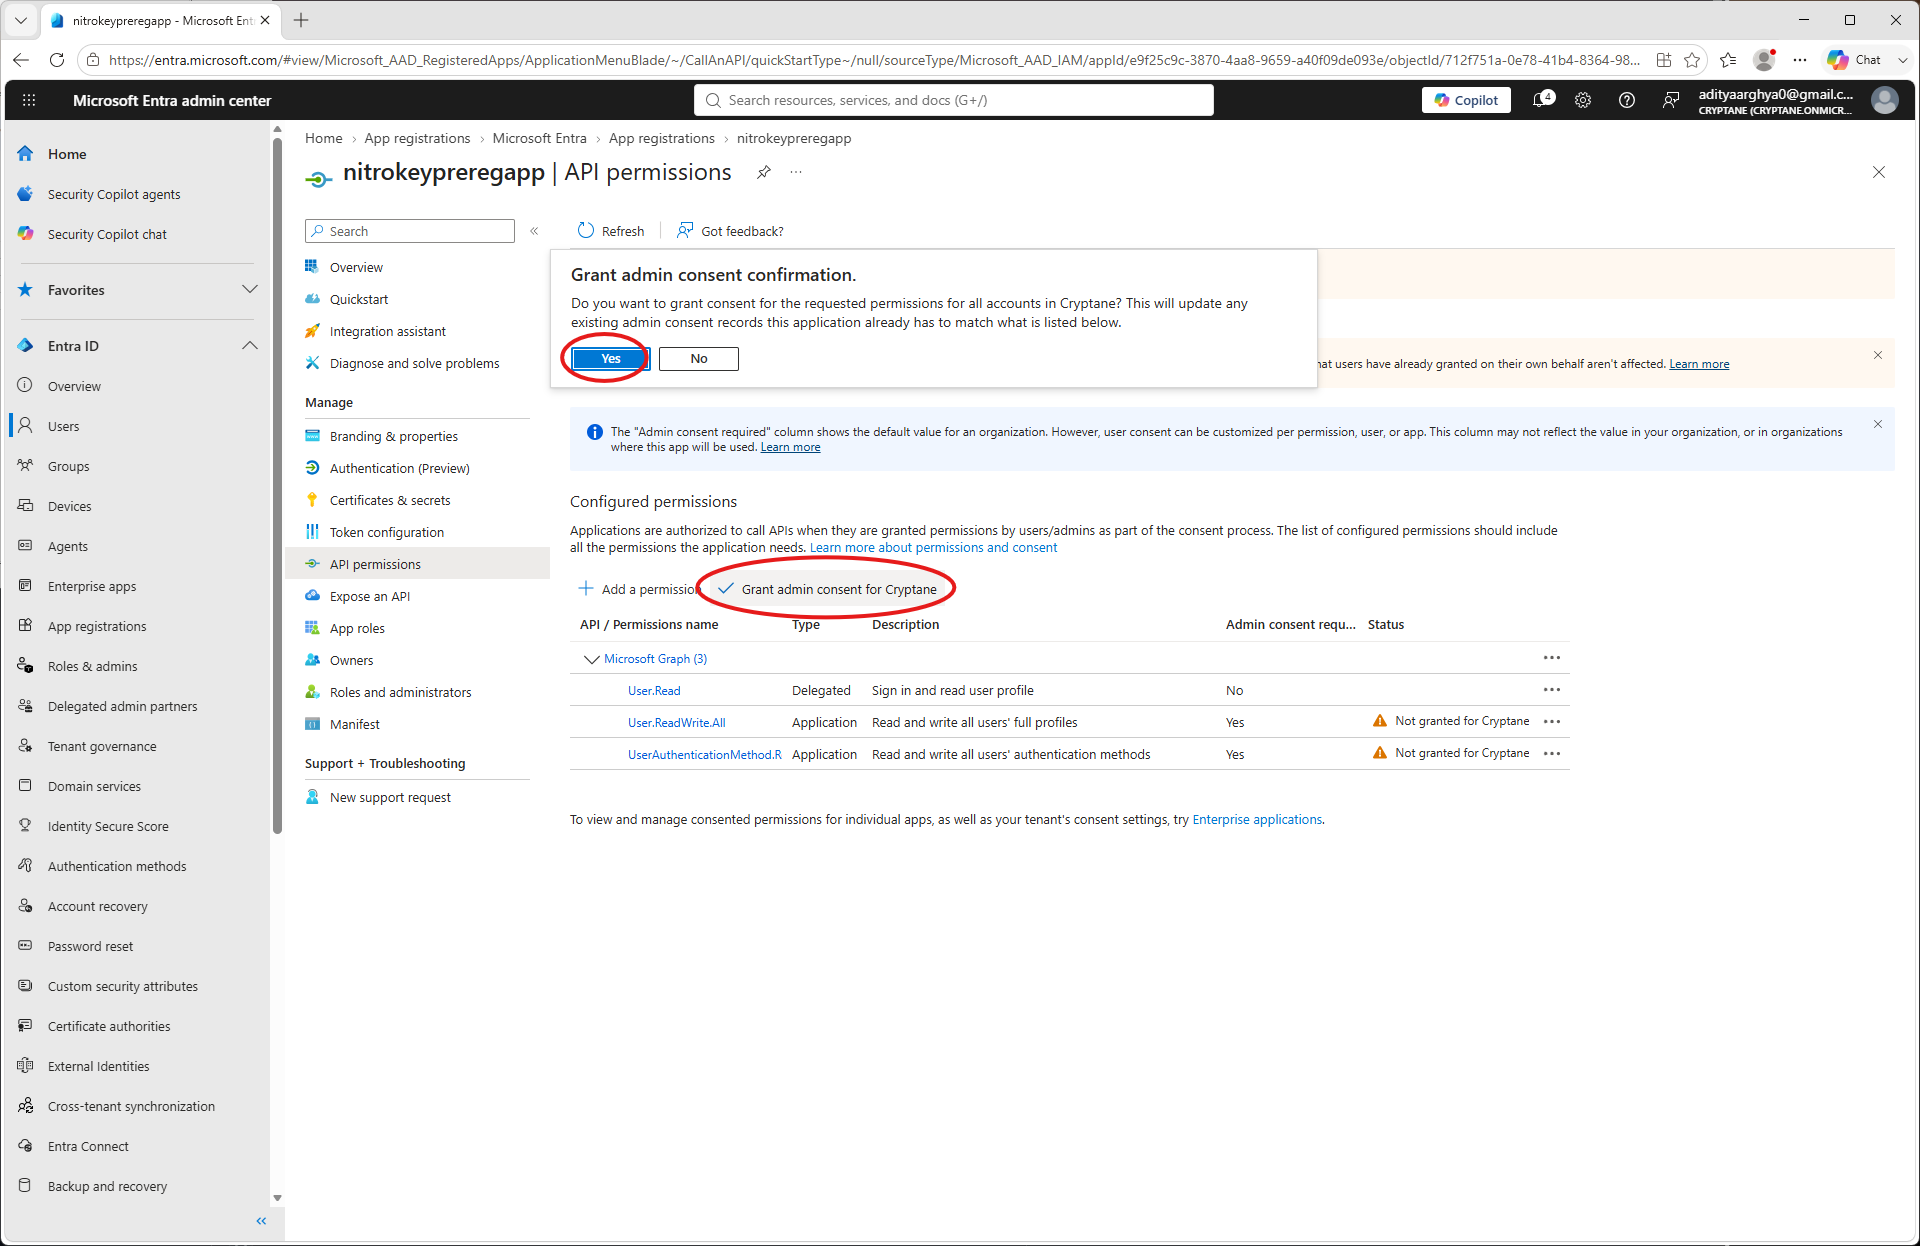
Revenez à la page d’accueil de l’application et sélectionnez « Certificats et secrets » dans le volet de gauche.
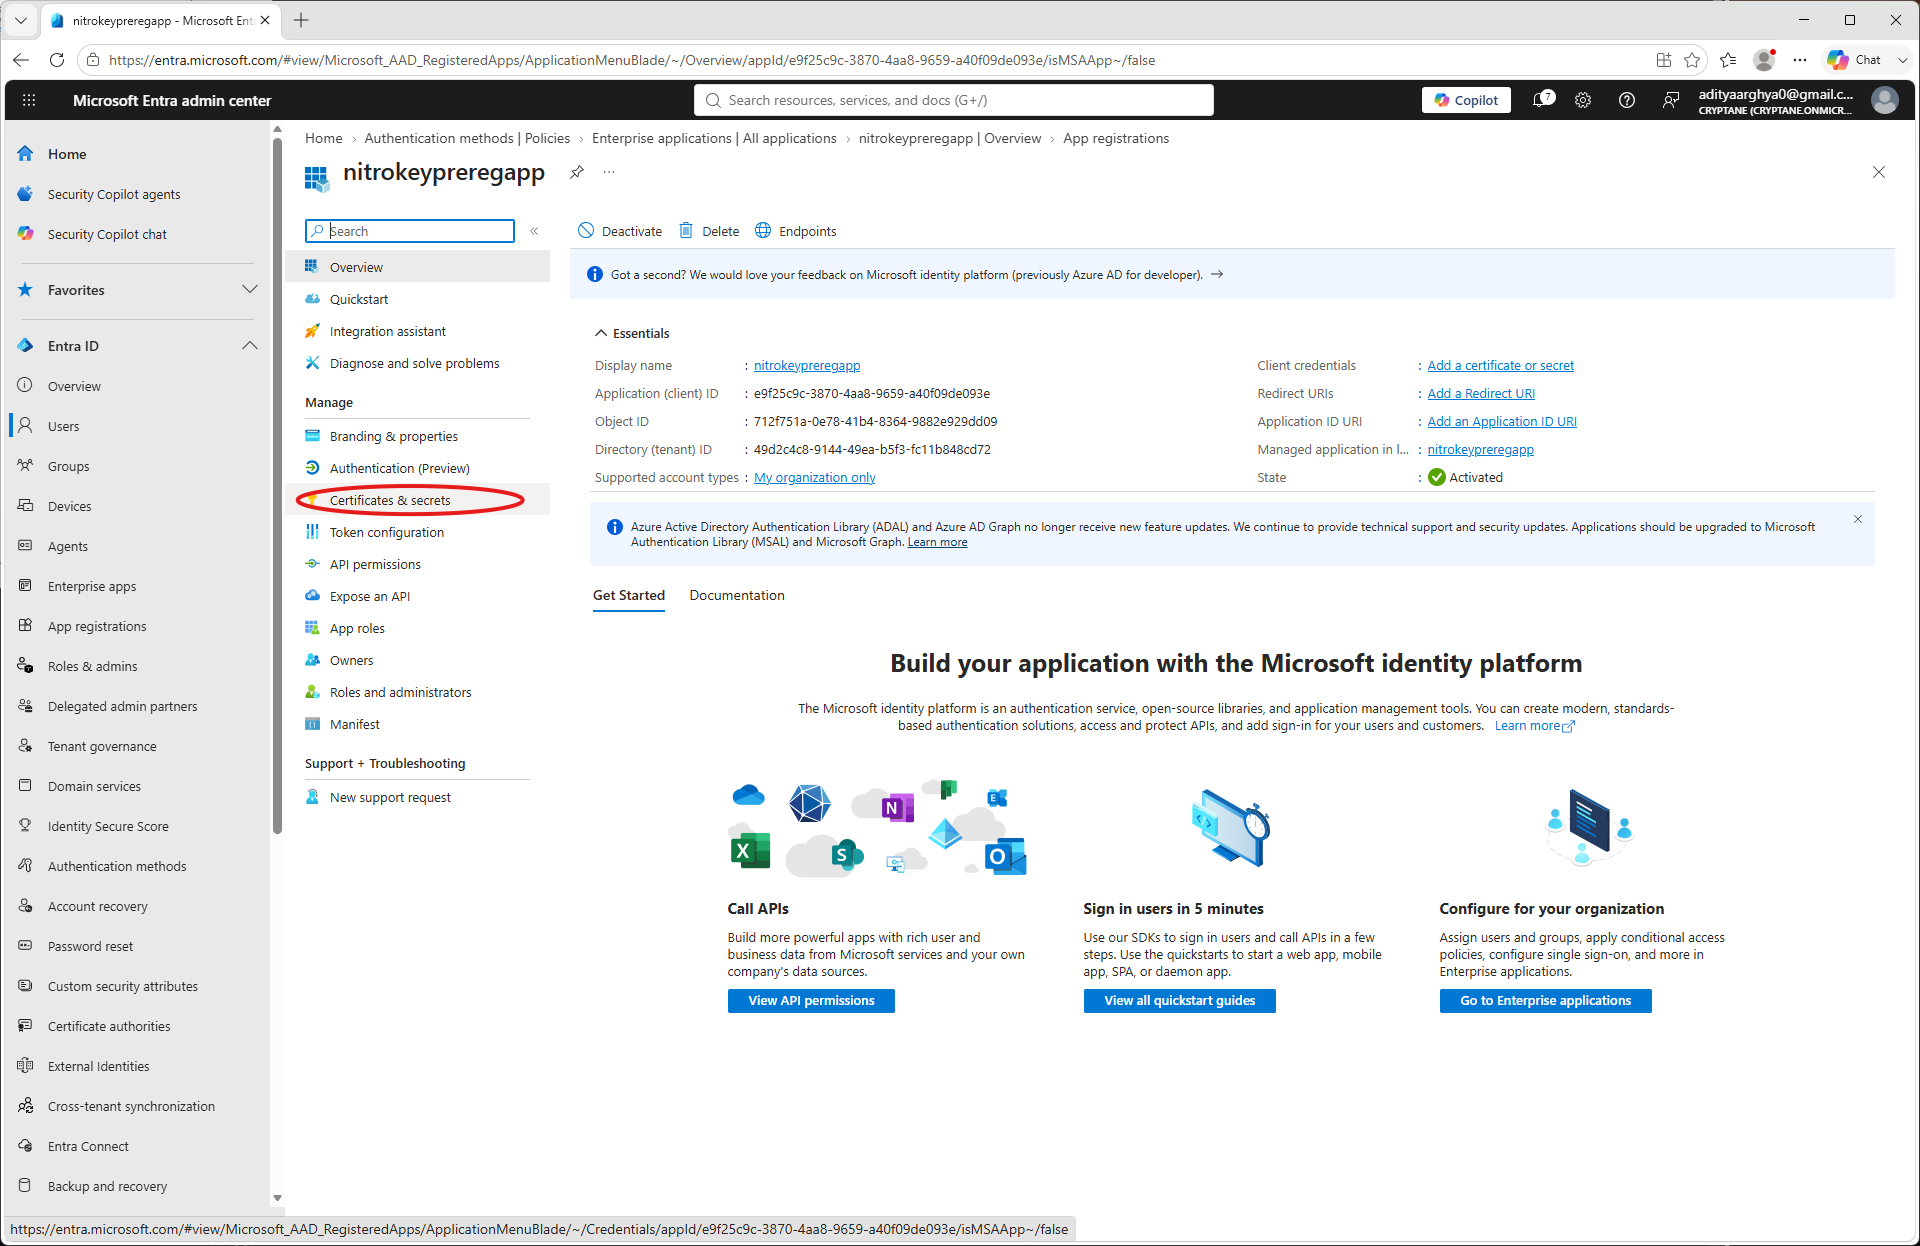
Cliquez sur « Nouveau secret client »
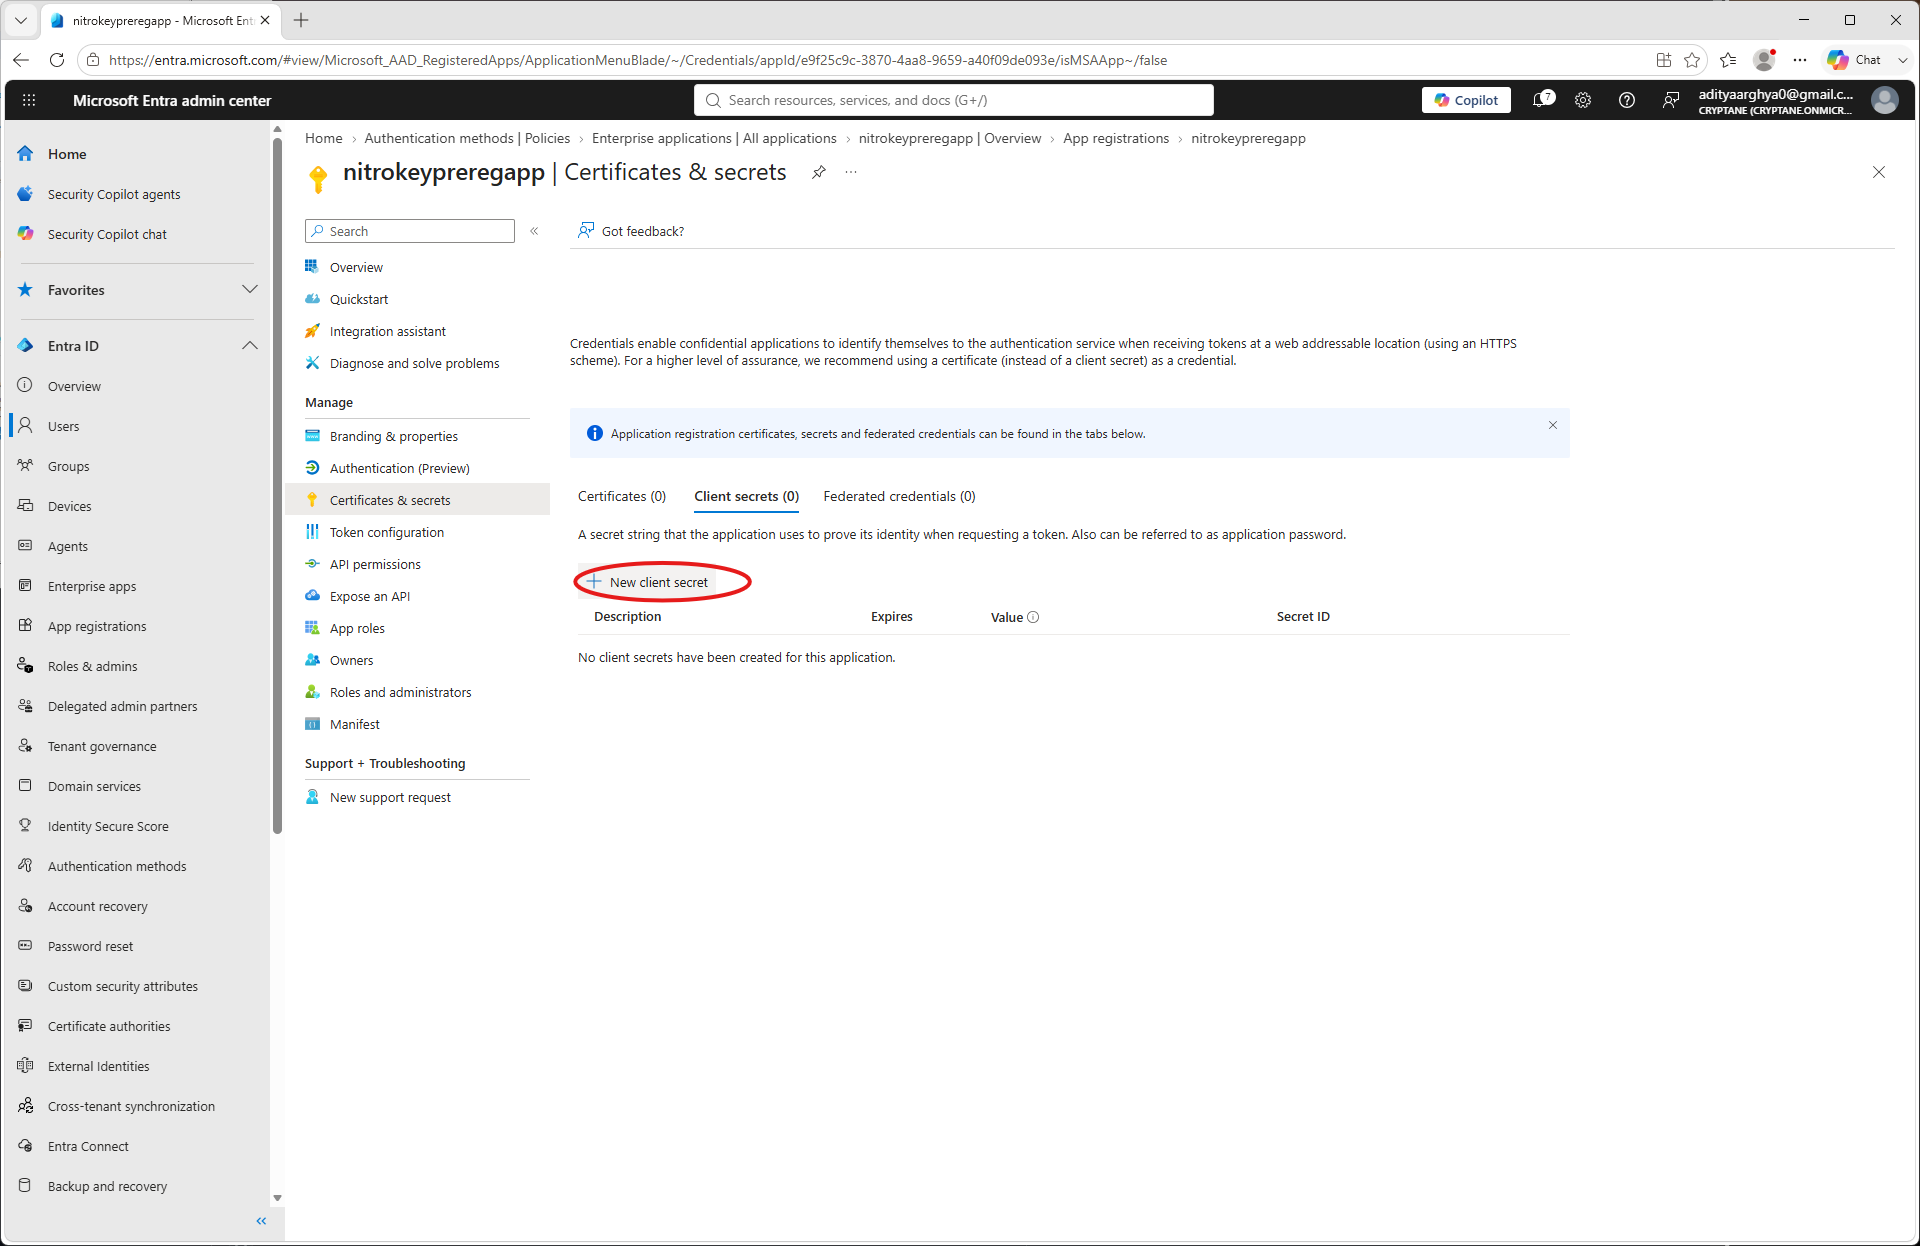
Saisissez un nom et une date d’expiration, puis cliquez sur « Ajouter ».
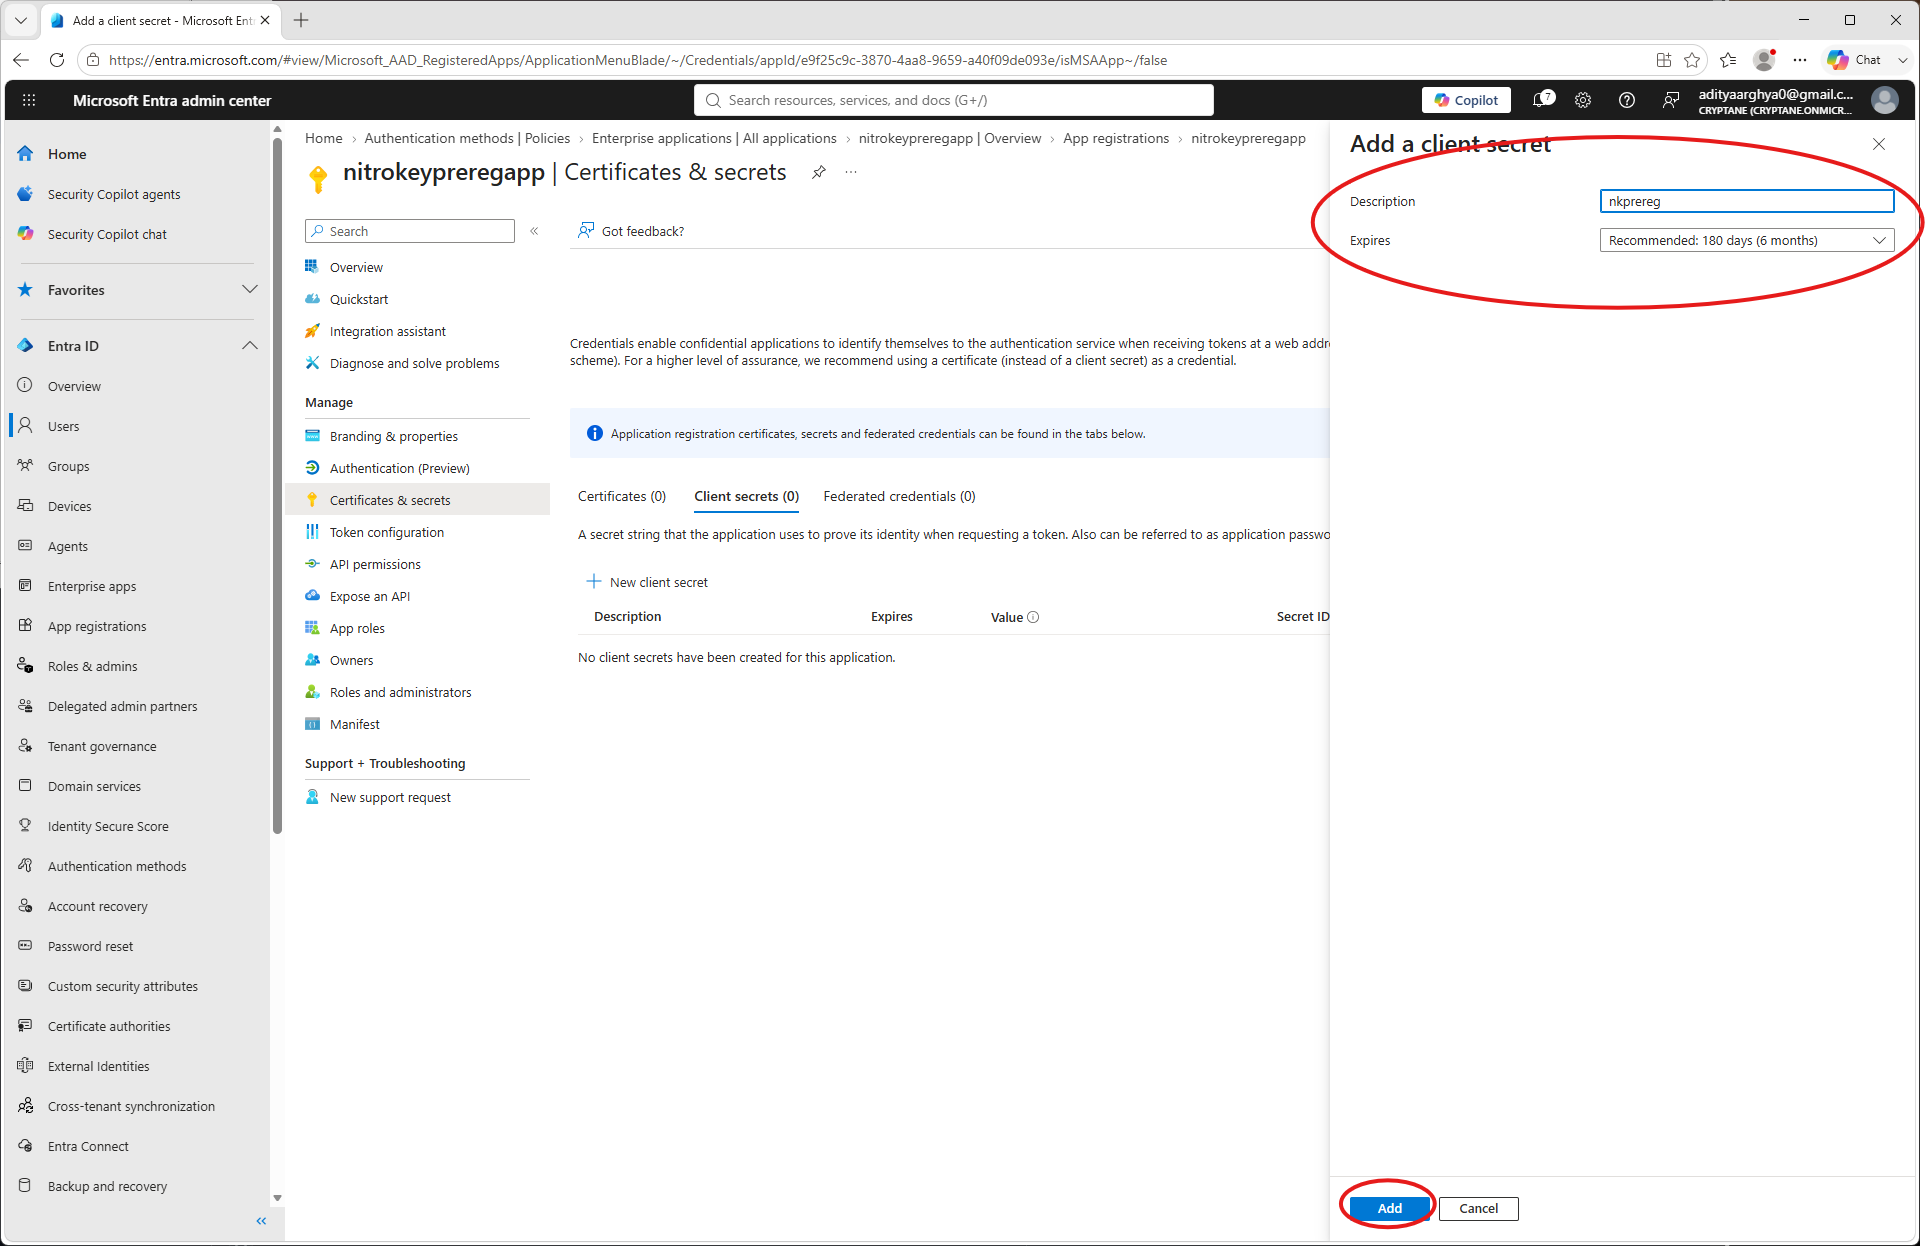
Notez bien la clé secrète du client (vous ne pourrez plus la consulter par la suite).
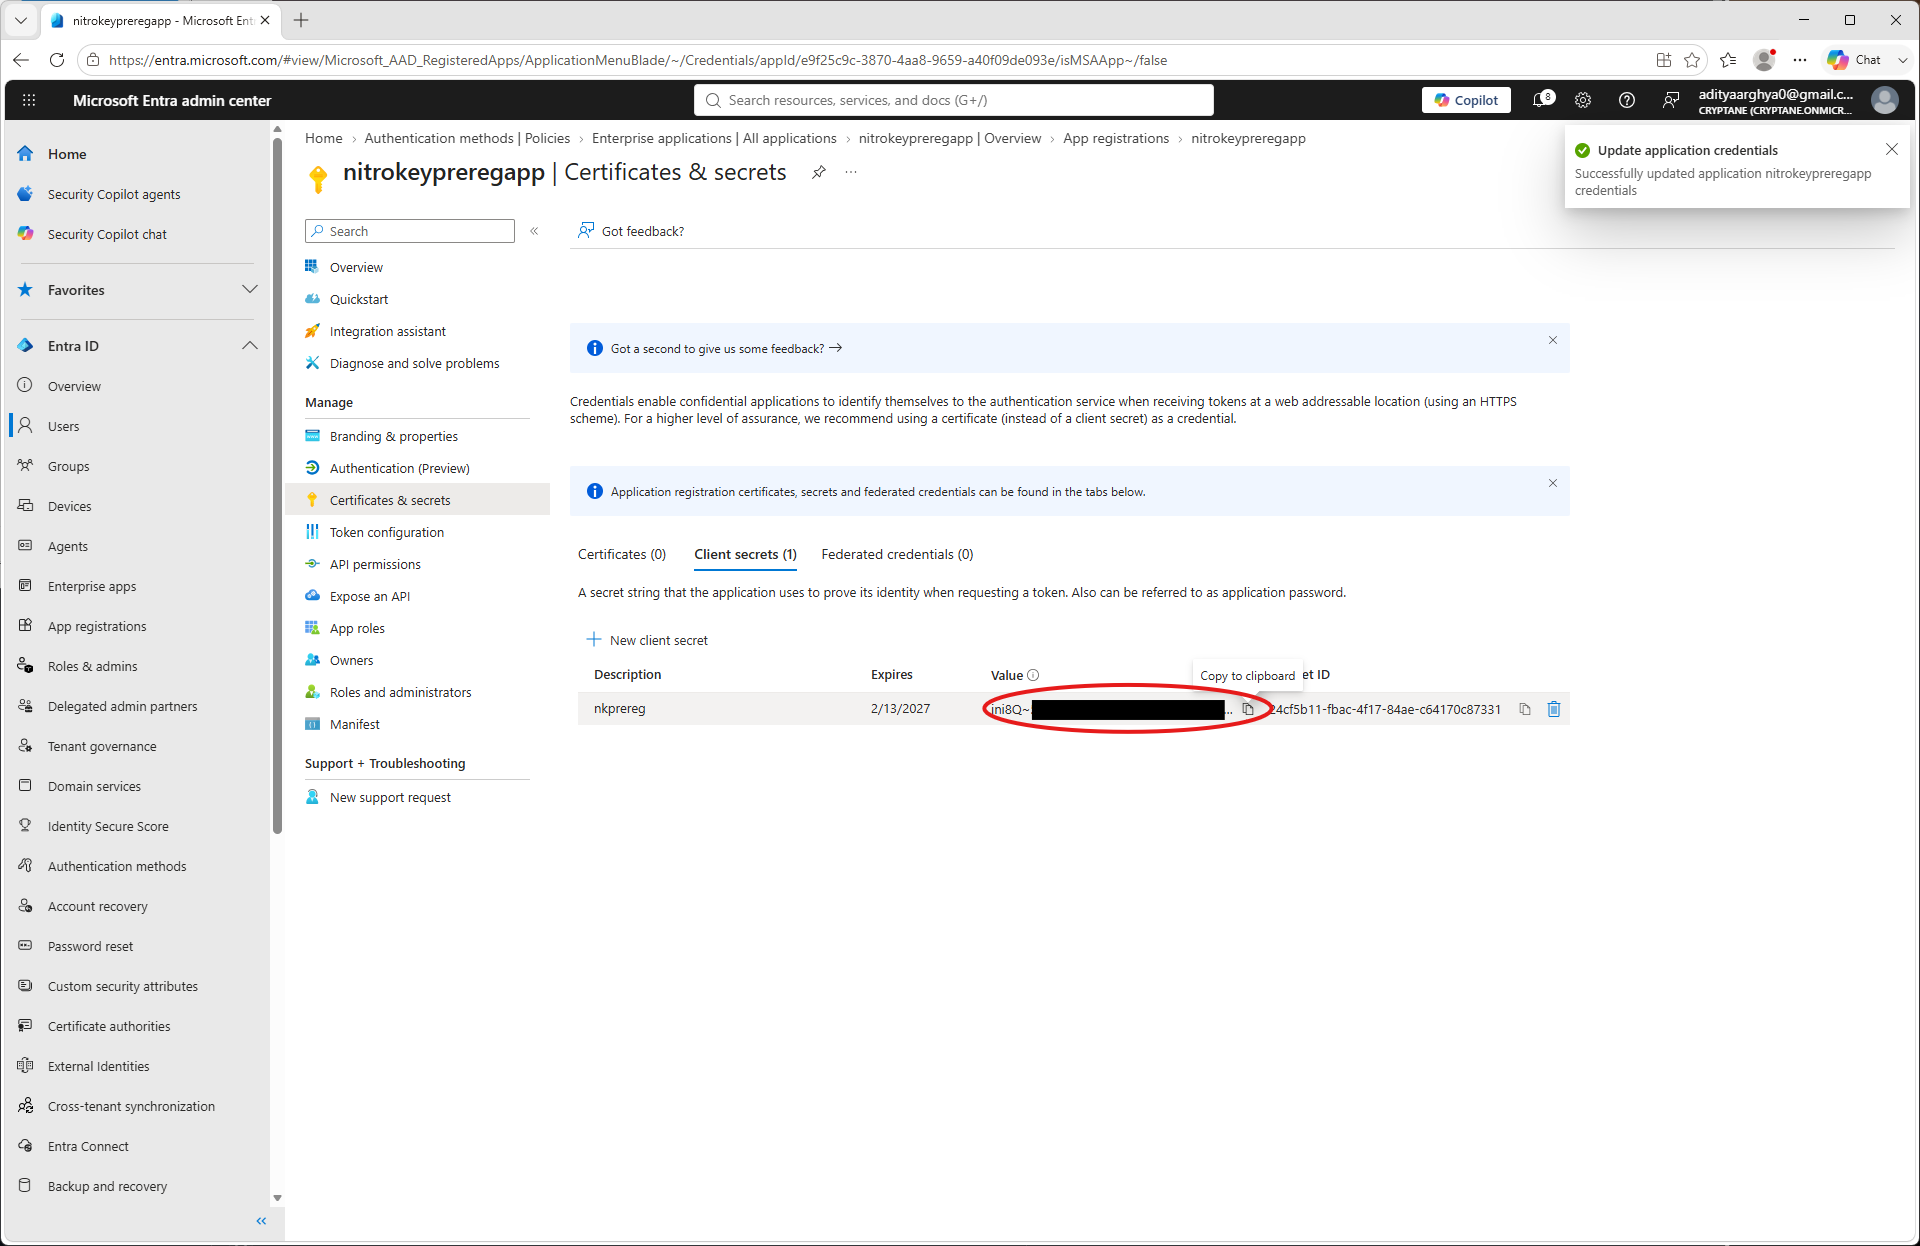
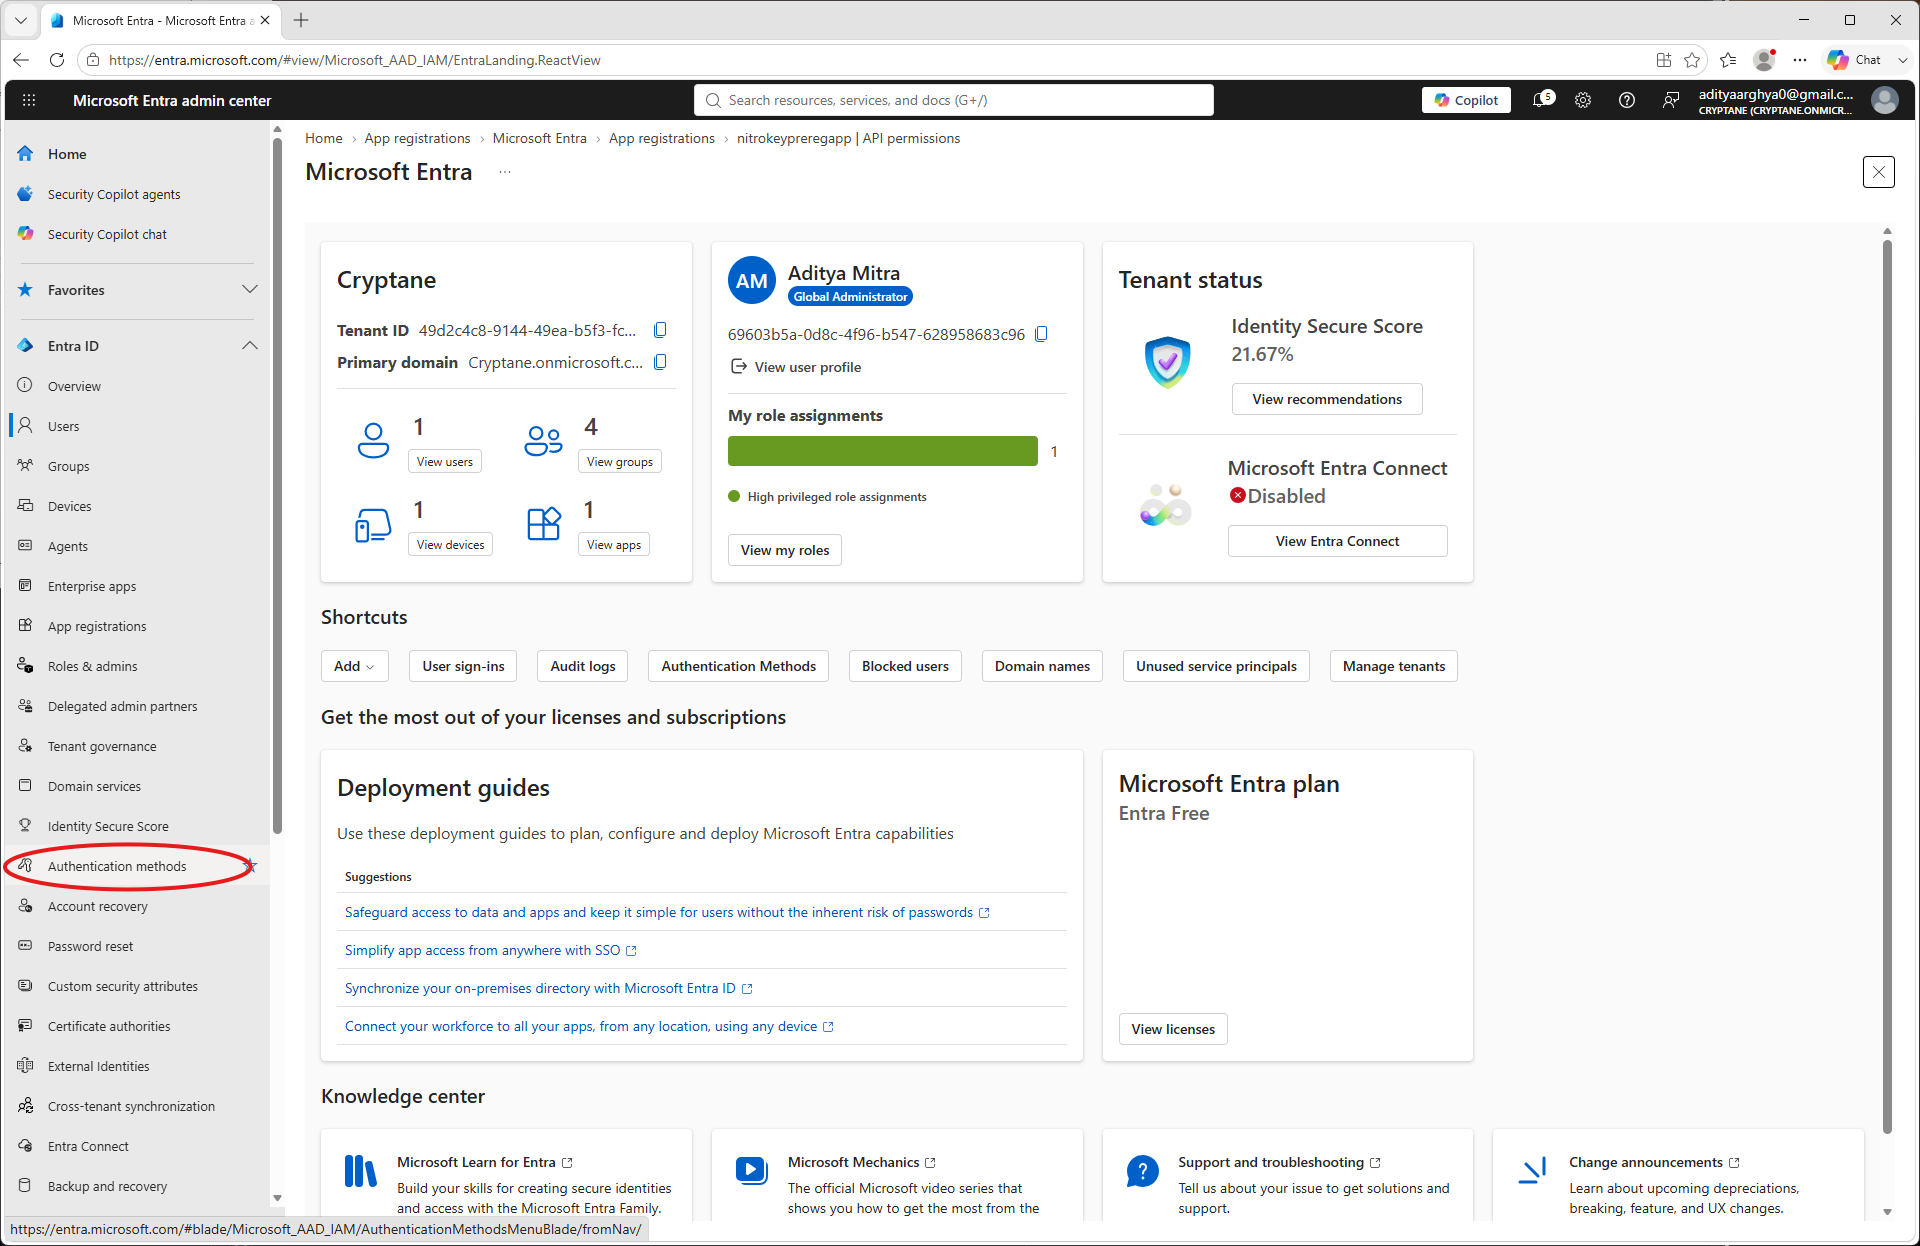
Cliquez sur « Méthodes d’authentification » dans le volet de gauche.
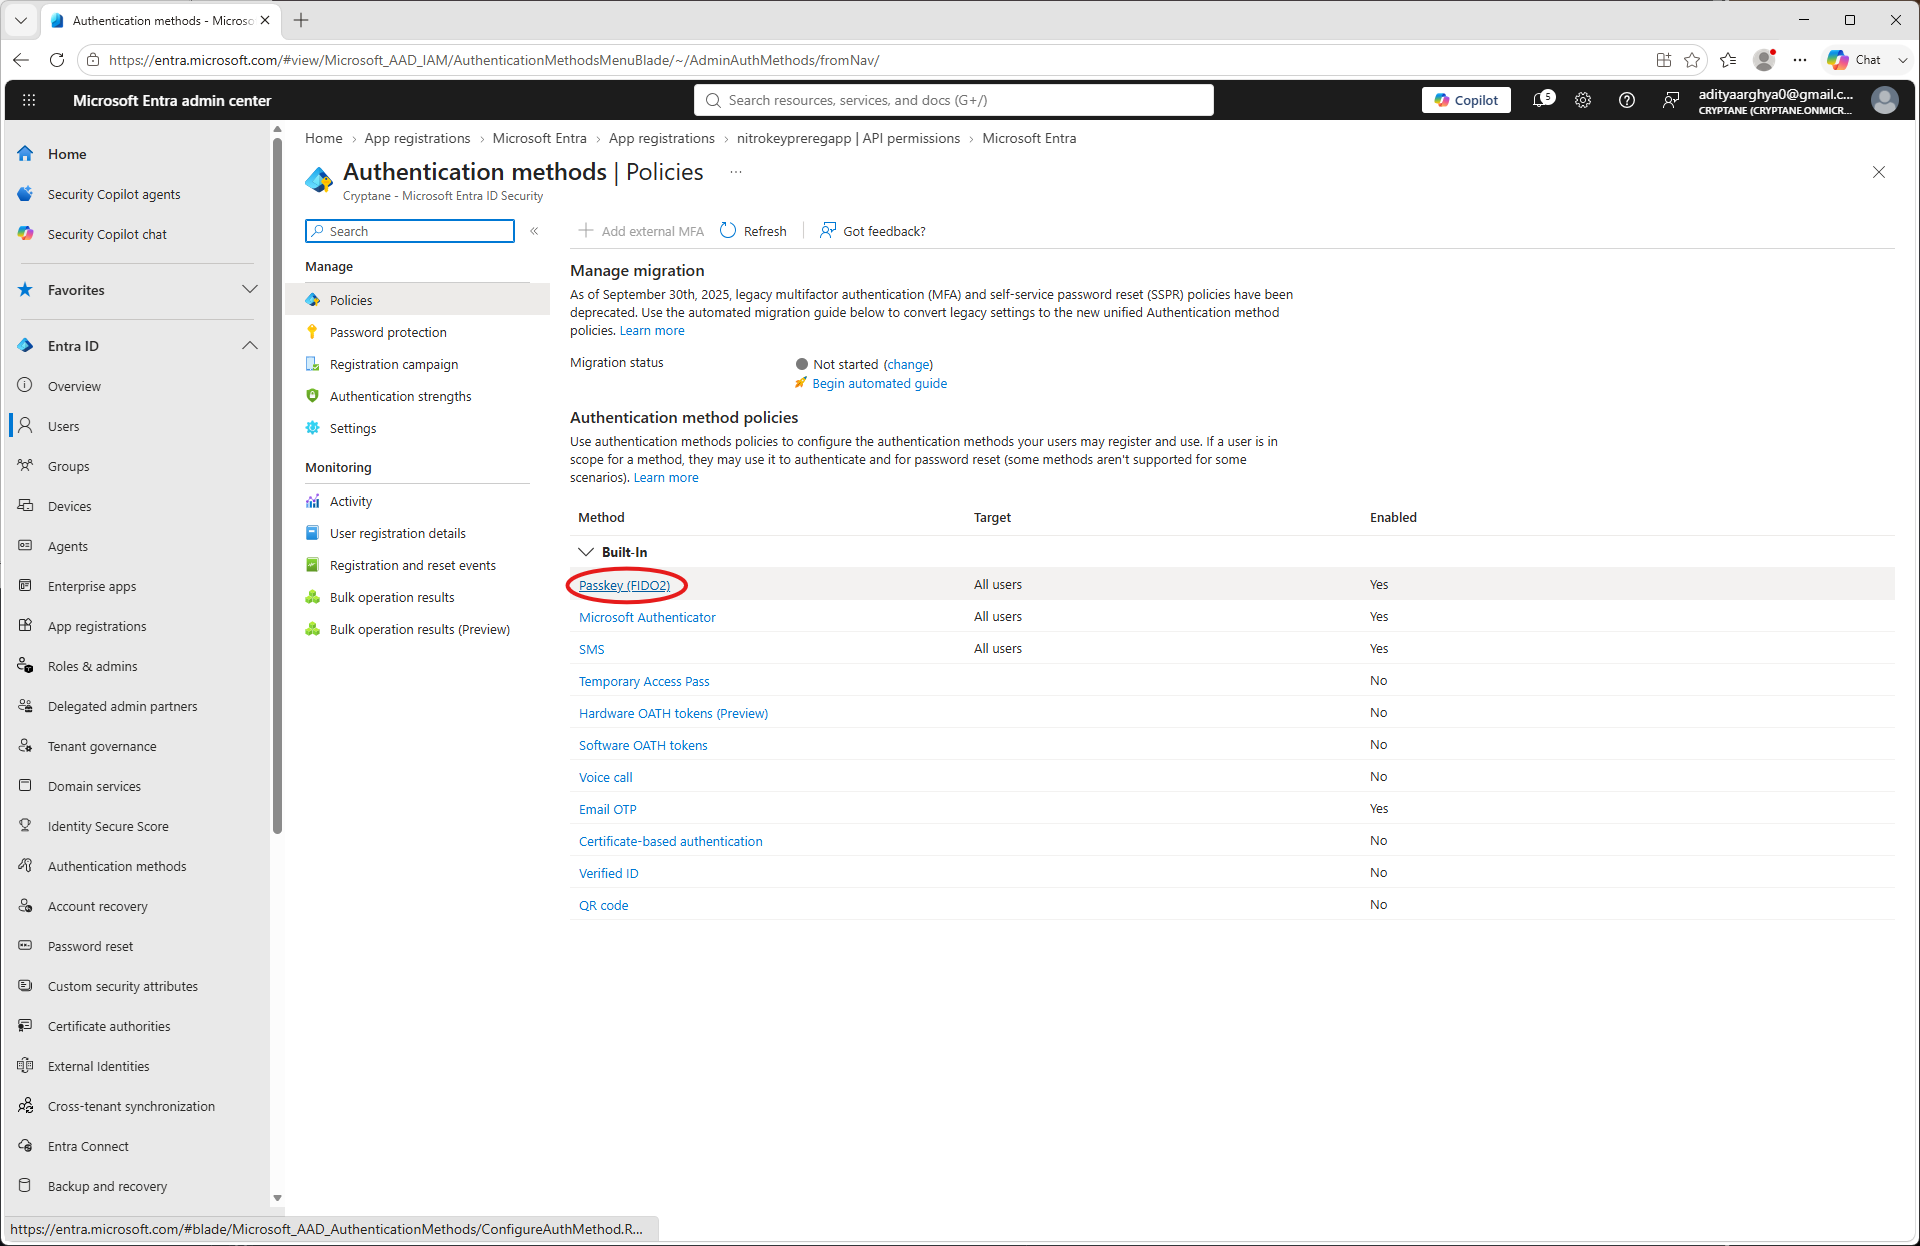
Select Passkey (FIDO2).
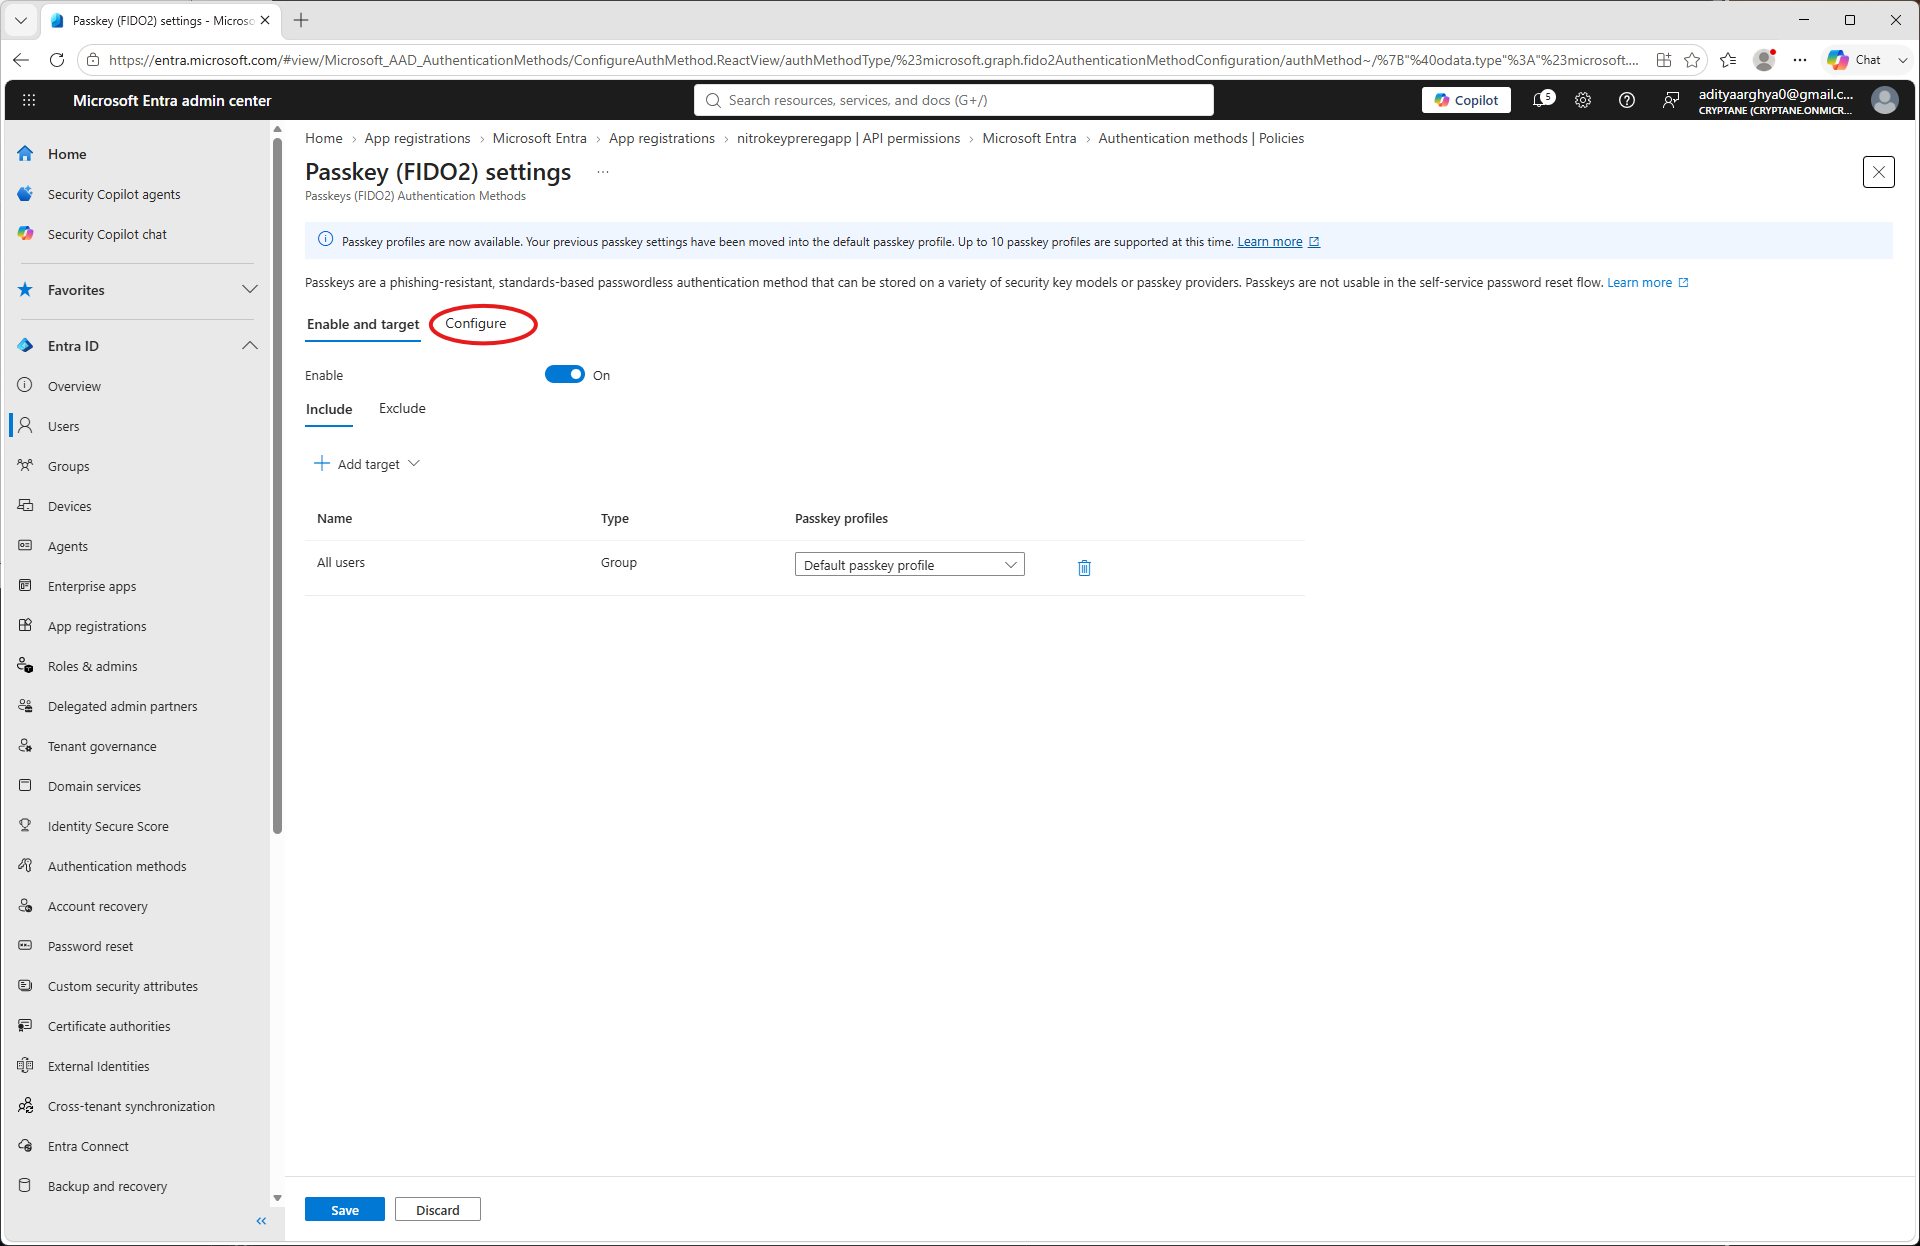
Click on the Configure tab.
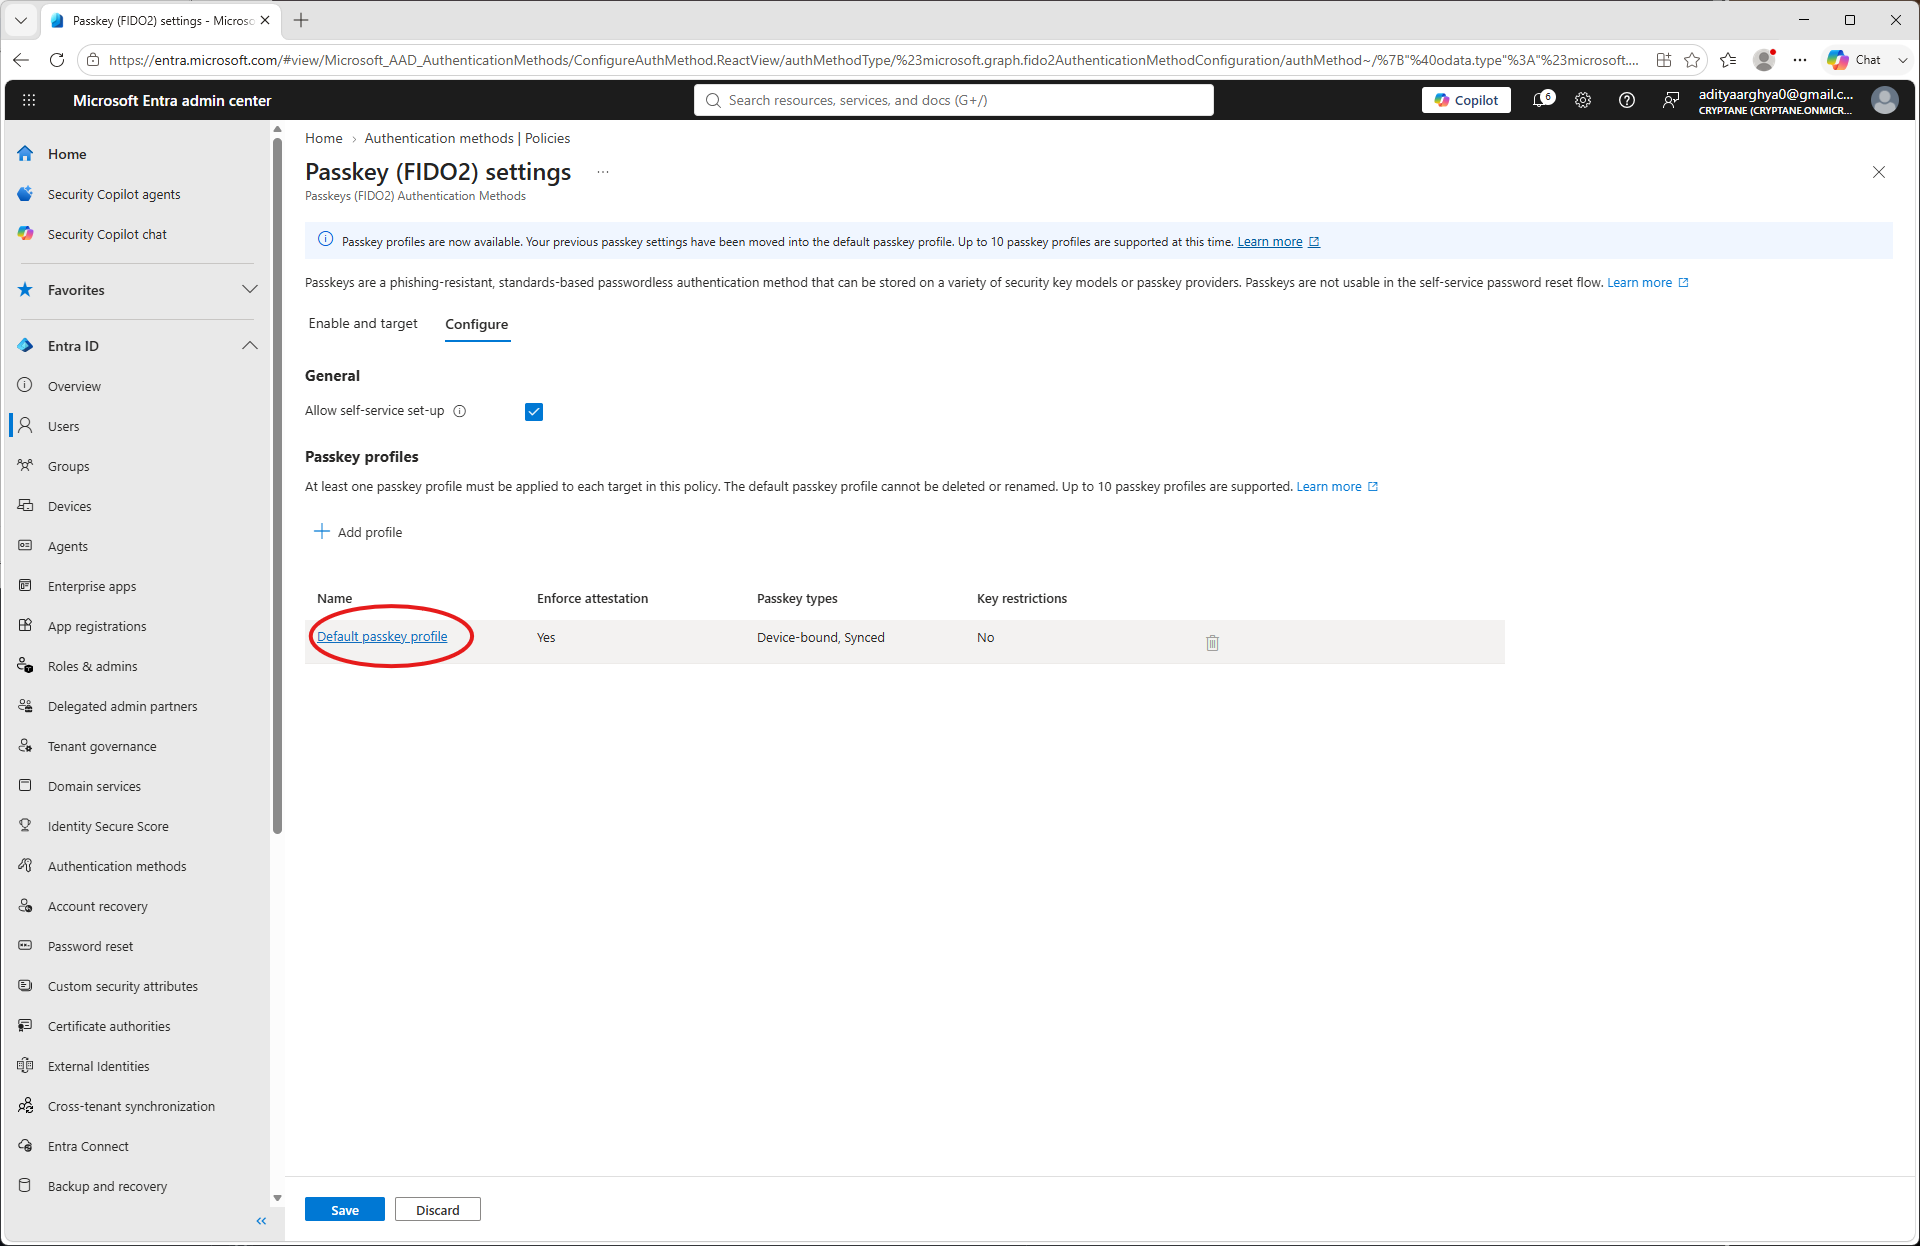
Click on Default Passkey profile
Décochez la case « Exiger l’attestation » (uniquement si vous utilisez une Nitrokey qui ne dispose pas de la certification FIDO Alliance. À la date de rédaction du présent document, seule la Nitrokey 3A Mini dispose de cette certification.)
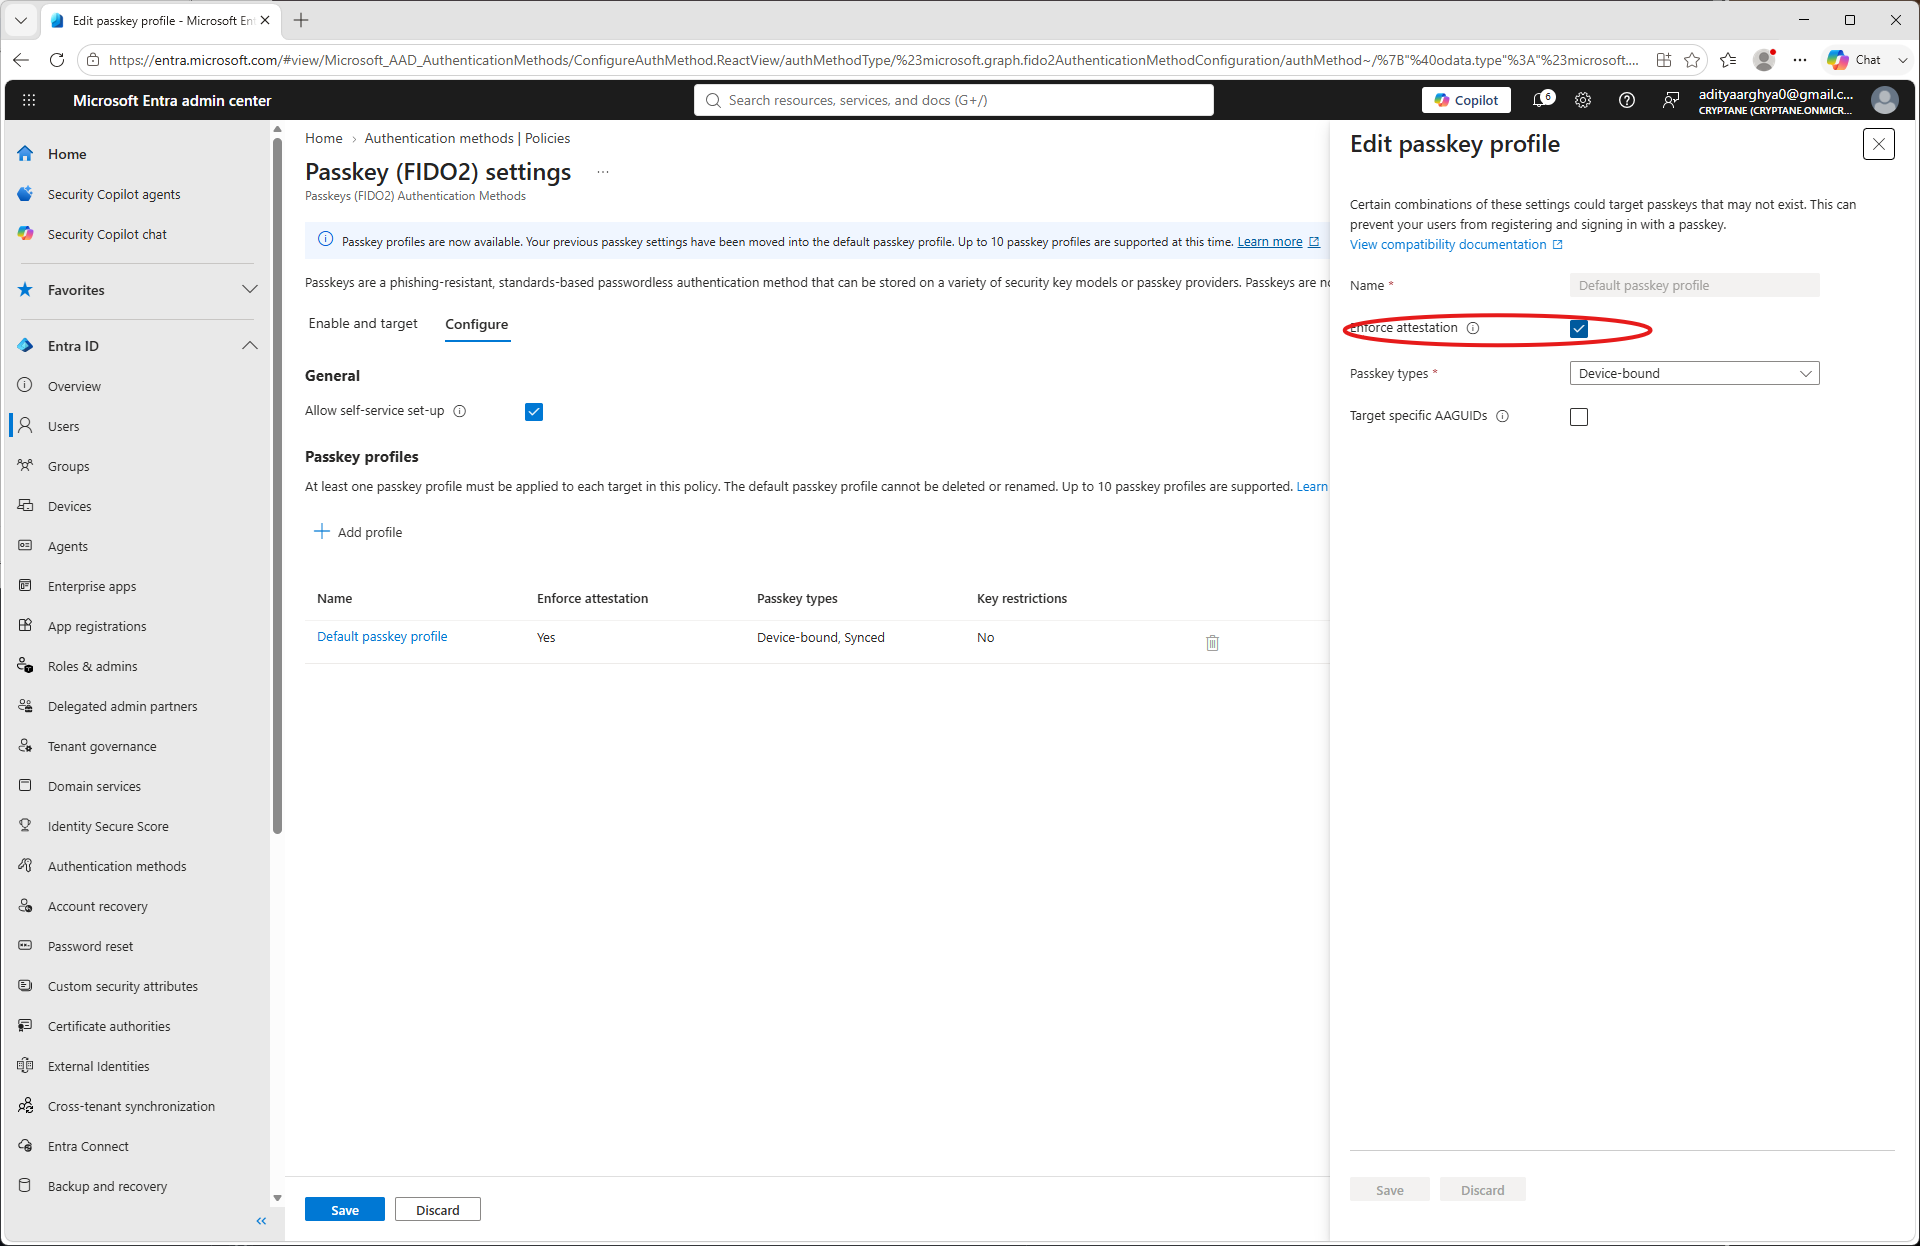
Click Save.
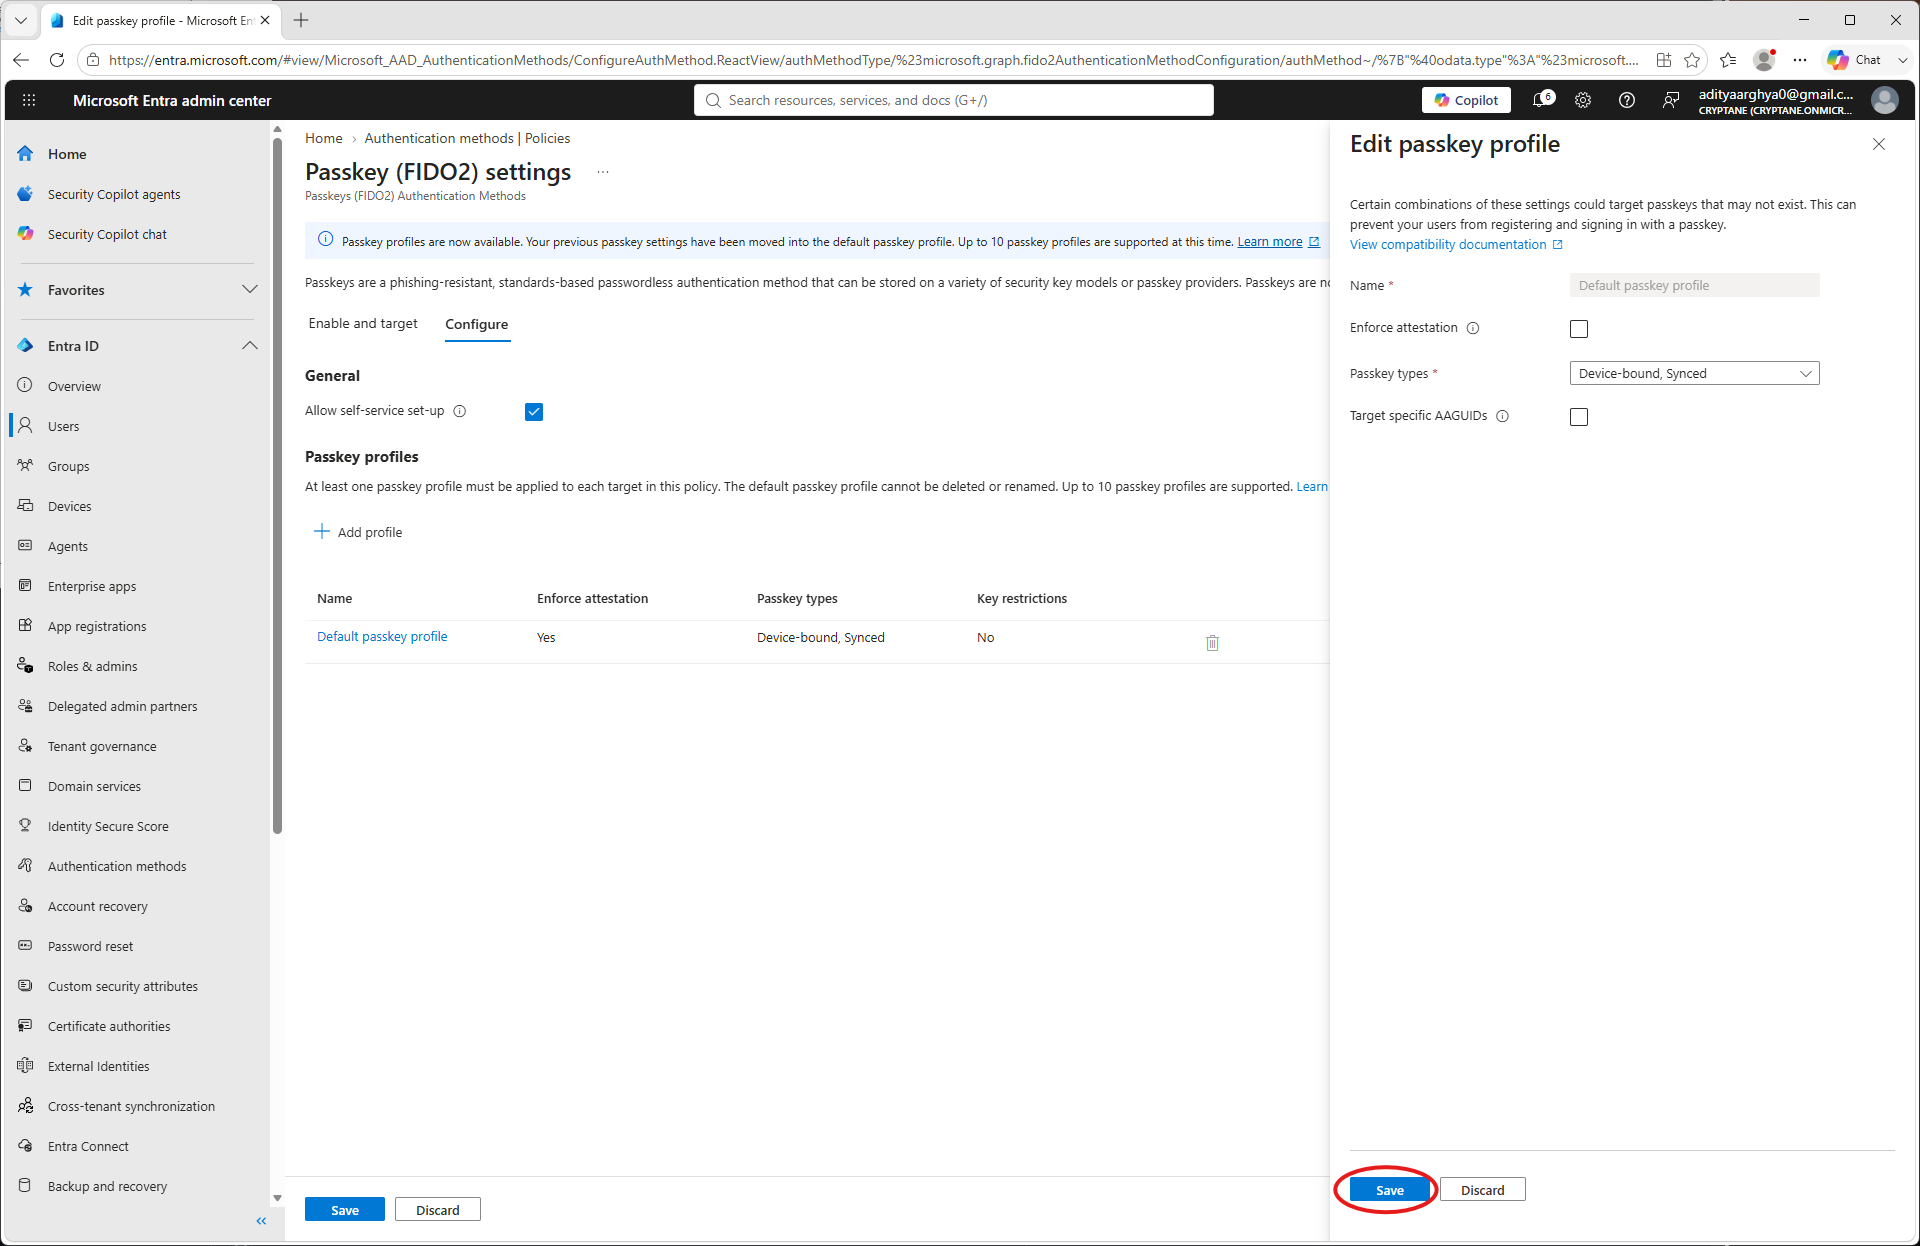
You have taken note of the Tenant ID, Client ID, Client Secret and Primary Domain as a part of the process. Make a
config.jsonfile with the information. An example is shown below.{ "tenant": "49d2c4c8-9144-49ea-b5f3-fc11b848cd72", "client": "e9f25c9c-3870-4aa8-9659-a40f09de093e", "secret": "************************************", "domain": "Cryptane.onmicrosoft.com" }
Utilisation
You may use the pynitrokey utility to provision a Nitrokey for an user in your tenant.
nitropy fido2 provision-credential entra -c config.json <username> --create-user
Here the <username> could be the Email ID of the user (User principal in terms of Microsoft) or a part of it till before the @ sign.
The --create-user flag directs the tool to create the user if it does not exist in the Entra Tenant.
$ nitropy fido2 provision-credential entra -c config.json aditya --create-user
Command line tool to interact with Nitrokey devices 0.12.3
Warning: It is recommended to execute nitropy with admin privileges to be able to access Nitrokey 3 and Nitrokey FIDO 2 devices.
Waiting 5 secs for Graph API to update
User aditya created on Entra
Enter PIN:
Touch your authenticator device now...
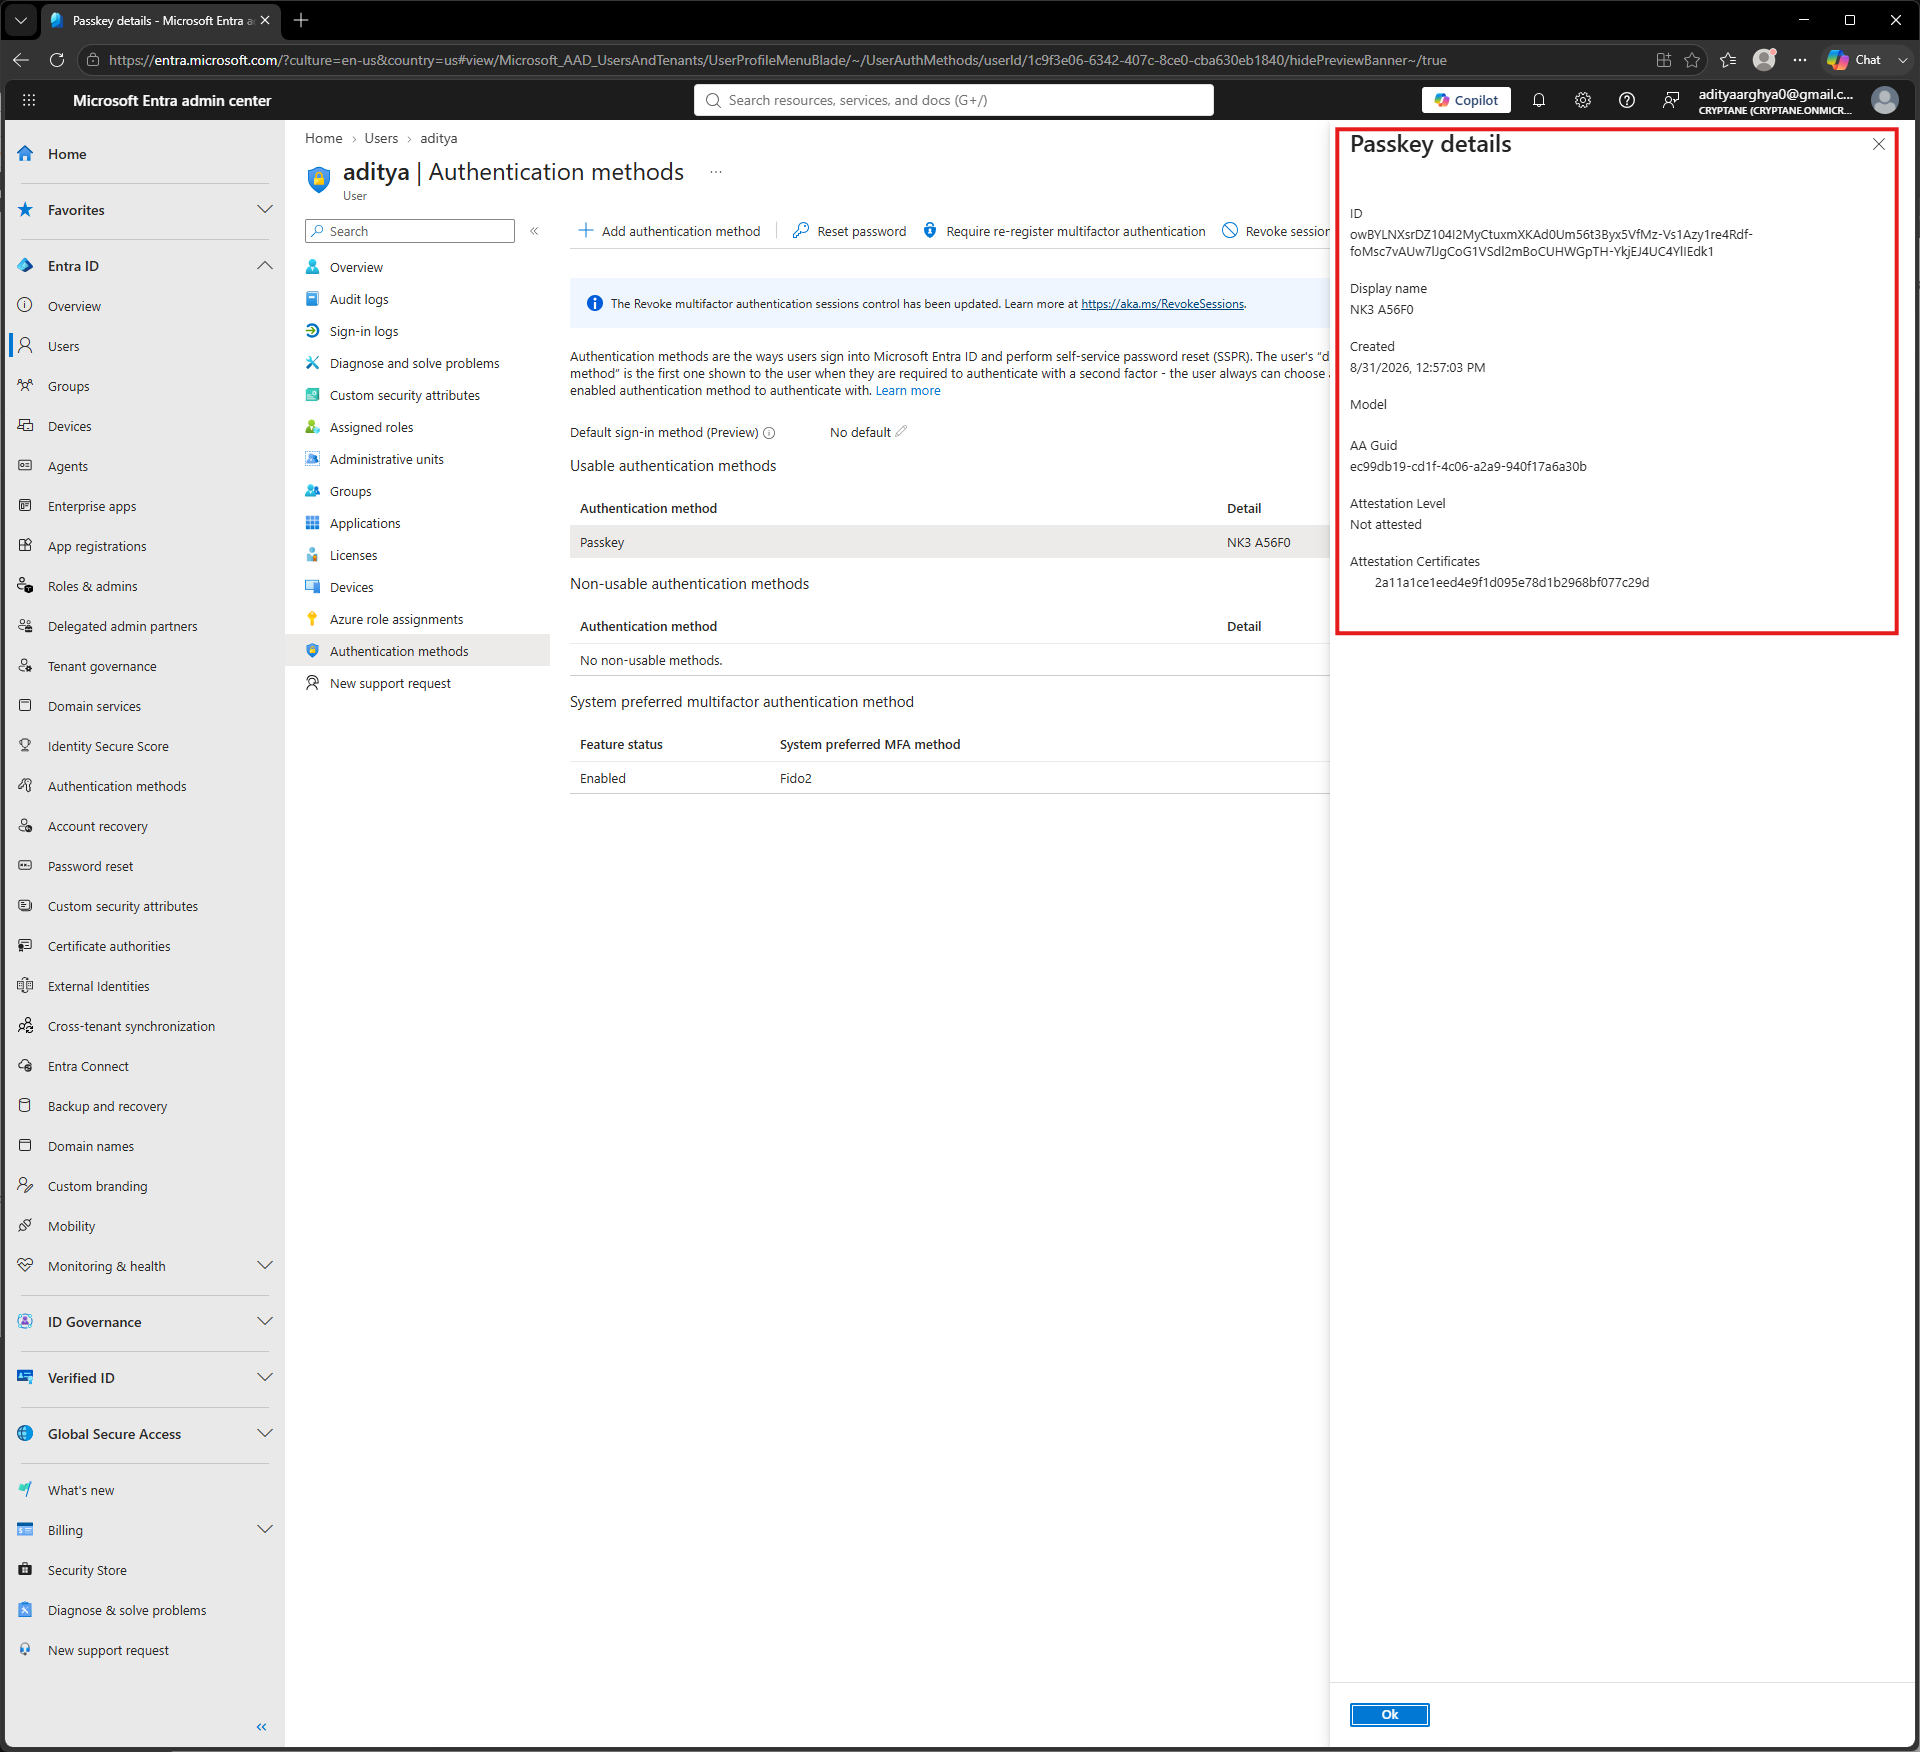
Entra credential for aditya pre-registered on NK3 A56F0 with Credential ID owBYLNXsrDZ104I2MyCtuxmXKAd0Um56t3Byx5VfMz-Vs1Azy1re4Rdf-foMsc7vAUw7lJgCoG1VSdl2mBoCUHWGpTH-YkjEJ4UC4YlIEdk1.
Verification
L’utilisateur peut utiliser la Nitrokey qui vient d’être configurée pour se connecter à son compte Microsoft. Suivez le lien Exemple de connexion à Microsoft avec la Nitrokey pour vous connecter à l’aide de cette Nitrokey qui vient d’être configurée.
Vous pouvez vérifier les identifiants fournis depuis le portail d’administration Entra en suivant les étapes indiquées.
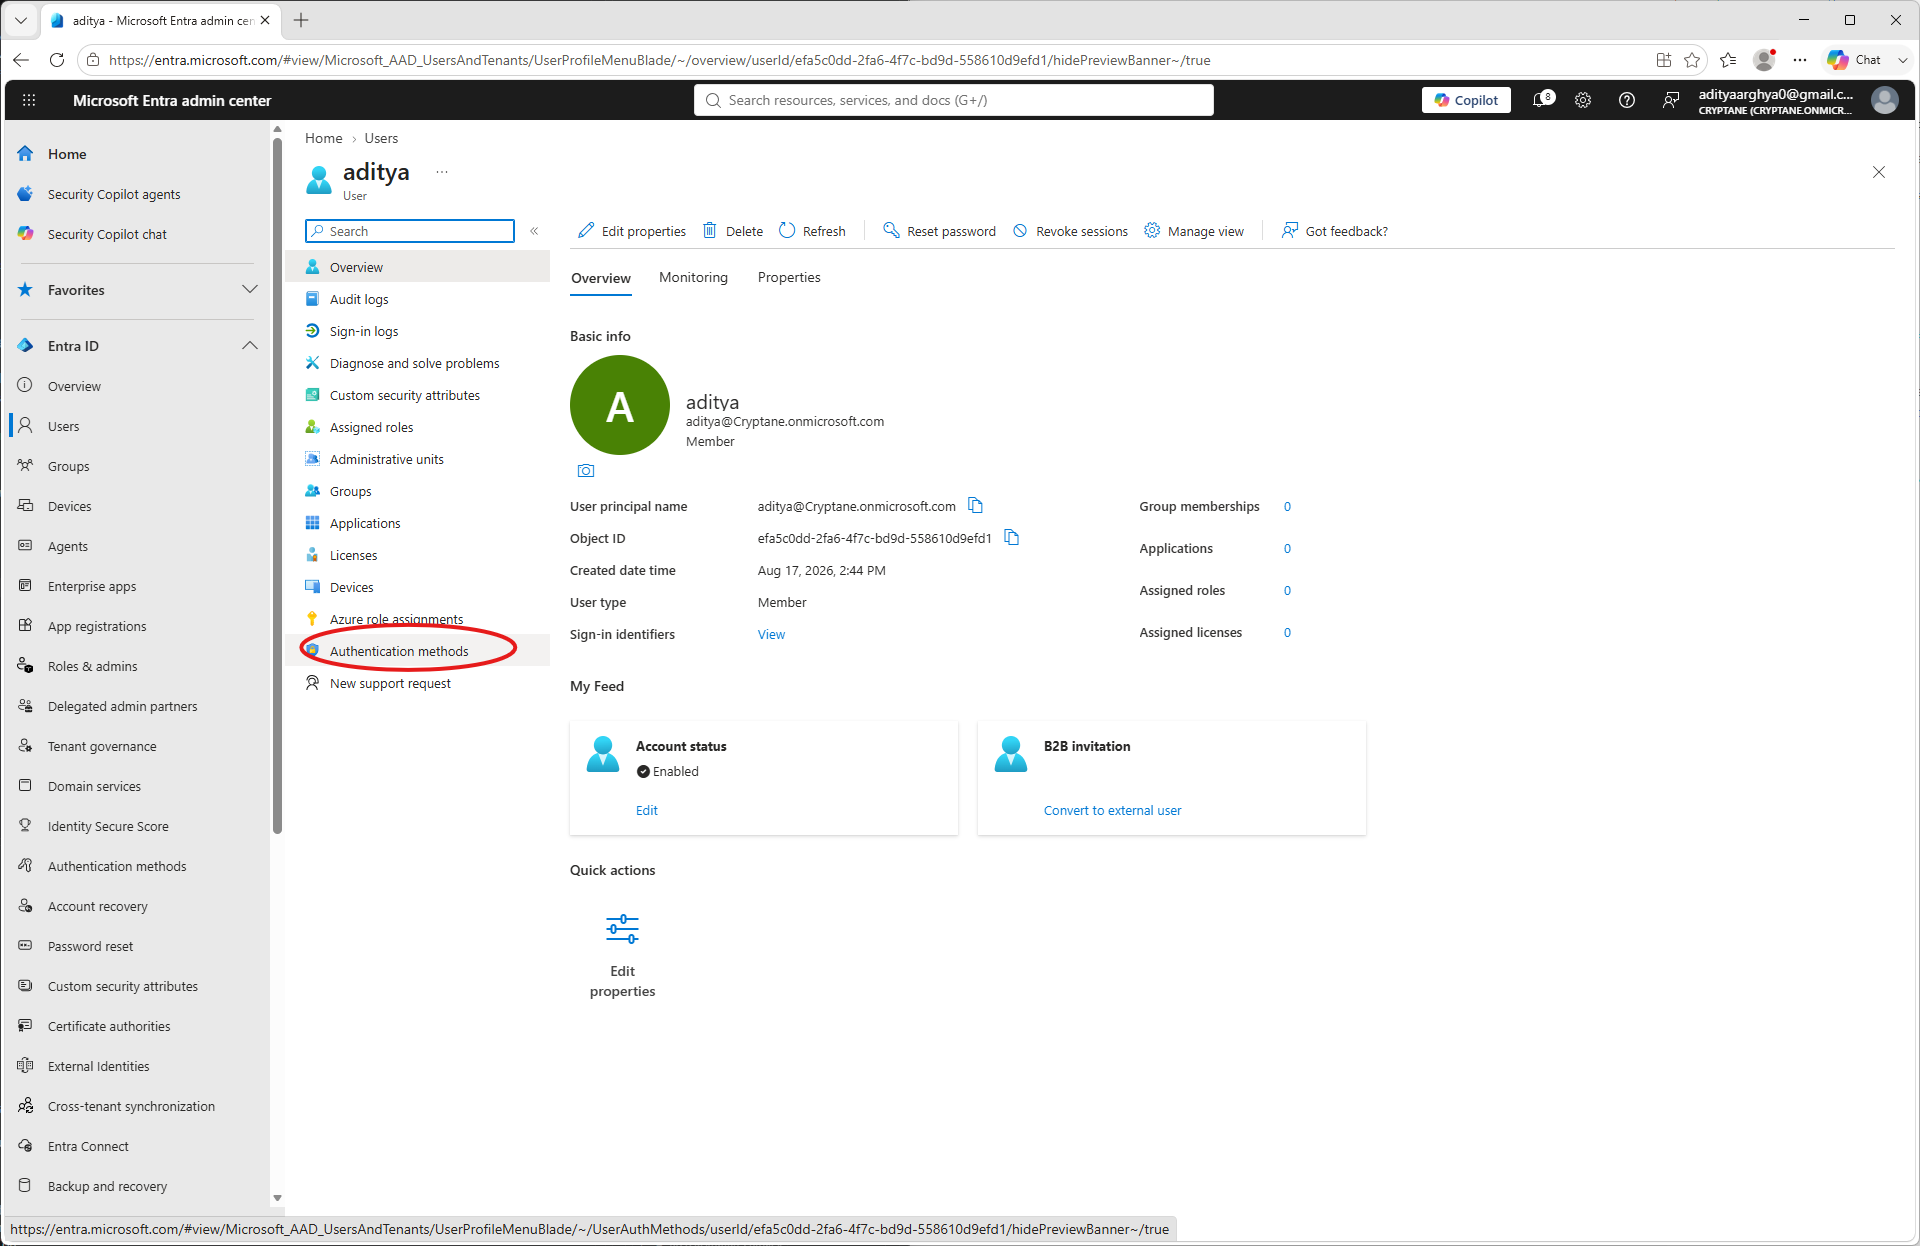
Accédez à l’option « Utilisateurs » dans le volet de gauche du centre d’administration Entra.
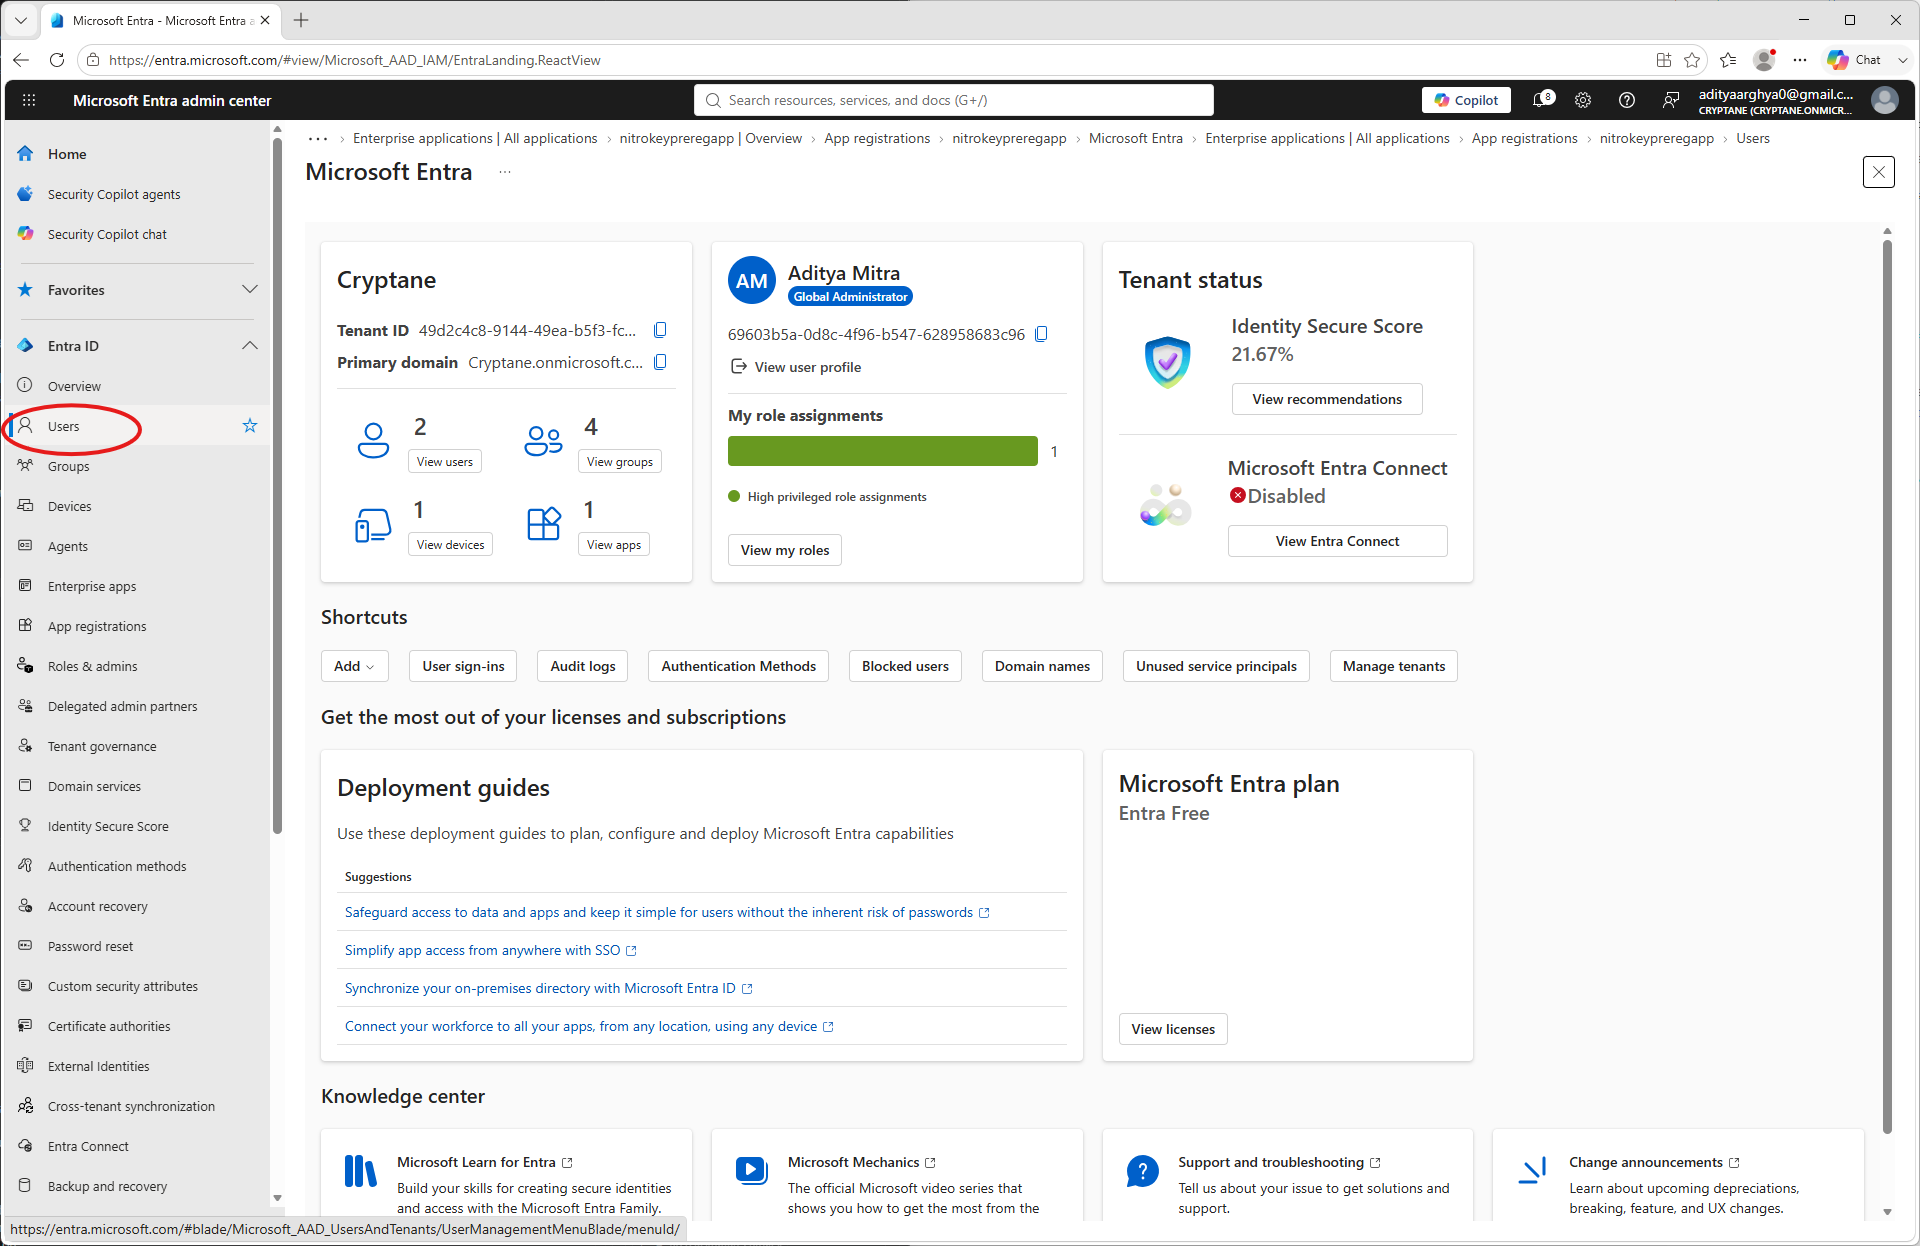
If the user was created with the
--create-userflag you may be able to find the entry on the list. If it is a pre-existing user, it would also be there. Click on the user to which the credential was enrolled.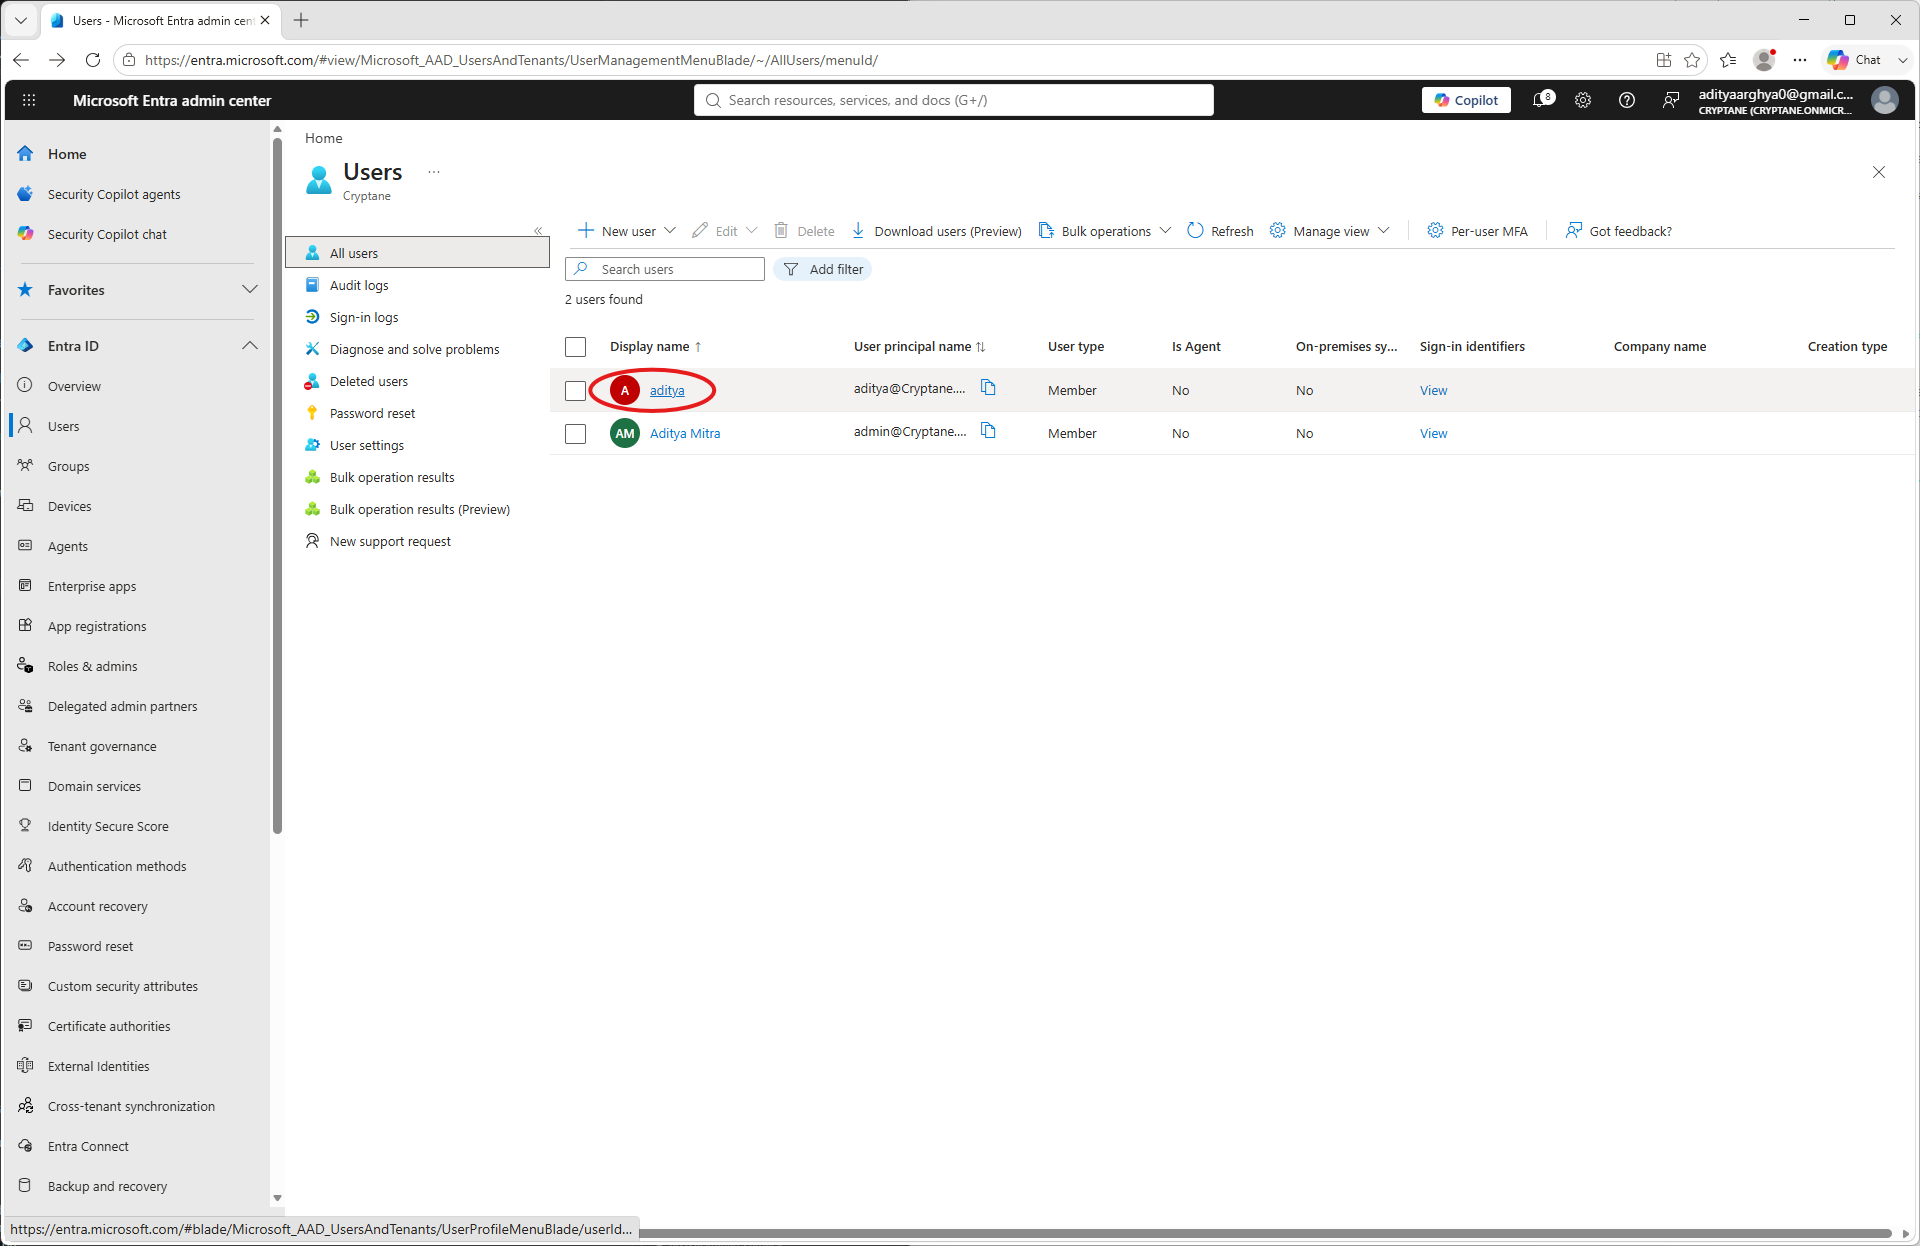
Click on Authentication methods on the user blade.
Les identifiants enregistrés, dont les 5 premiers caractères correspondent à l’UUID de la Nitrokey, s’affichent. Vous pouvez cliquer sur les trois points, puis sur « Afficher les détails » pour consulter les informations détaillées concernant ces identifiants.
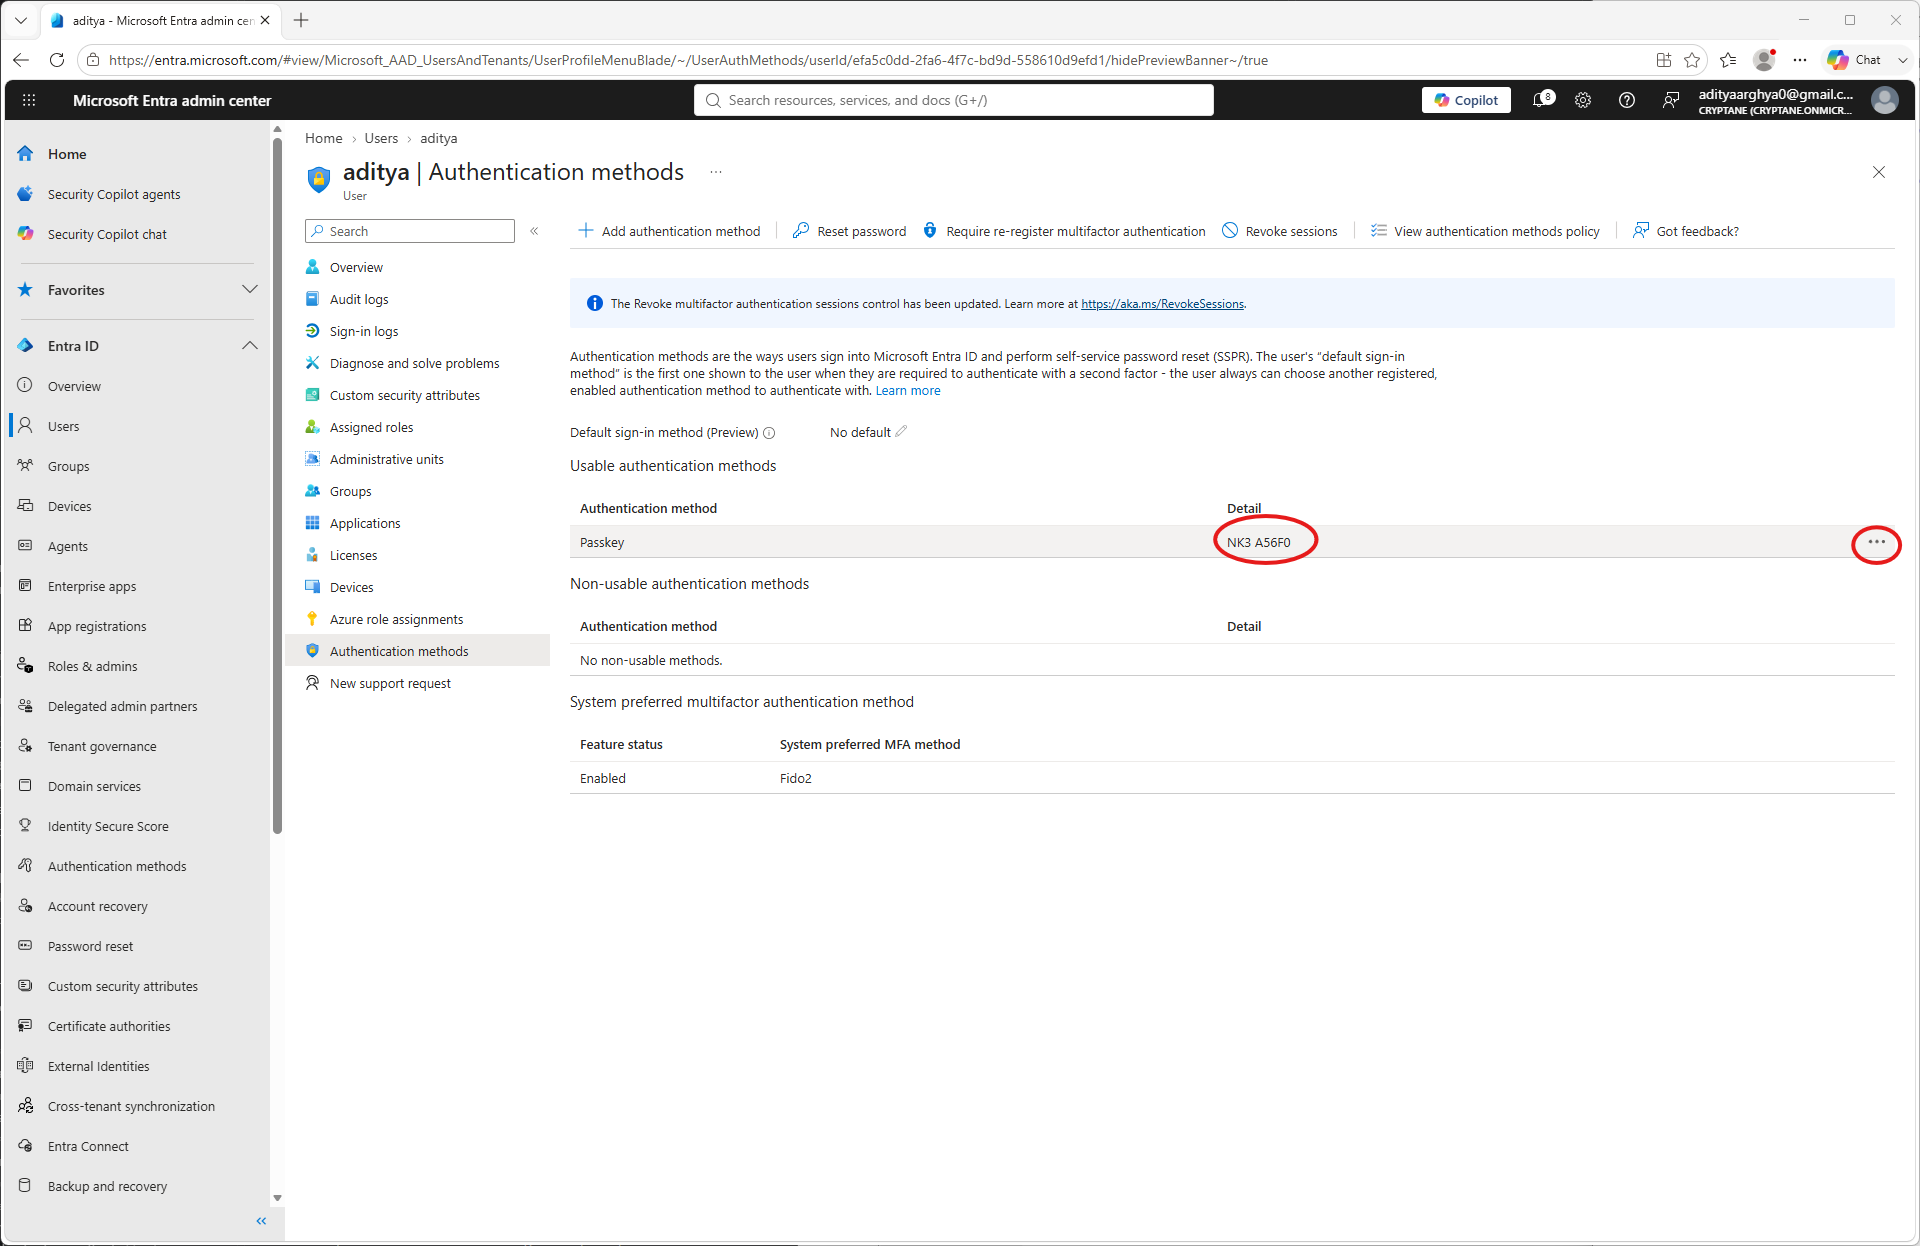
Des informations supplémentaires concernant ces identifiants s’afficheraient. Vous pourriez alors les vérifier.