Nitrokey seadistamine Entra ID jaoks
Compatible Nitrokeys |
|||||||
|---|---|---|---|---|---|---|---|
✓ active |
✓ active |
⨯ inactive |
⨯ inactive |
⨯ inactive |
⨯ inactive |
⨯ inactive |
⨯ inactive |
The Nitrokey 3 and Nitrokey Passkey support provisioning credentials for Microsoft Entra for seamless employee on-boarding in enterprise scenarios.
Seadistamine
Kasutaja autentimisandmete programmiline registreerimine eeldab Microsoft Entra rakenduse olemasolu. Siin pakume teile selle seadistamise juhendit, eeldusel, et teil on selleks vajalikud õigused.
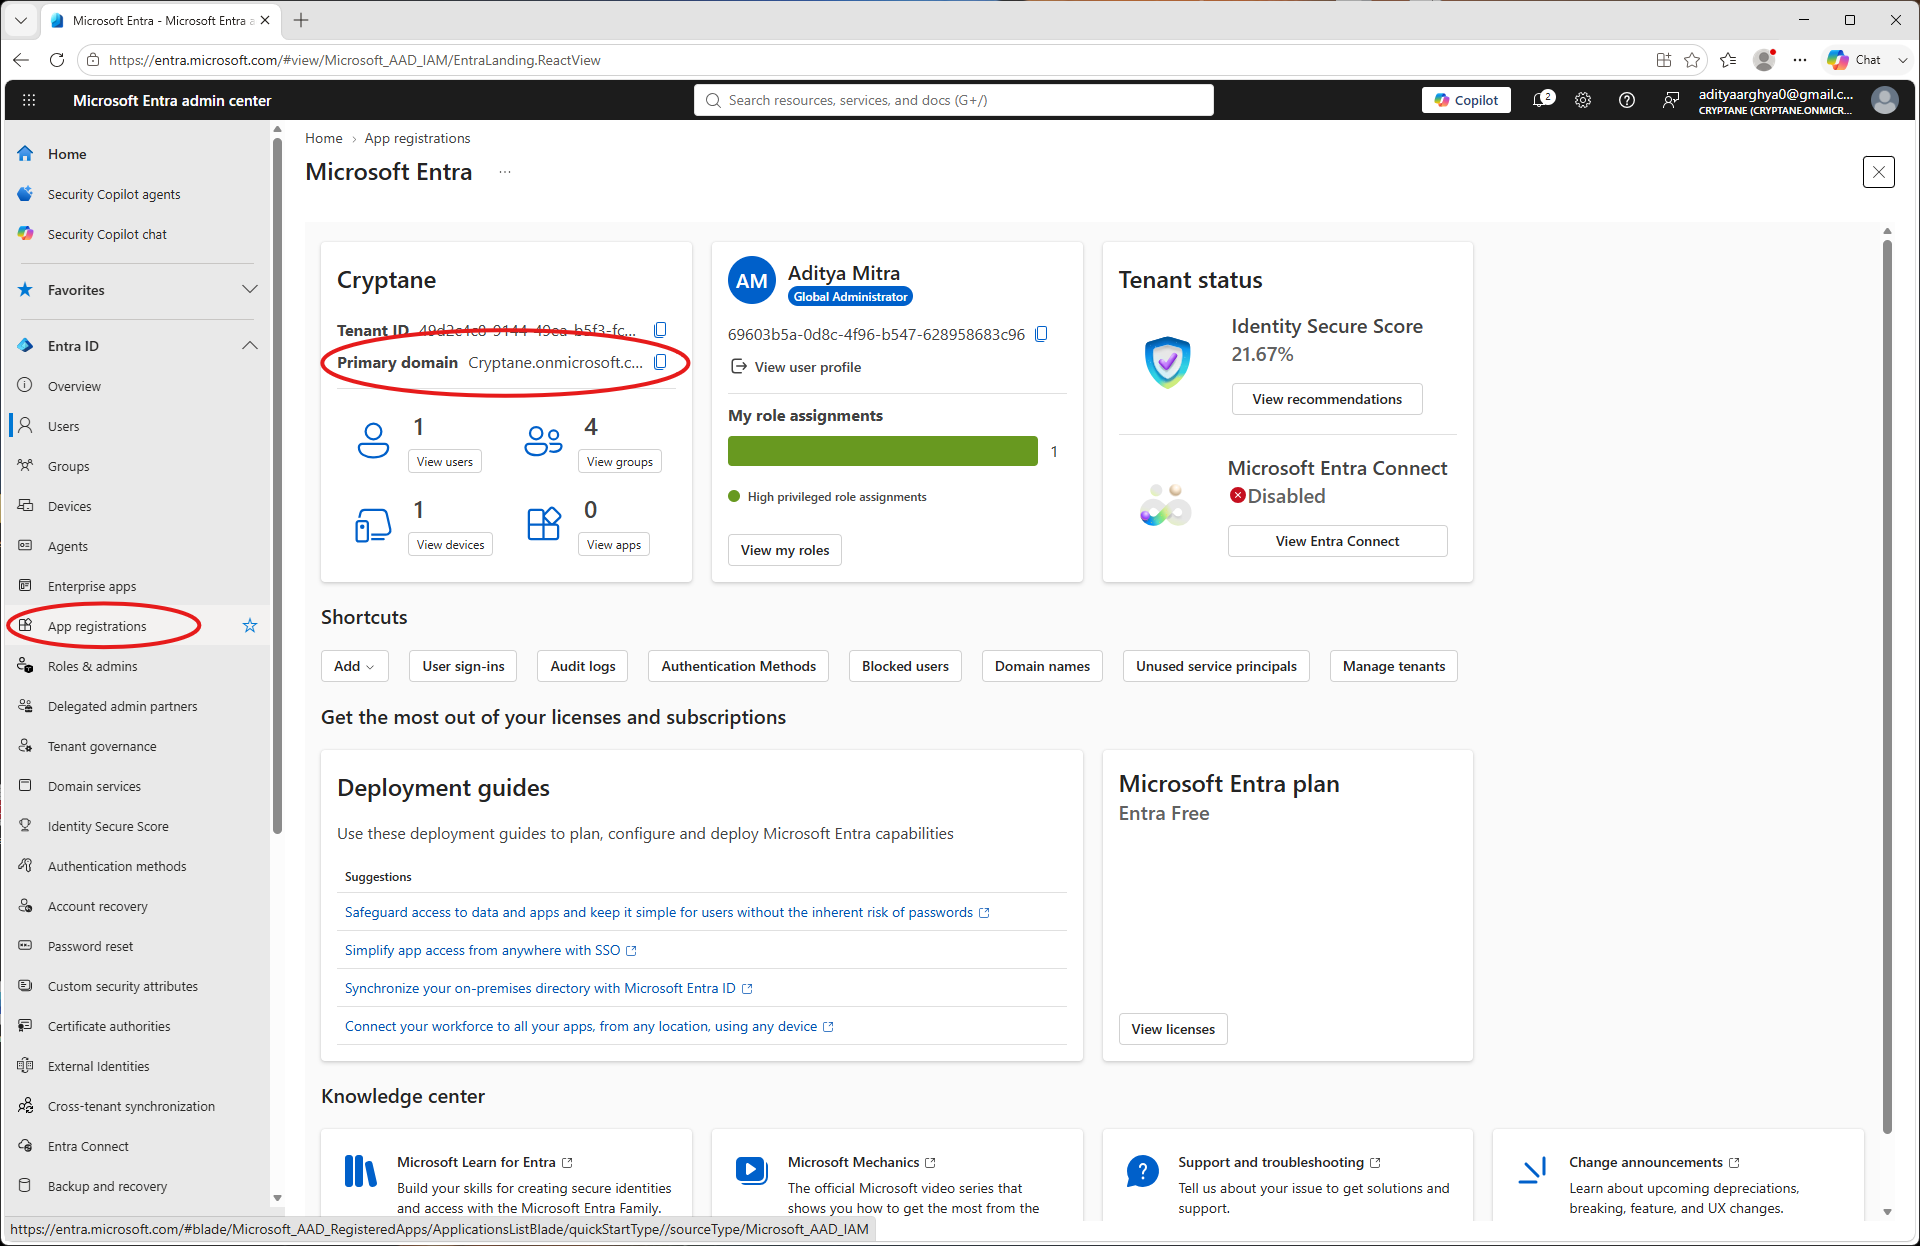
Login to Entra Admin portal. Take a note of the primary domain which you will need later. Go to App Registrations on the left blade.
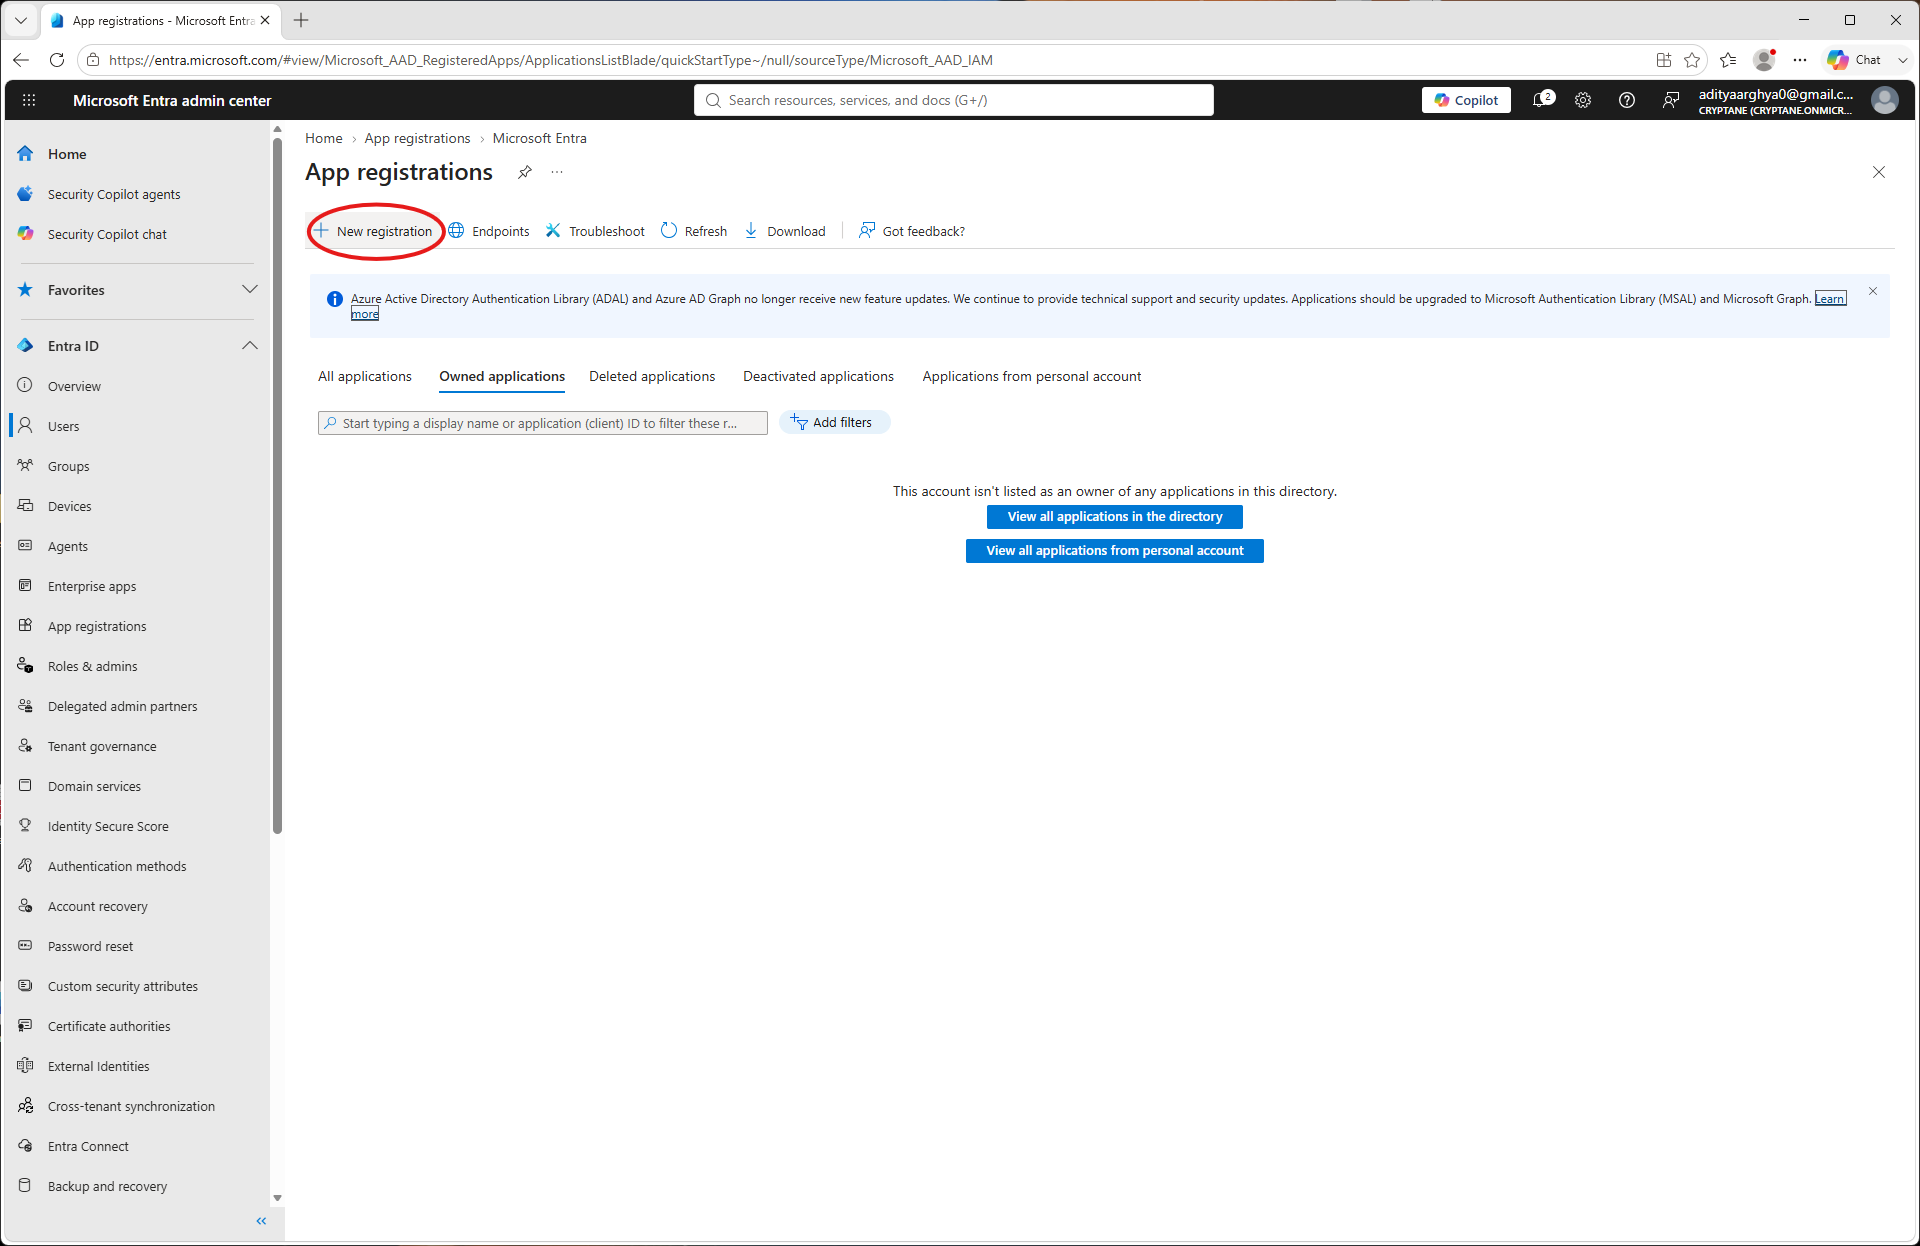
Valige „Uus registreerimine”.
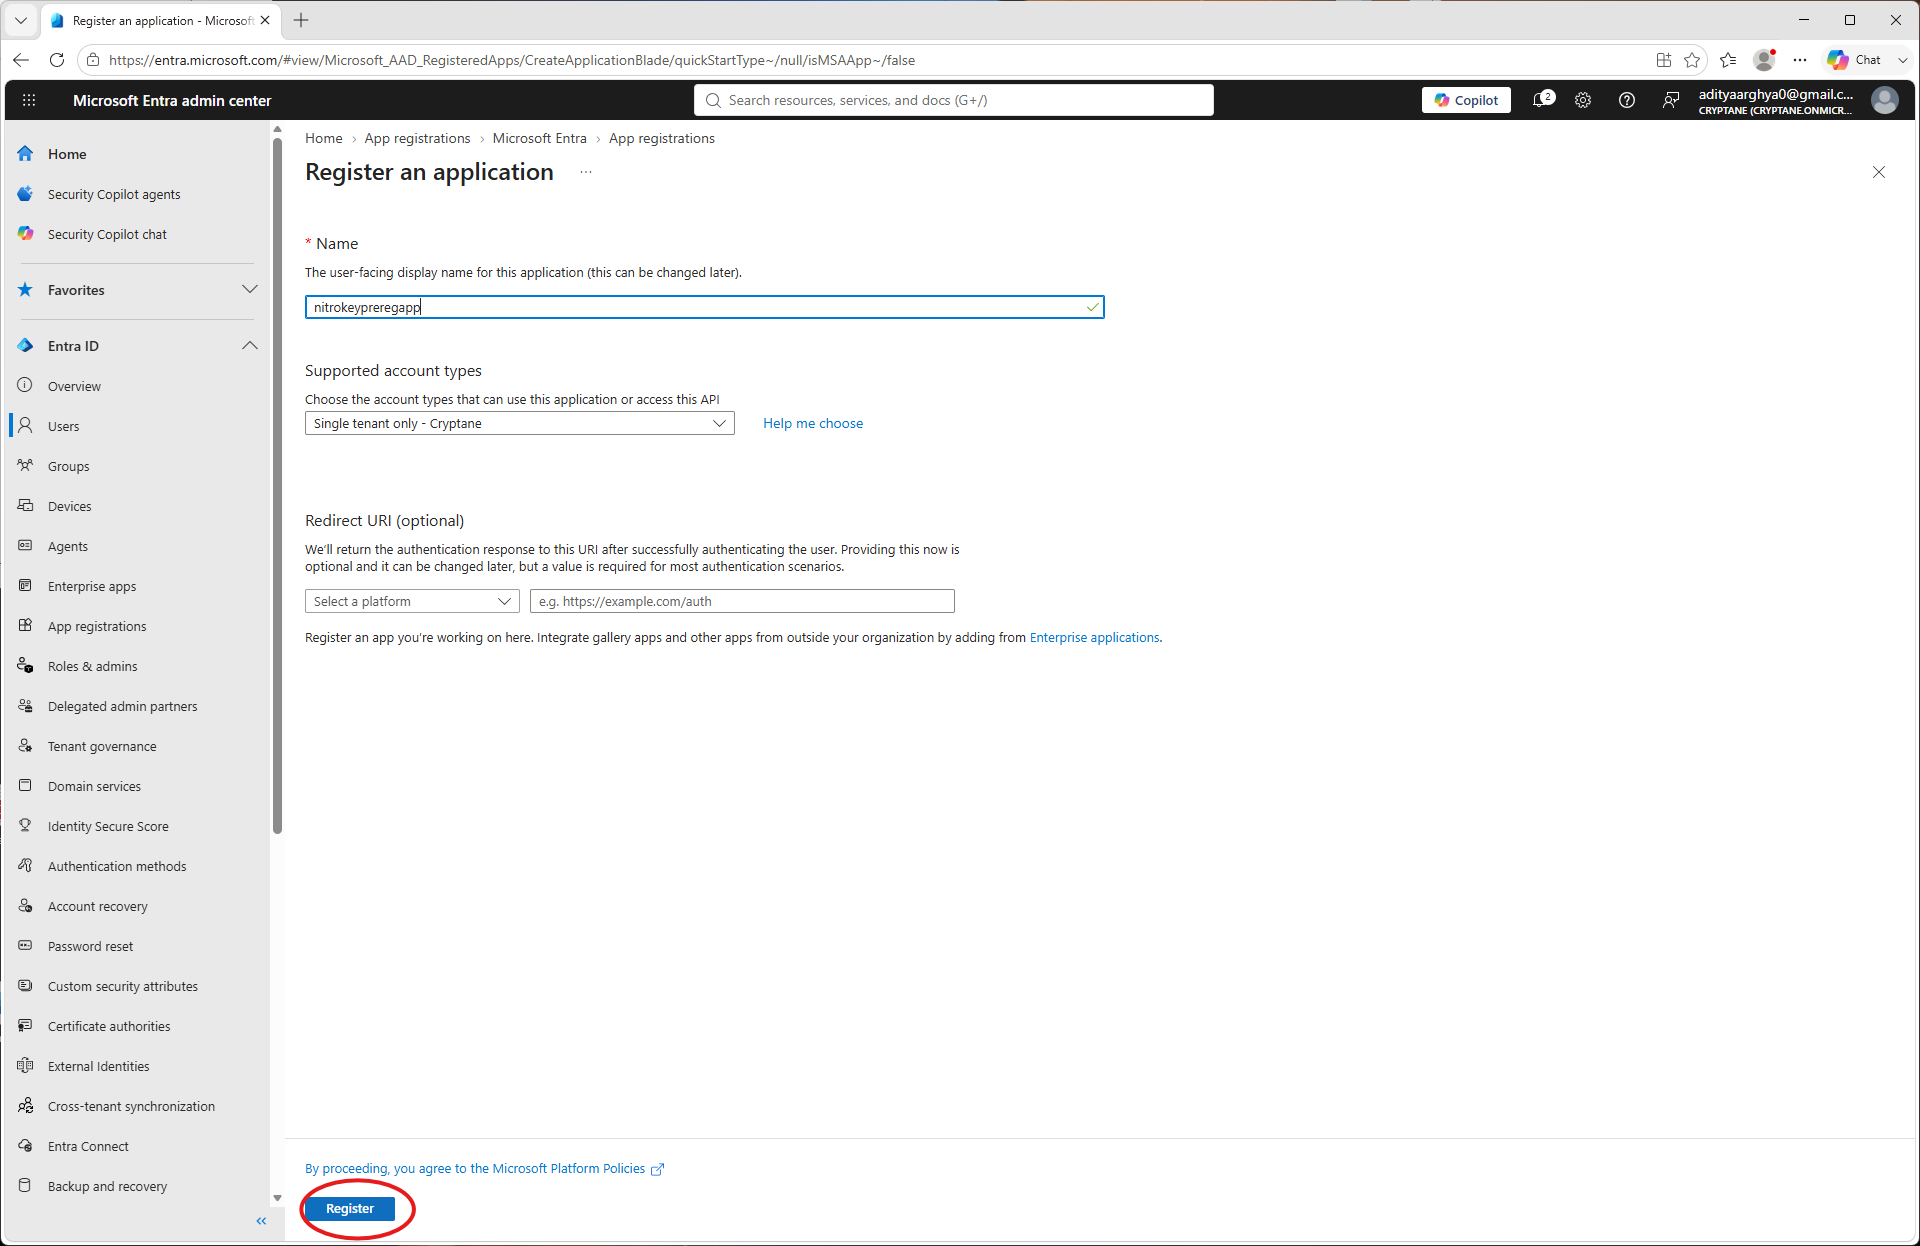
Loo uus rakendus ja määra sellele nimi. Klõpsa nupule „Registreeri”.
Kirjutage siia üles kliendi ID ja kasutaja ID. Neid on hiljem vaja. Minge rakenduse vahekaardil valikule „API-õigused“.
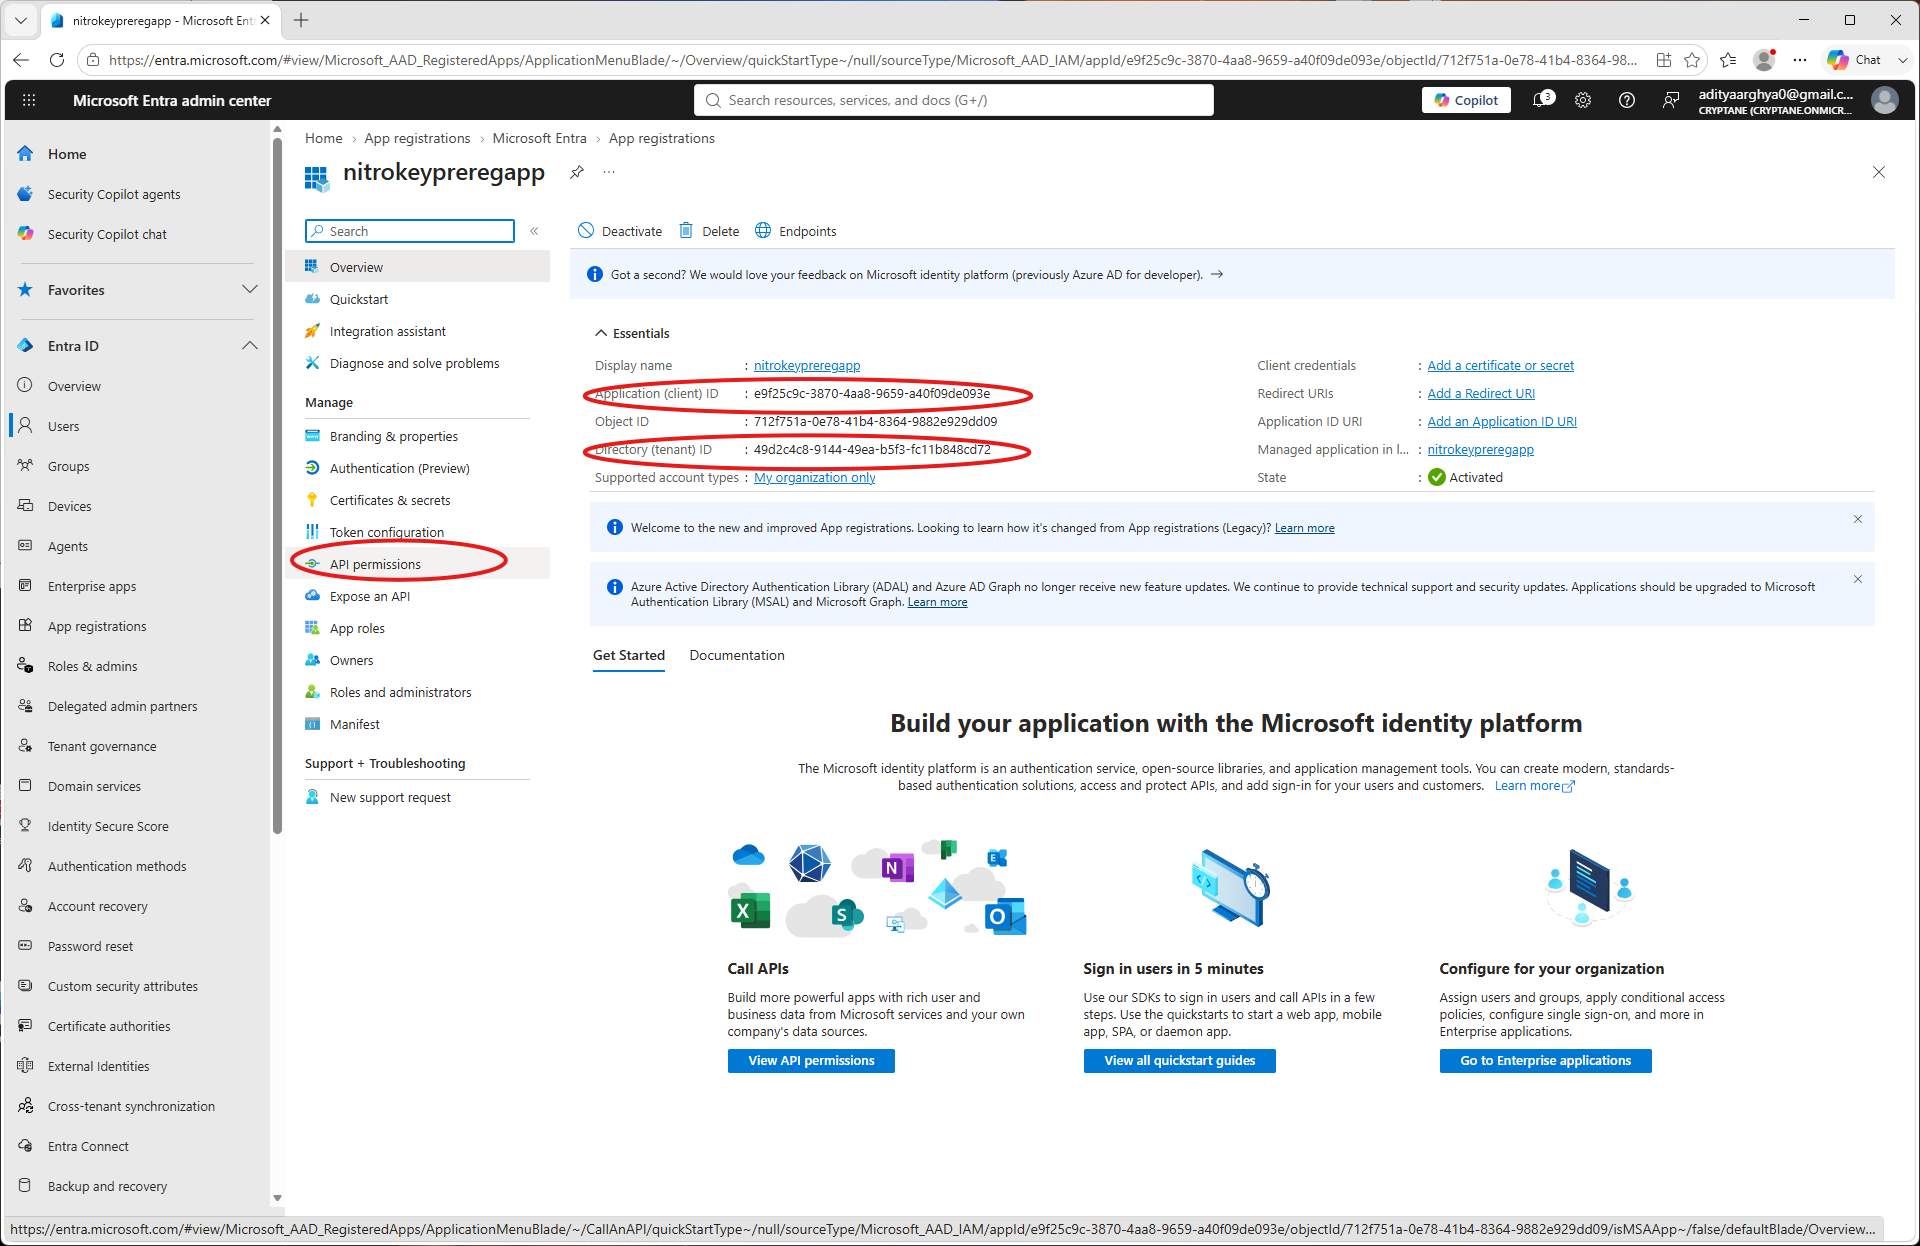
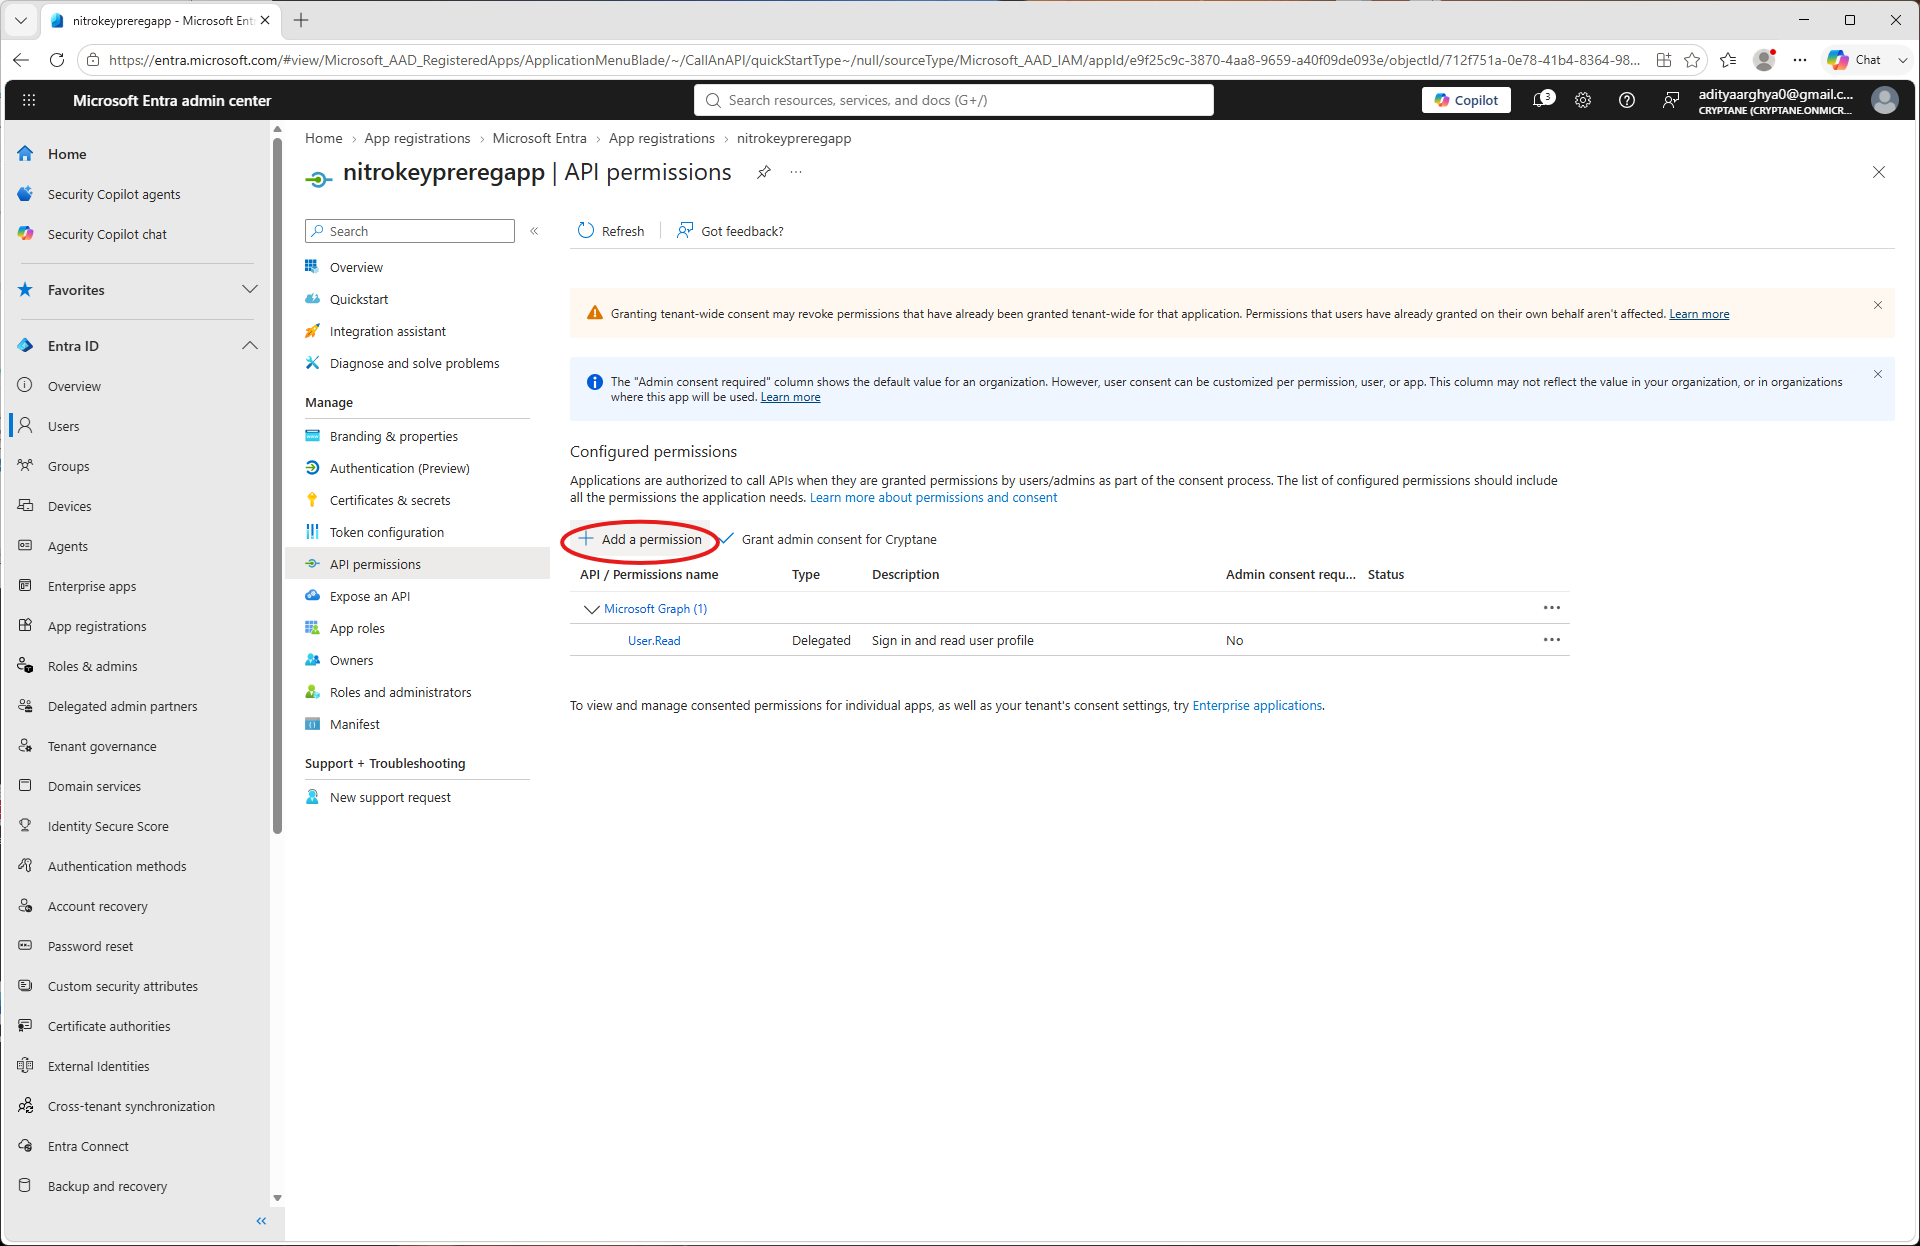
Click on Add a permission.
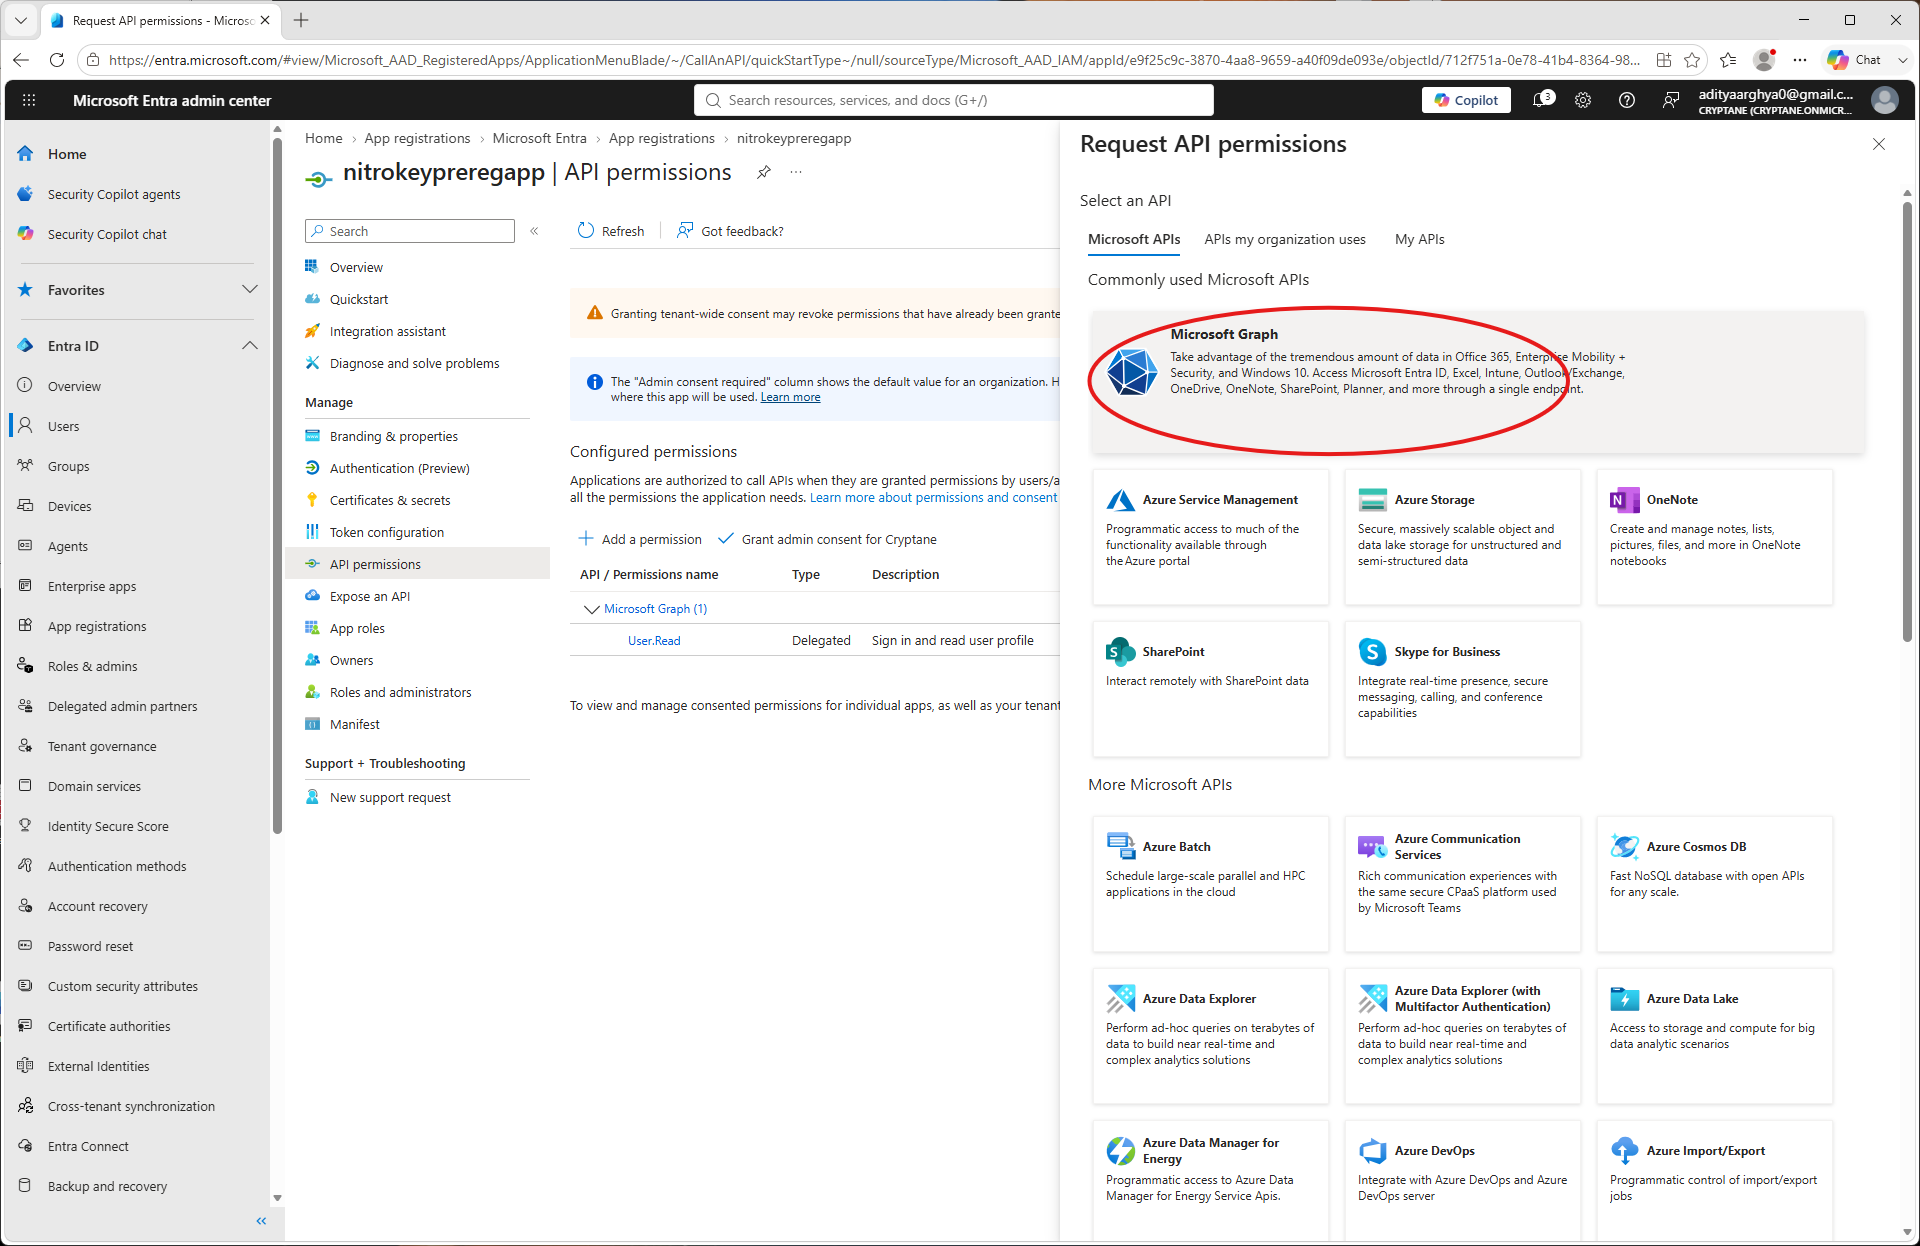
Select Microsoft Graph.
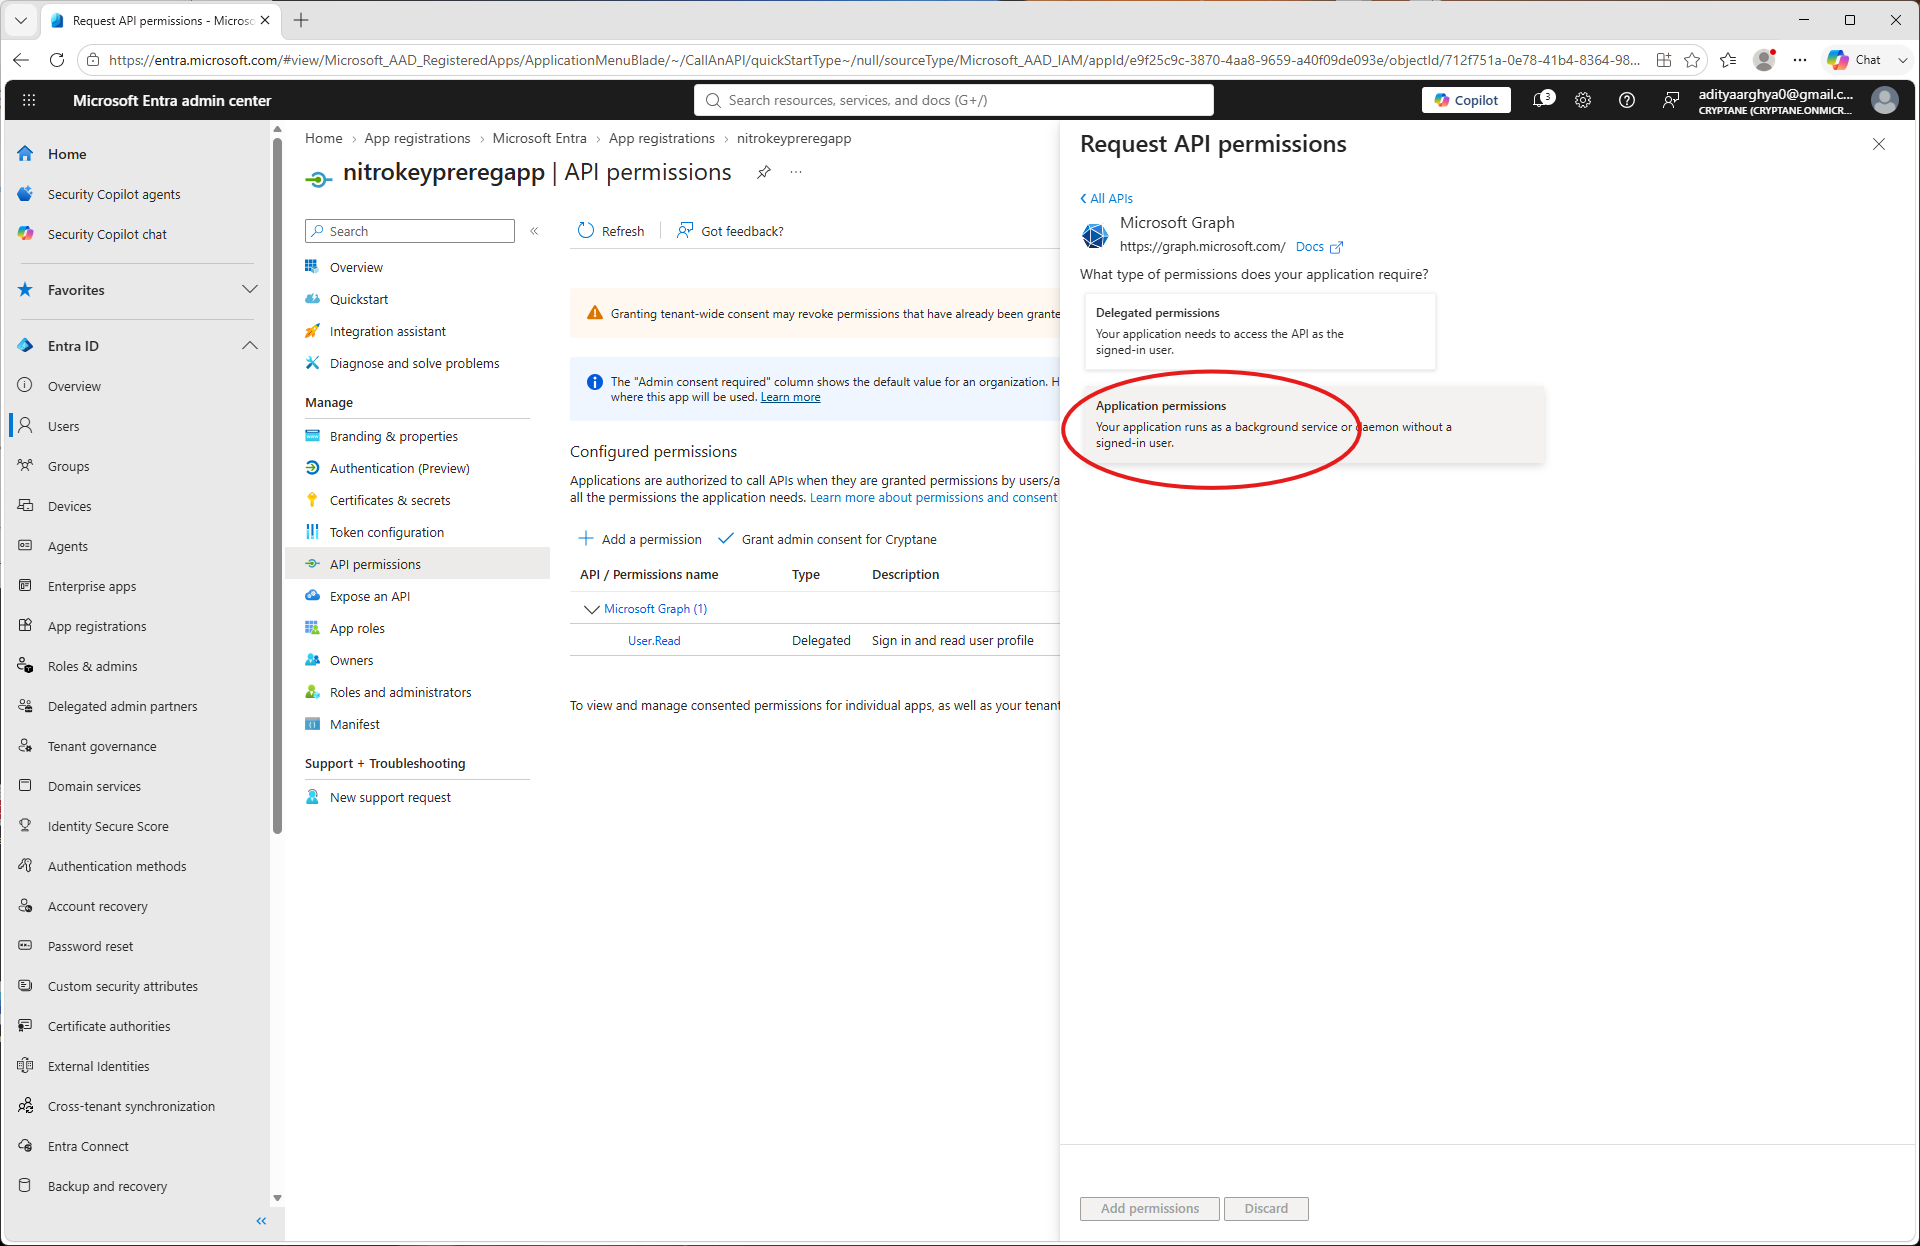
Vali „Rakenduse õigused”.
Search for
UserAuthenticationMethod.ReadWrite.Alland select it.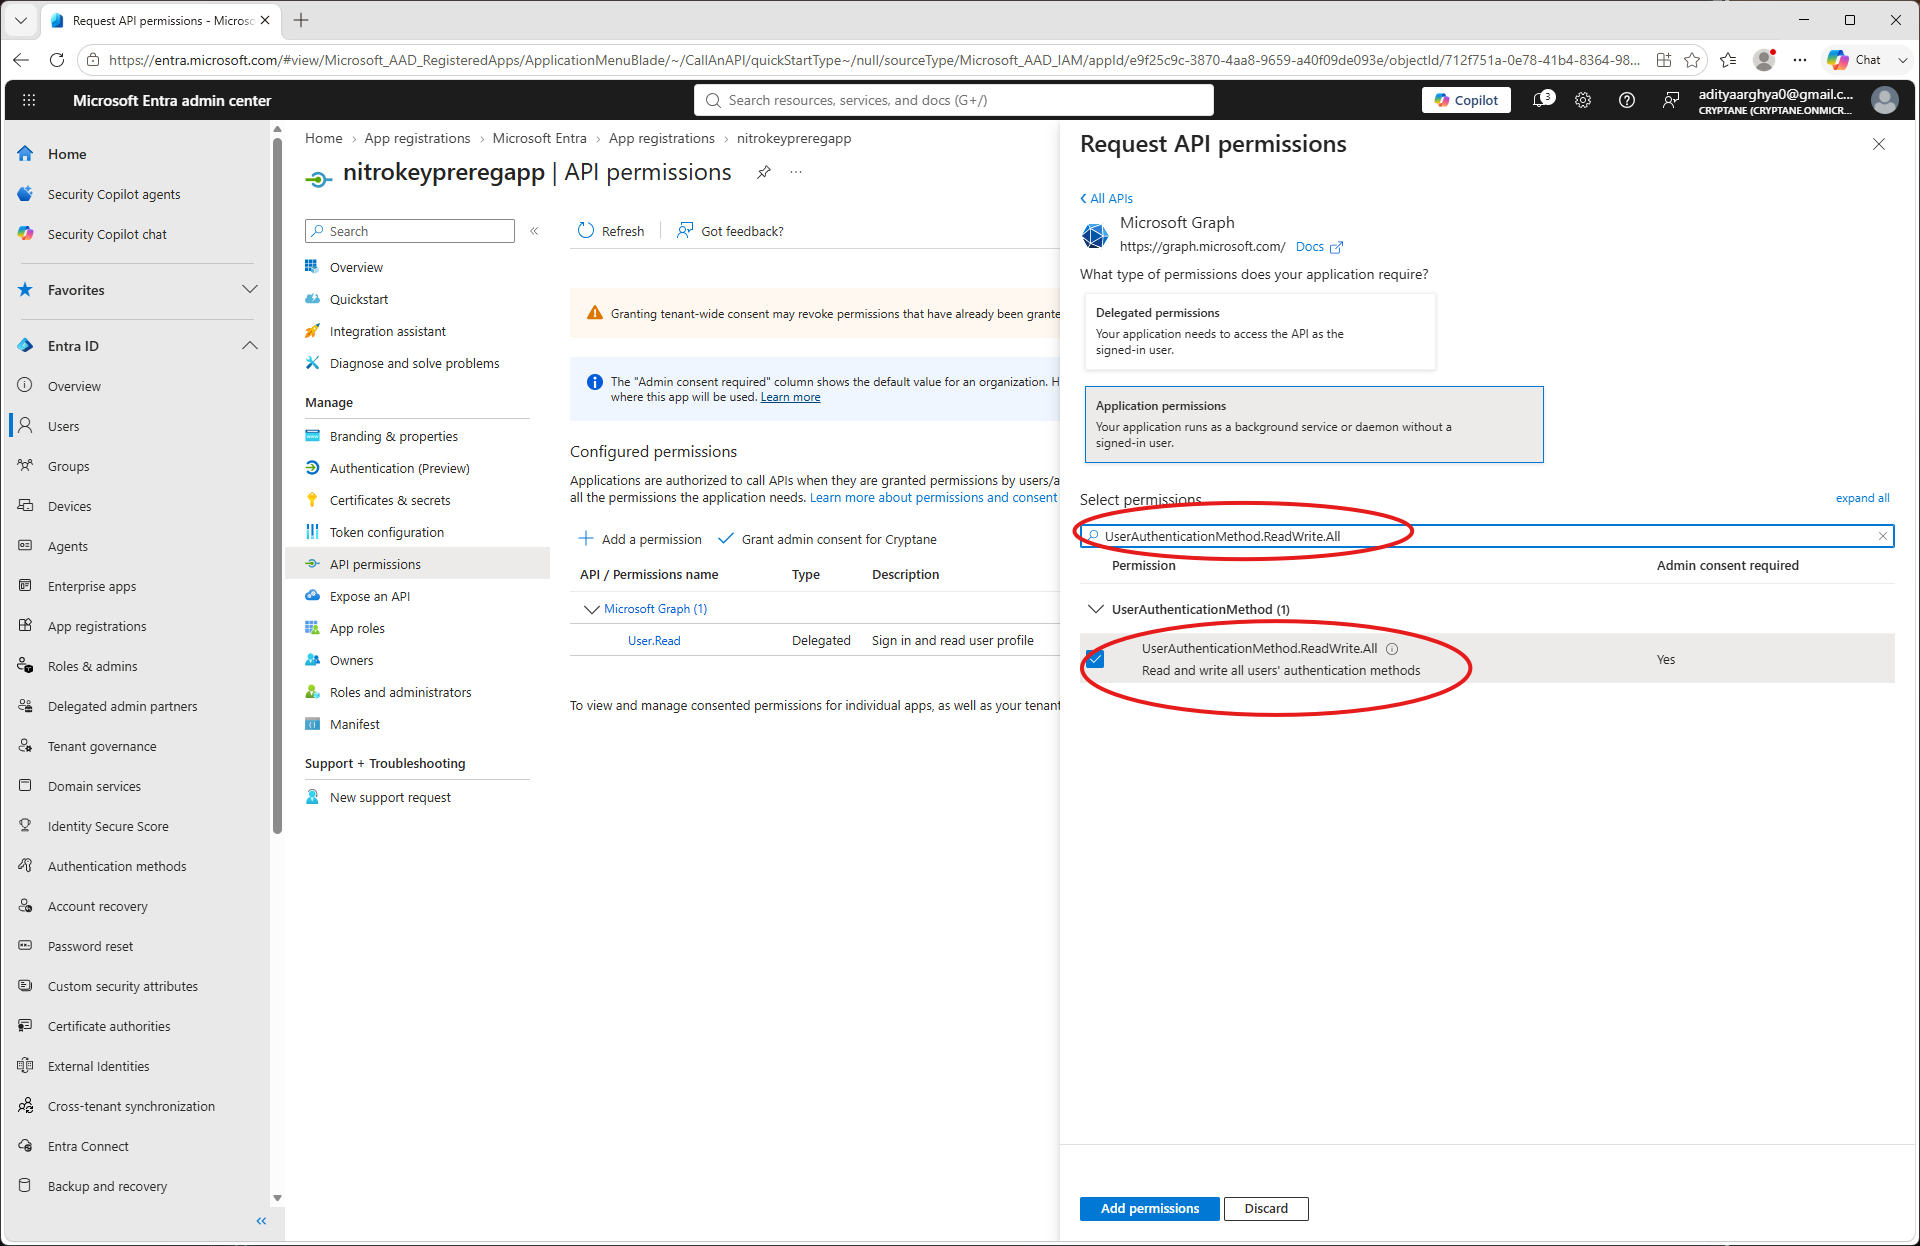
Search for
User.ReadWrite.Alland select it (Only if you want to be able to create users frompynitrokey). Click on the Add Permissions button.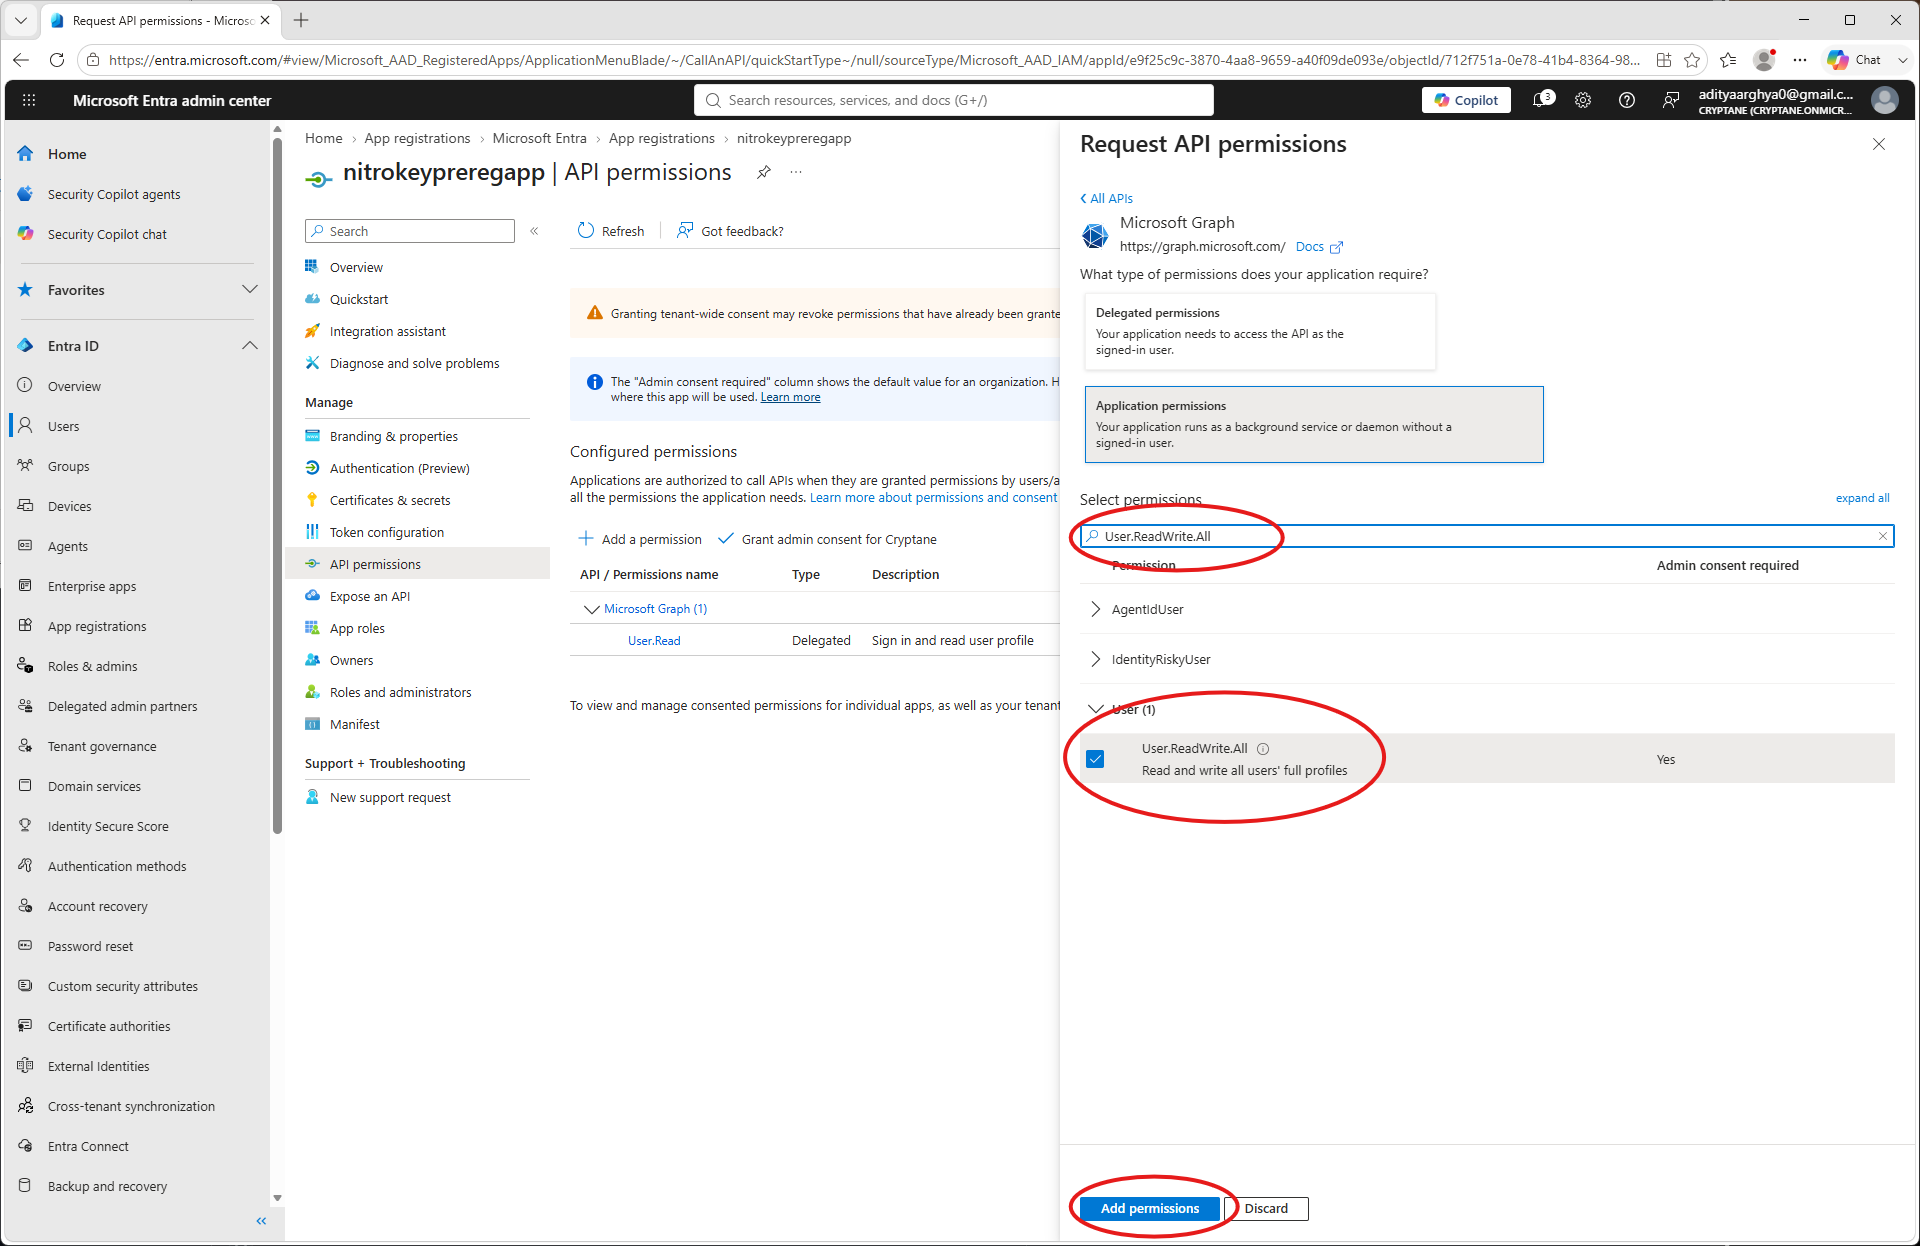
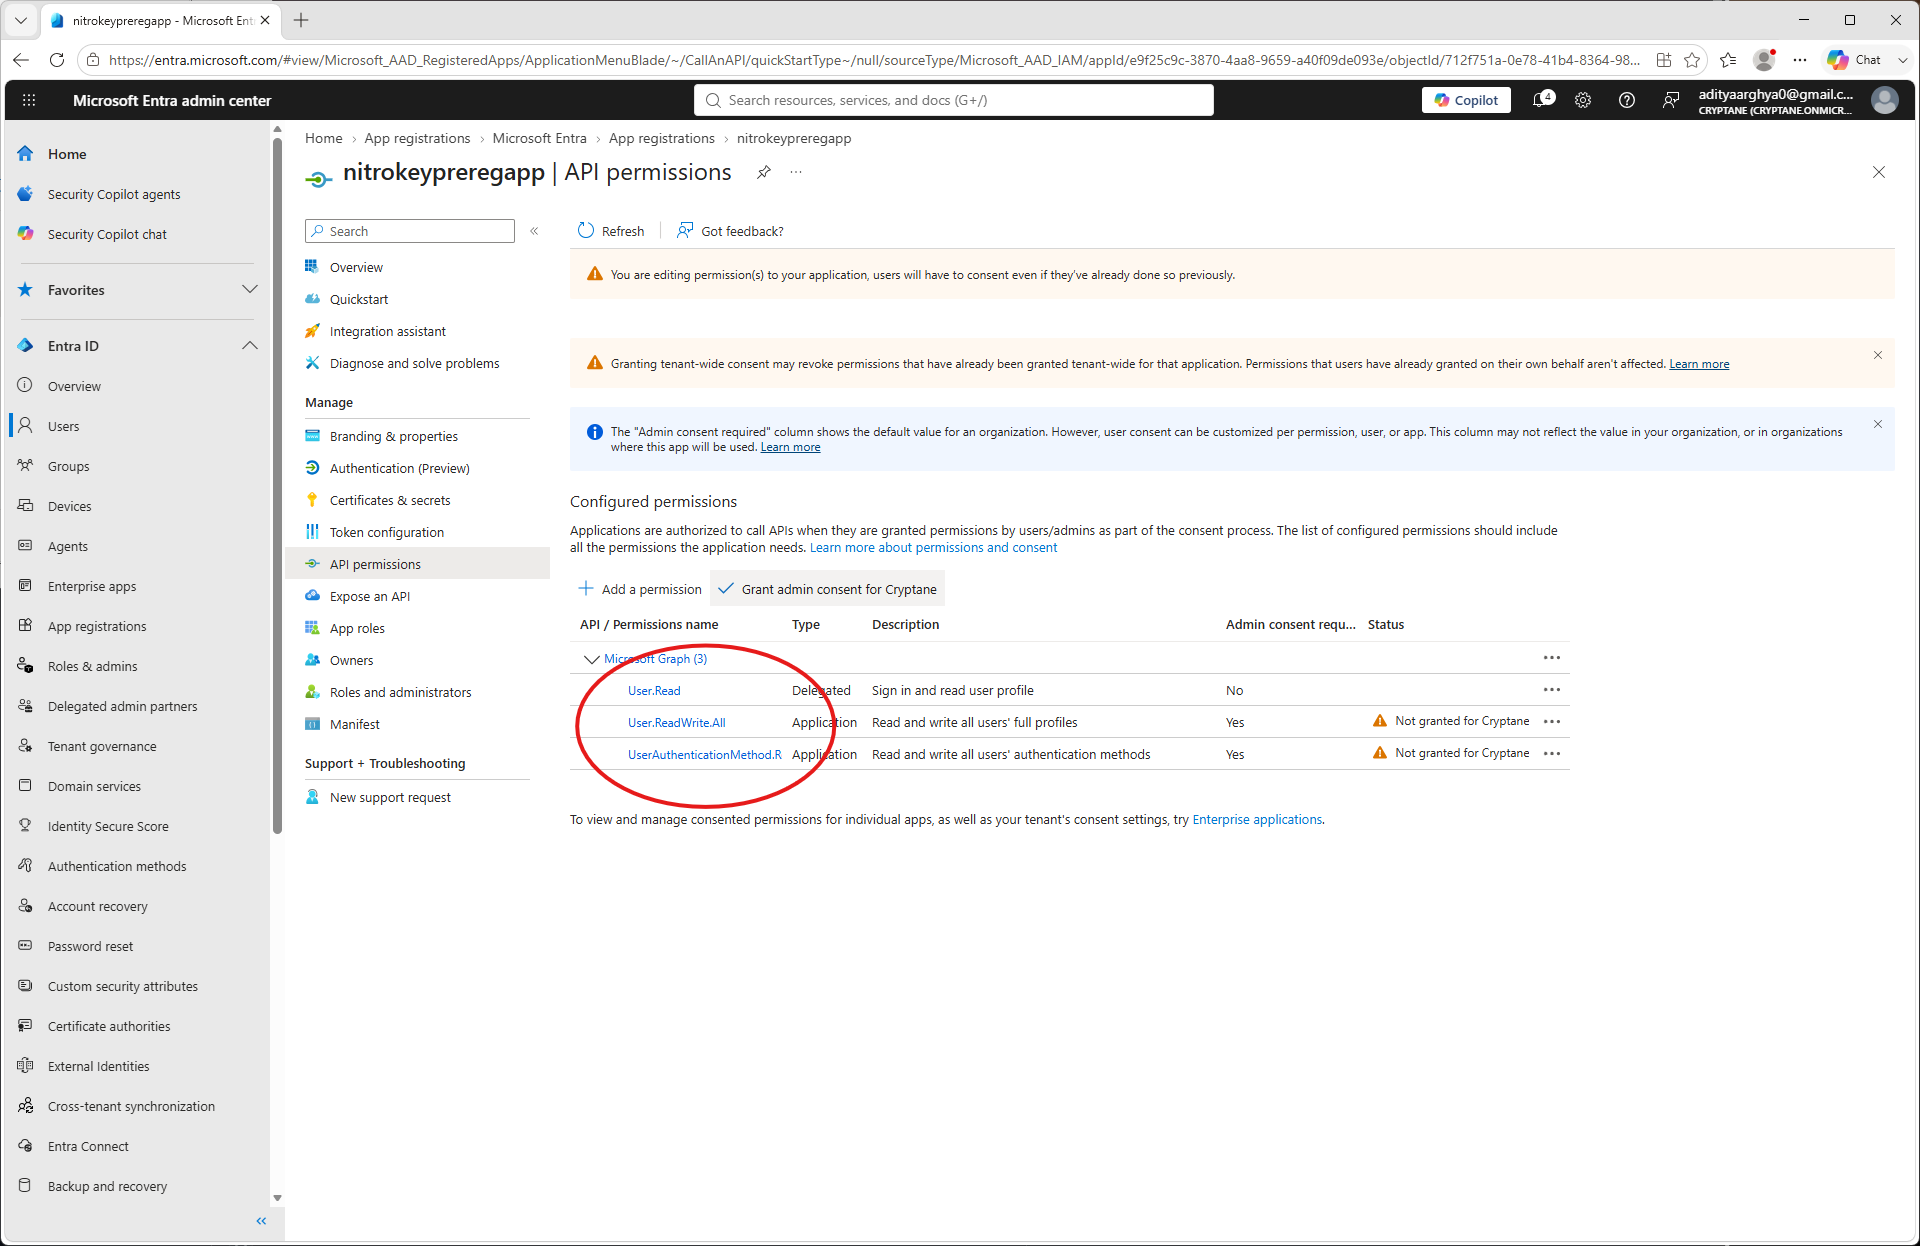
Kontrollige antud õigusi.
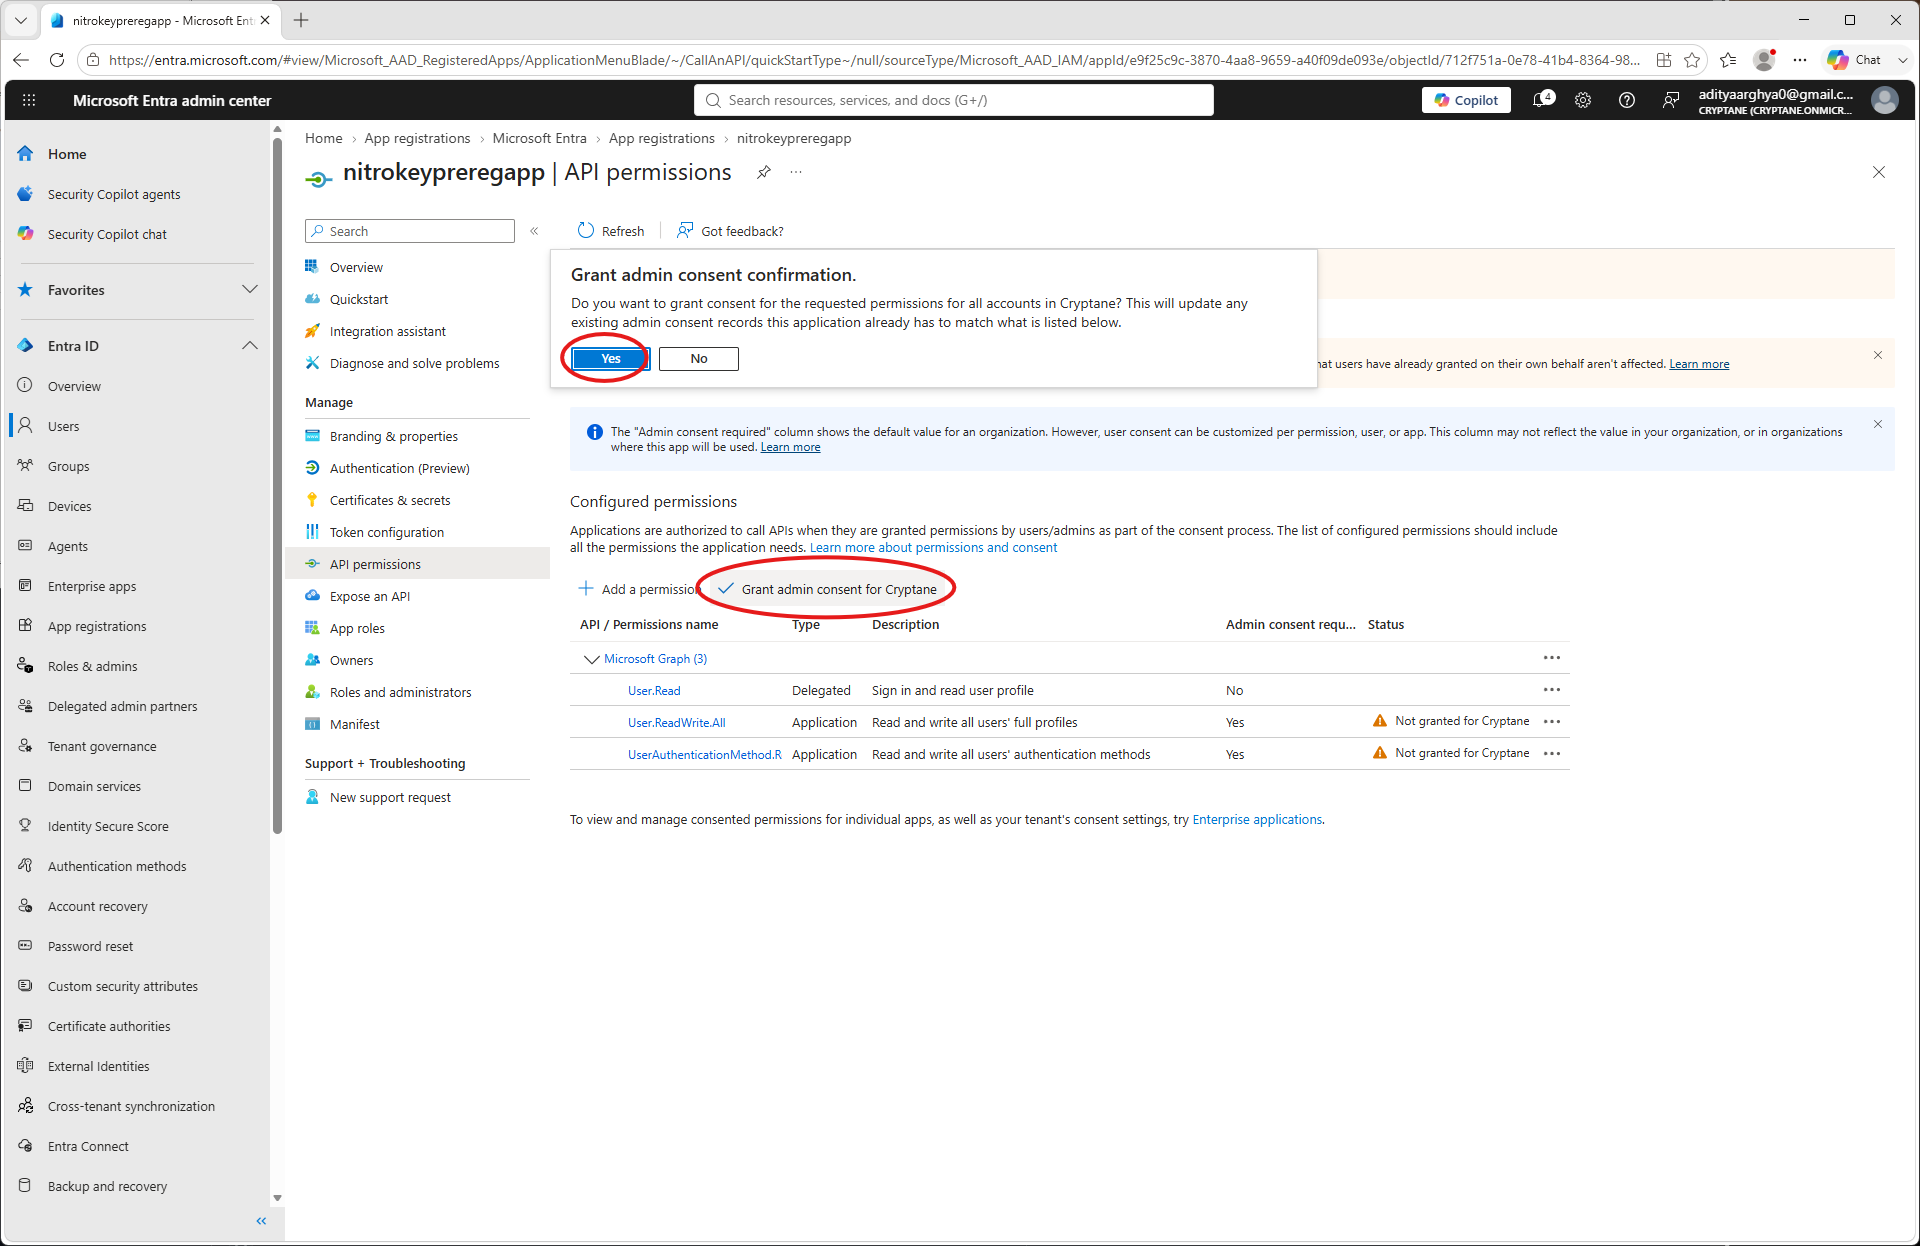
Klõpsake nuppu „Anna administraatori nõusolek“ ja kinnitage see.
Mine tagasi rakenduse avalehele ja vali vasakpoolsest menüüribast „Sertifikaadid ja salajased andmed“
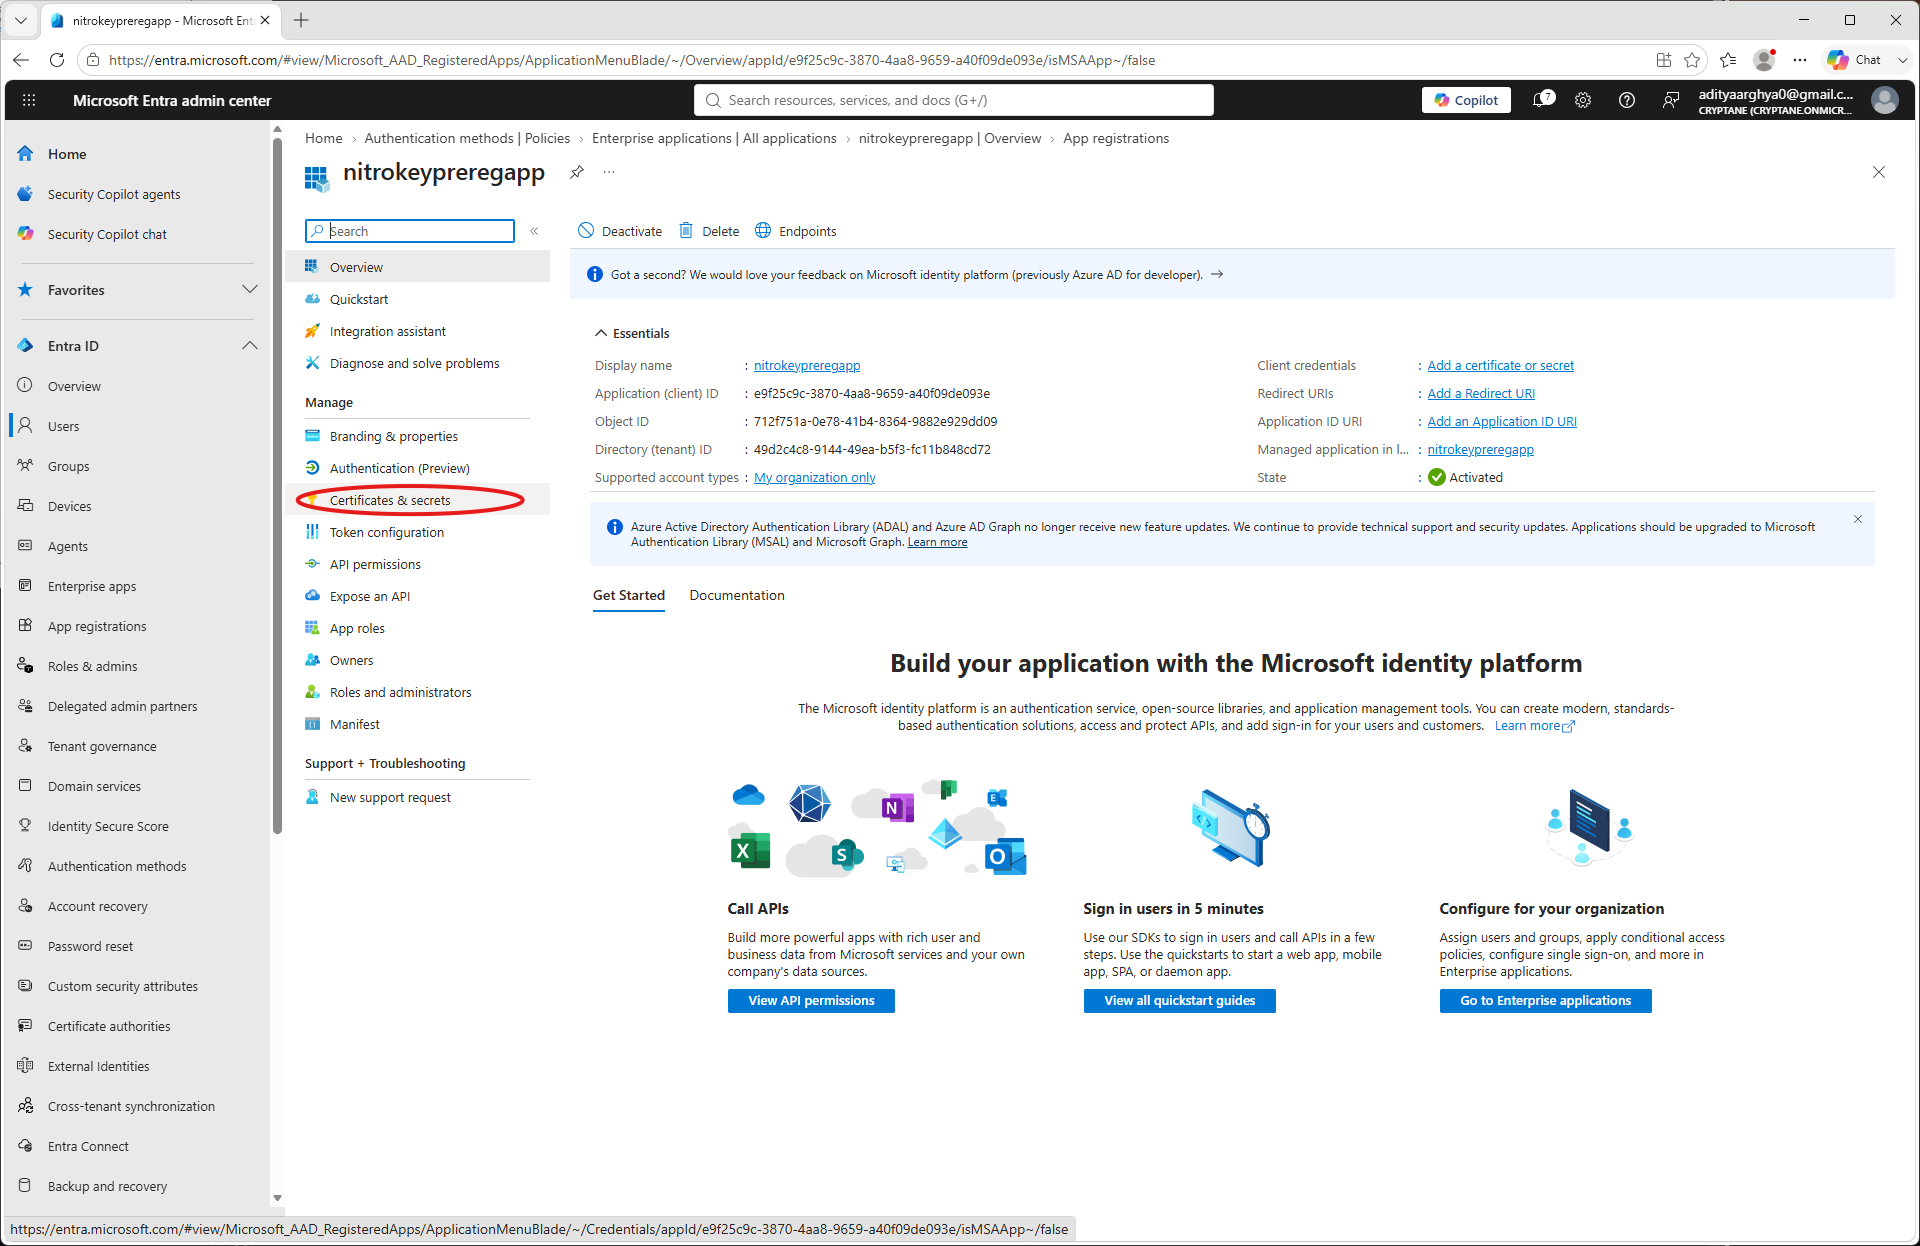
Klõpsa „Uus kliendi salajane võti“
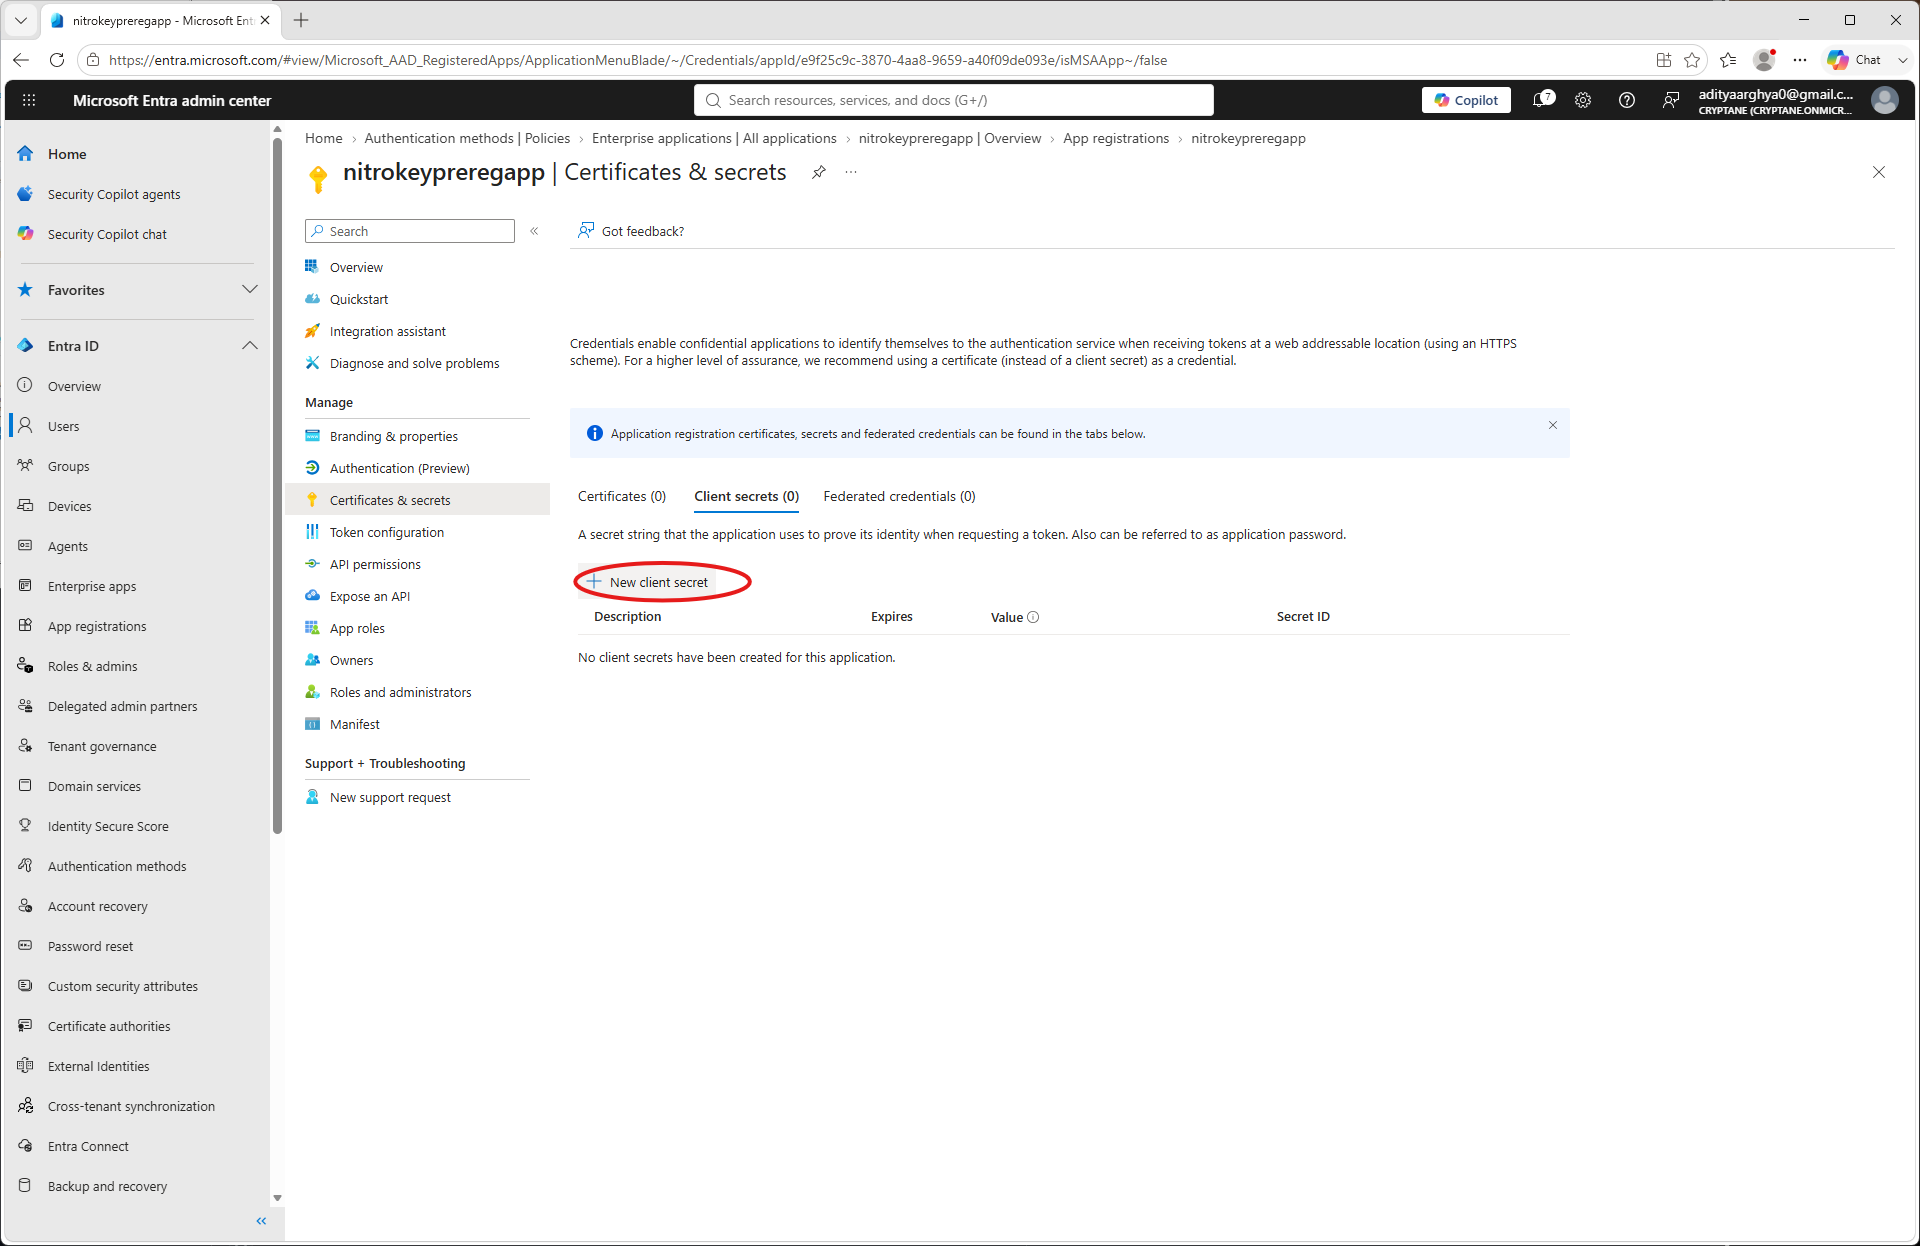
Sisestage nimi ja kehtivusaeg ning klõpsake seejärel nuppu „Lisa”
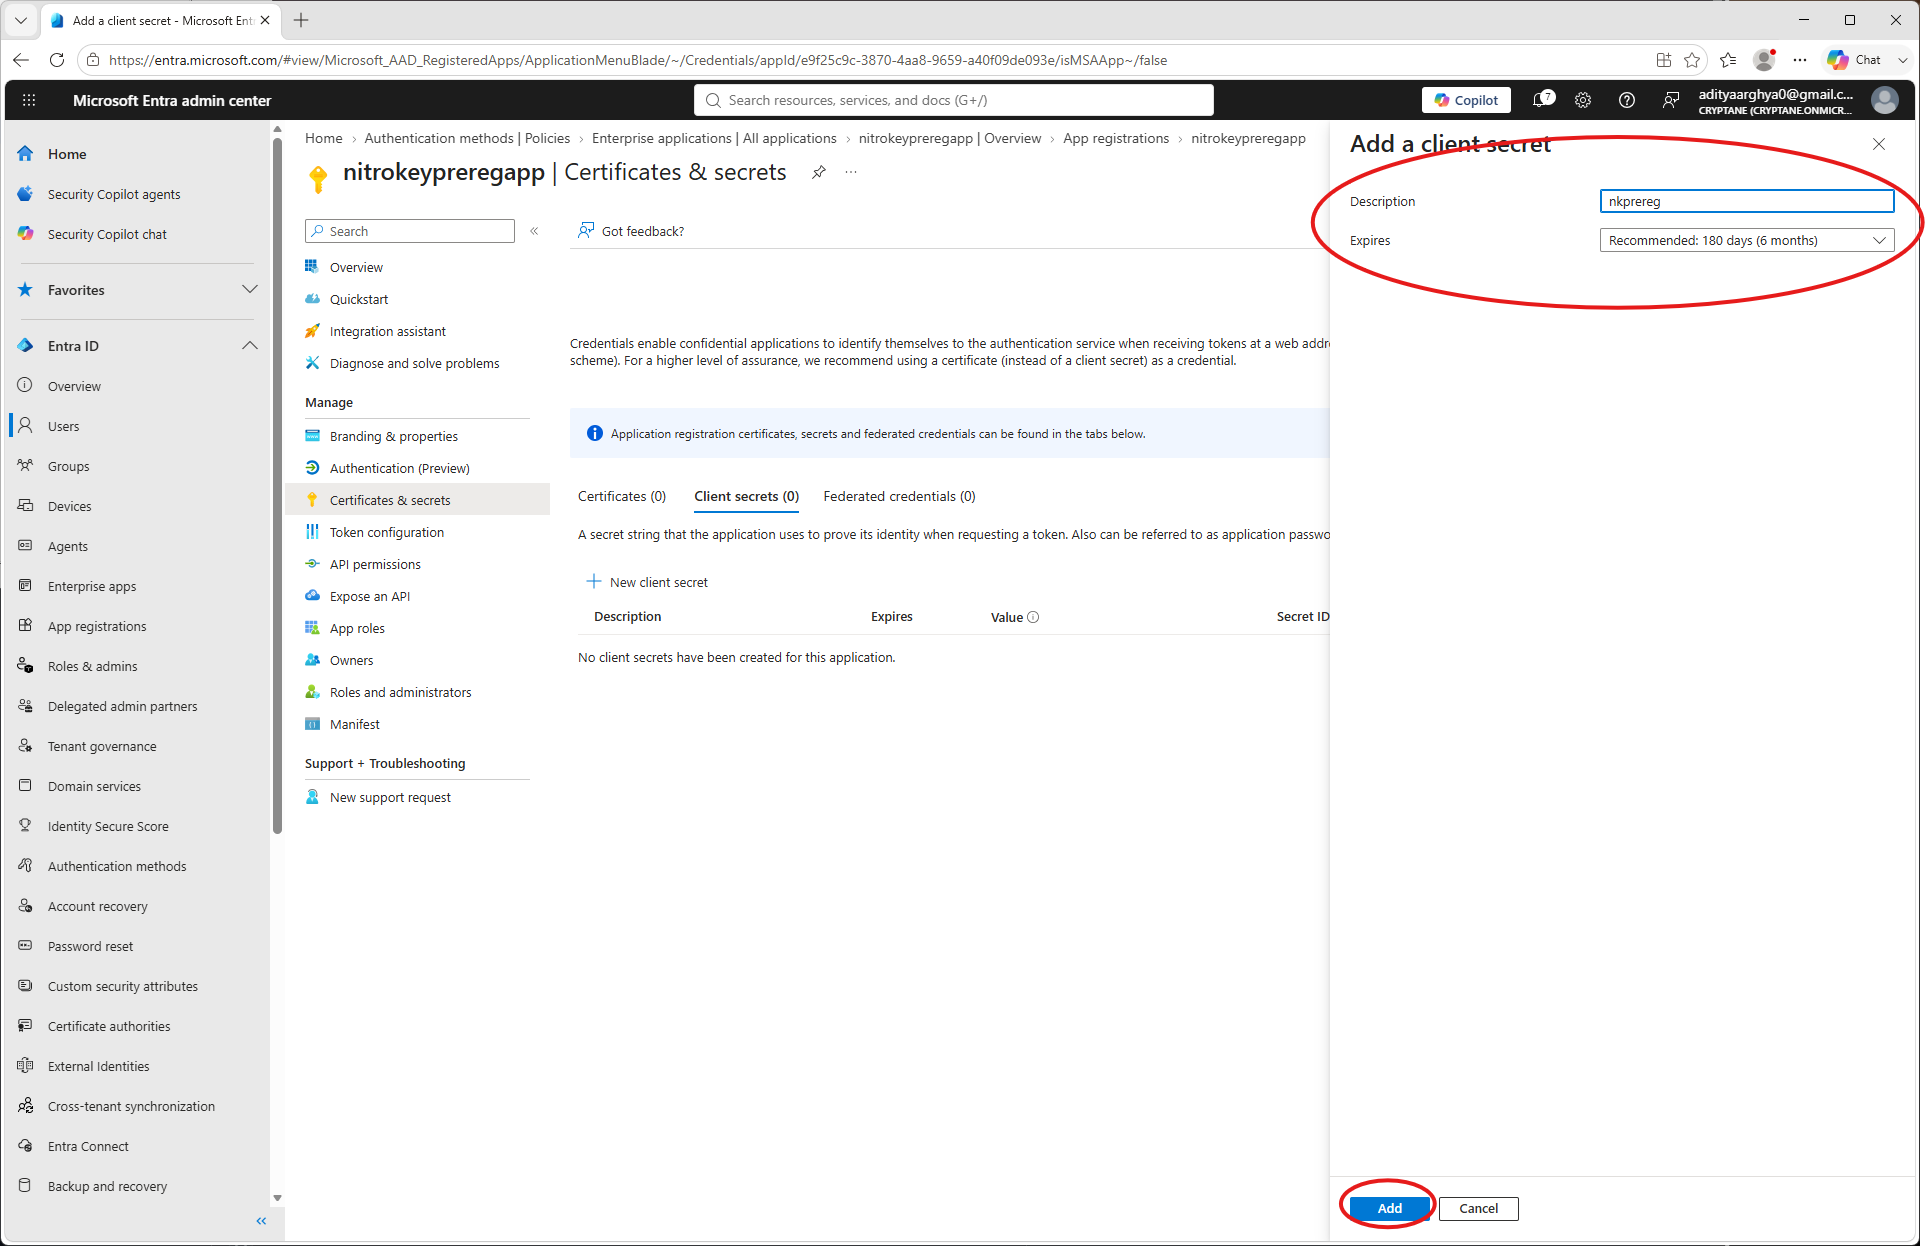
Kirjutage kliendi salakood üles (hiljem ei ole seda enam võimalik vaadata).
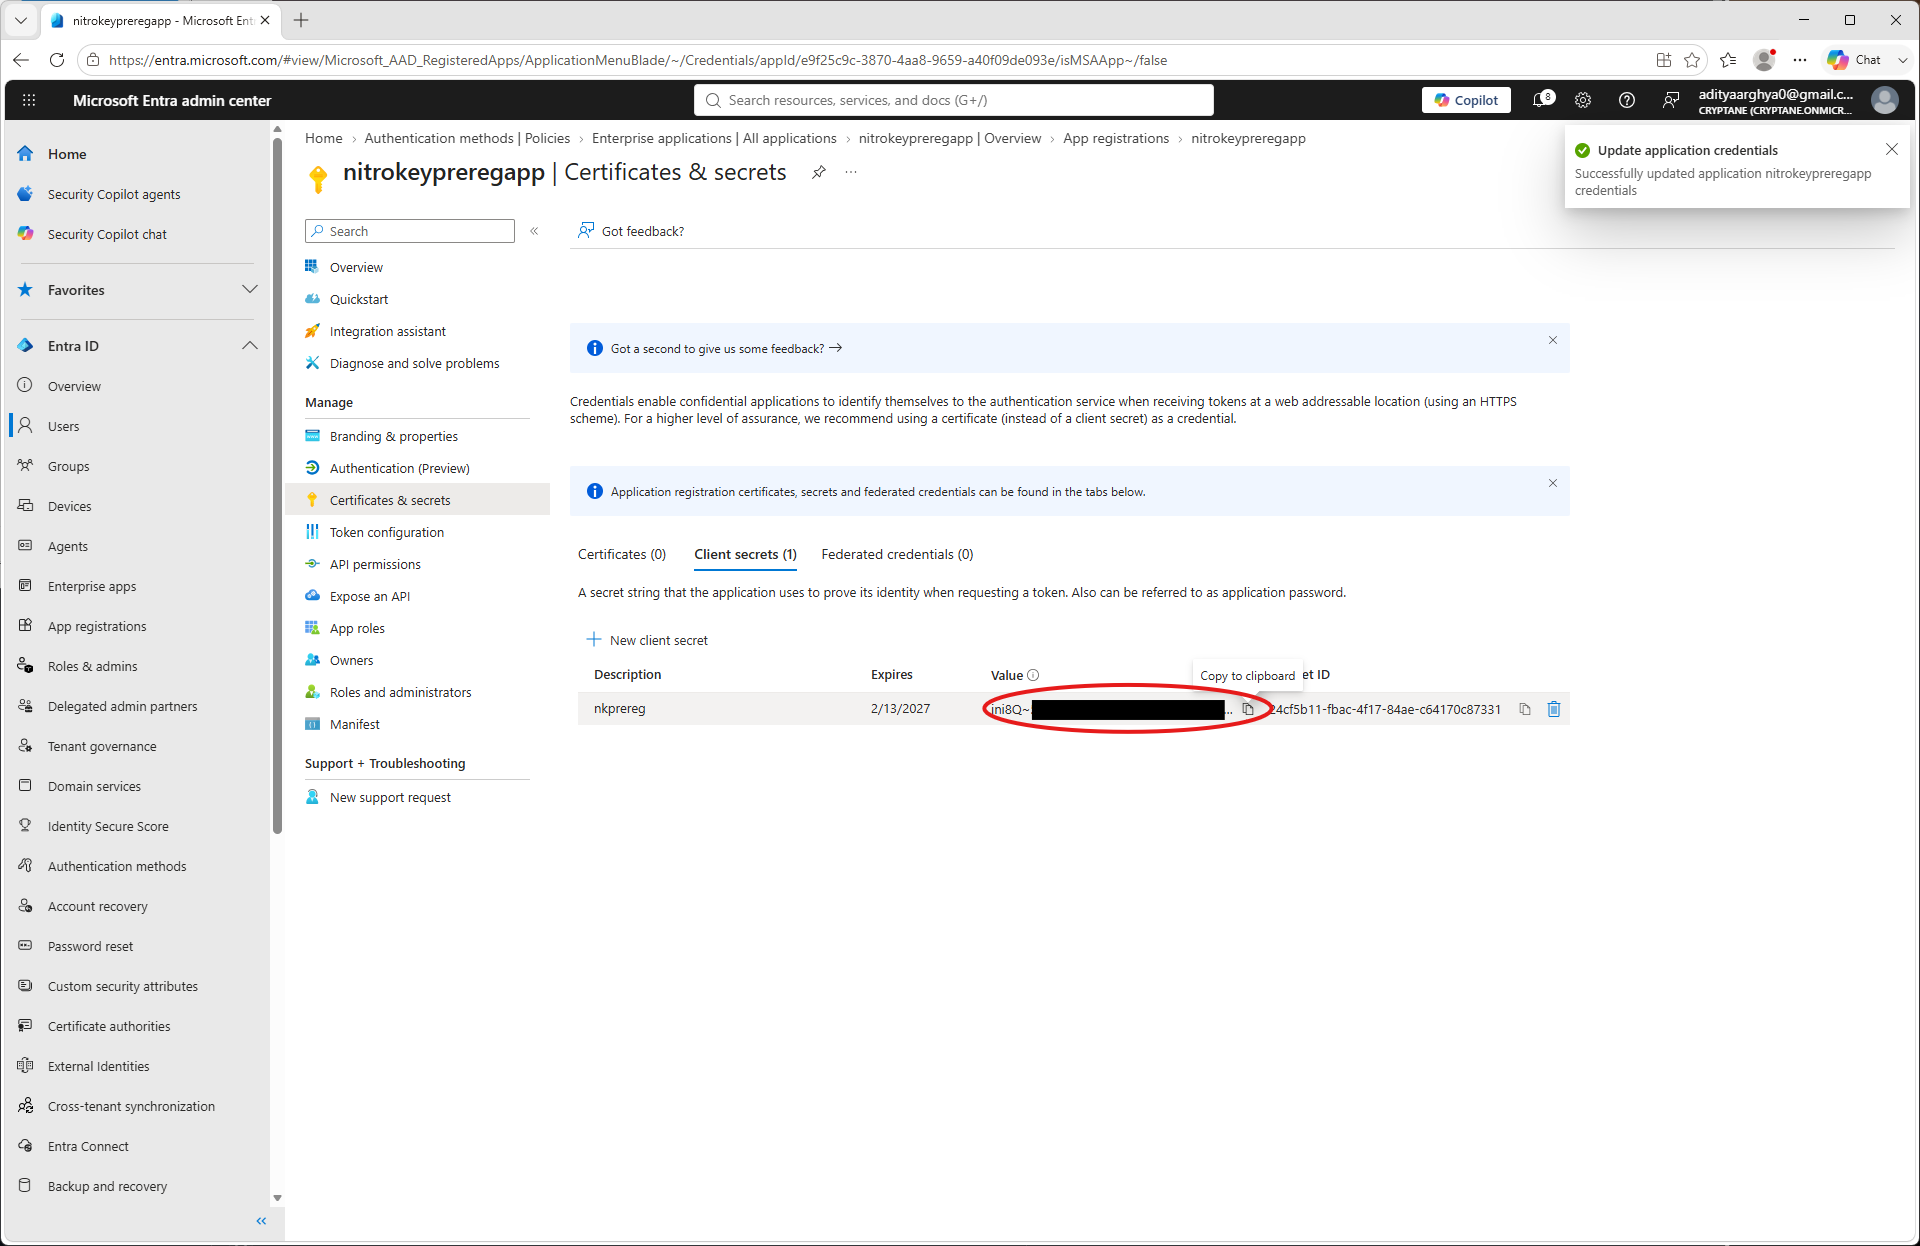
Klõpsake vasakul paneelil valikut „Autentimismeetodid”.
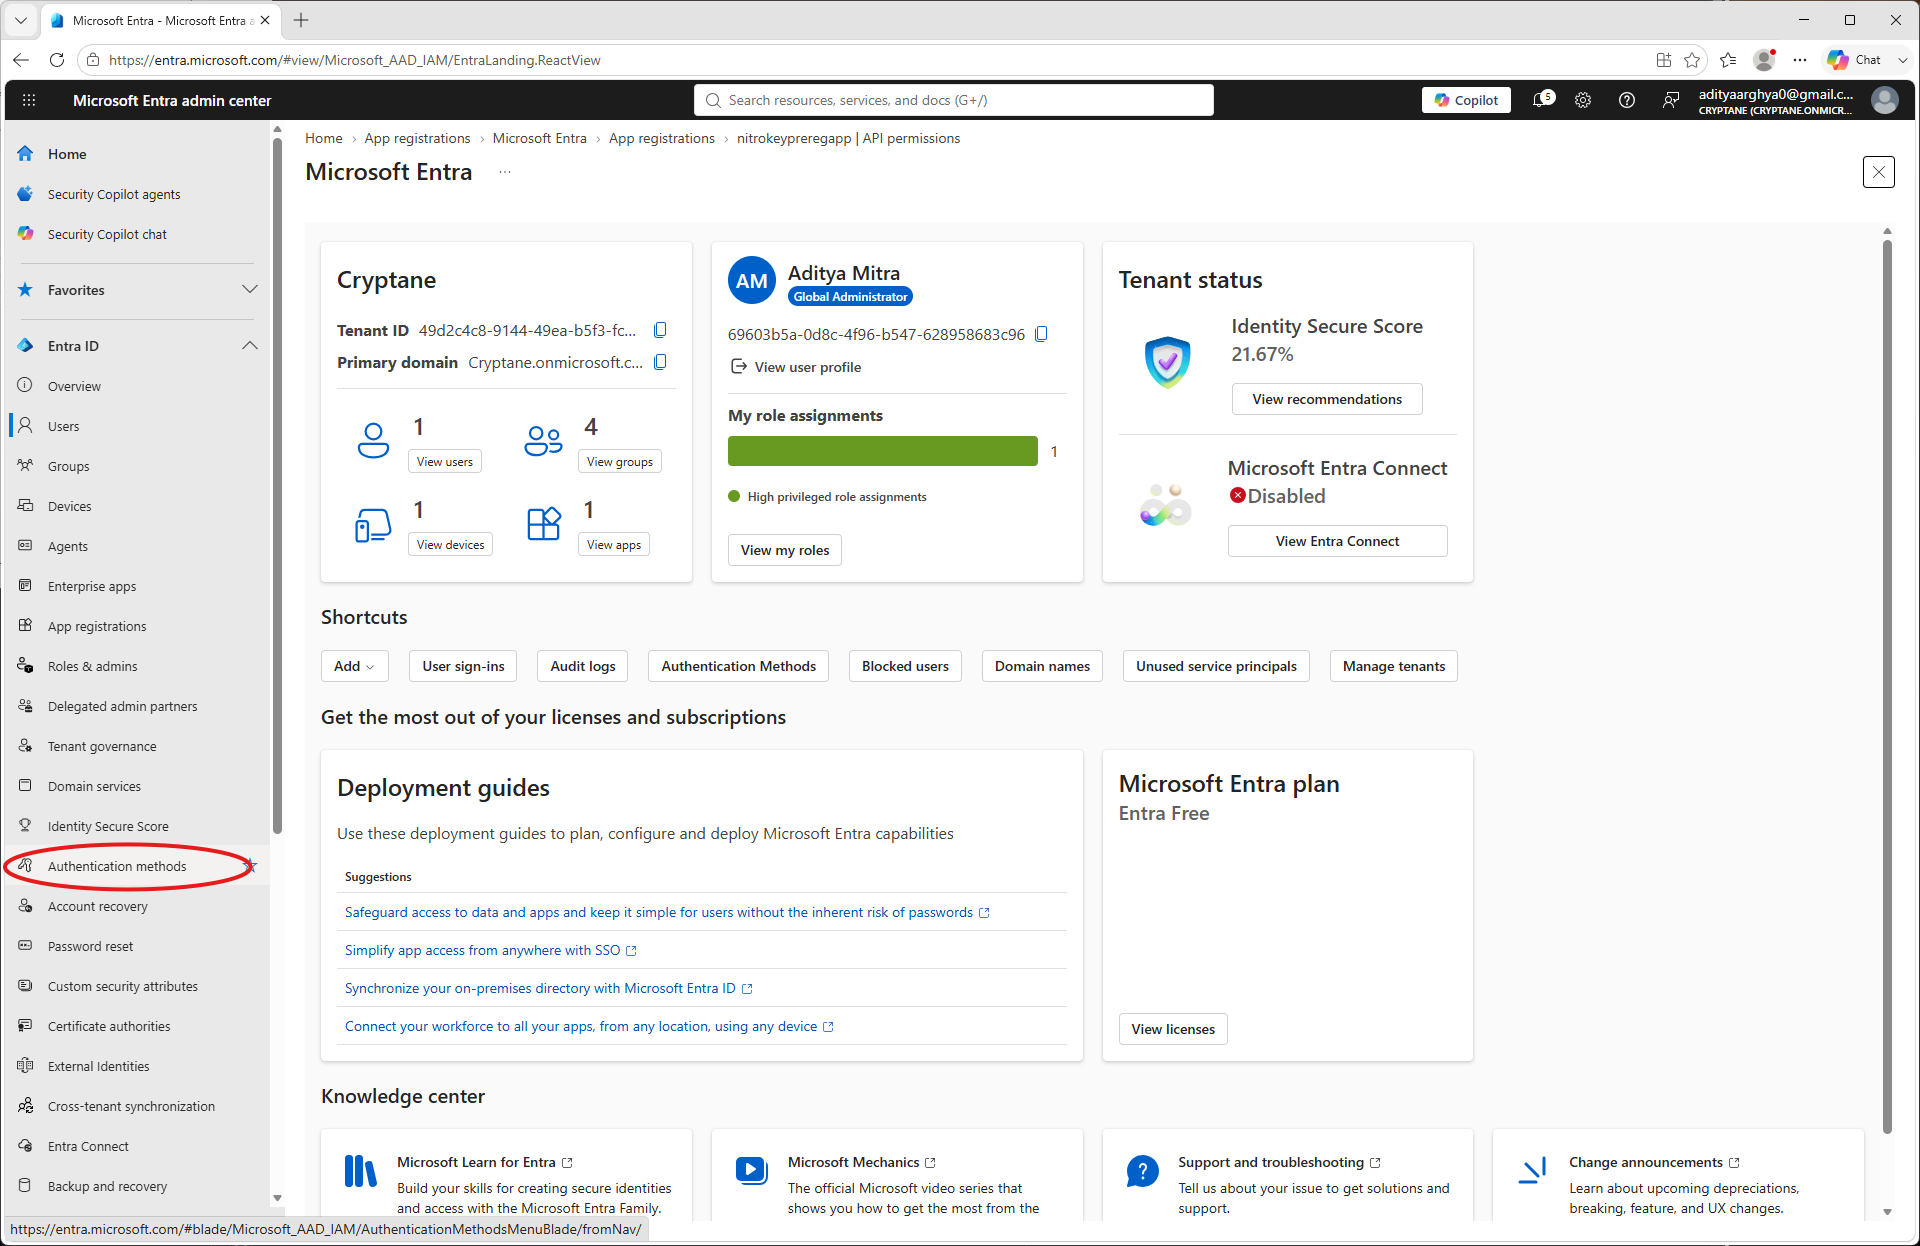
Select Passkey (FIDO2).
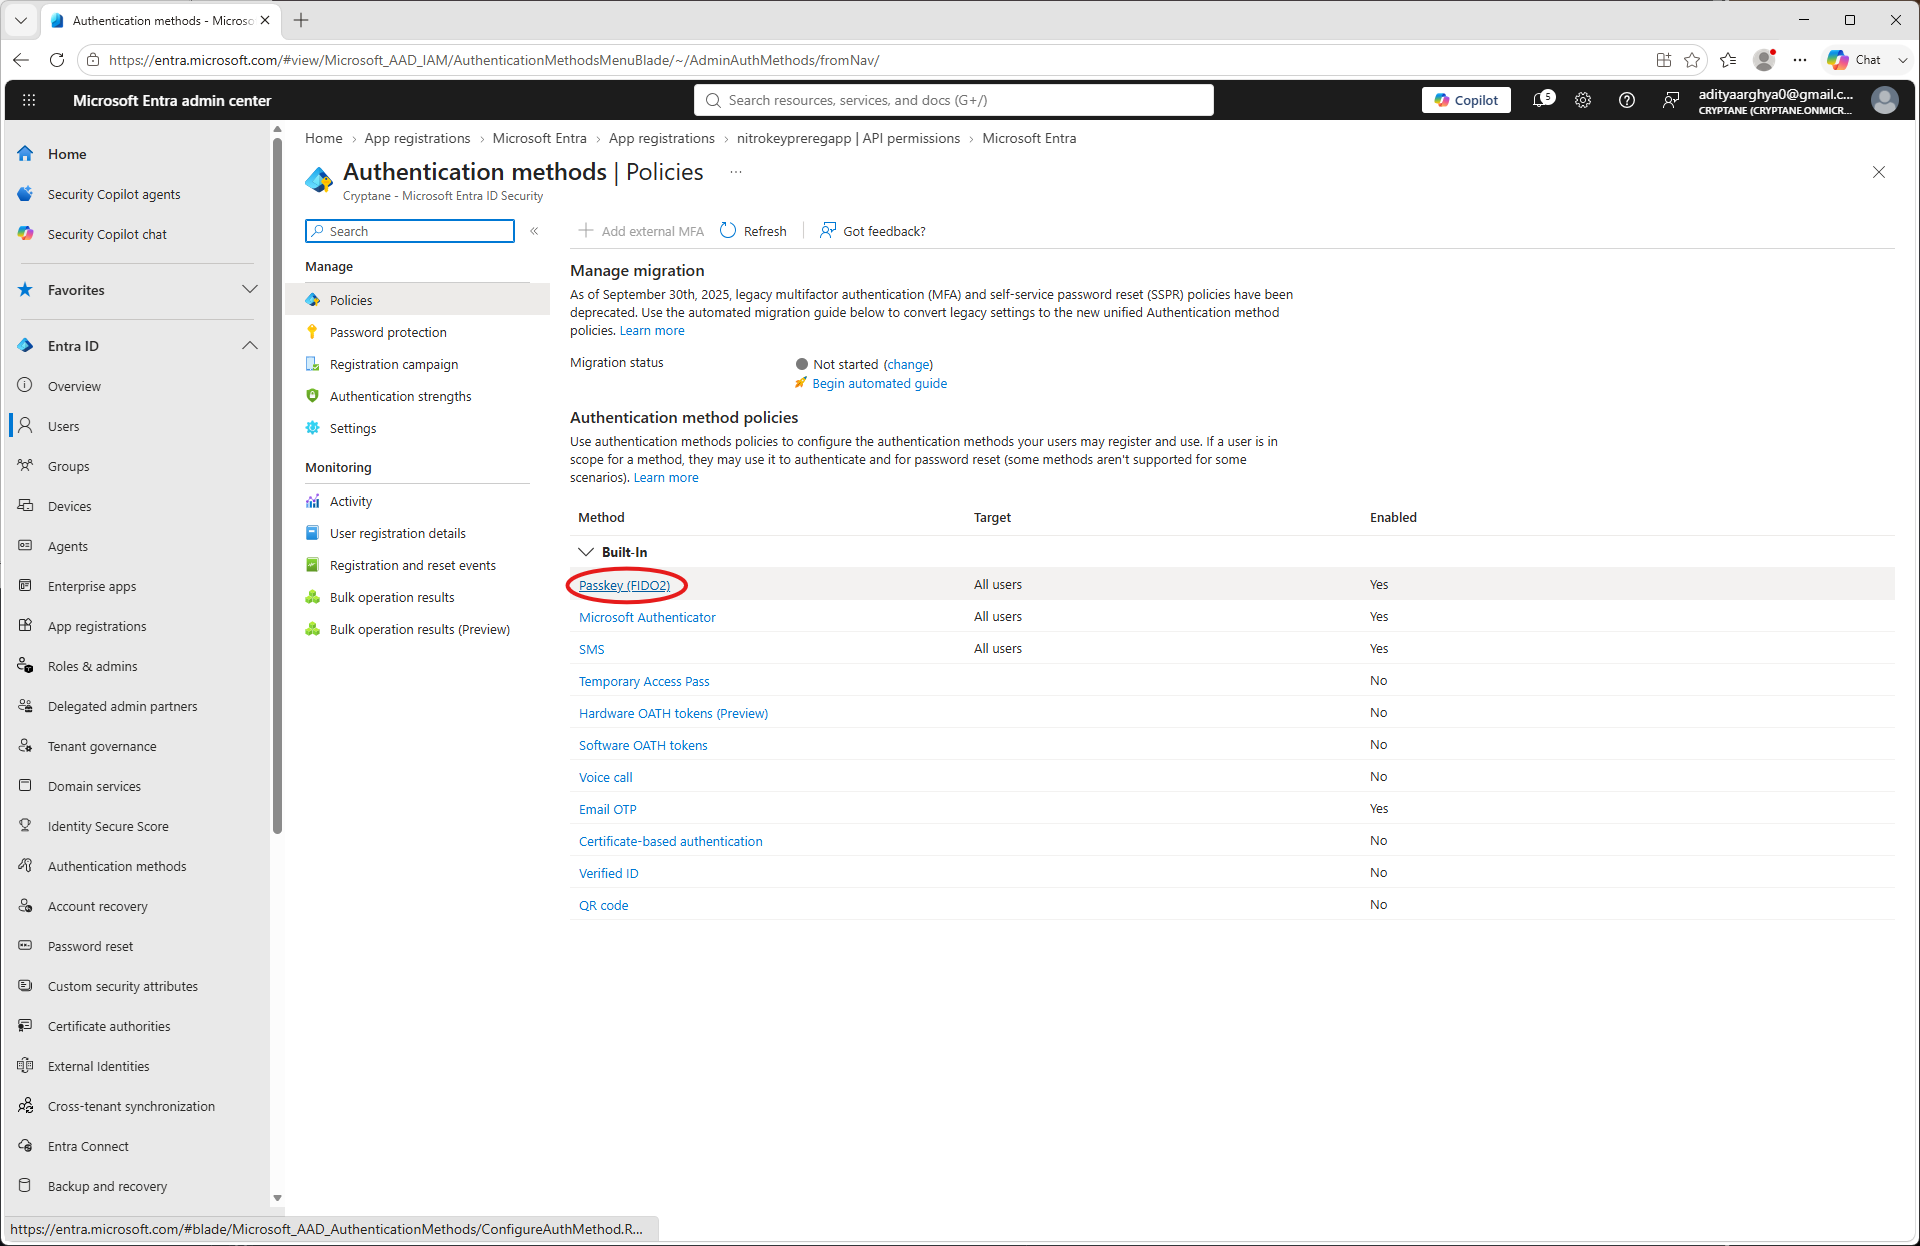
Click on the Configure tab.
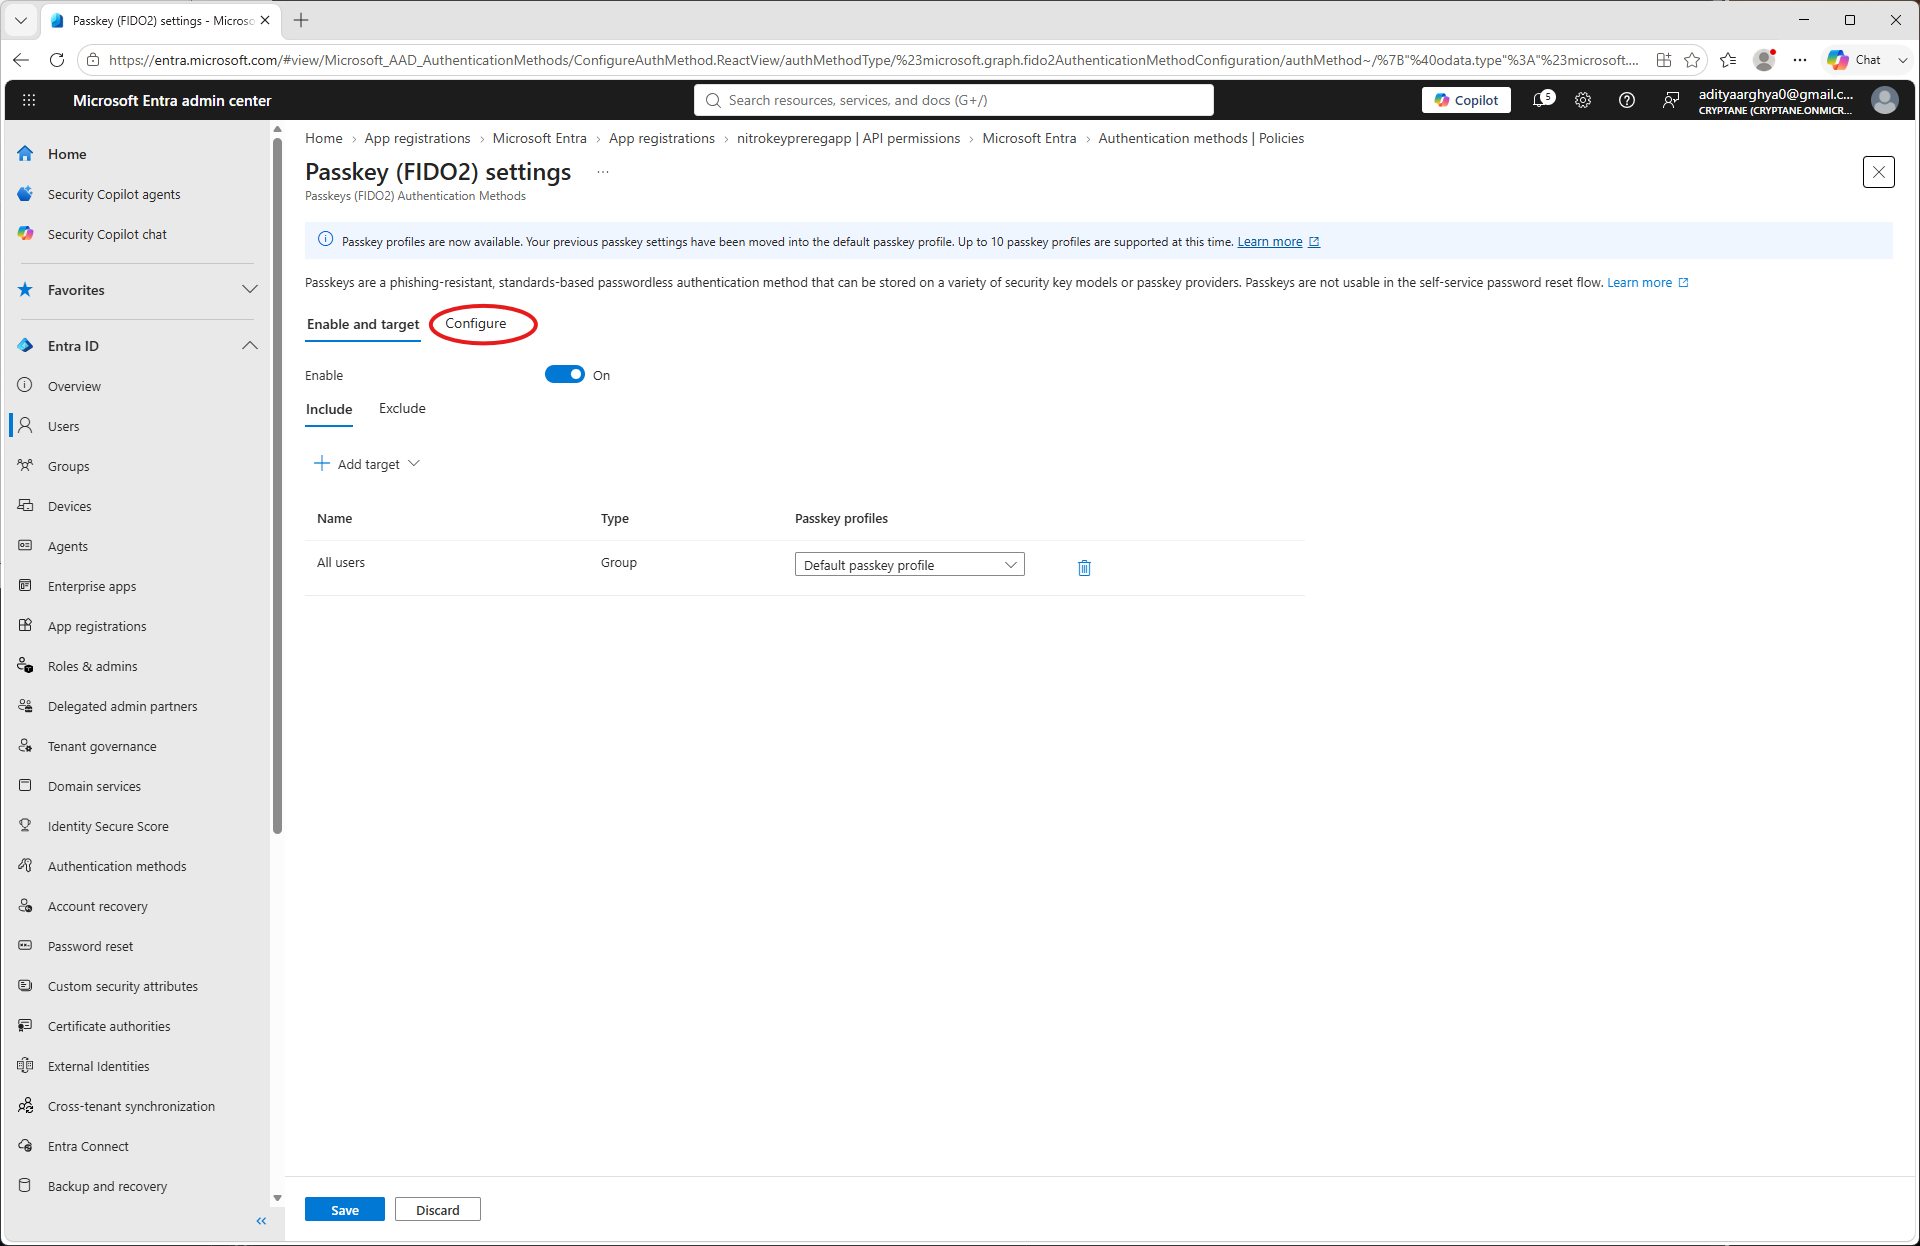
Click on Default Passkey profile
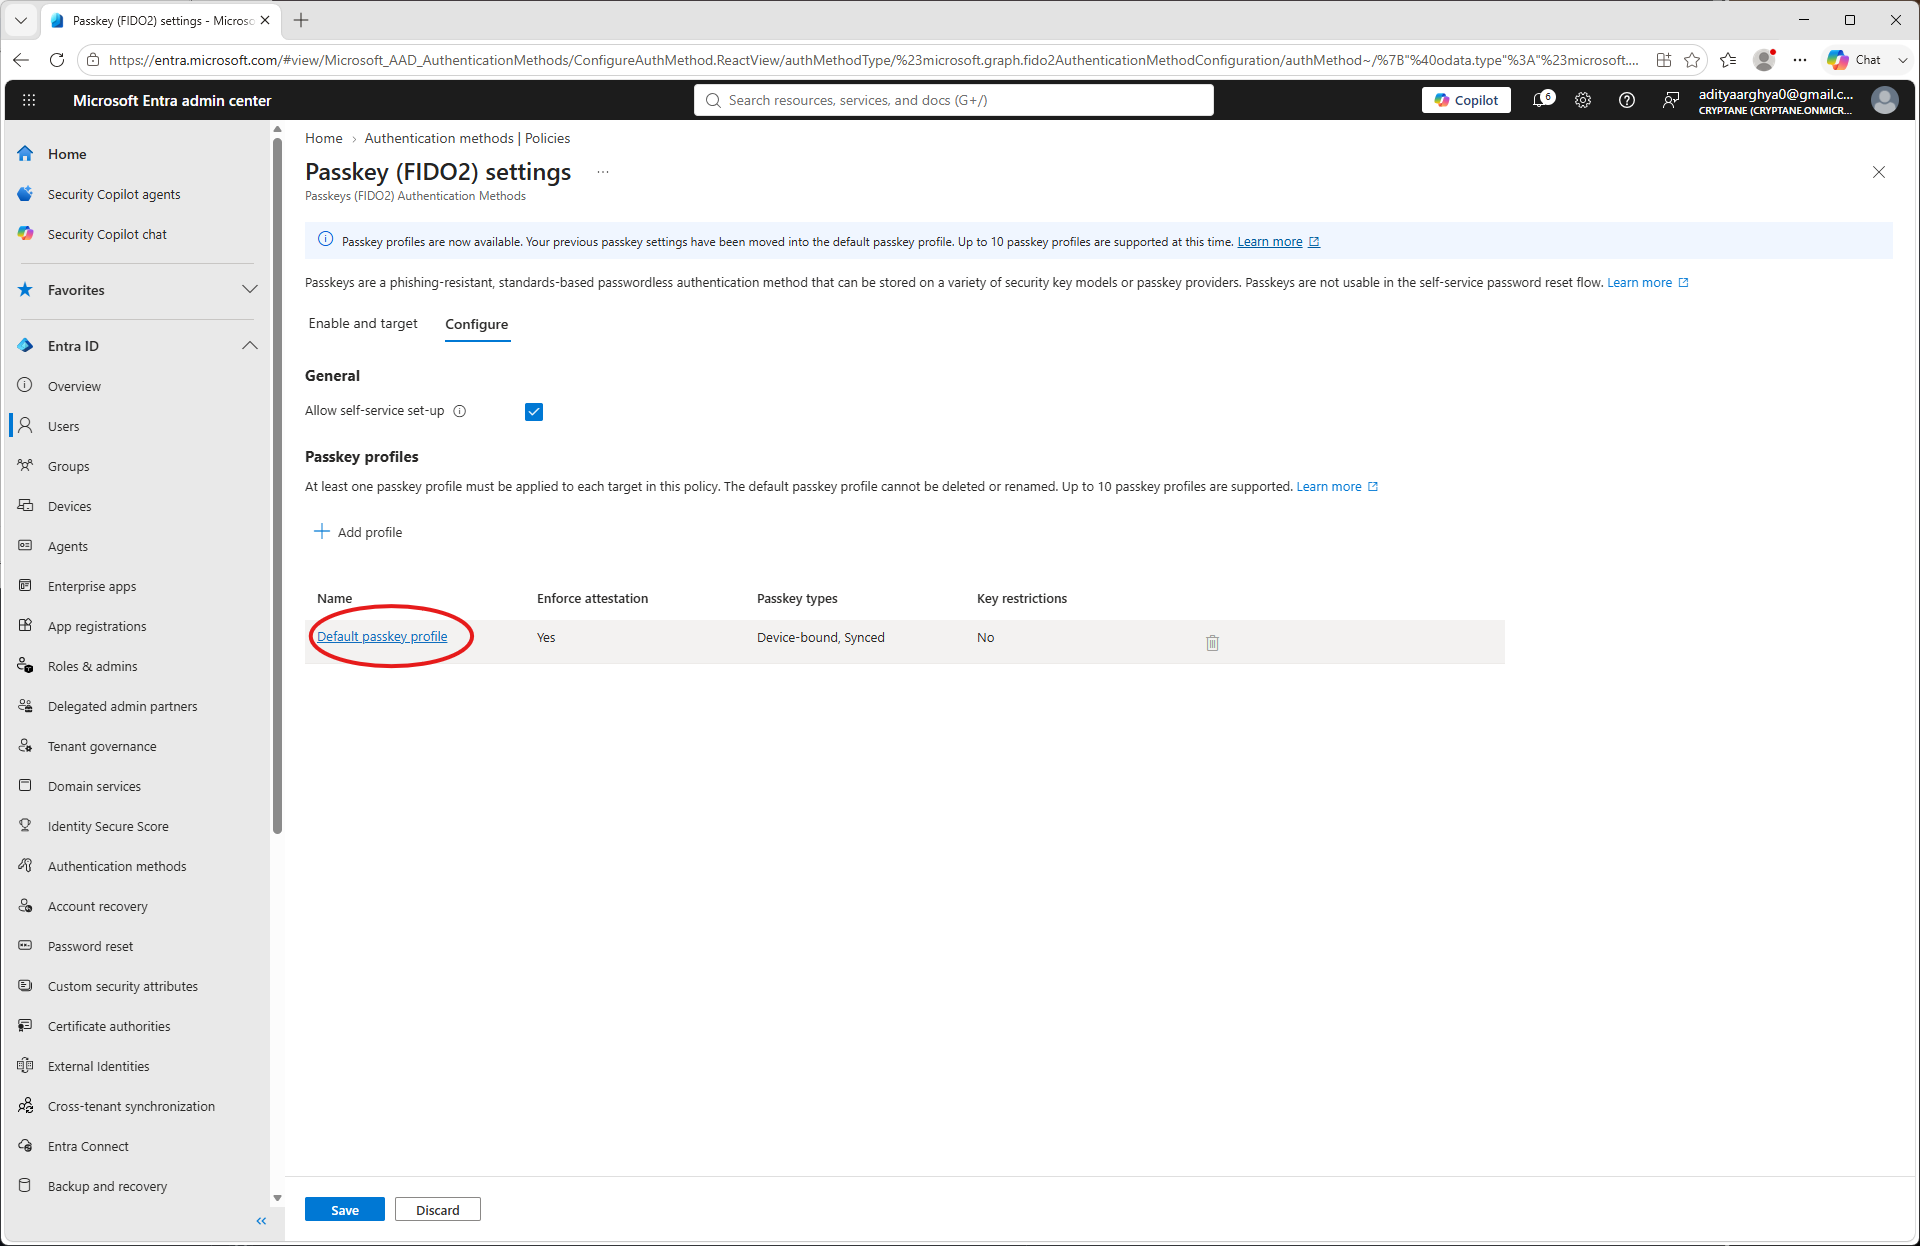
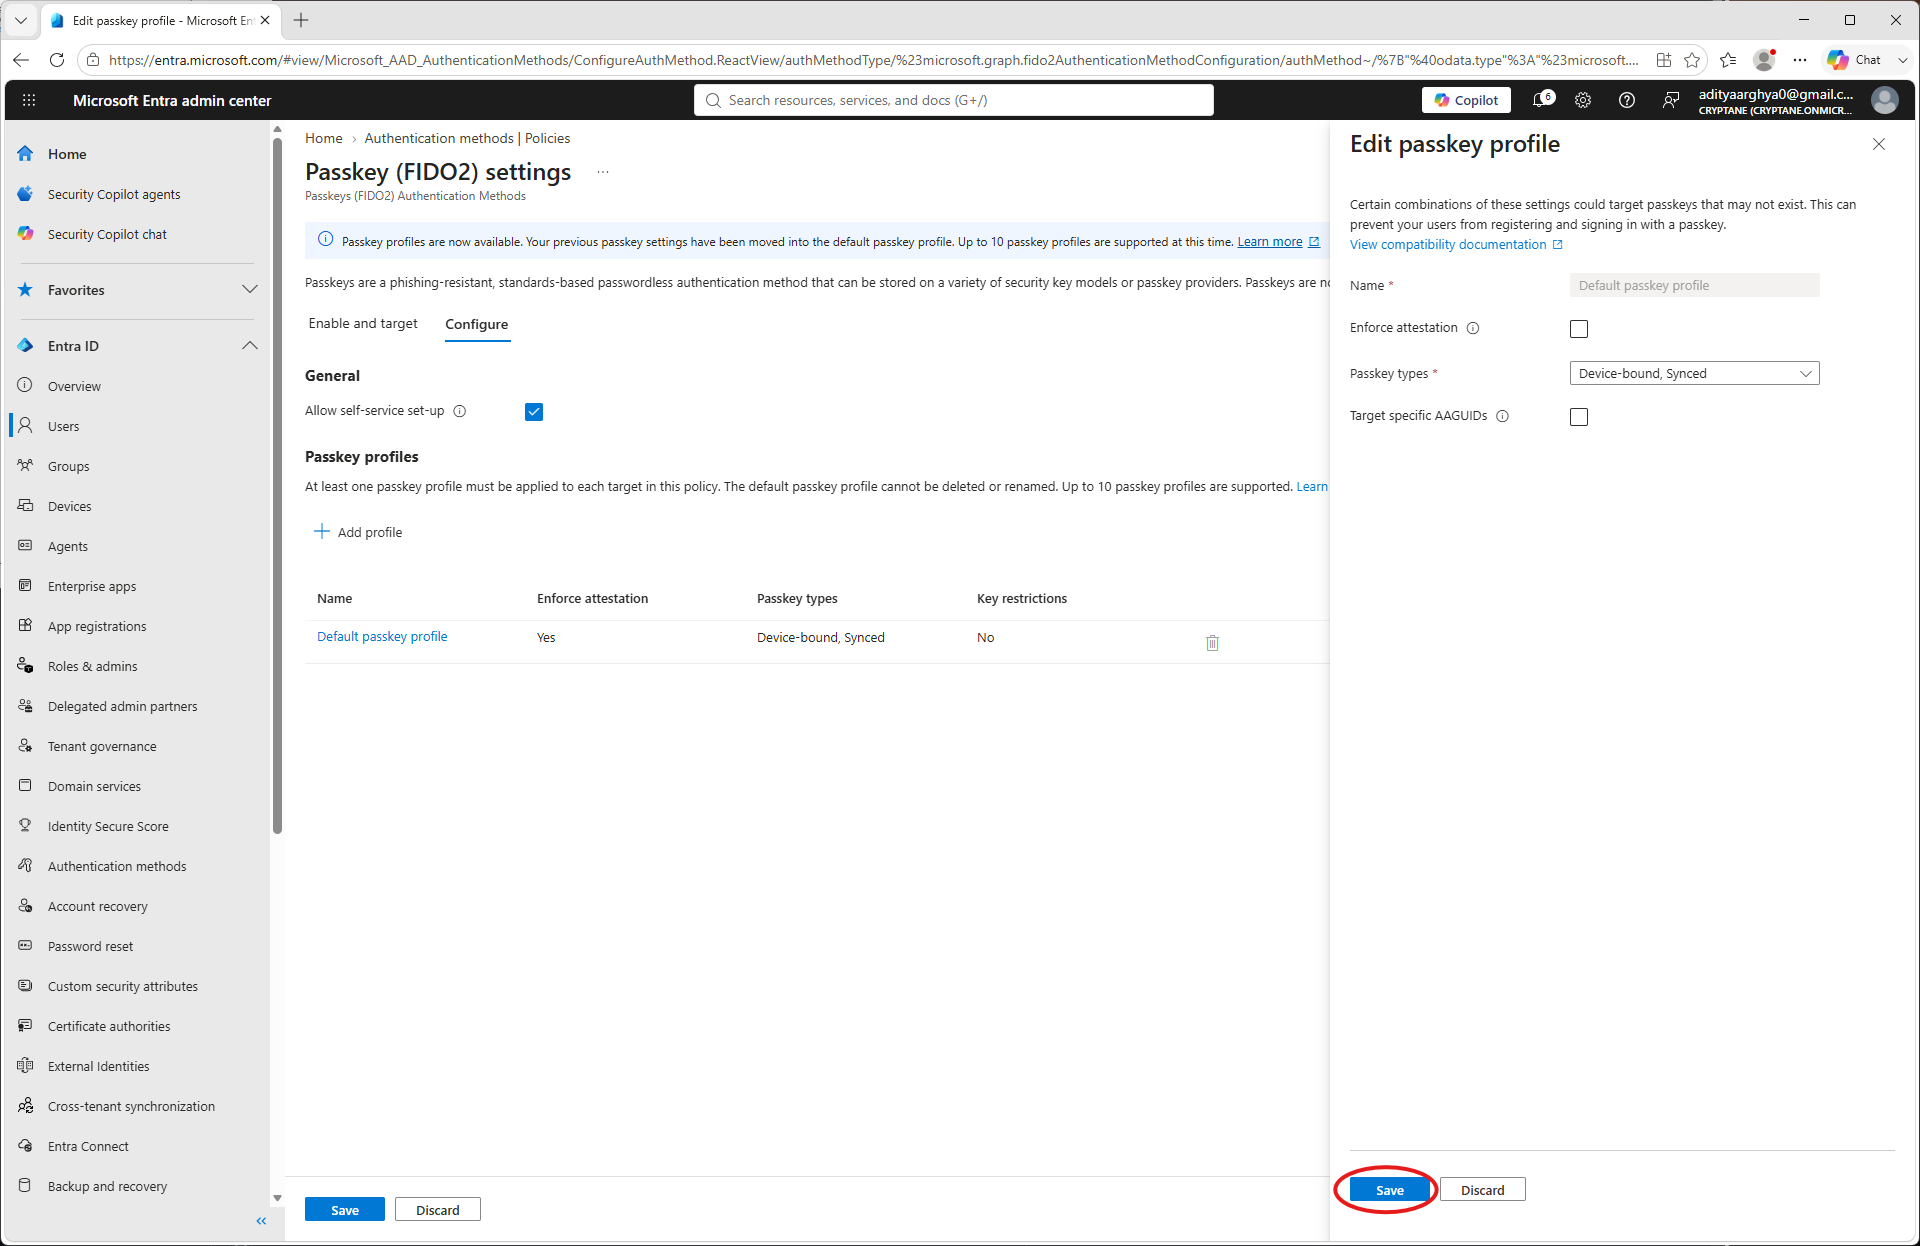
Tühista valik „Enforce Attestation” (ainult juhul, kui kasutad Nitrokey-seadet, millel puudub FIDO Alliance’i sertifikaat. Käesoleva dokumendi koostamise ajal on see sertifikaat ainult Nitrokey 3A Mini-l.)
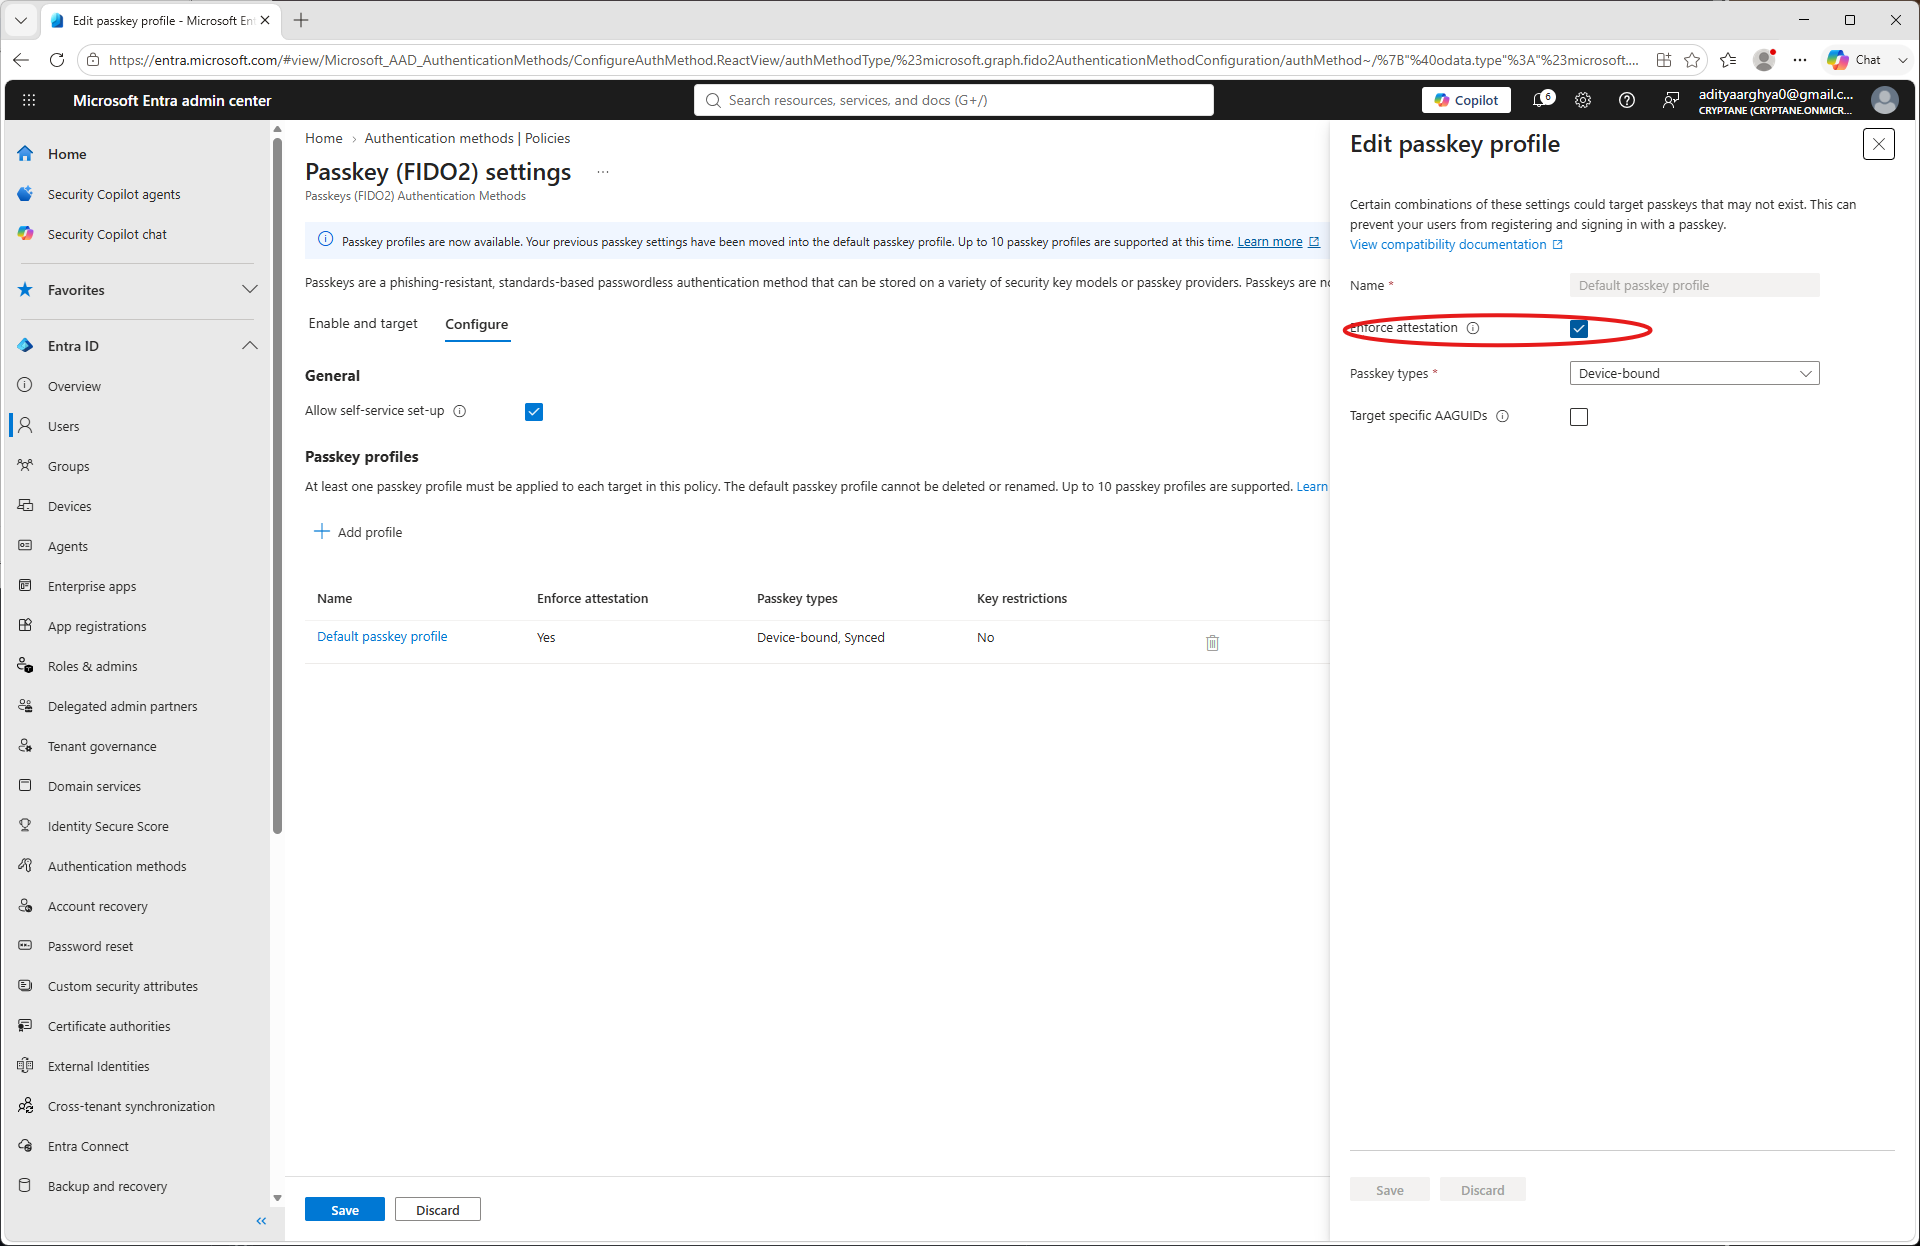
Click Save.
You have taken note of the Tenant ID, Client ID, Client Secret and Primary Domain as a part of the process. Make a
config.jsonfile with the information. An example is shown below.{ "tenant": "49d2c4c8-9144-49ea-b5f3-fc11b848cd72", "client": "e9f25c9c-3870-4aa8-9659-a40f09de093e", "secret": "************************************", "domain": "Cryptane.onmicrosoft.com" }
Kasutamine
You may use the pynitrokey utility to provision a Nitrokey for an user in your tenant.
nitropy fido2 provision-credential entra -c config.json <username> --create-user
Here the <username> could be the Email ID of the user (User principal in terms of Microsoft) or a part of it till before the @ sign.
The --create-user flag directs the tool to create the user if it does not exist in the Entra Tenant.
$ nitropy fido2 provision-credential entra -c config.json aditya --create-user
Command line tool to interact with Nitrokey devices 0.12.3
Warning: It is recommended to execute nitropy with admin privileges to be able to access Nitrokey 3 and Nitrokey FIDO 2 devices.
Waiting 5 secs for Graph API to update
User aditya created on Entra
Enter PIN:
Touch your authenticator device now...
Entra credential for aditya pre-registered on NK3 A56F0 with Credential ID owBYLNXsrDZ104I2MyCtuxmXKAd0Um56t3Byx5VfMz-Vs1Azy1re4Rdf-foMsc7vAUw7lJgCoG1VSdl2mBoCUHWGpTH-YkjEJ4UC4YlIEdk1.
Verification
Kasutaja võib äsja kasutusele võetud Nitrokey abil oma Microsofti kontosse sisse logida. Jälgi juhendit aadressil . Näide Nitrokey abil Microsofti kontosse sisselogimisest:, et logida sisse selle äsja kasutusele võetud Nitrokey abil.
Võite kontrollida Entra haldusportaalis eraldatud autentimisandmeid, järgides allpool toodud juhiseid.
Mine Entra halduskeskuse vasakul paneelil valikule „Kasutajad”.
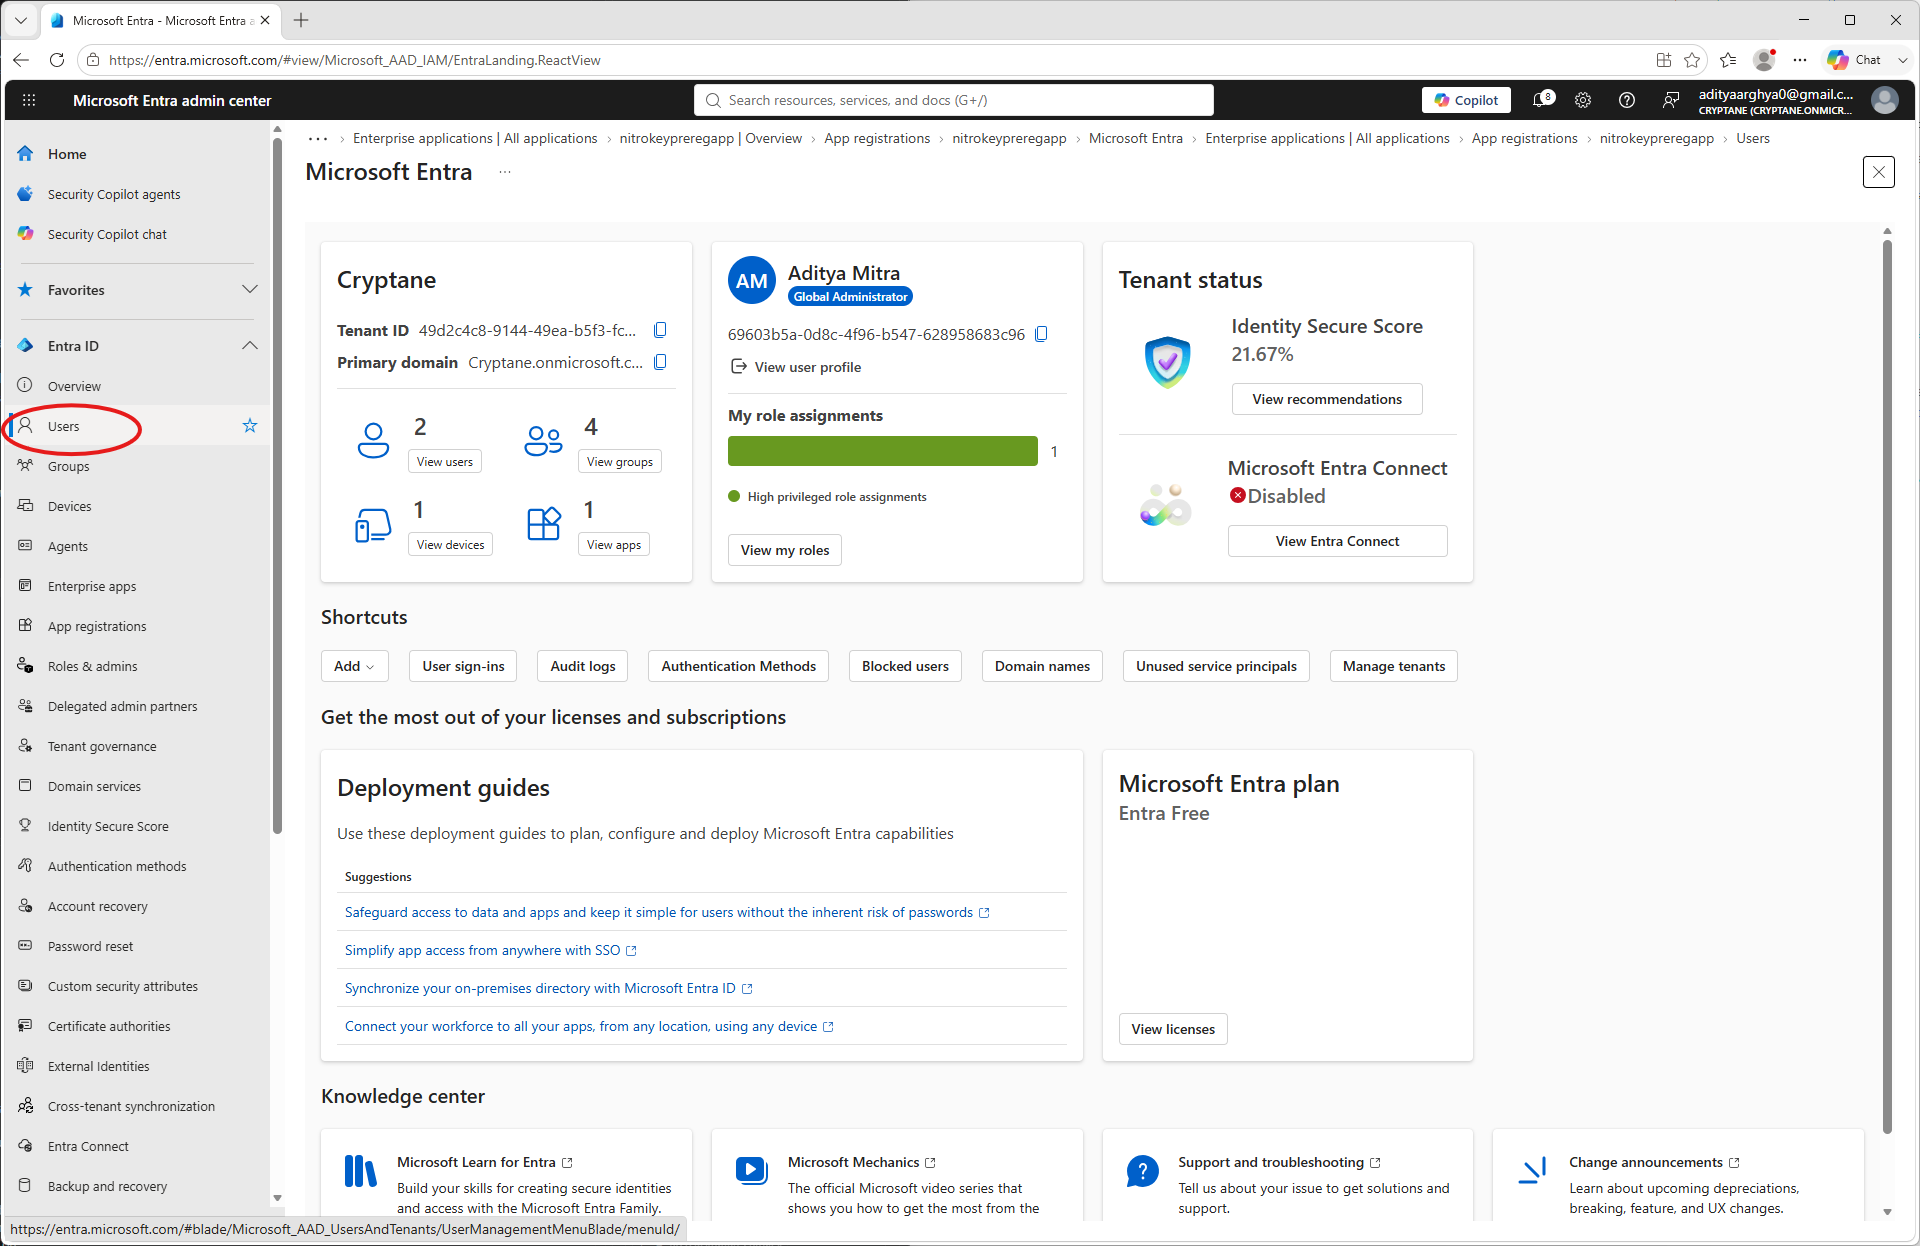
If the user was created with the
--create-userflag you may be able to find the entry on the list. If it is a pre-existing user, it would also be there. Click on the user to which the credential was enrolled.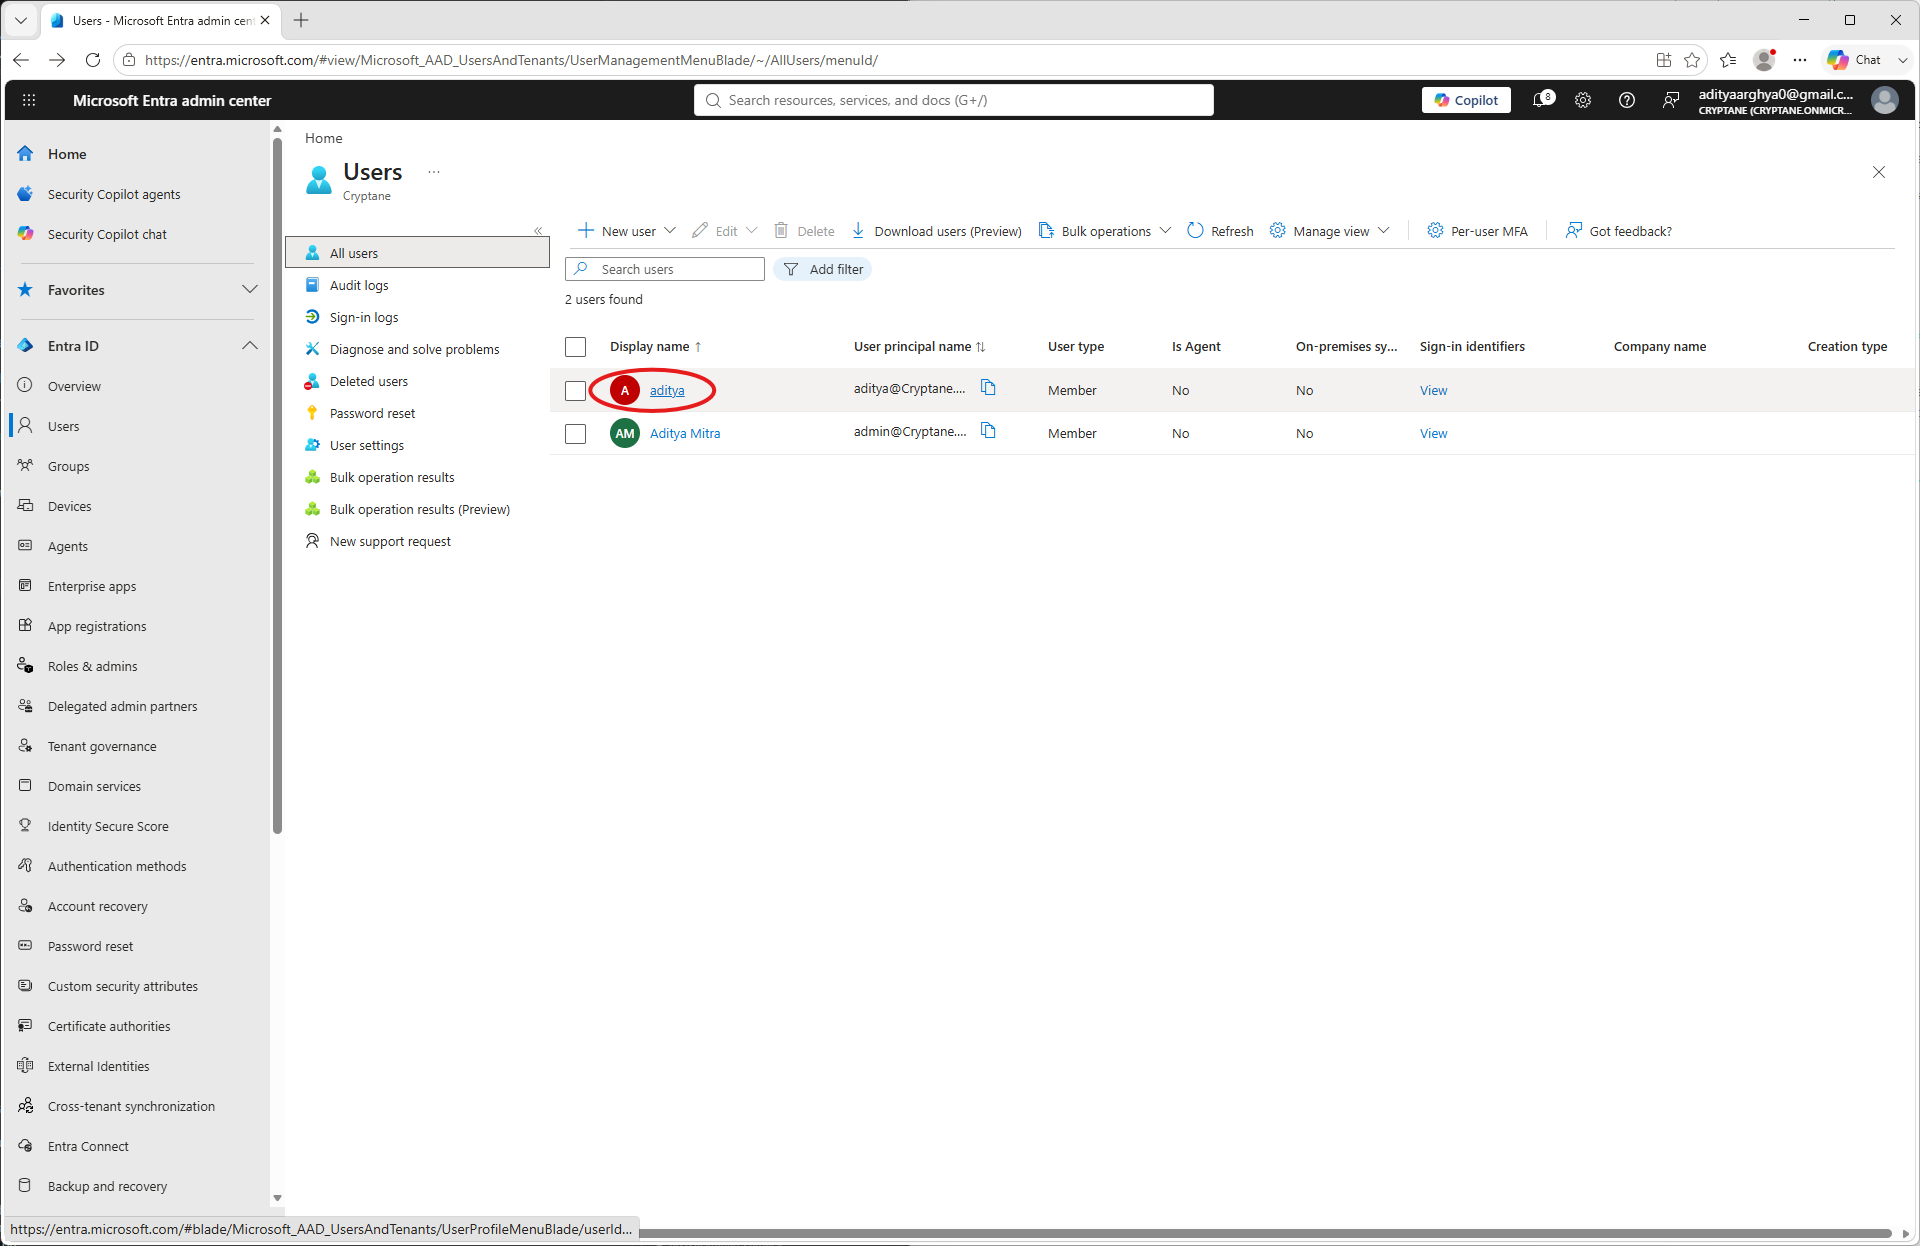
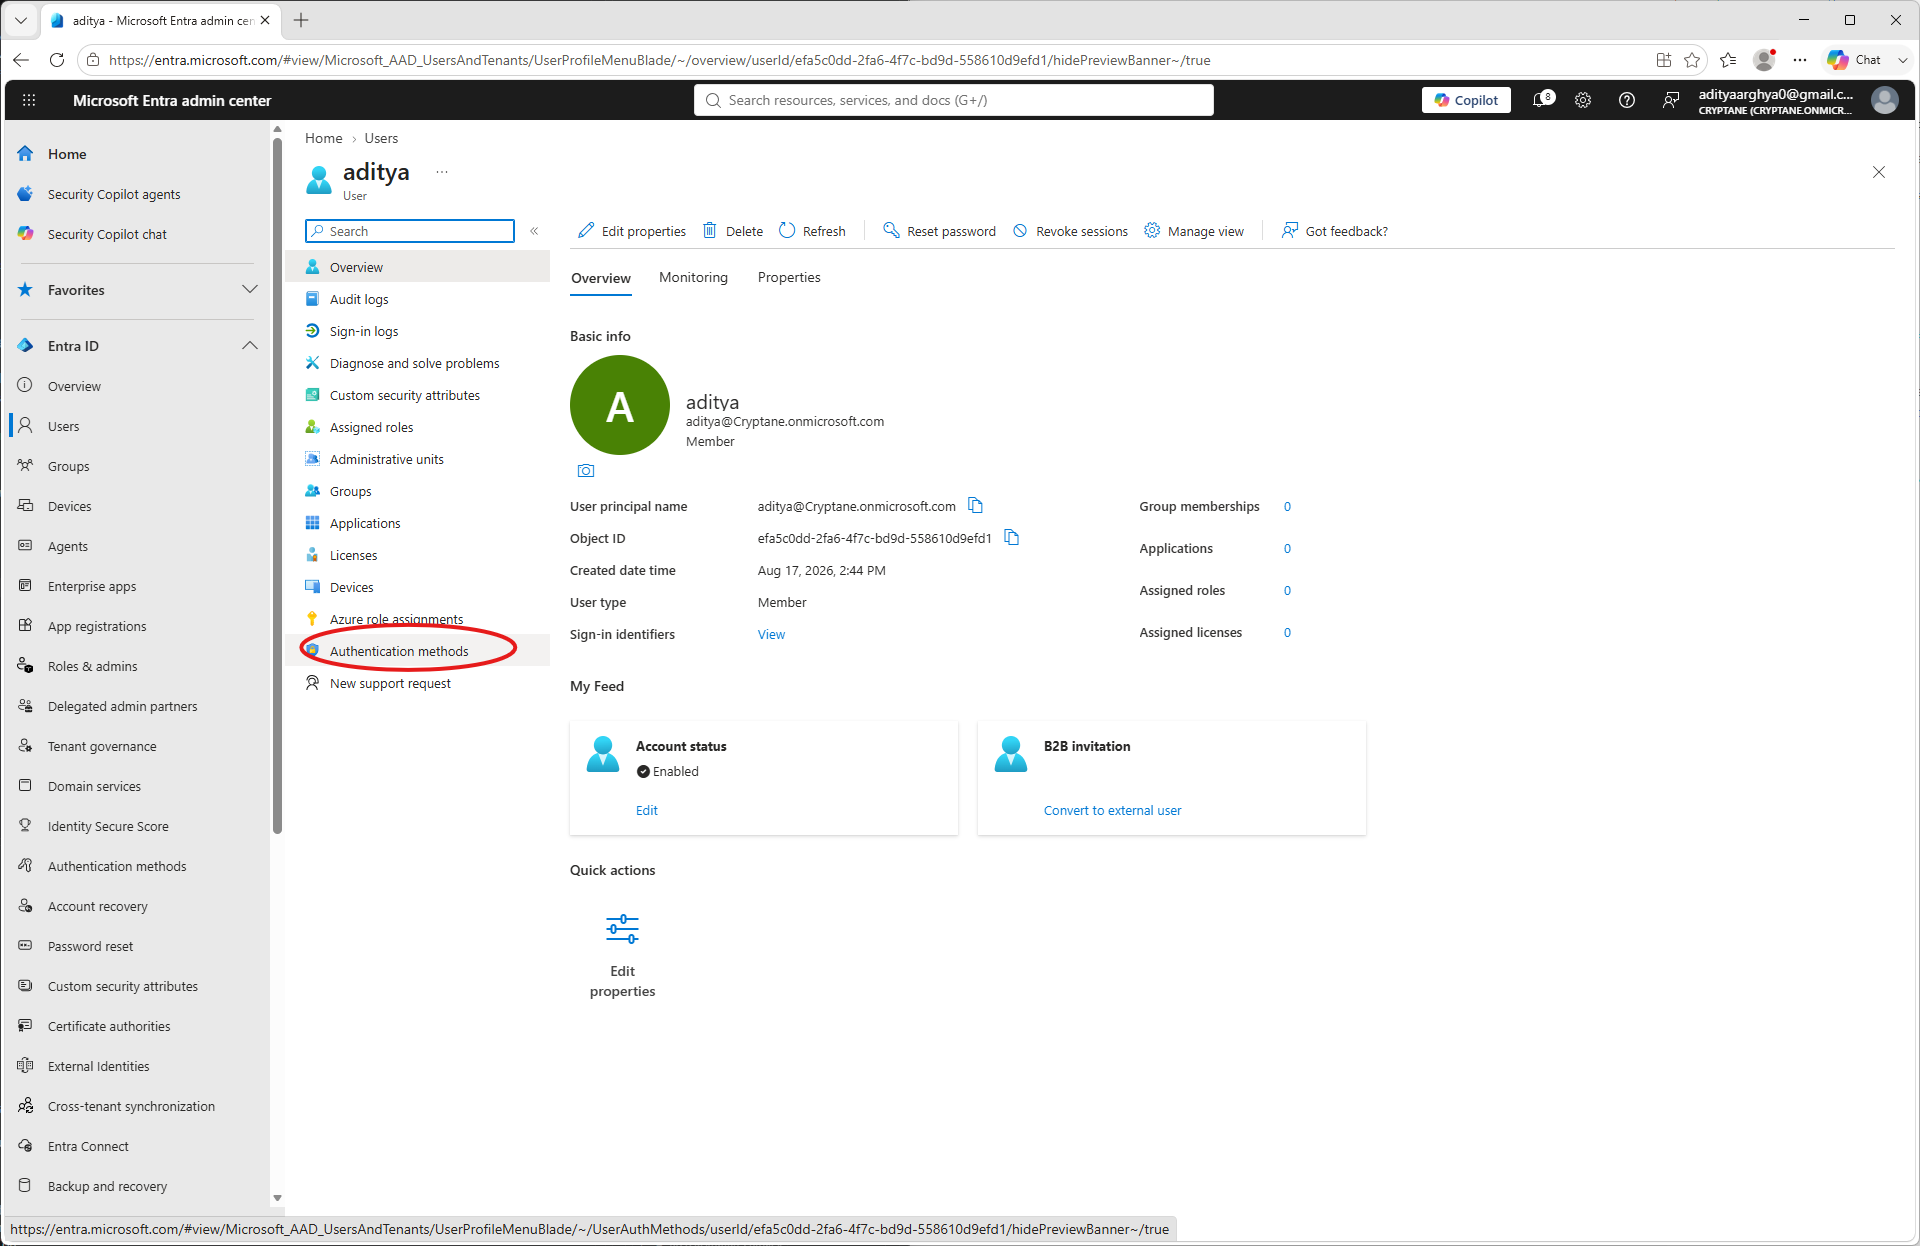
Click on Authentication methods on the user blade.
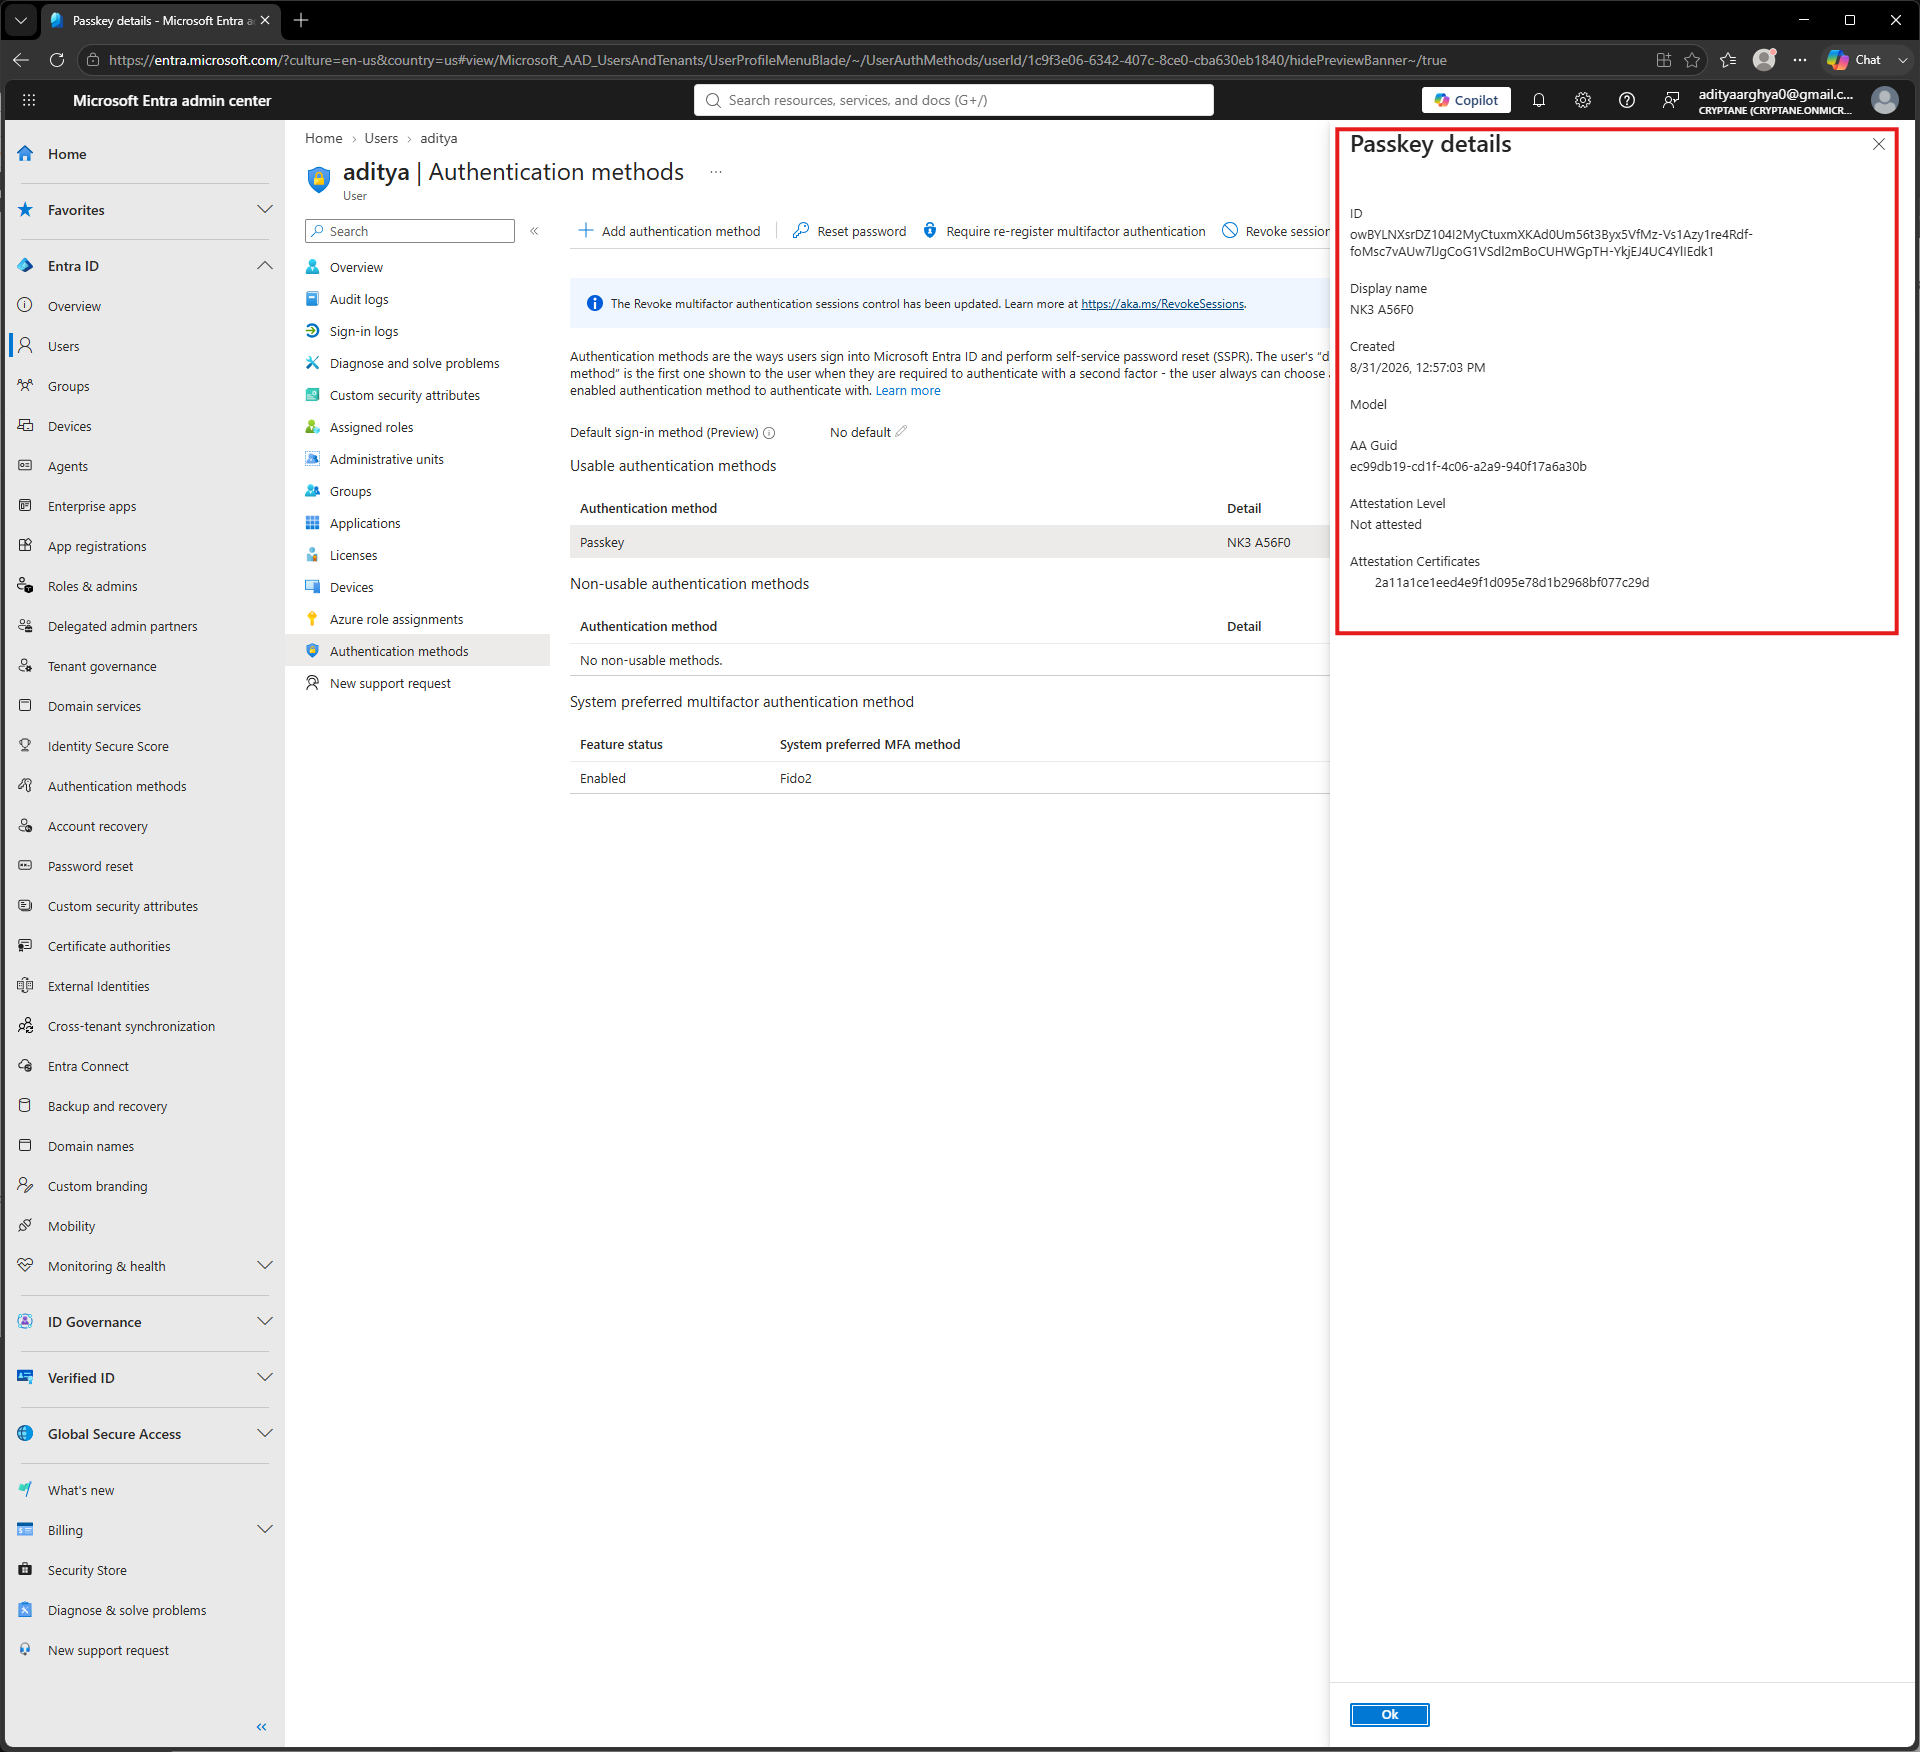
Näidatakse registreeritud autentimisandmed, mille esimesed 5 tähemärki moodustavad Nitrokey UUID. Registreeritud autentimisandmete üksikasjaliku teabe vaatamiseks võite klõpsata kolme punktile ja seejärel valikule „Vaata üksikasju”.
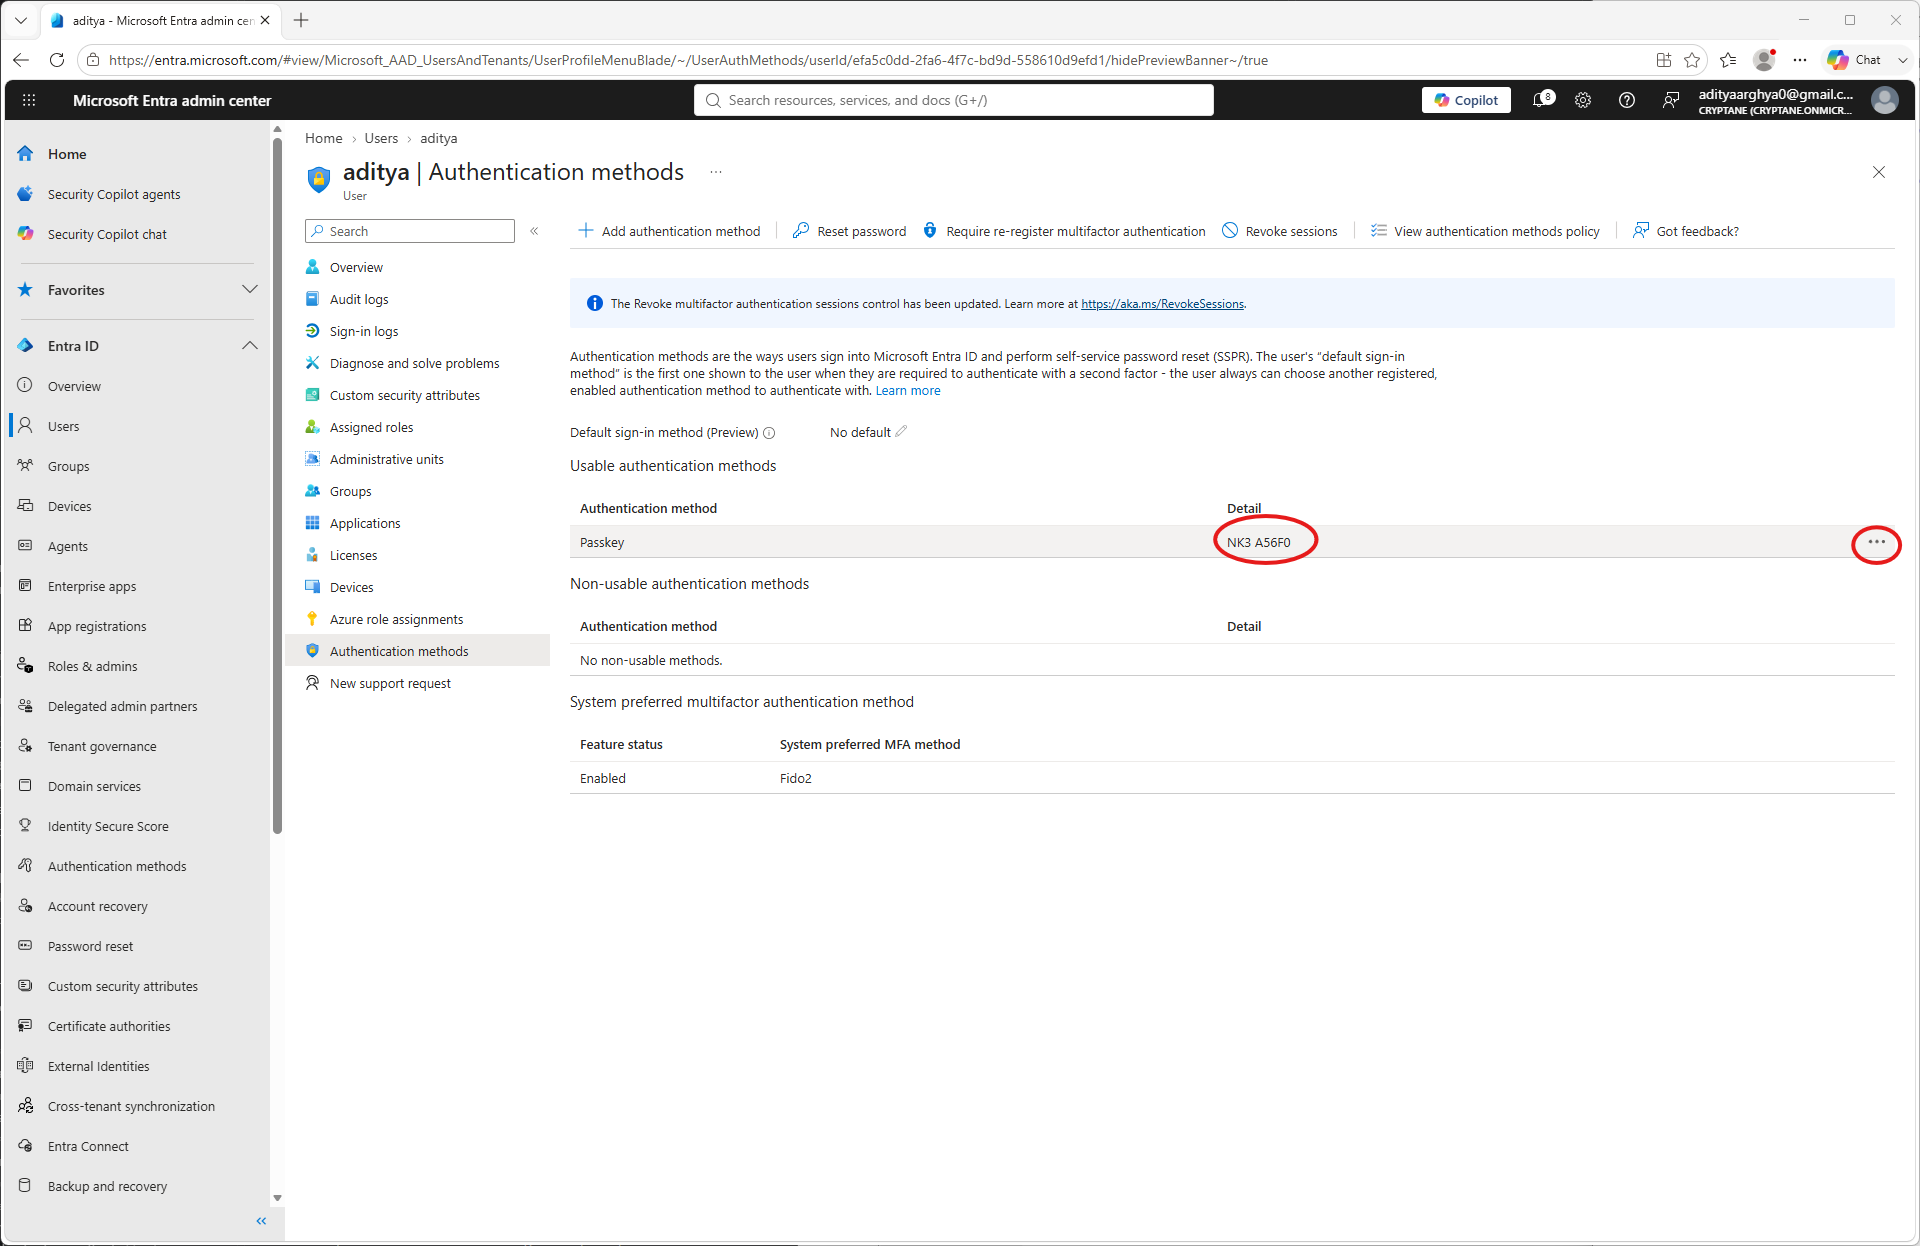
Kuvatakse täiendav teave volituse kohta. Saate seda kontrollida.