„Nitrokey“ konfigurēšana „Entra ID“ lietošanai
Compatible Nitrokeys |
|||||||
|---|---|---|---|---|---|---|---|
✓ active |
✓ active |
⨯ inactive |
⨯ inactive |
⨯ inactive |
⨯ inactive |
⨯ inactive |
⨯ inactive |
The Nitrokey 3 and Nitrokey Passkey support provisioning credentials for Microsoft Entra for seamless employee on-boarding in enterprise scenarios.
Iestatīšana
Lai nodrošinātu lietotāju autentifikācijas datu reģistrēšanu ar programmēšanas palīdzību, ir nepieciešama Microsoft Entra lietojumprogramma. Šeit mēs piedāvājam jums šīs lietojumprogrammas konfigurēšanas rokasgrāmatu, ja jums ir atbilstošas piekļuves tiesības.
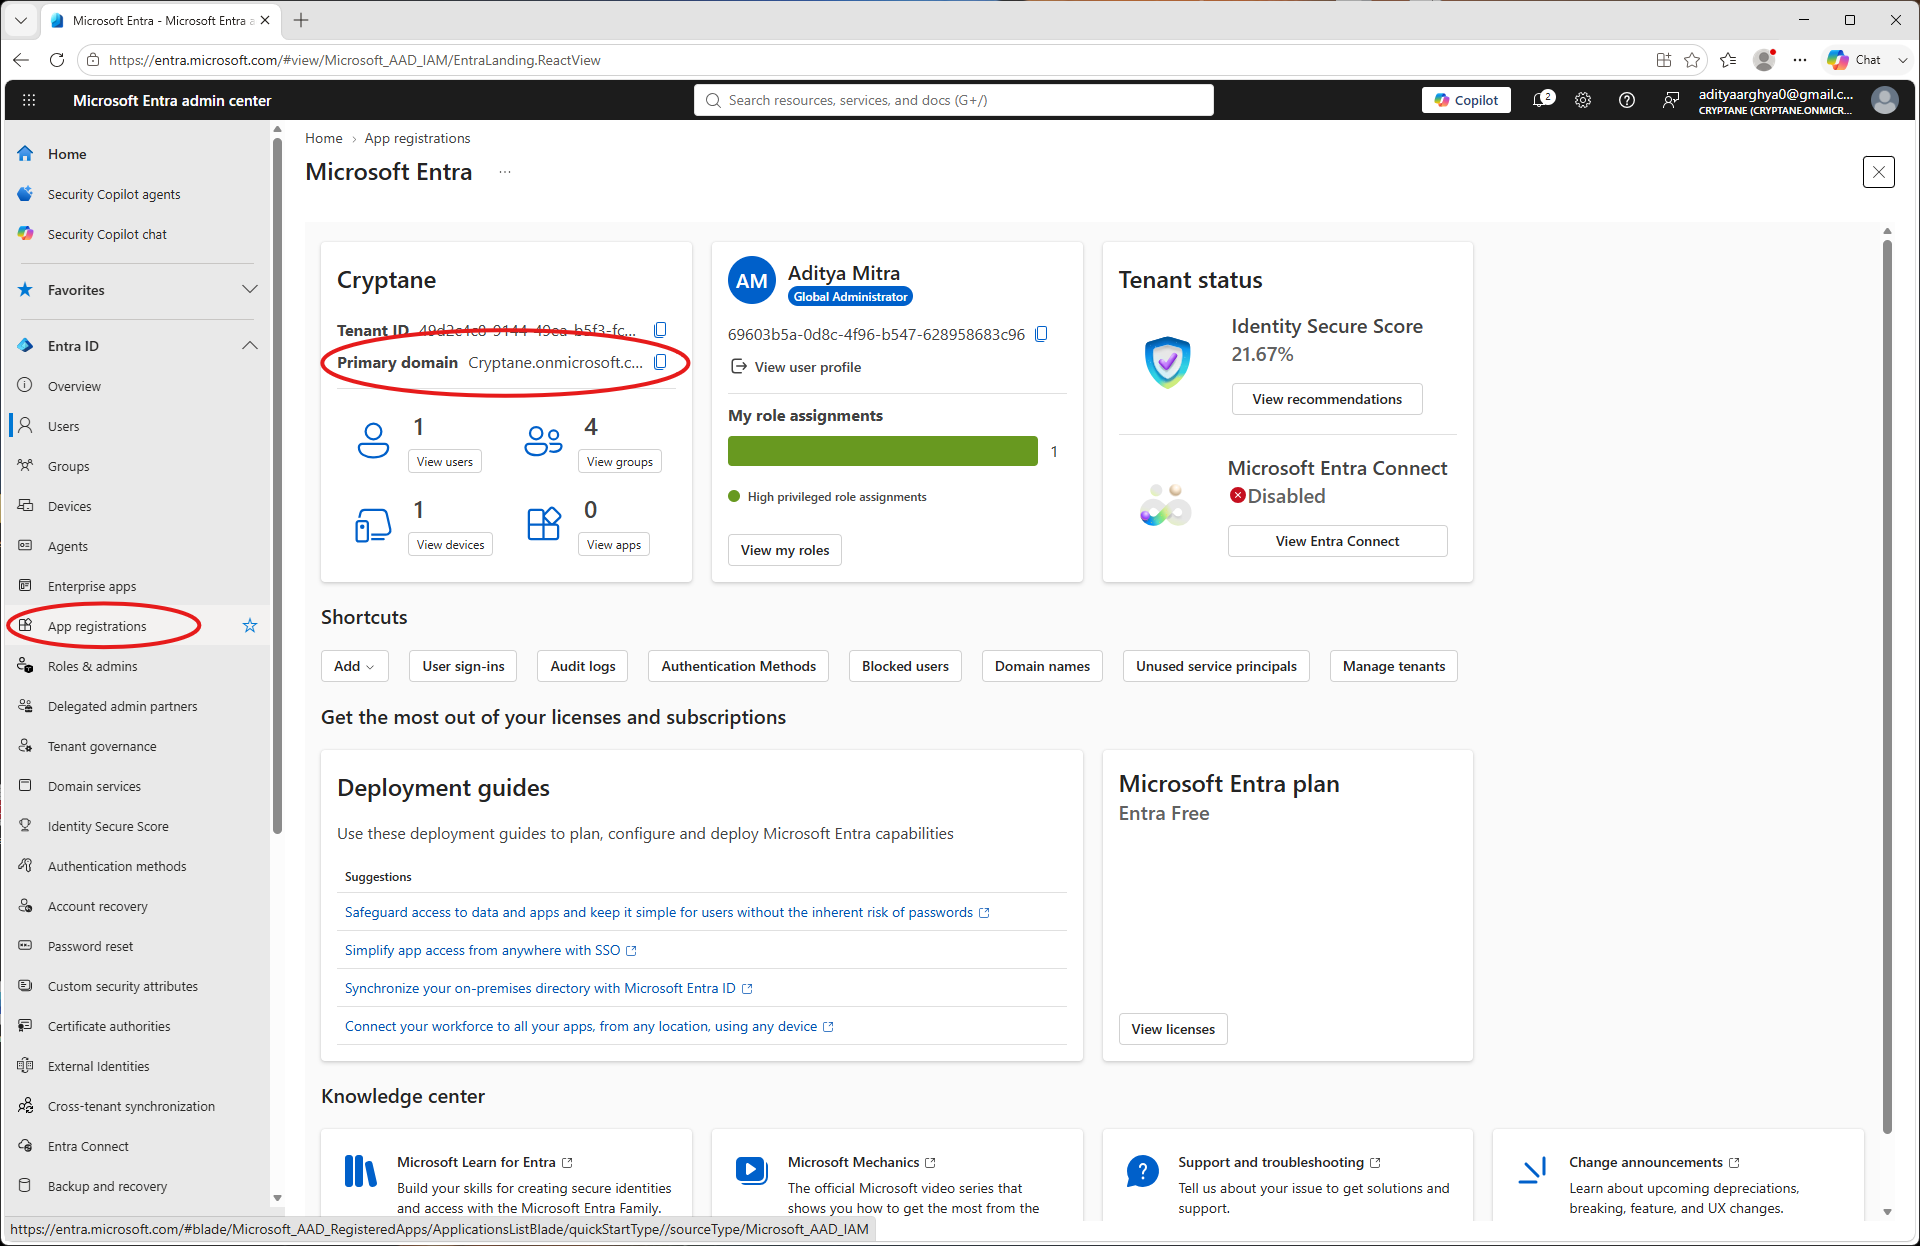
Login to Entra Admin portal. Take a note of the primary domain which you will need later. Go to App Registrations on the left blade.
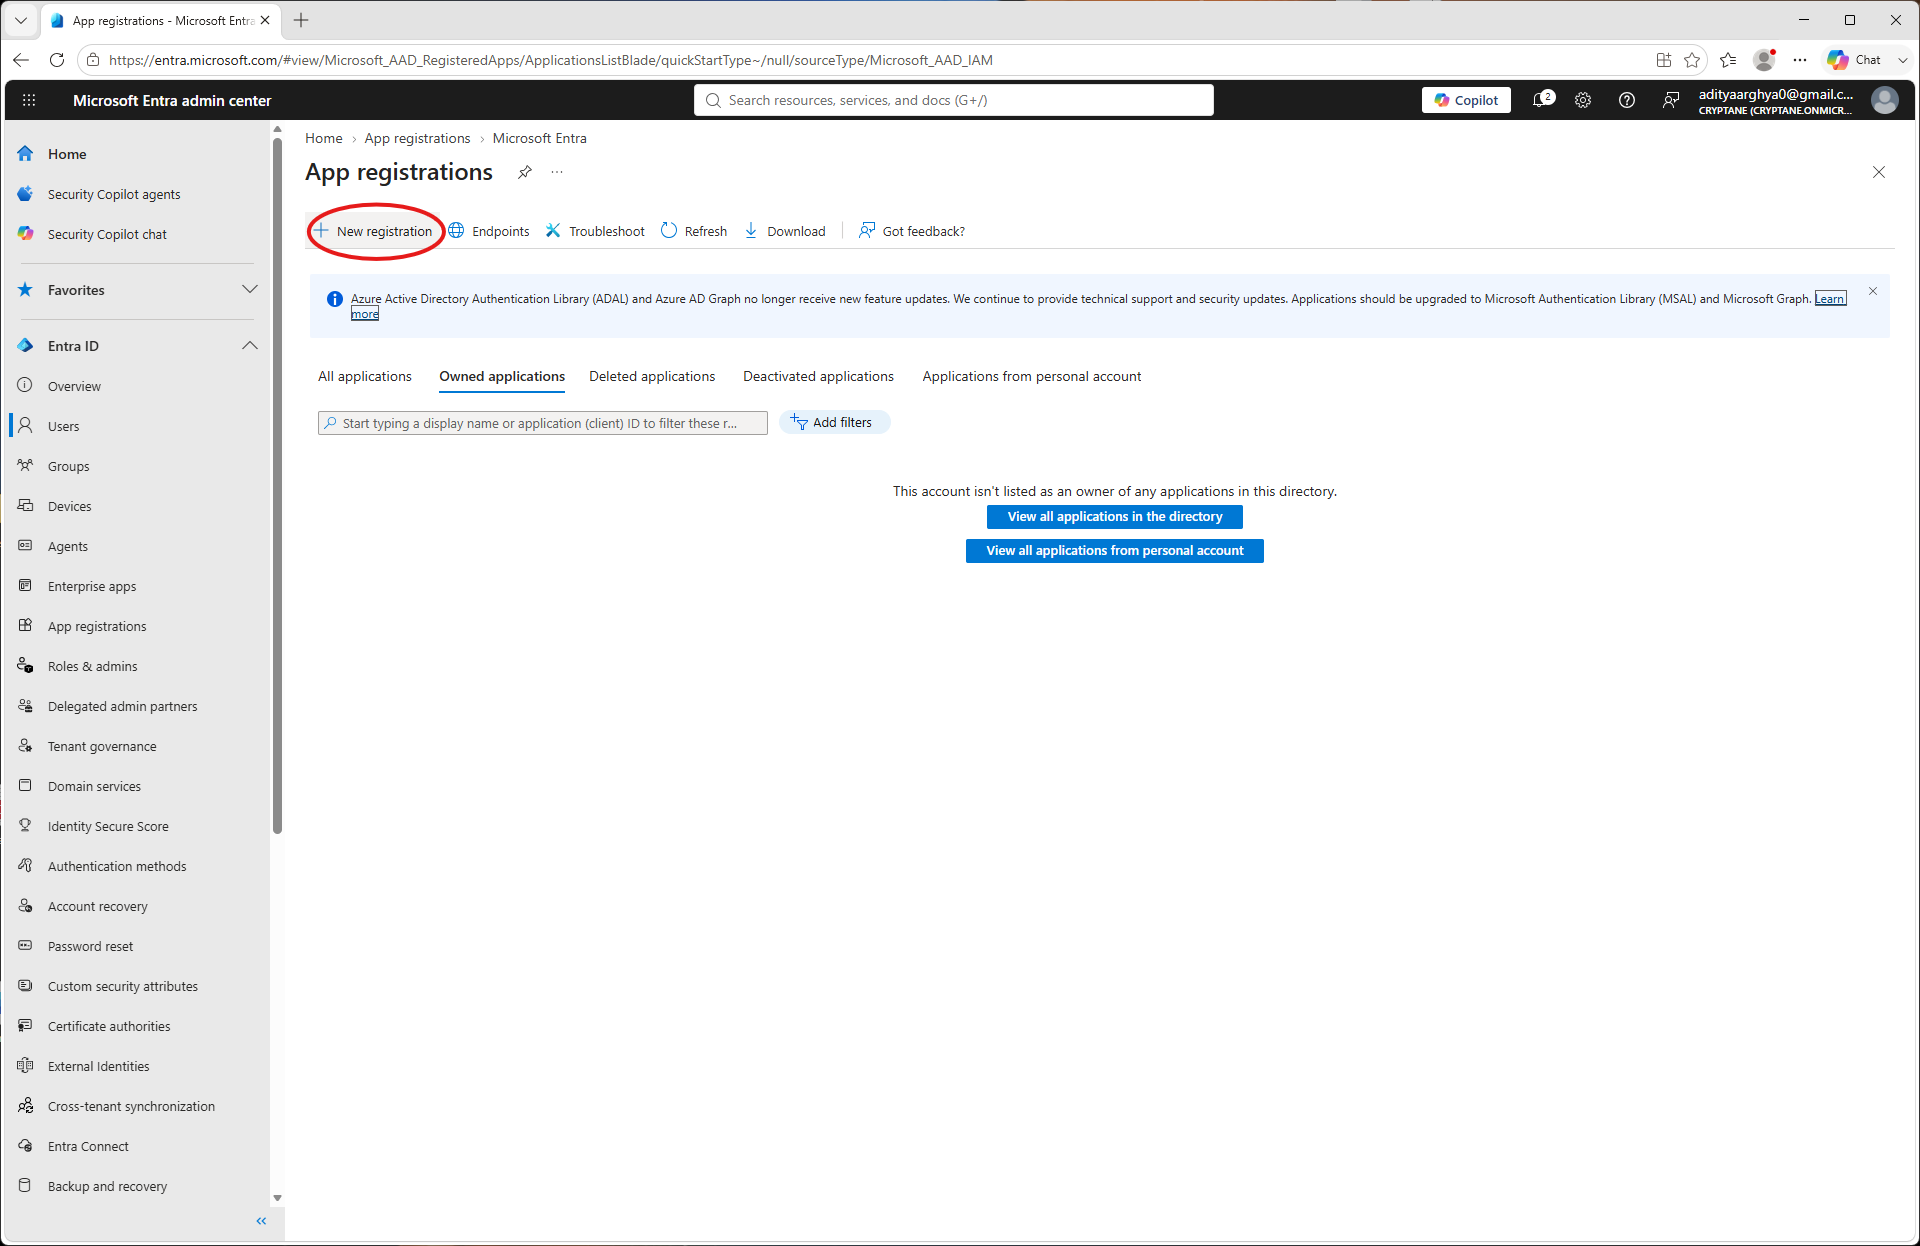
Izvēlieties „Jauna reģistrācija”.
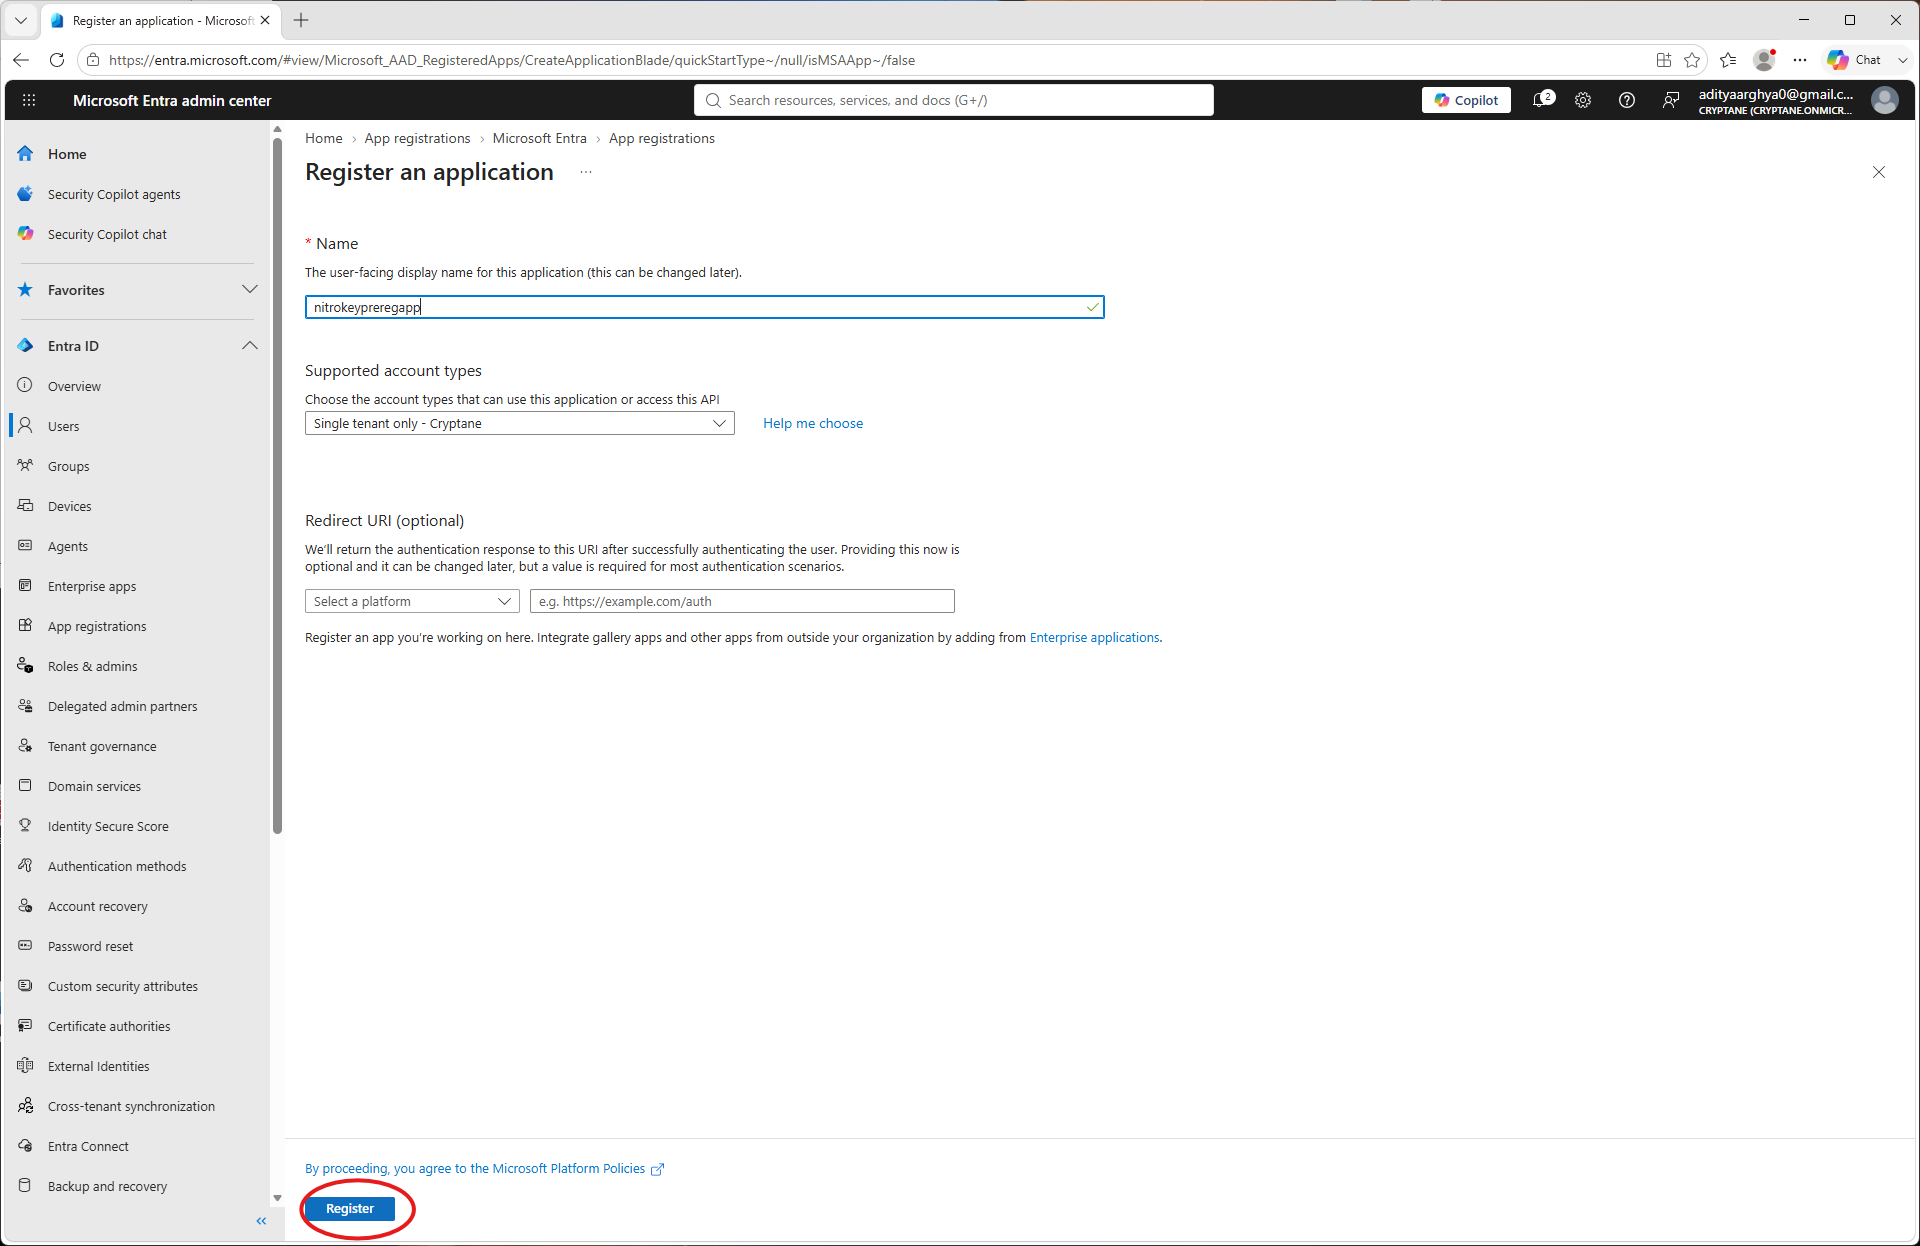
Izveidojiet jaunu lietotni un norādiet tās nosaukumu. Noklikšķiniet uz „Reģistrēties”.
Šeit pierakstiet klienta ID un nomnieka ID. Tie jums būs nepieciešami vēlāk. Pārejiet uz sadaļu „API atļaujas” lietotnes logā.
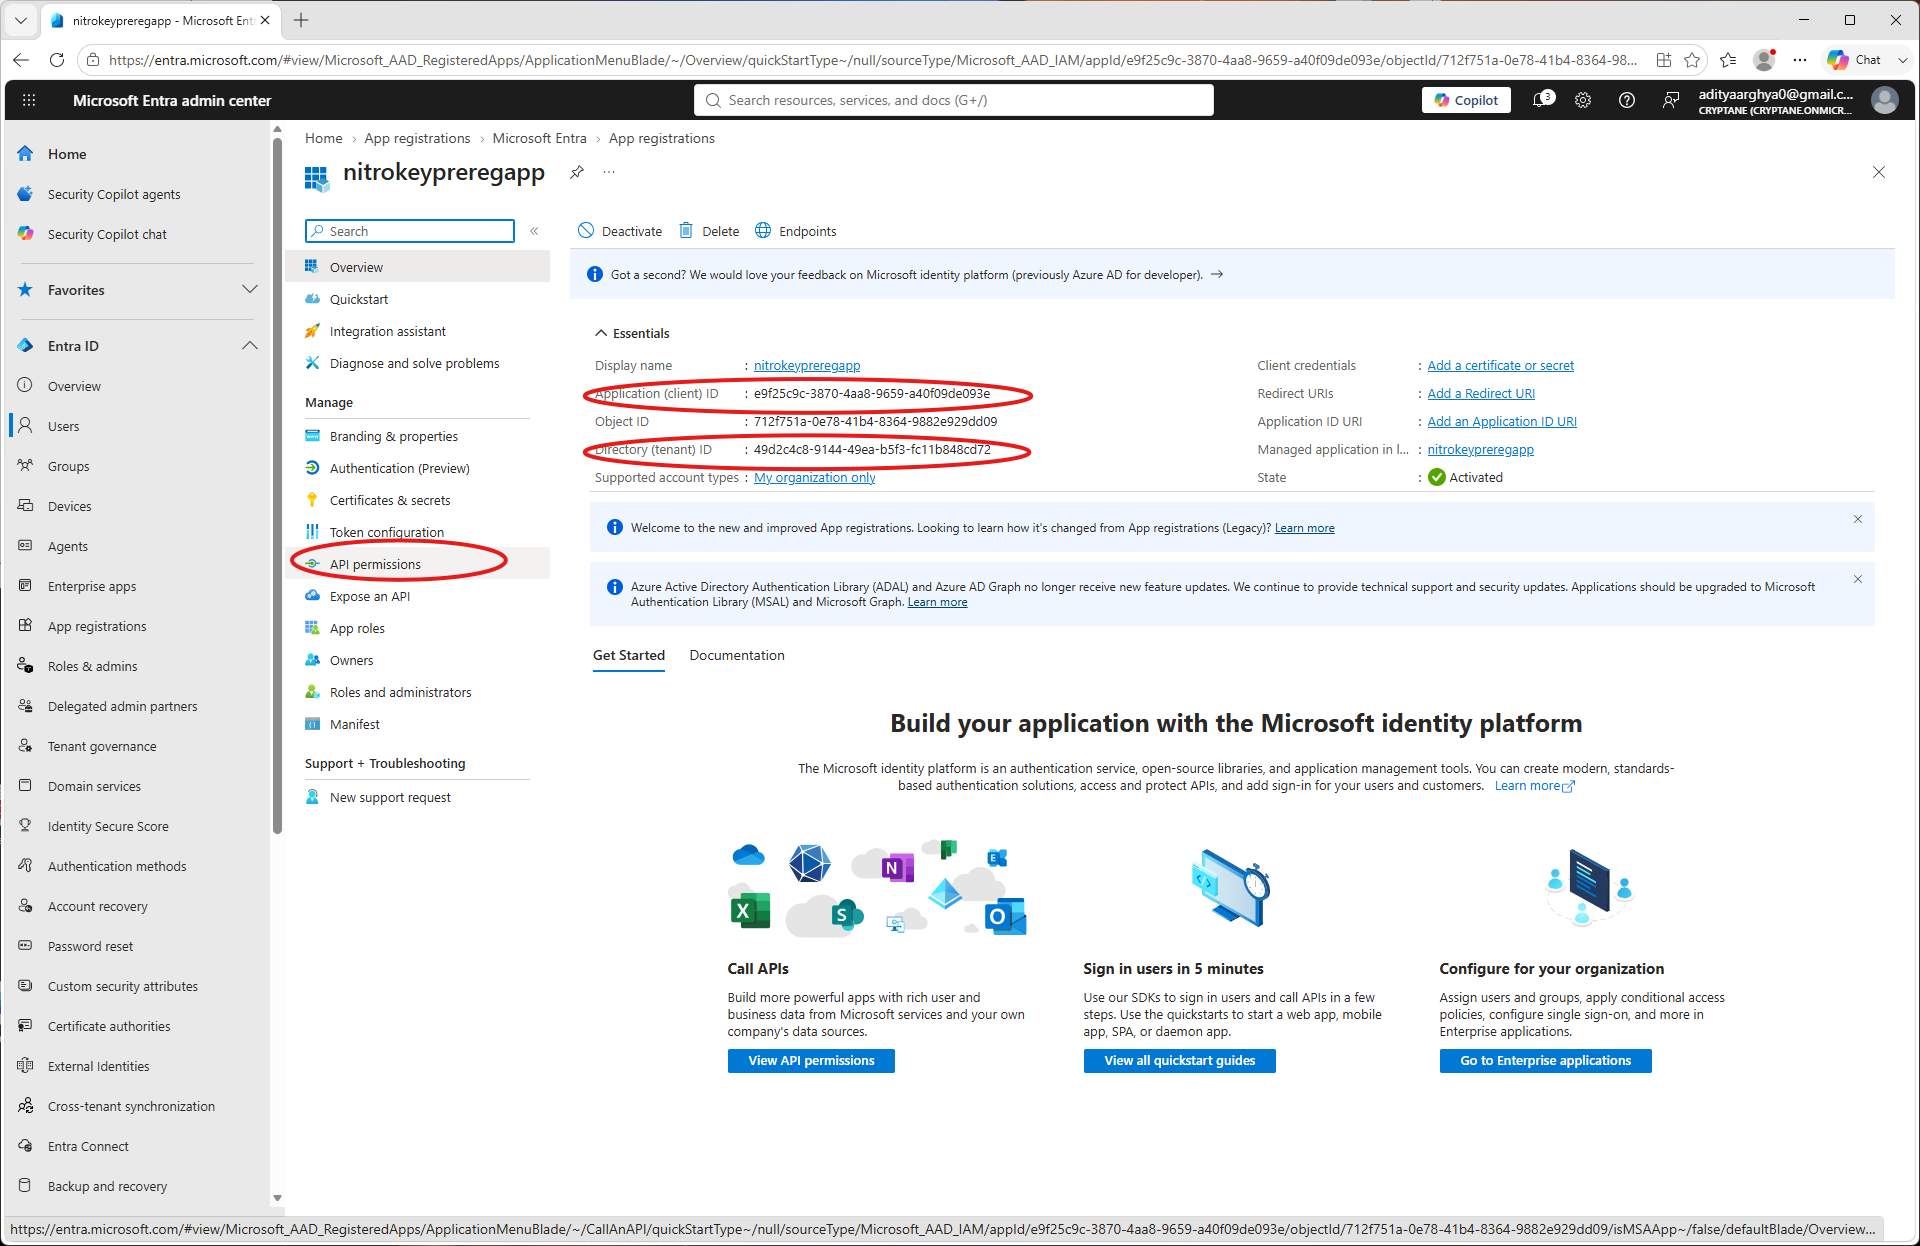
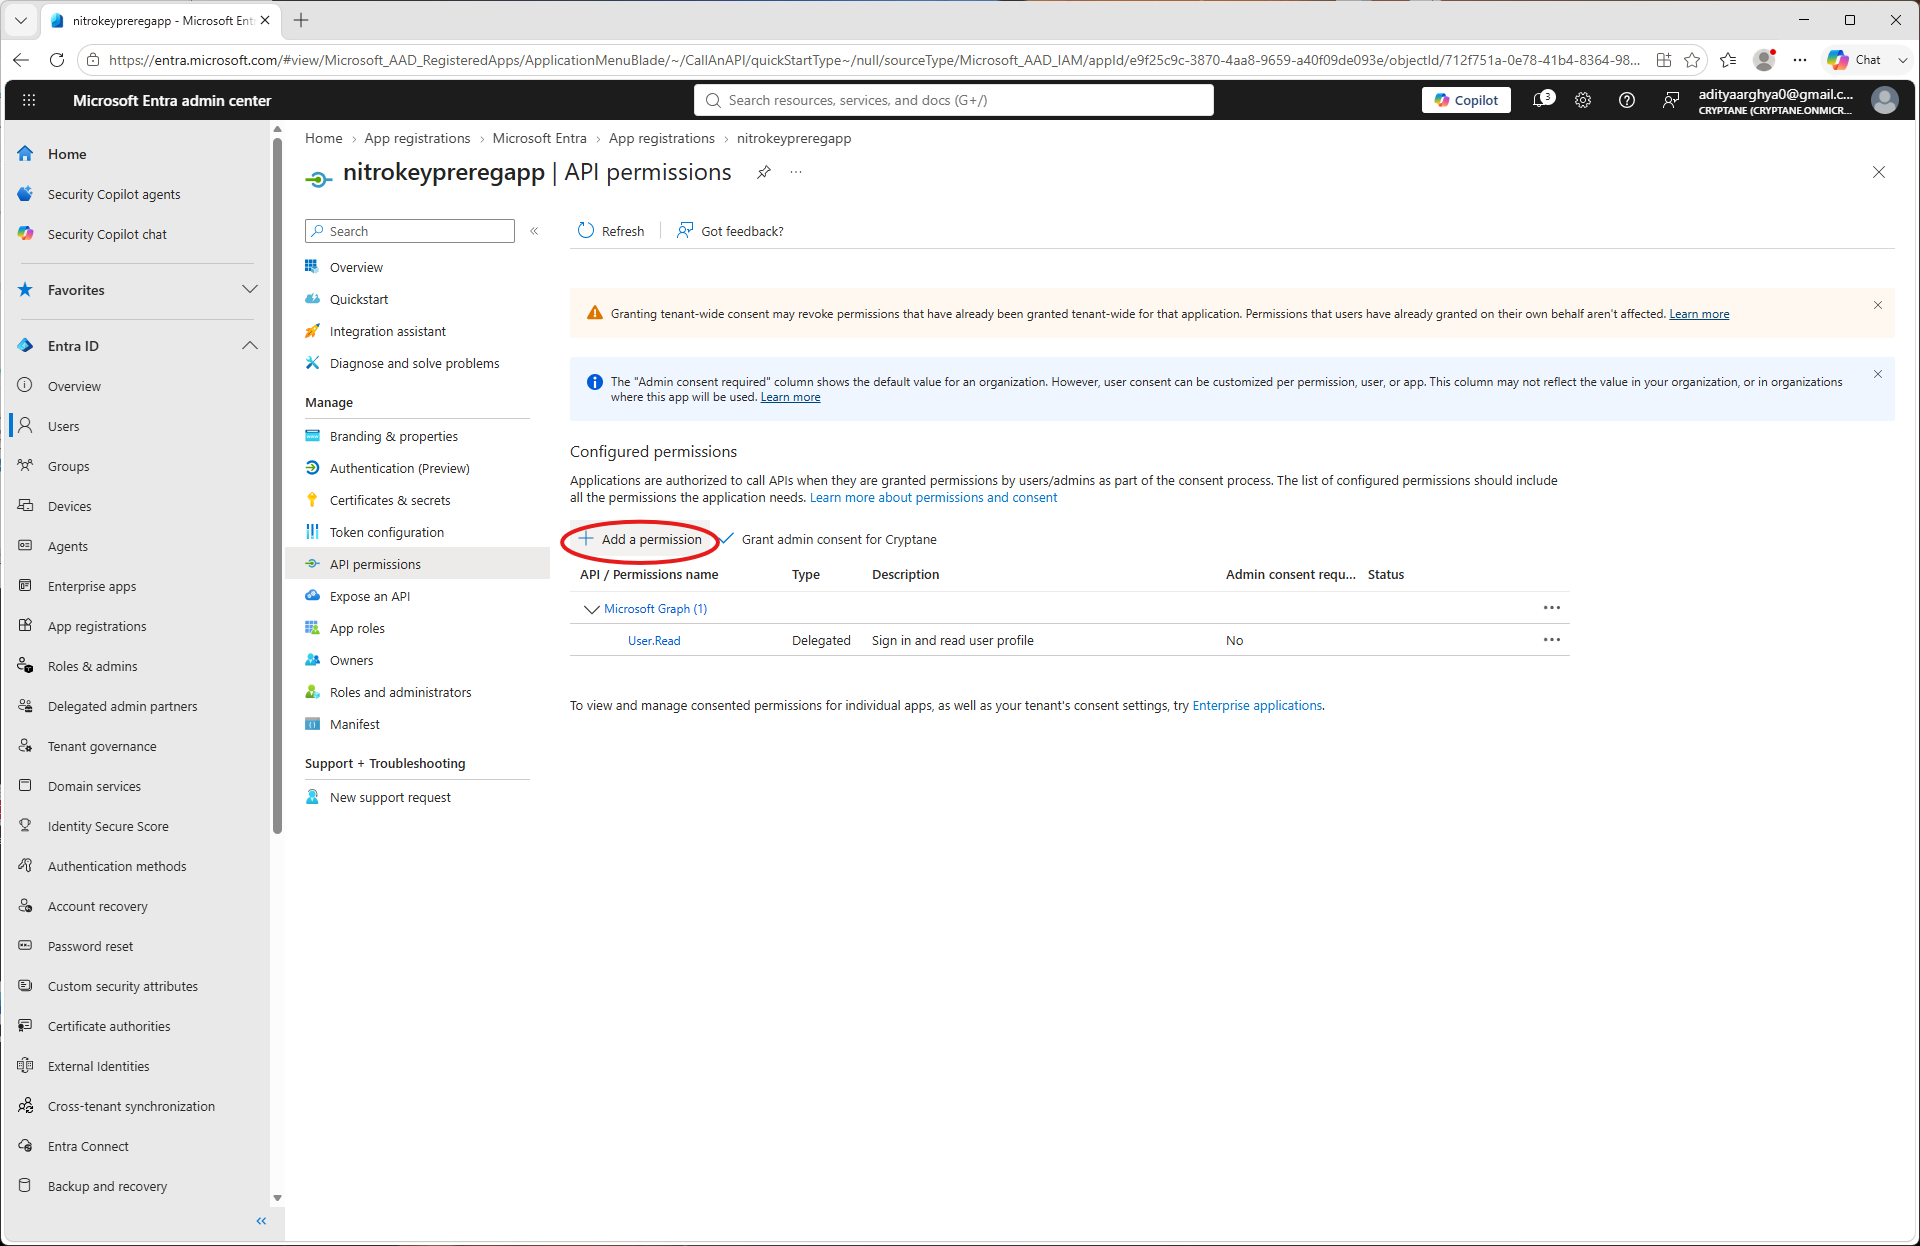
Click on Add a permission.
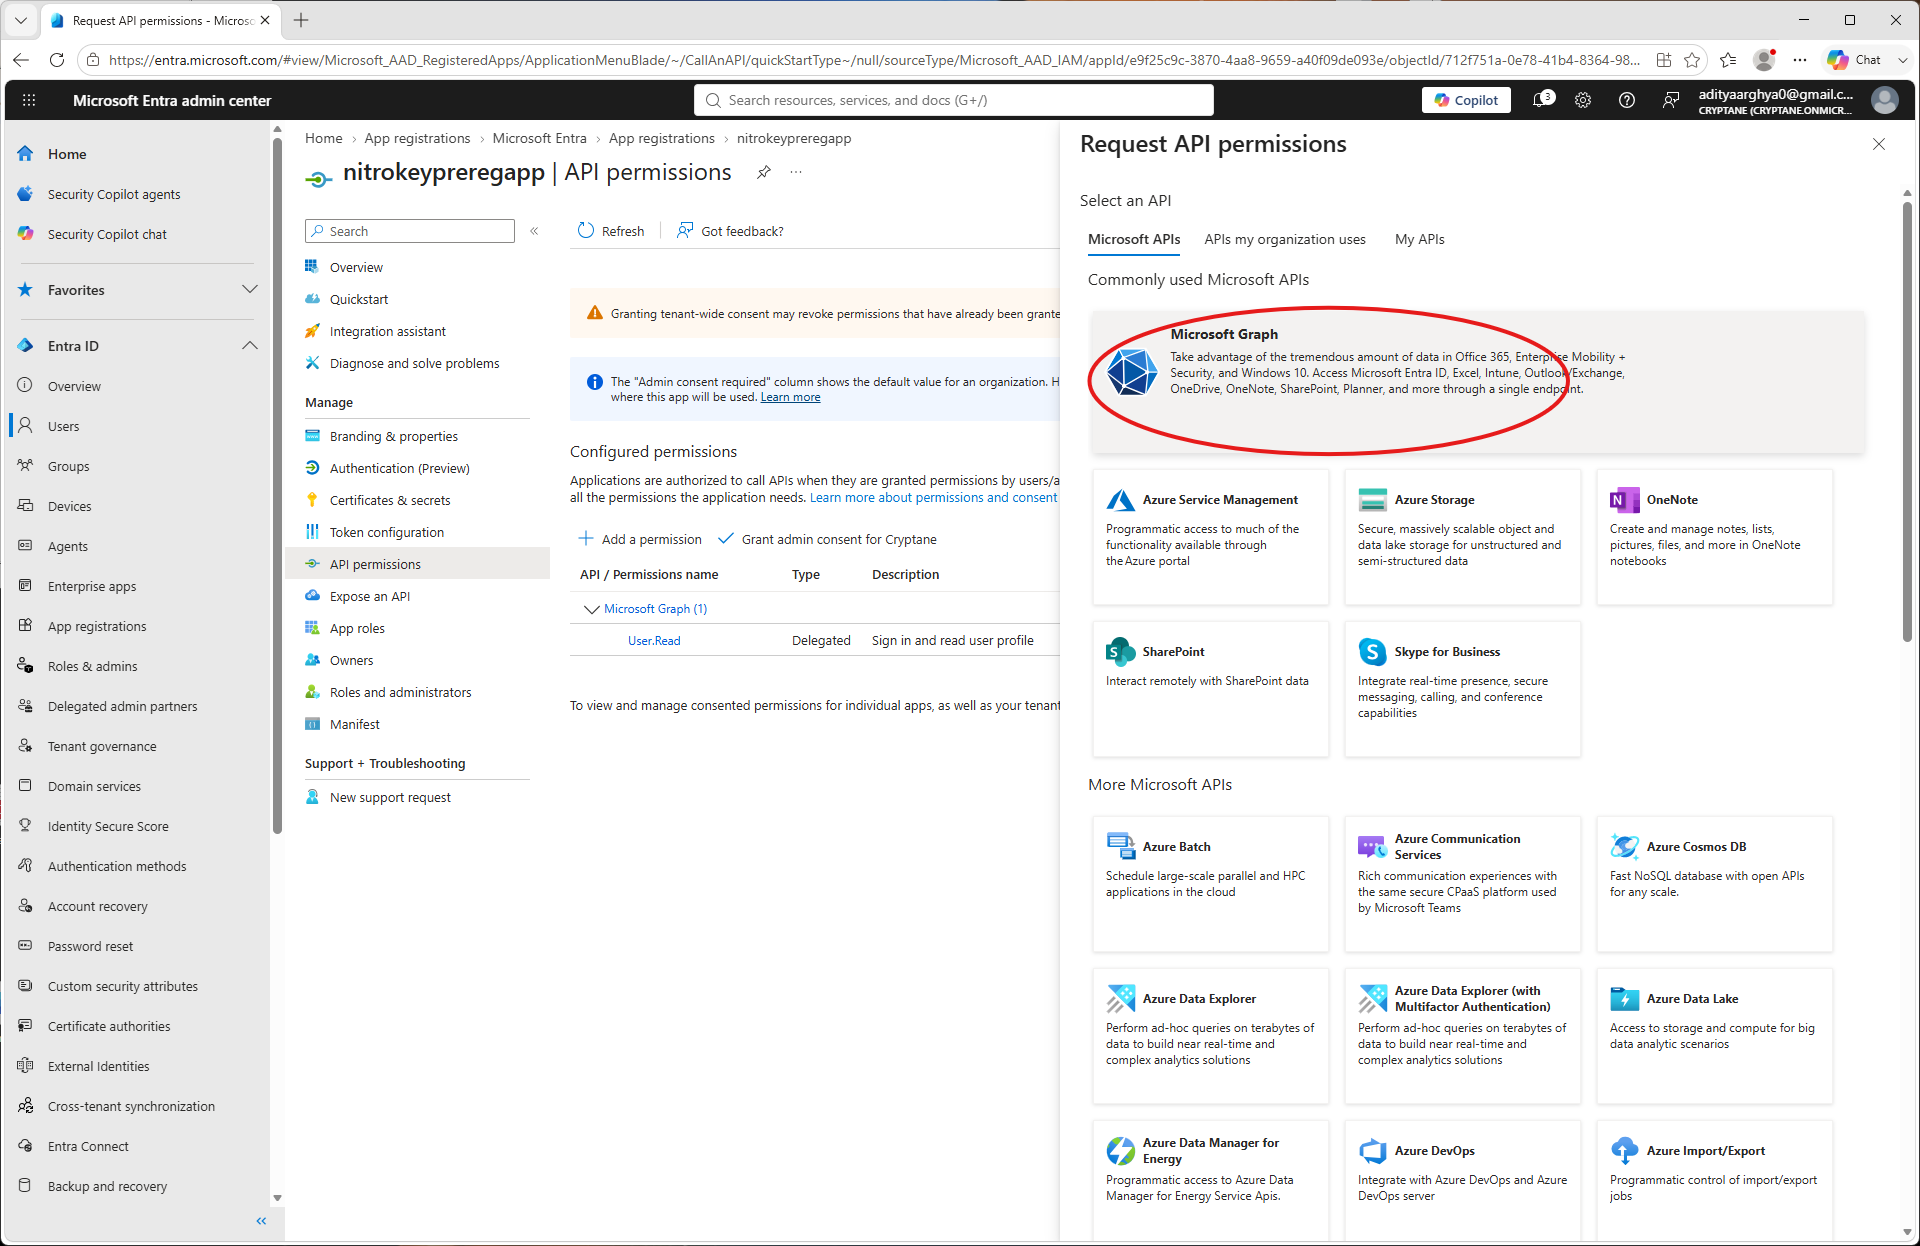
Select Microsoft Graph.
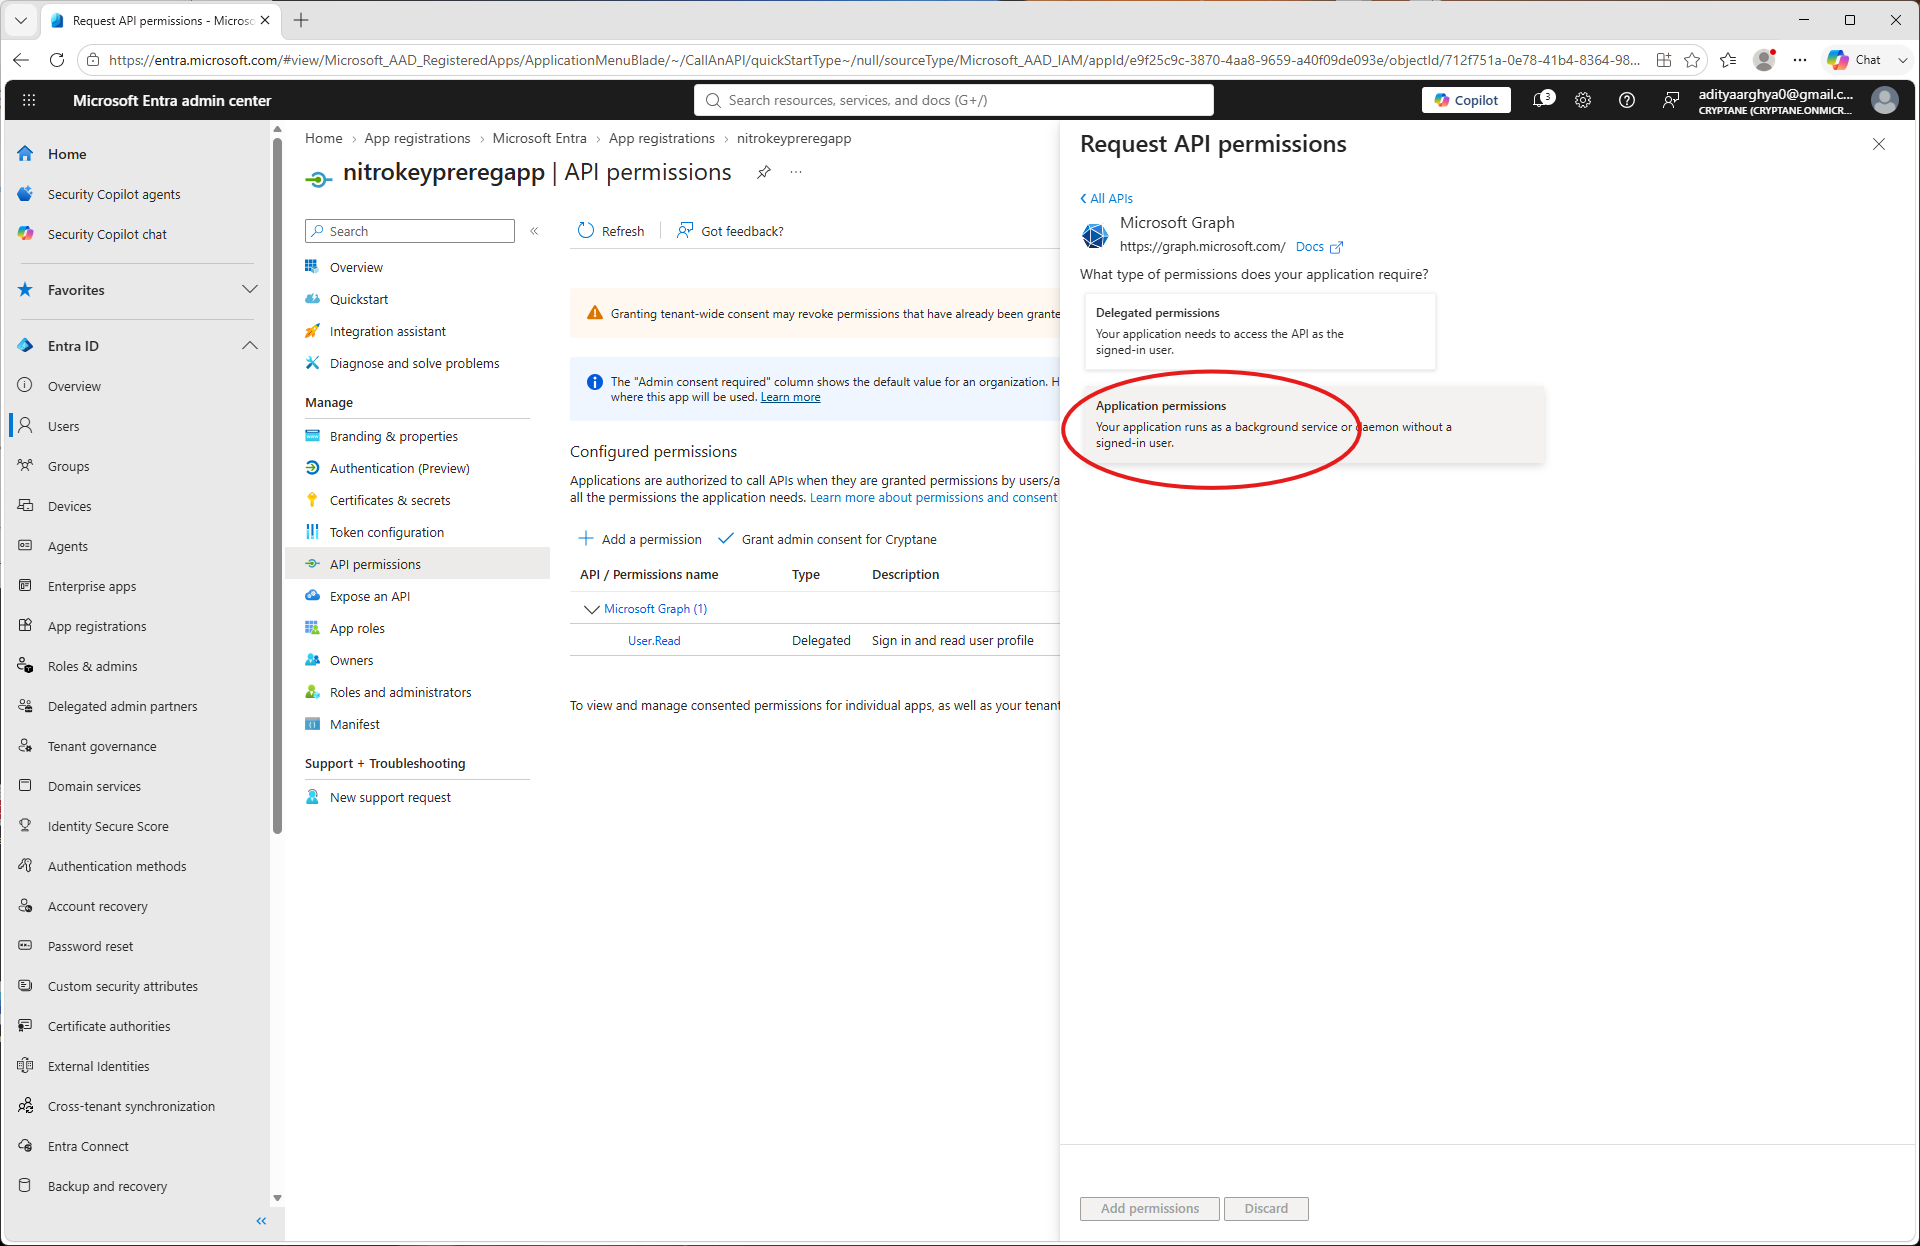
Izvēlieties „Lietojumprogrammas atļaujas”.
Search for
UserAuthenticationMethod.ReadWrite.Alland select it.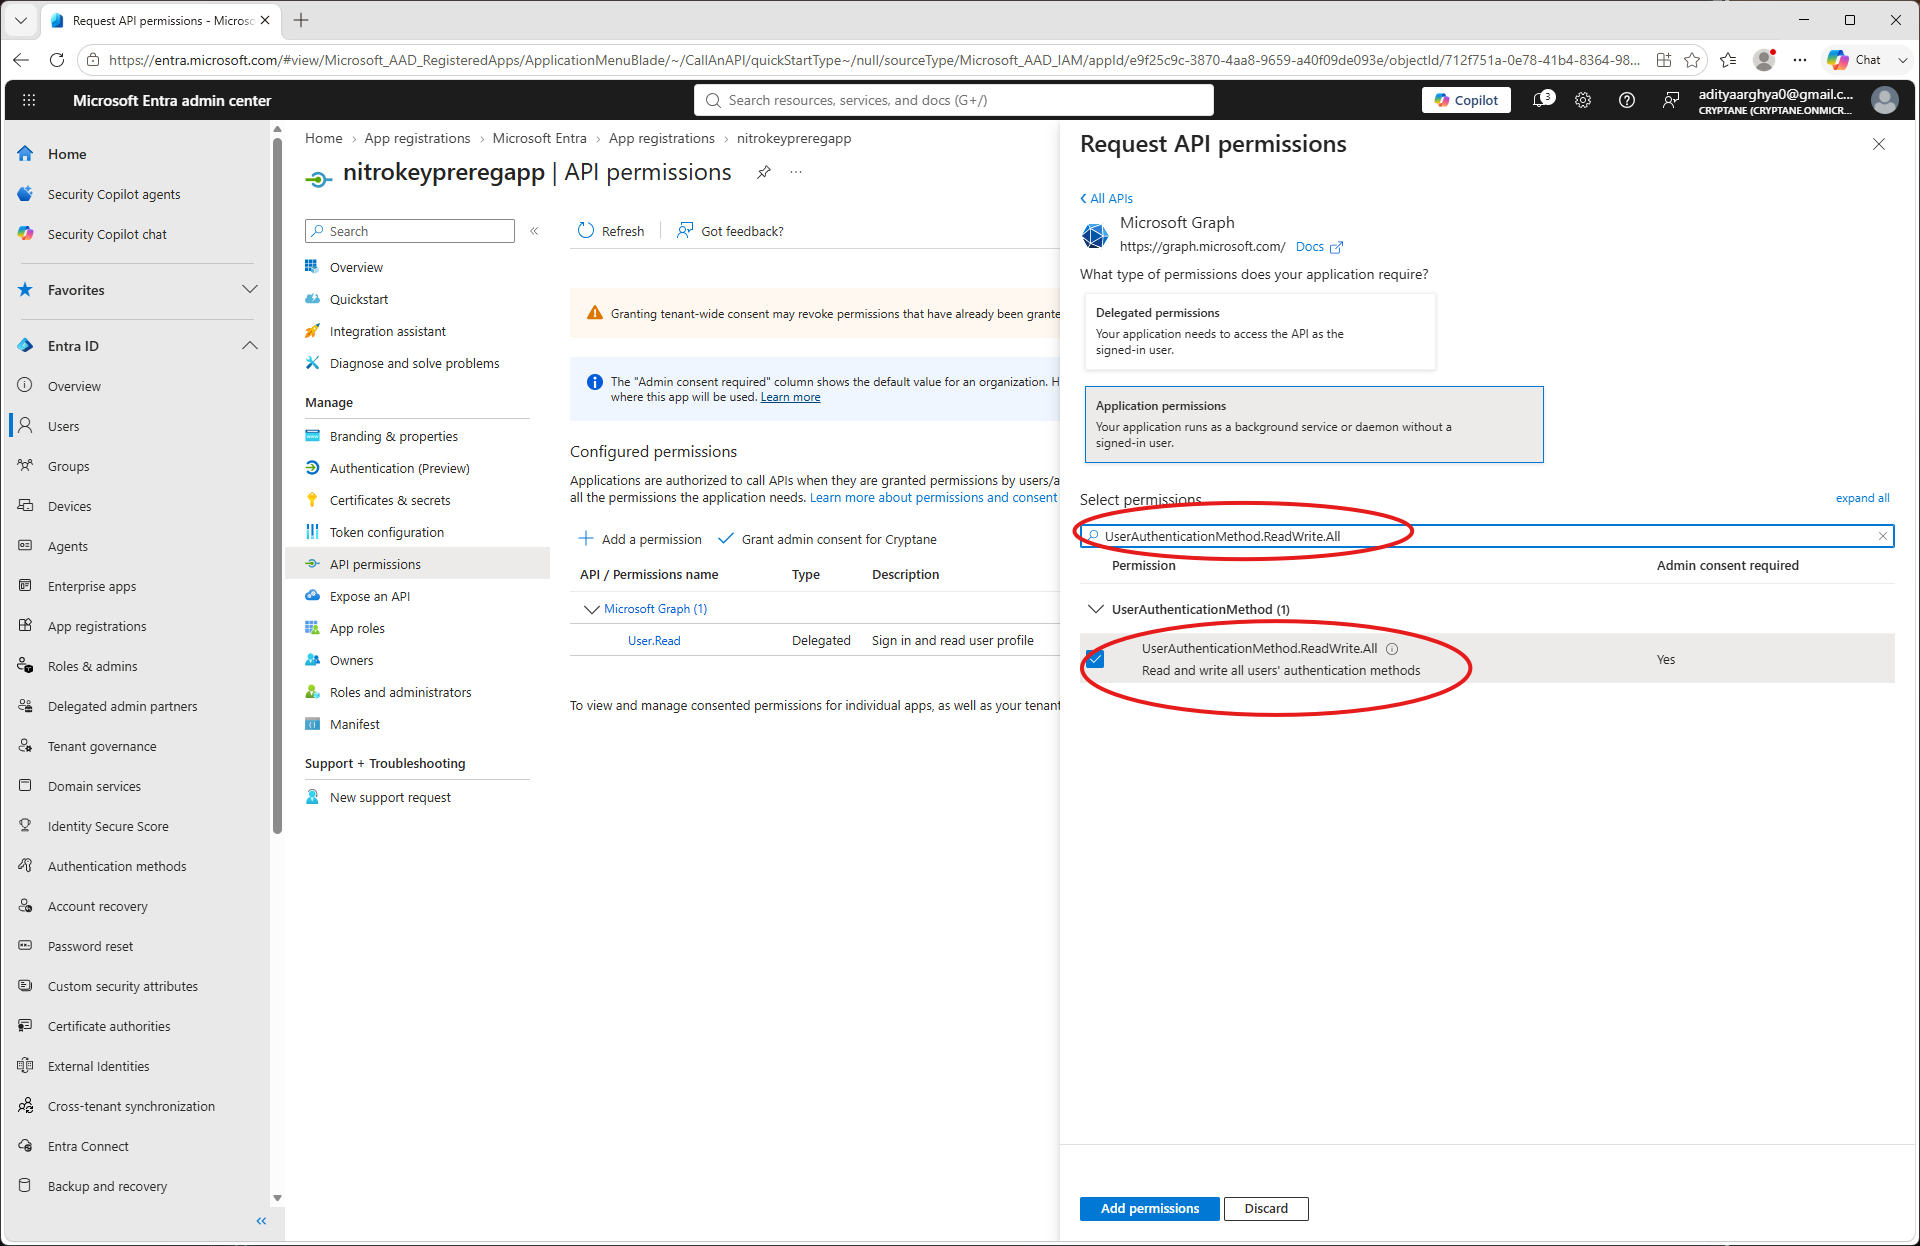
Search for
User.ReadWrite.Alland select it (Only if you want to be able to create users frompynitrokey). Click on the Add Permissions button.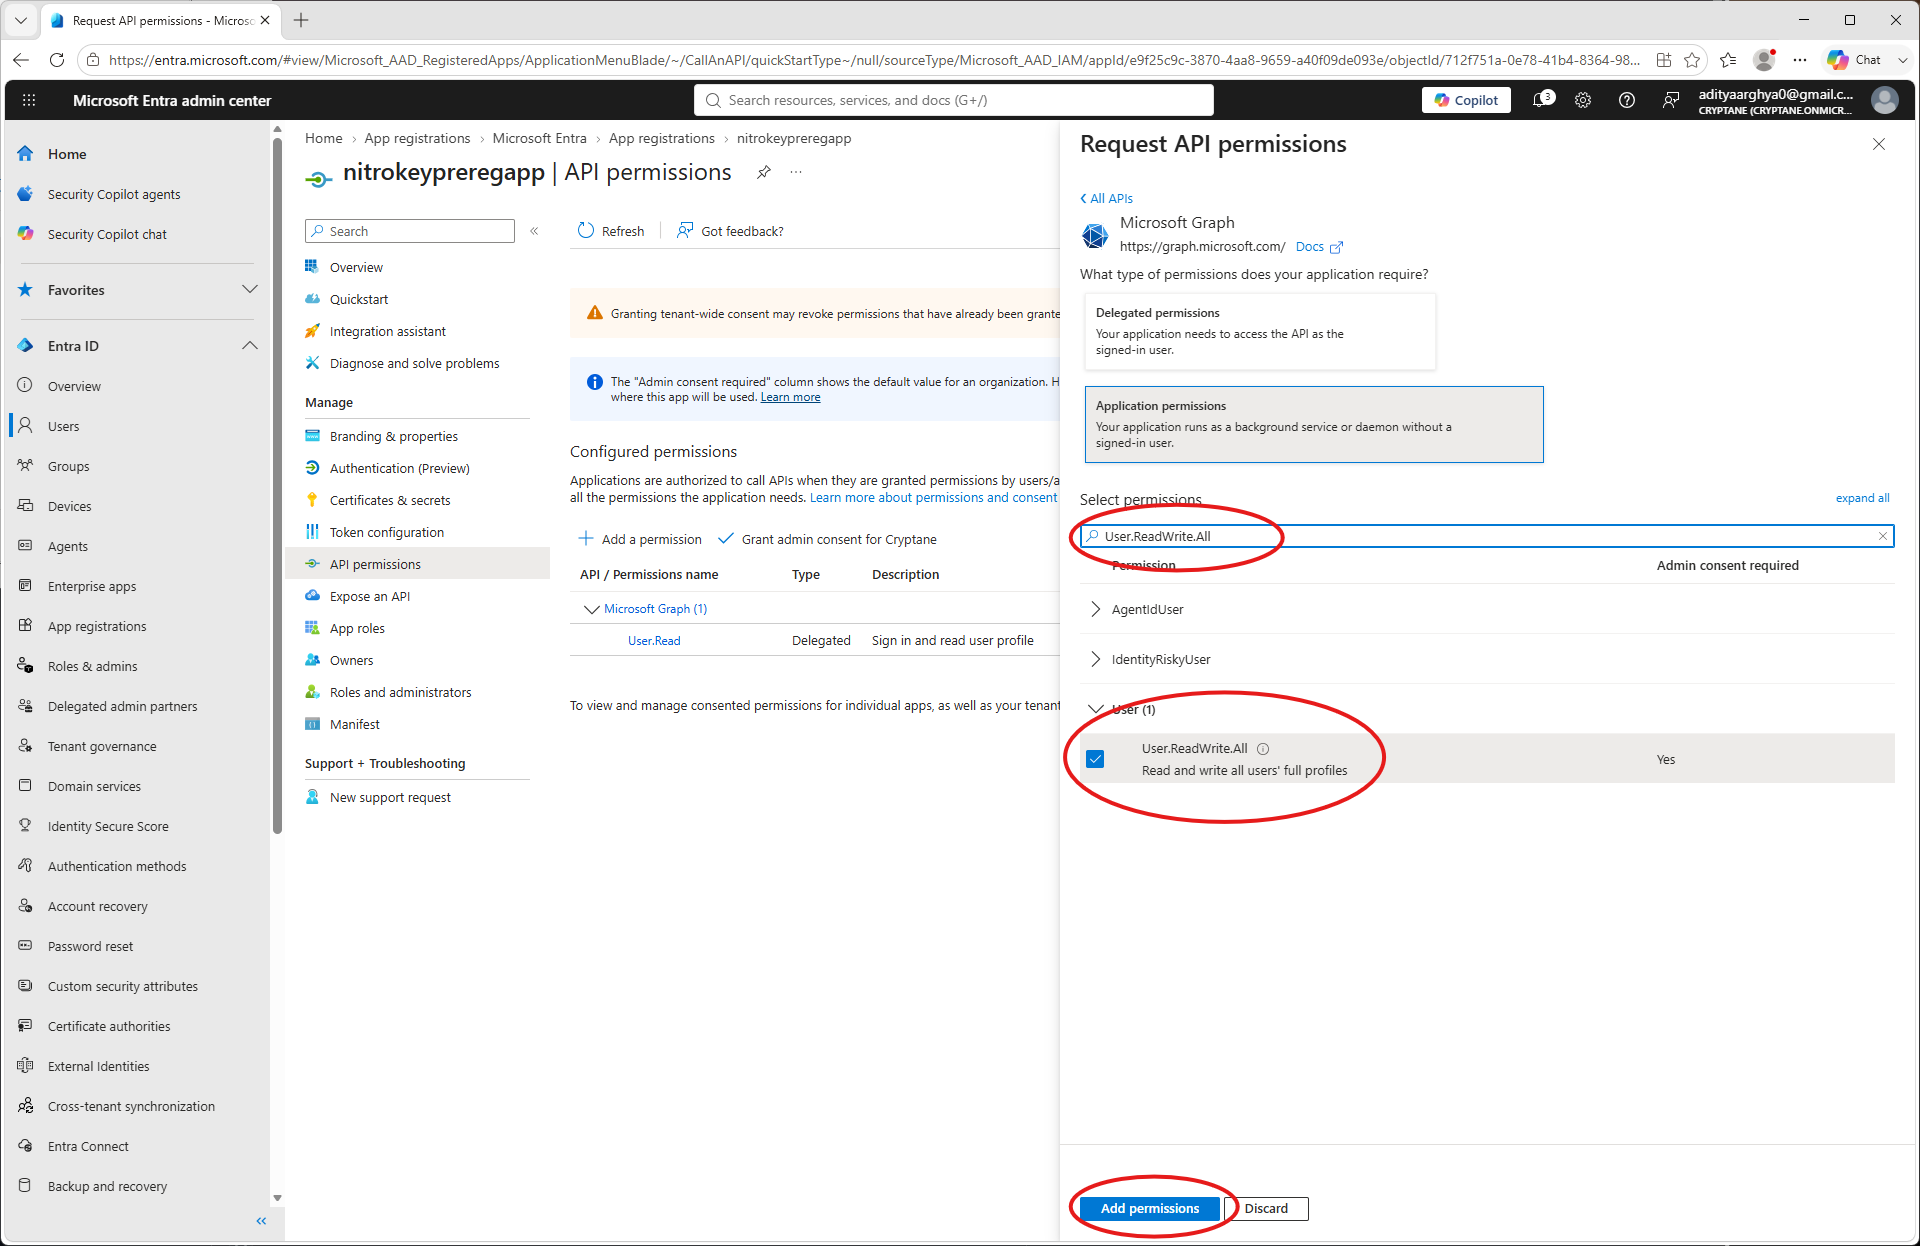
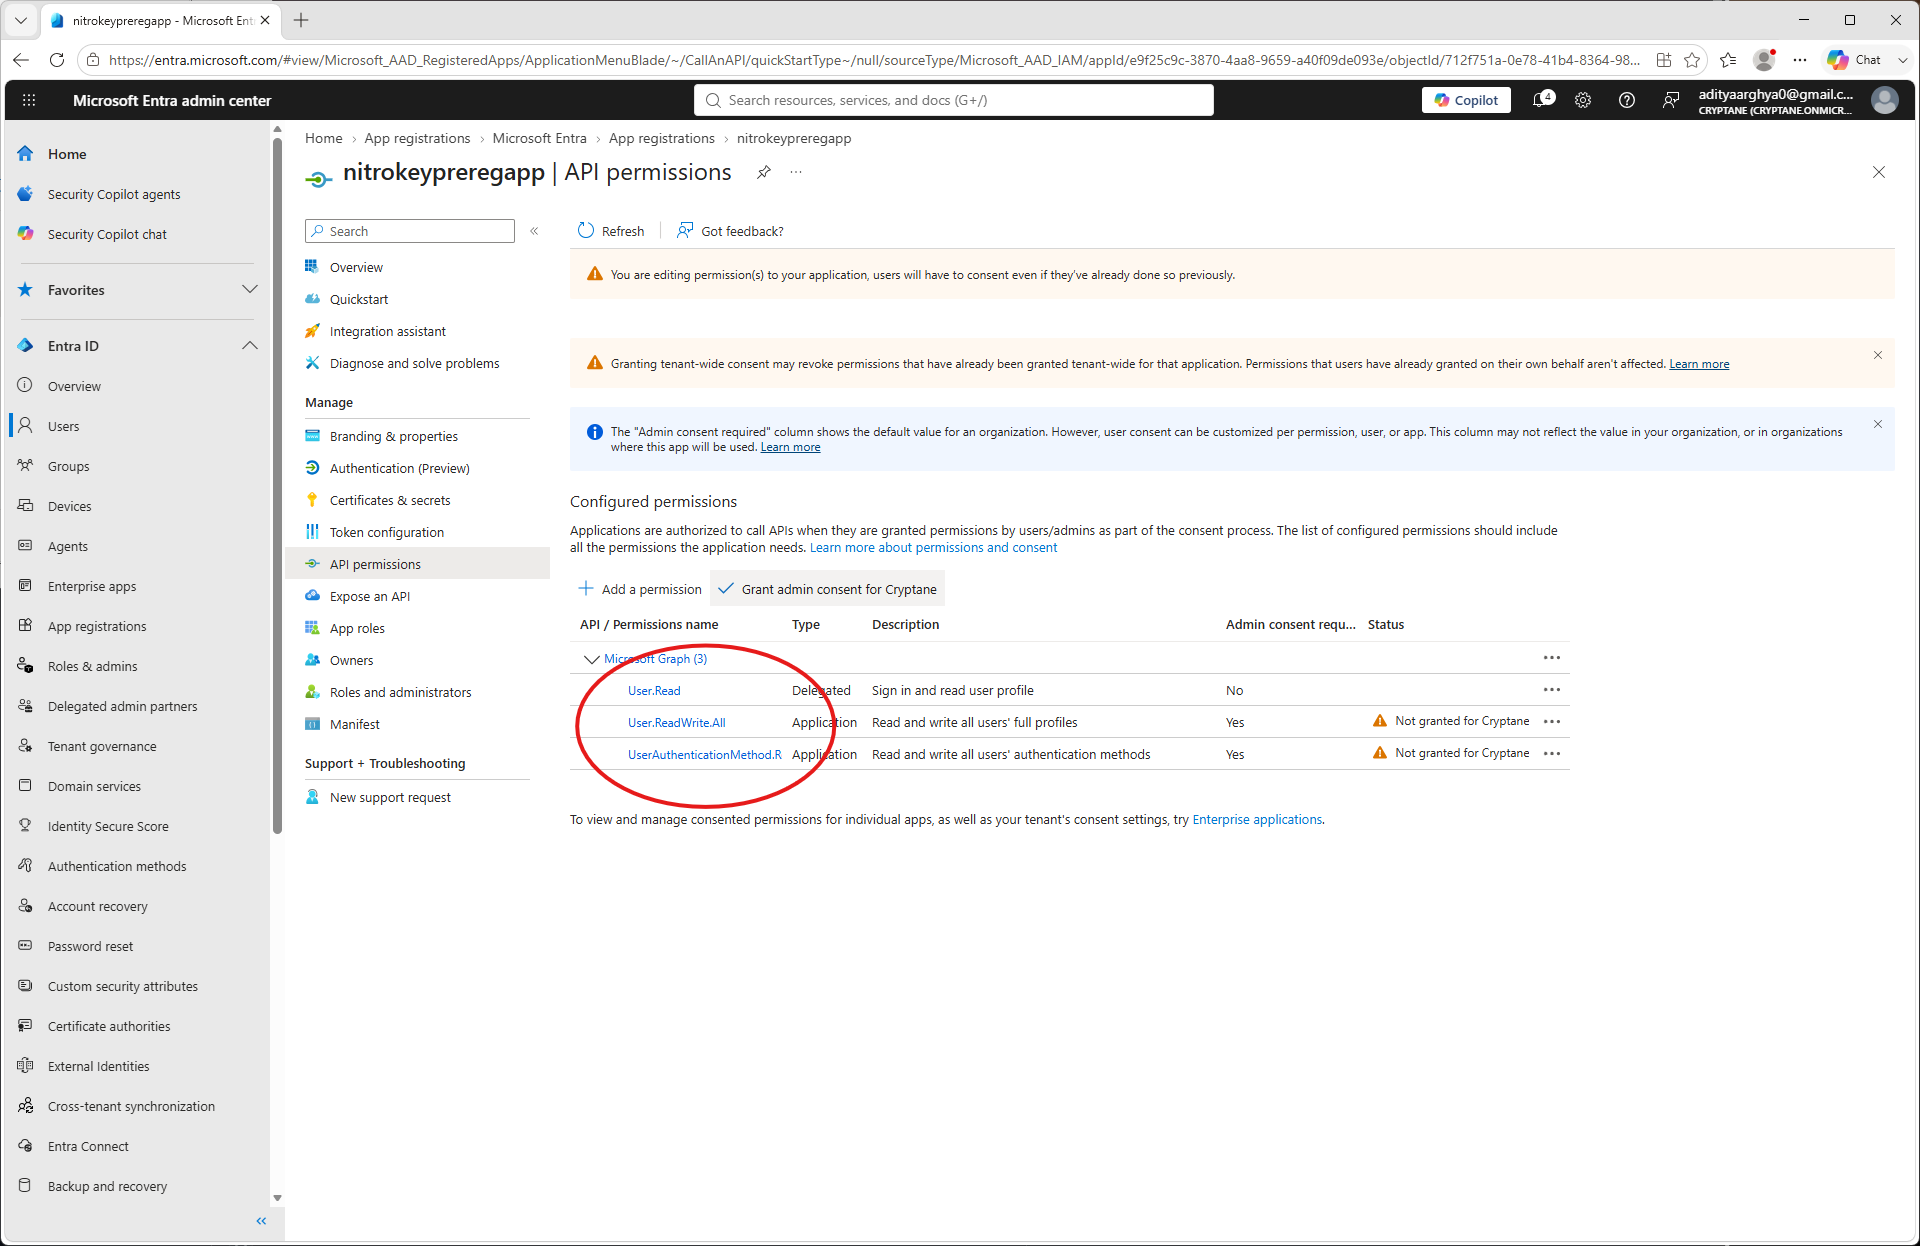
Pārbaudiet piešķirtās atļaujas.
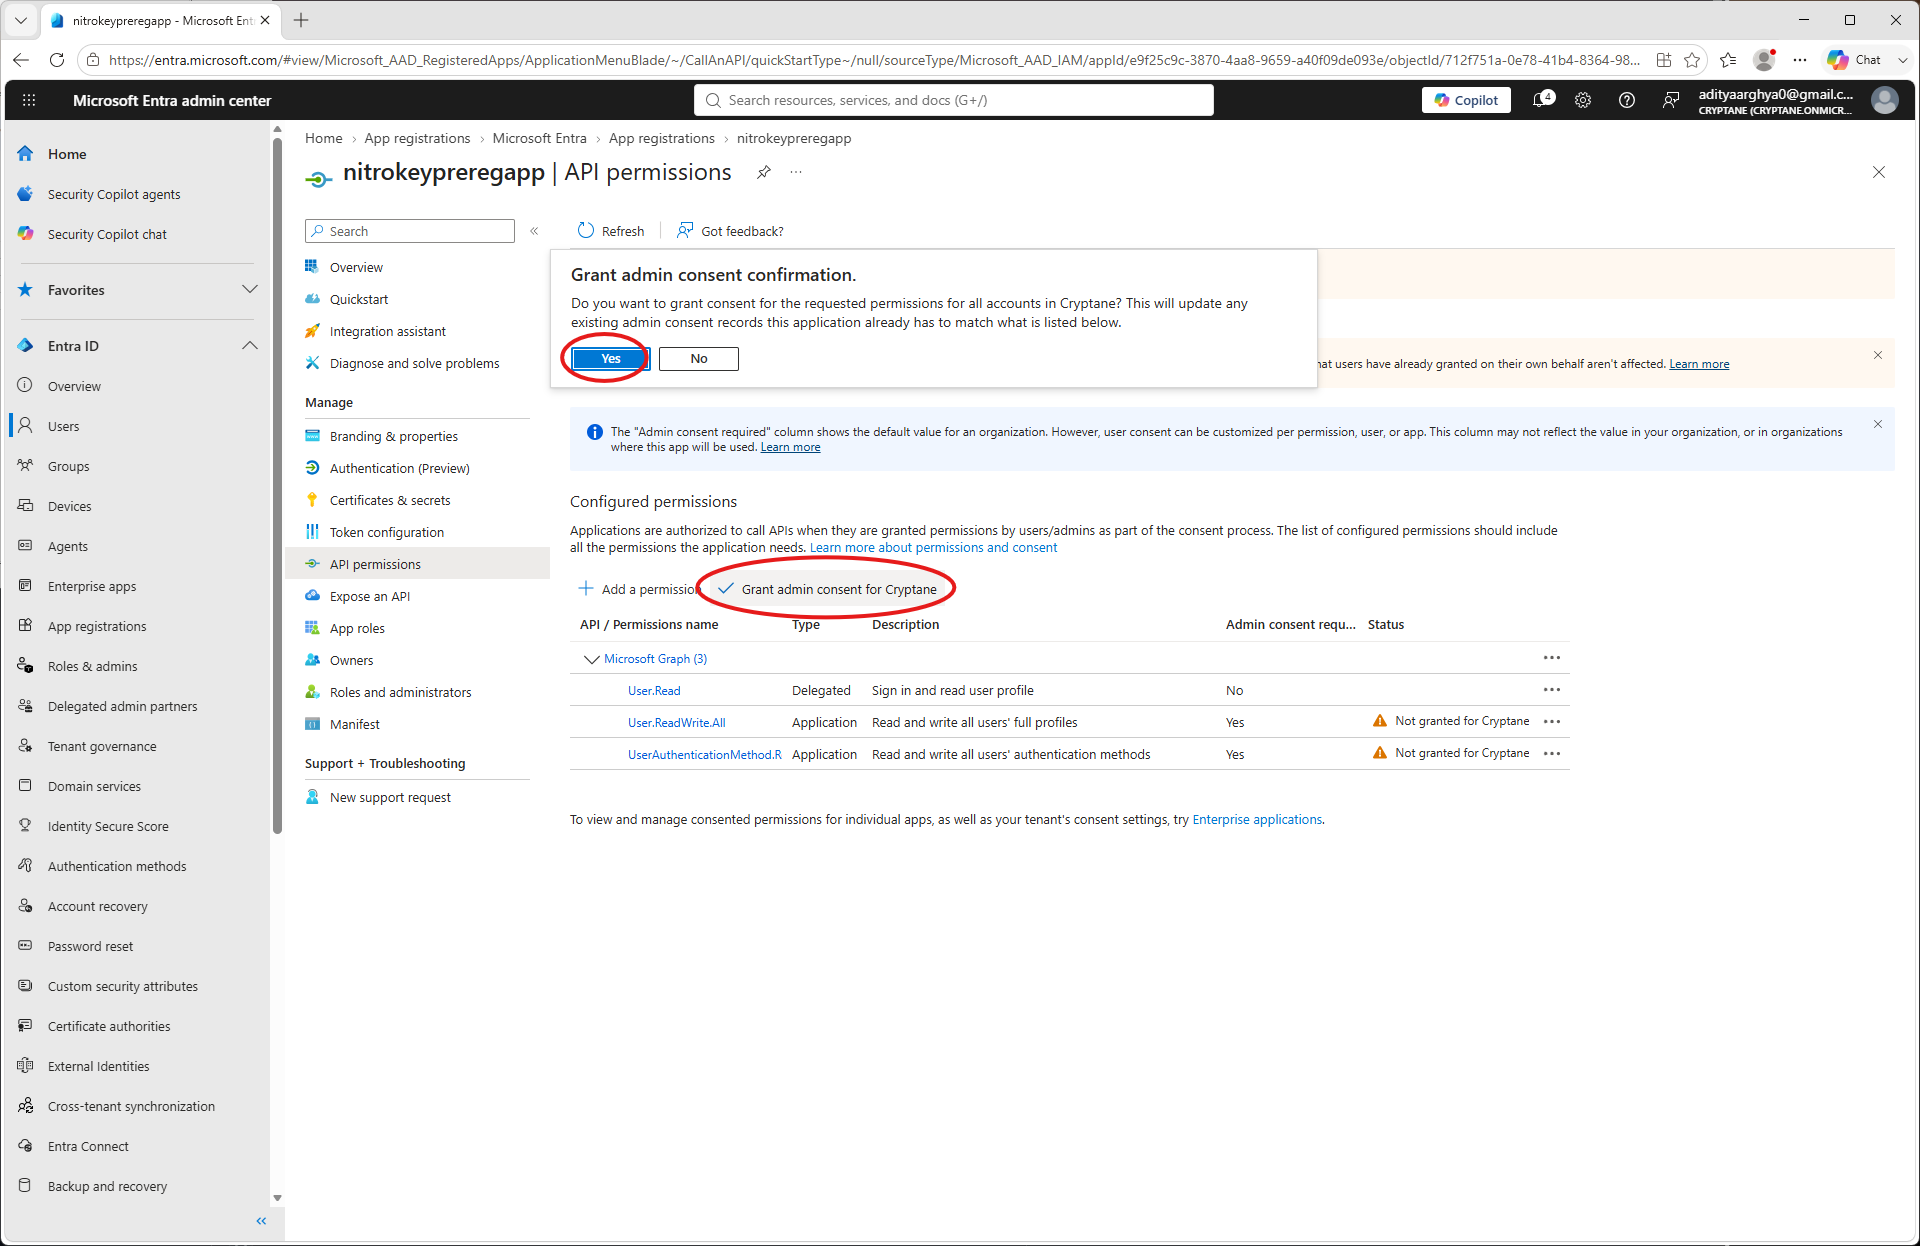
Noklikšķiniet uz „Piešķirt administratora piekrišanu” un apstipriniet to.
Atgriezieties lietotnes sākumlapā un kreisajā panelī izvēlieties „Sertifikāti un slepenās atslēgas“
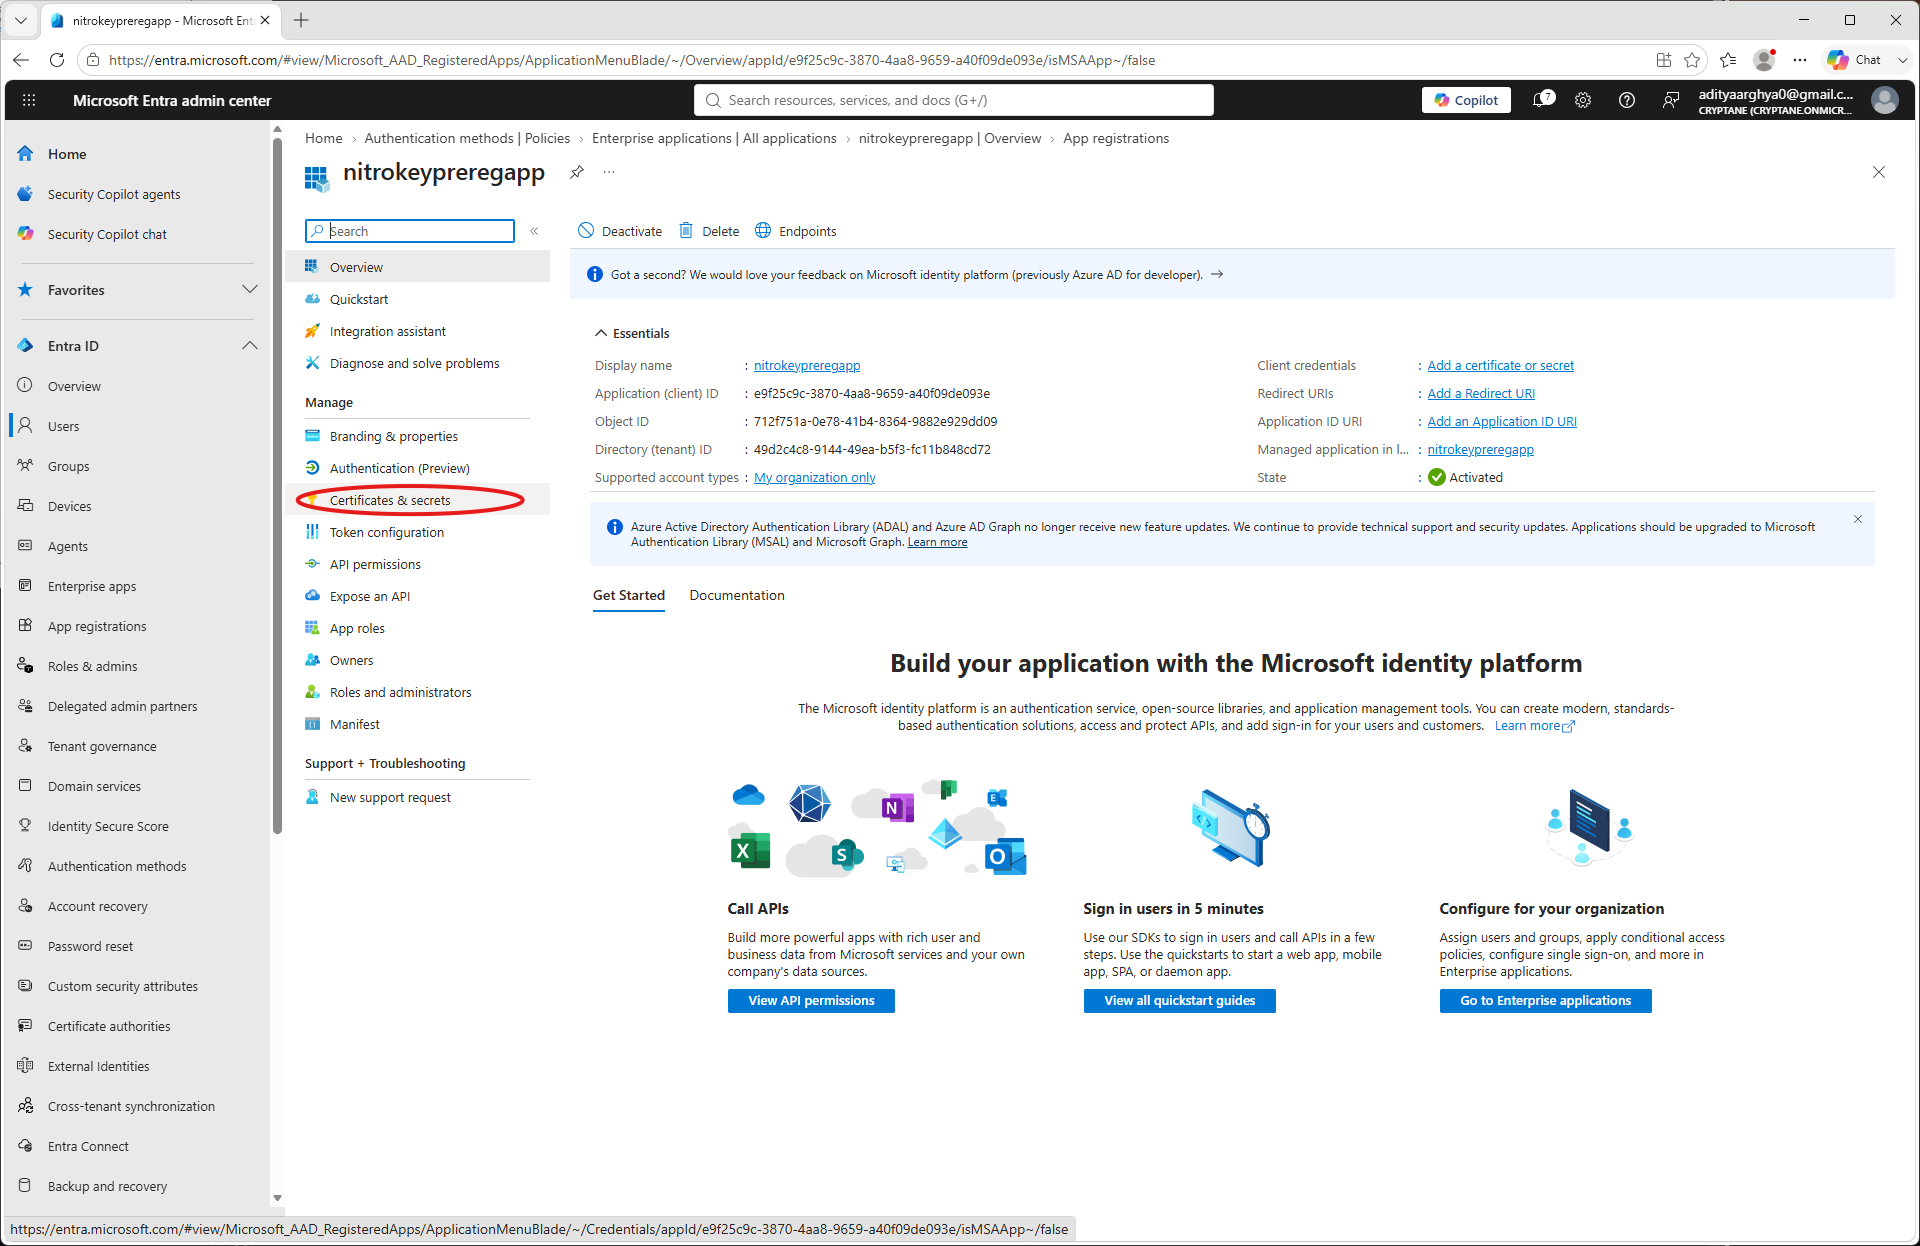
Noklikšķiniet uz „Jauns klienta slepenais kods”
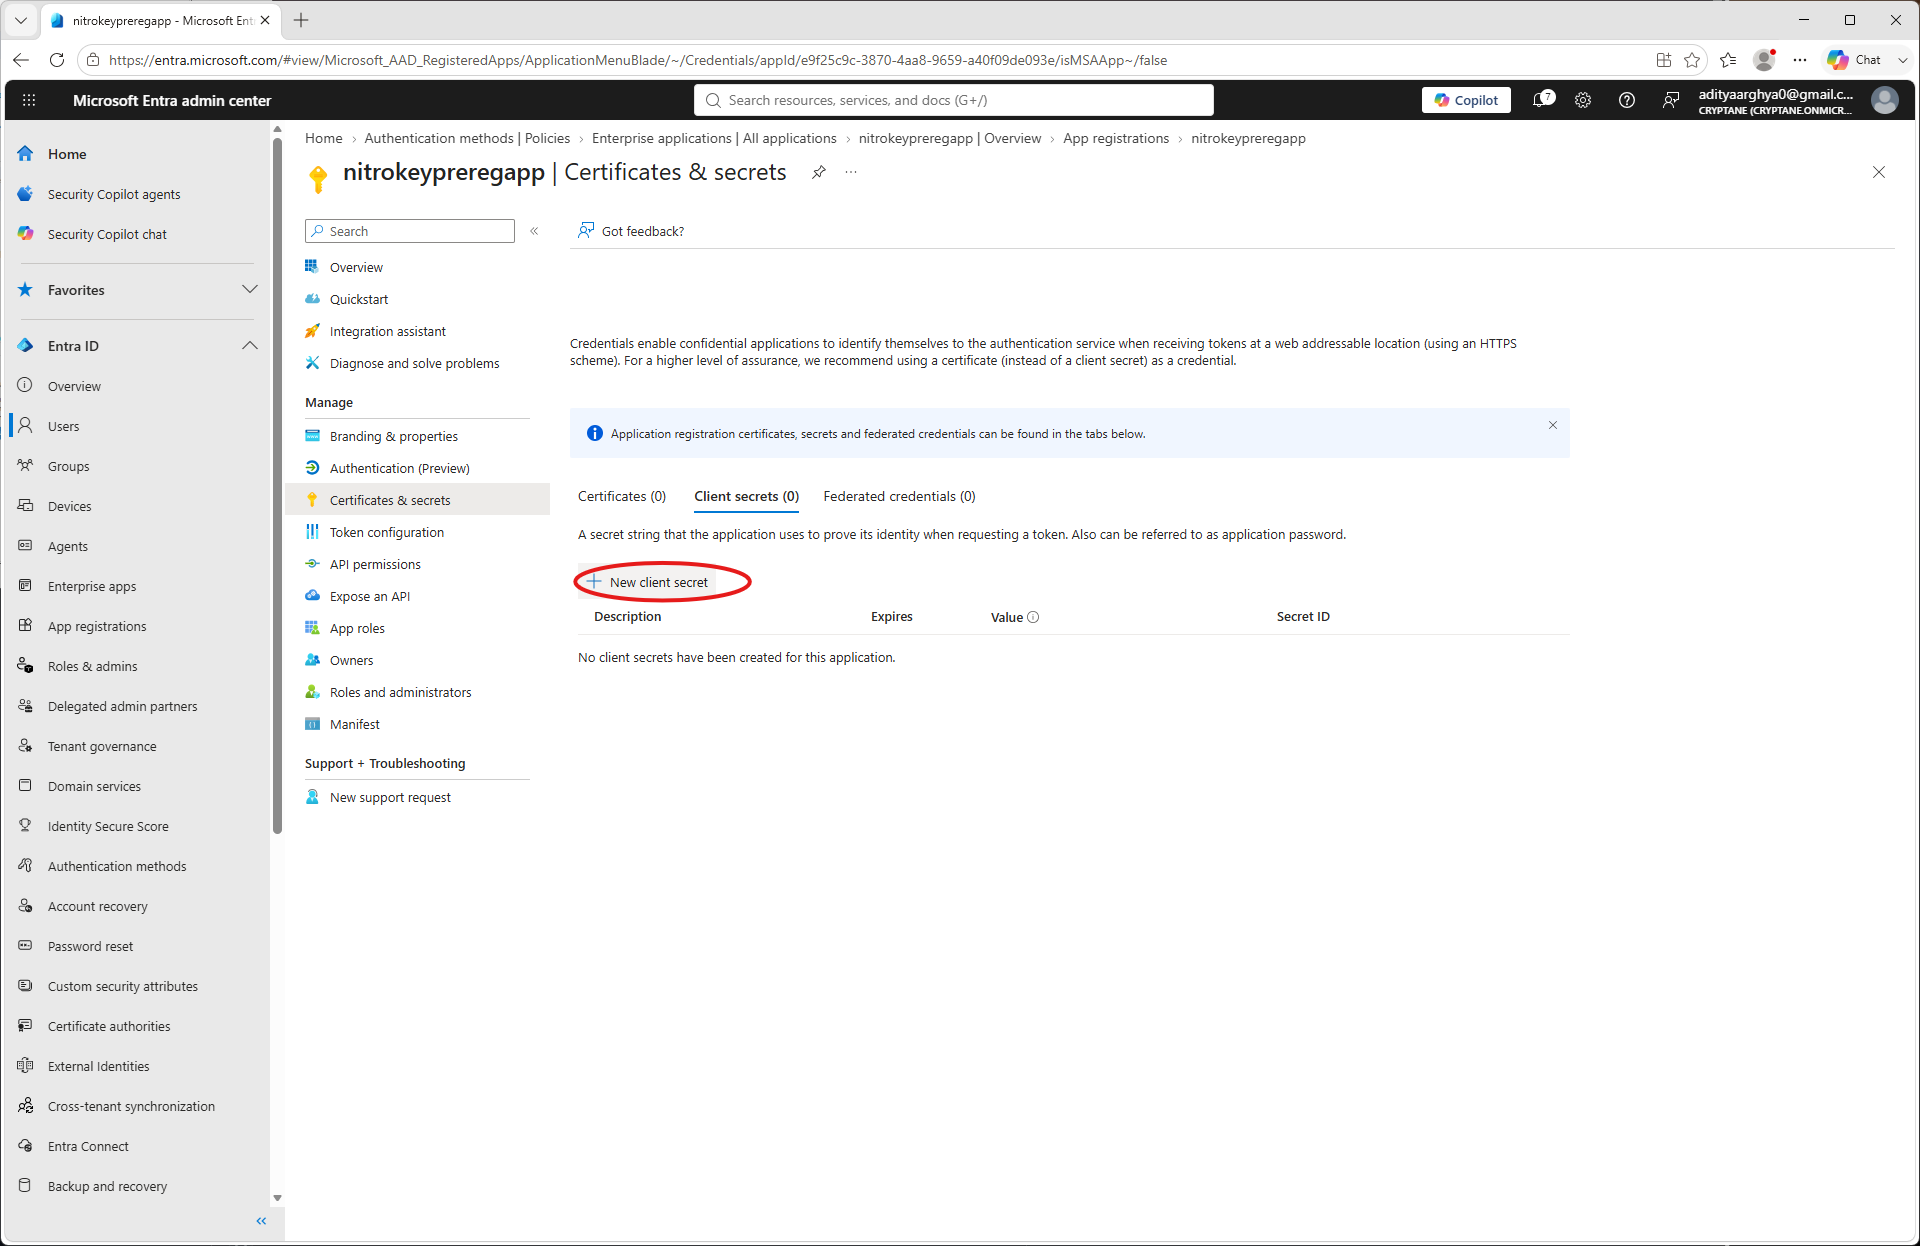
Ievadiet nosaukumu un derīguma termiņu, pēc tam noklikšķiniet uz „Pievienot”
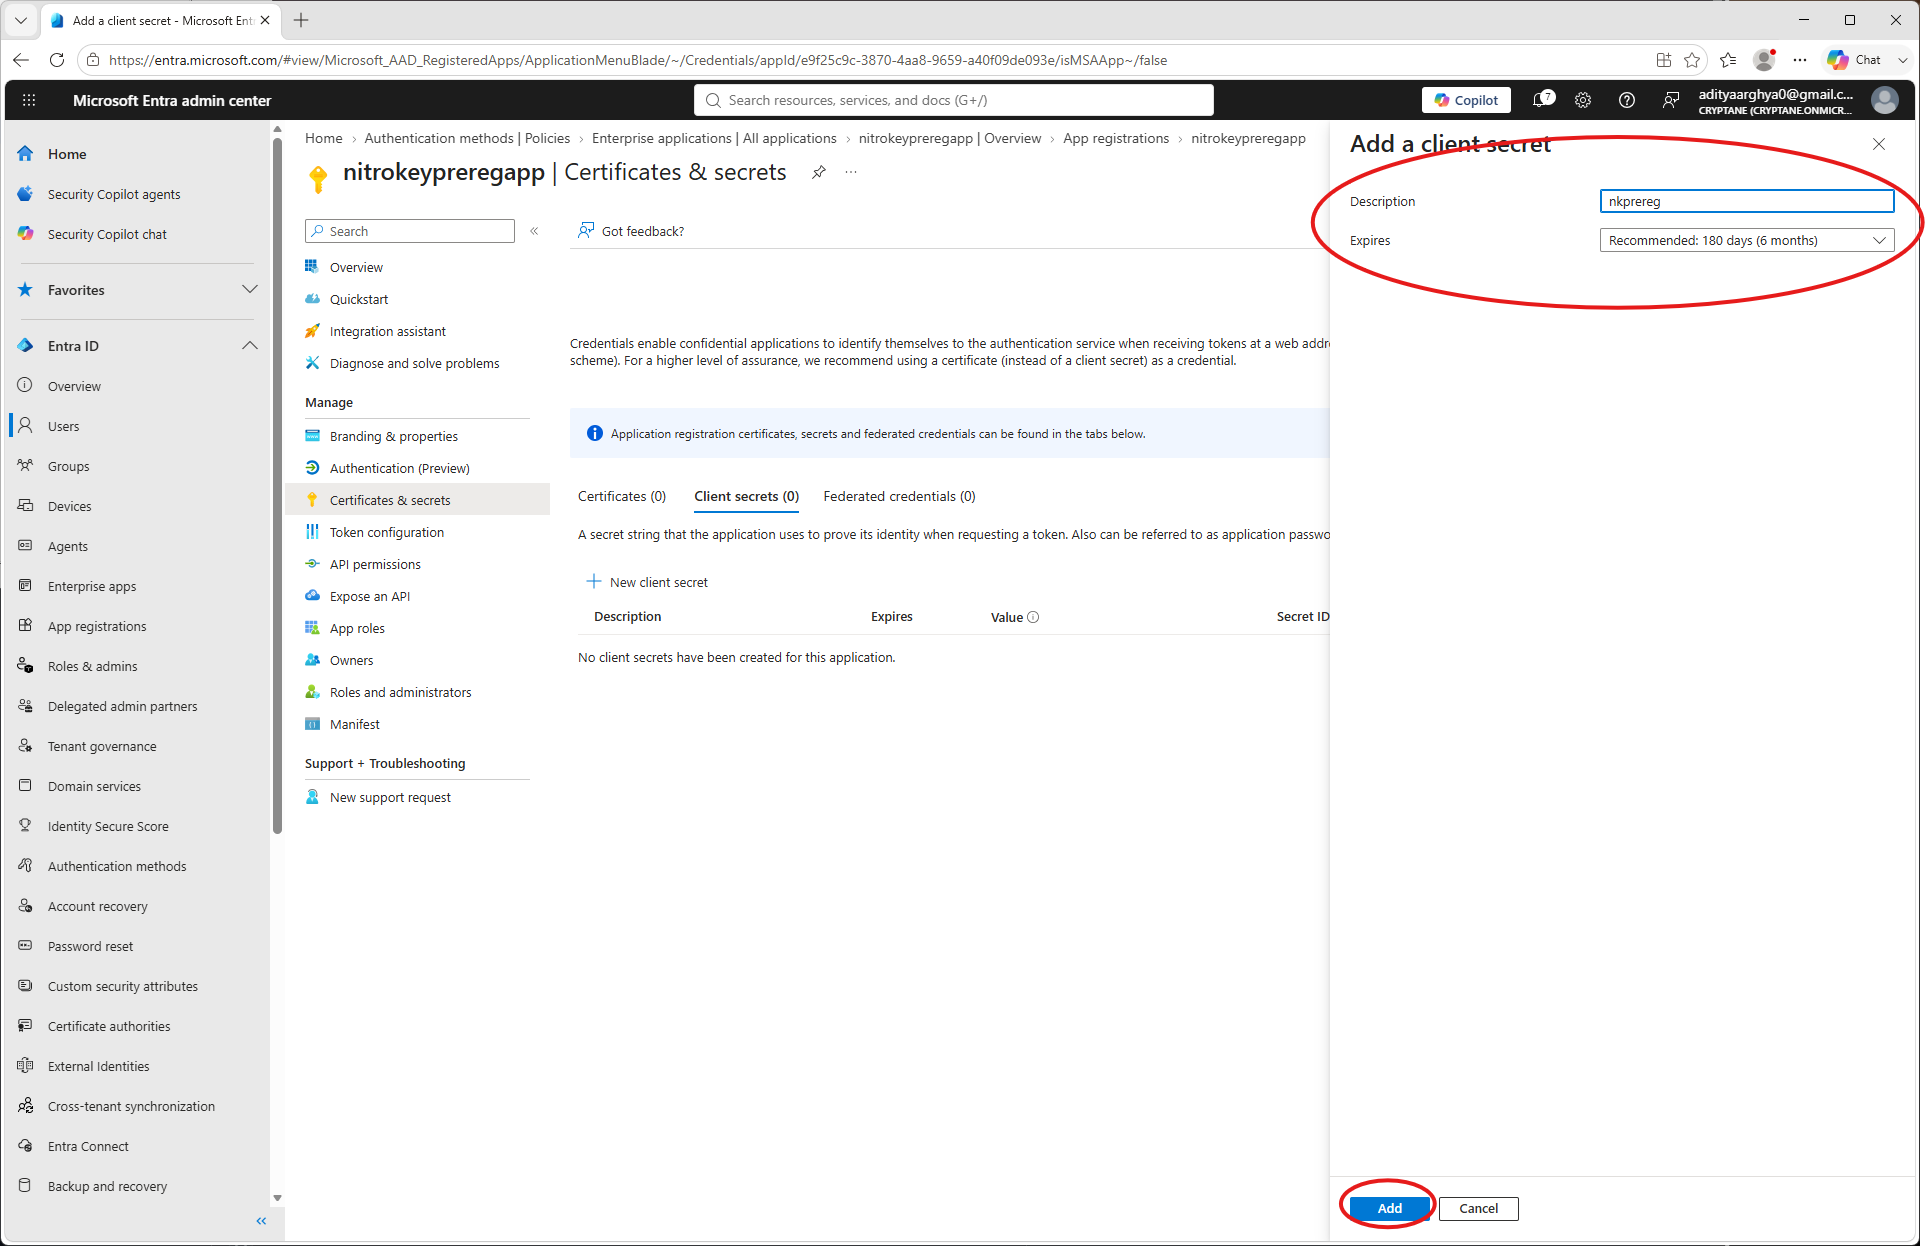
Pierakstiet klienta slepeno kodu (vēlāk to vairs nevarēsiet apskatīt).
Noklikšķiniet uz „Autentifikācijas metodes” kreisajā panelī.
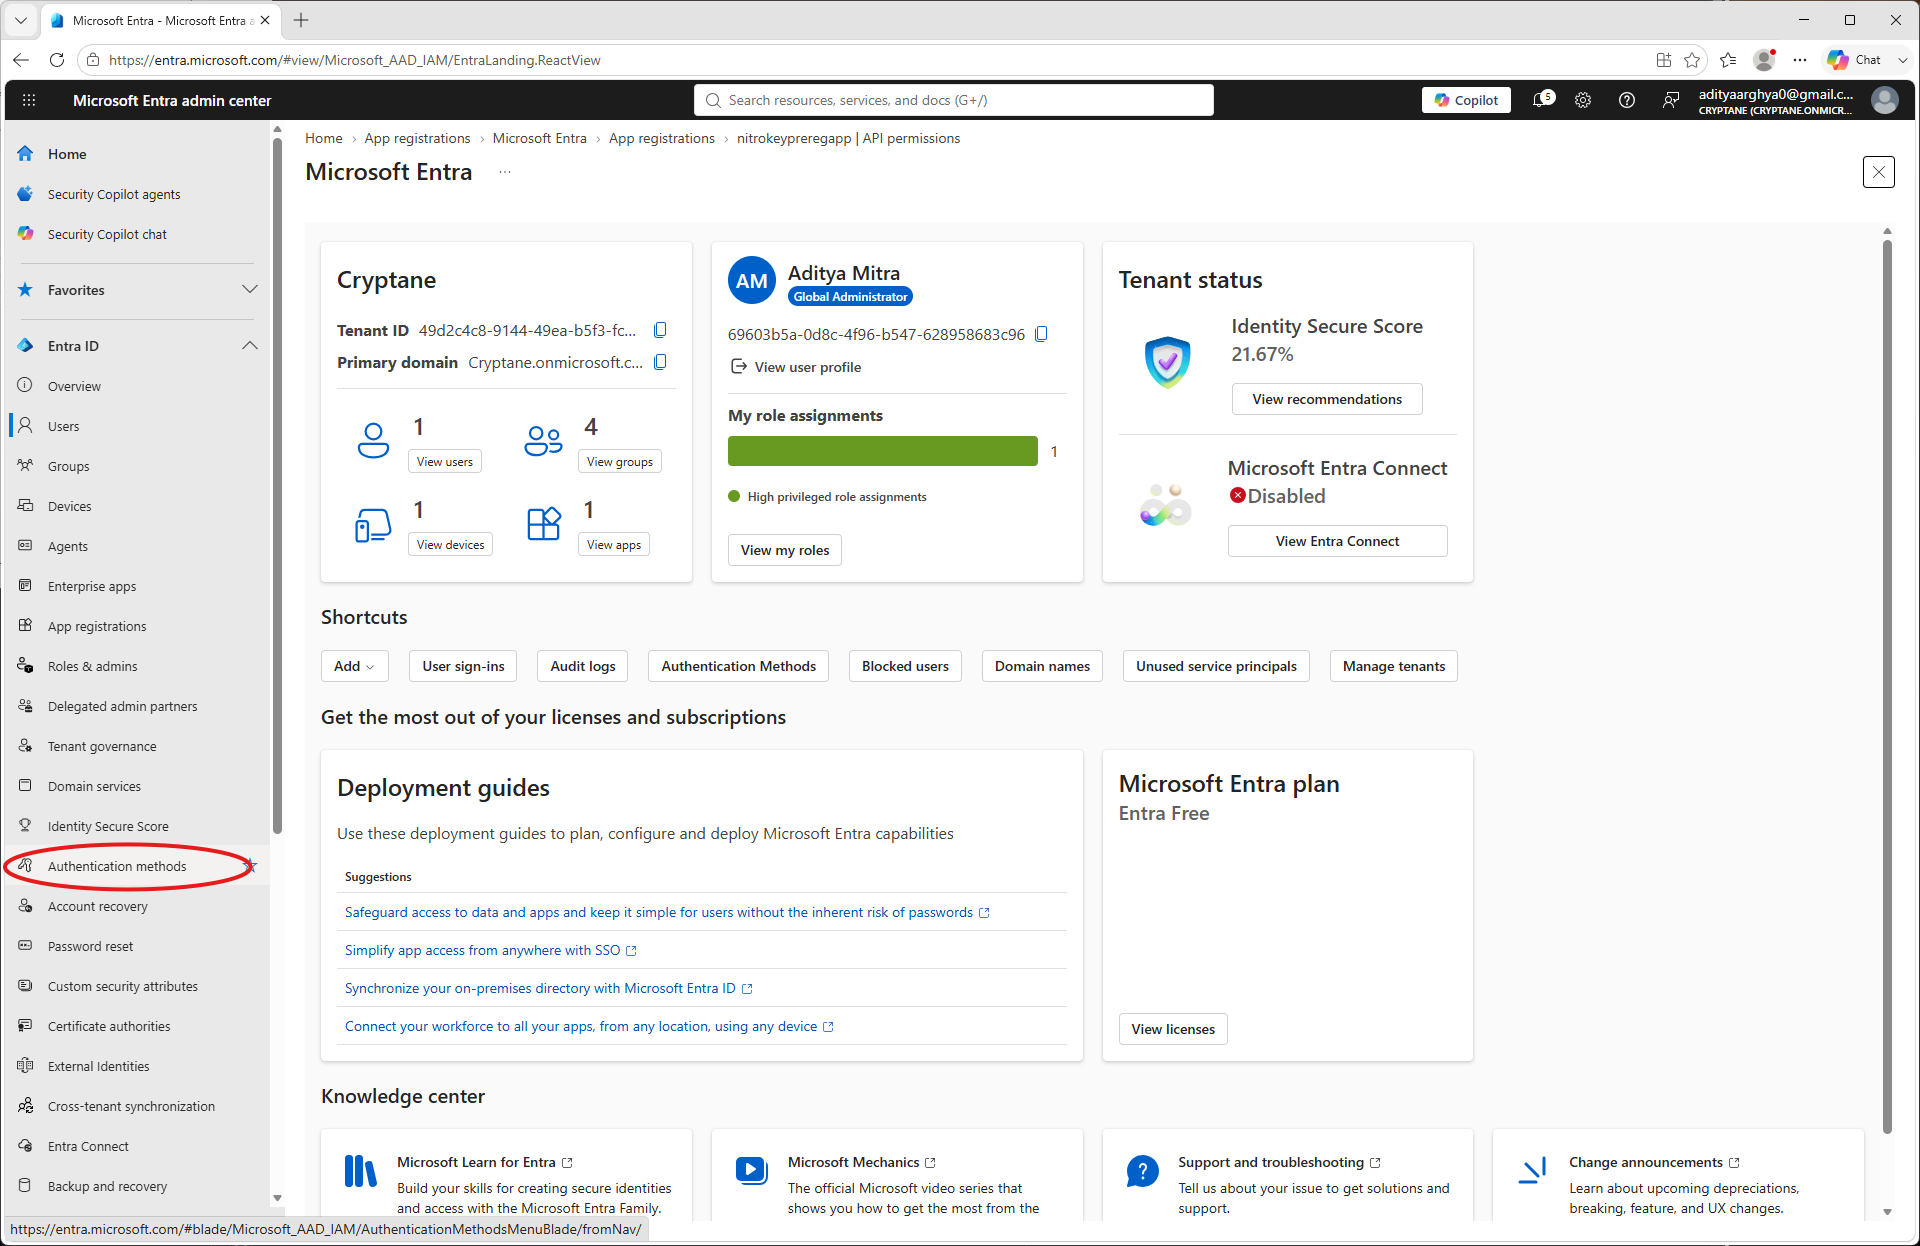
Select Passkey (FIDO2).
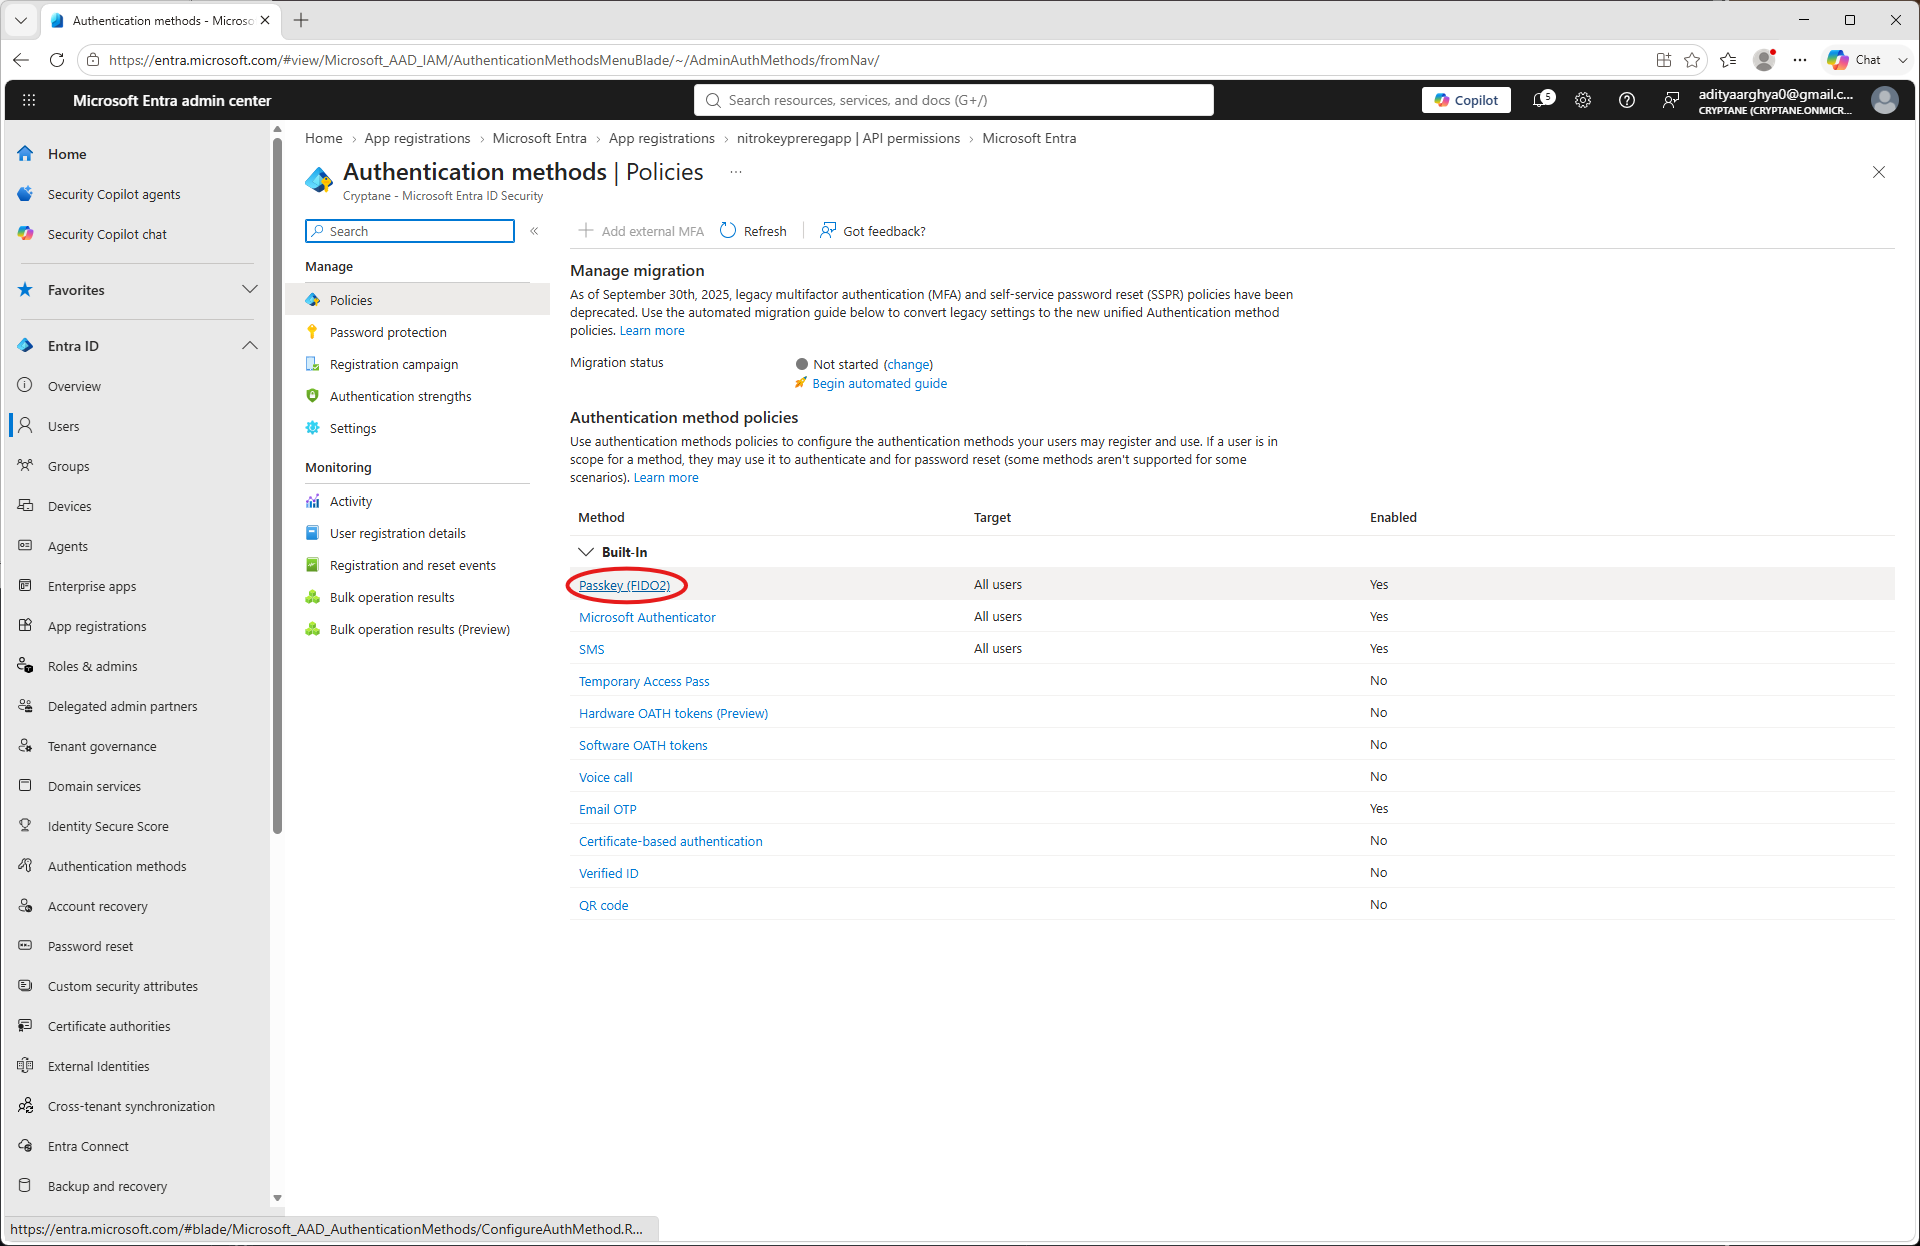
Click on the Configure tab.
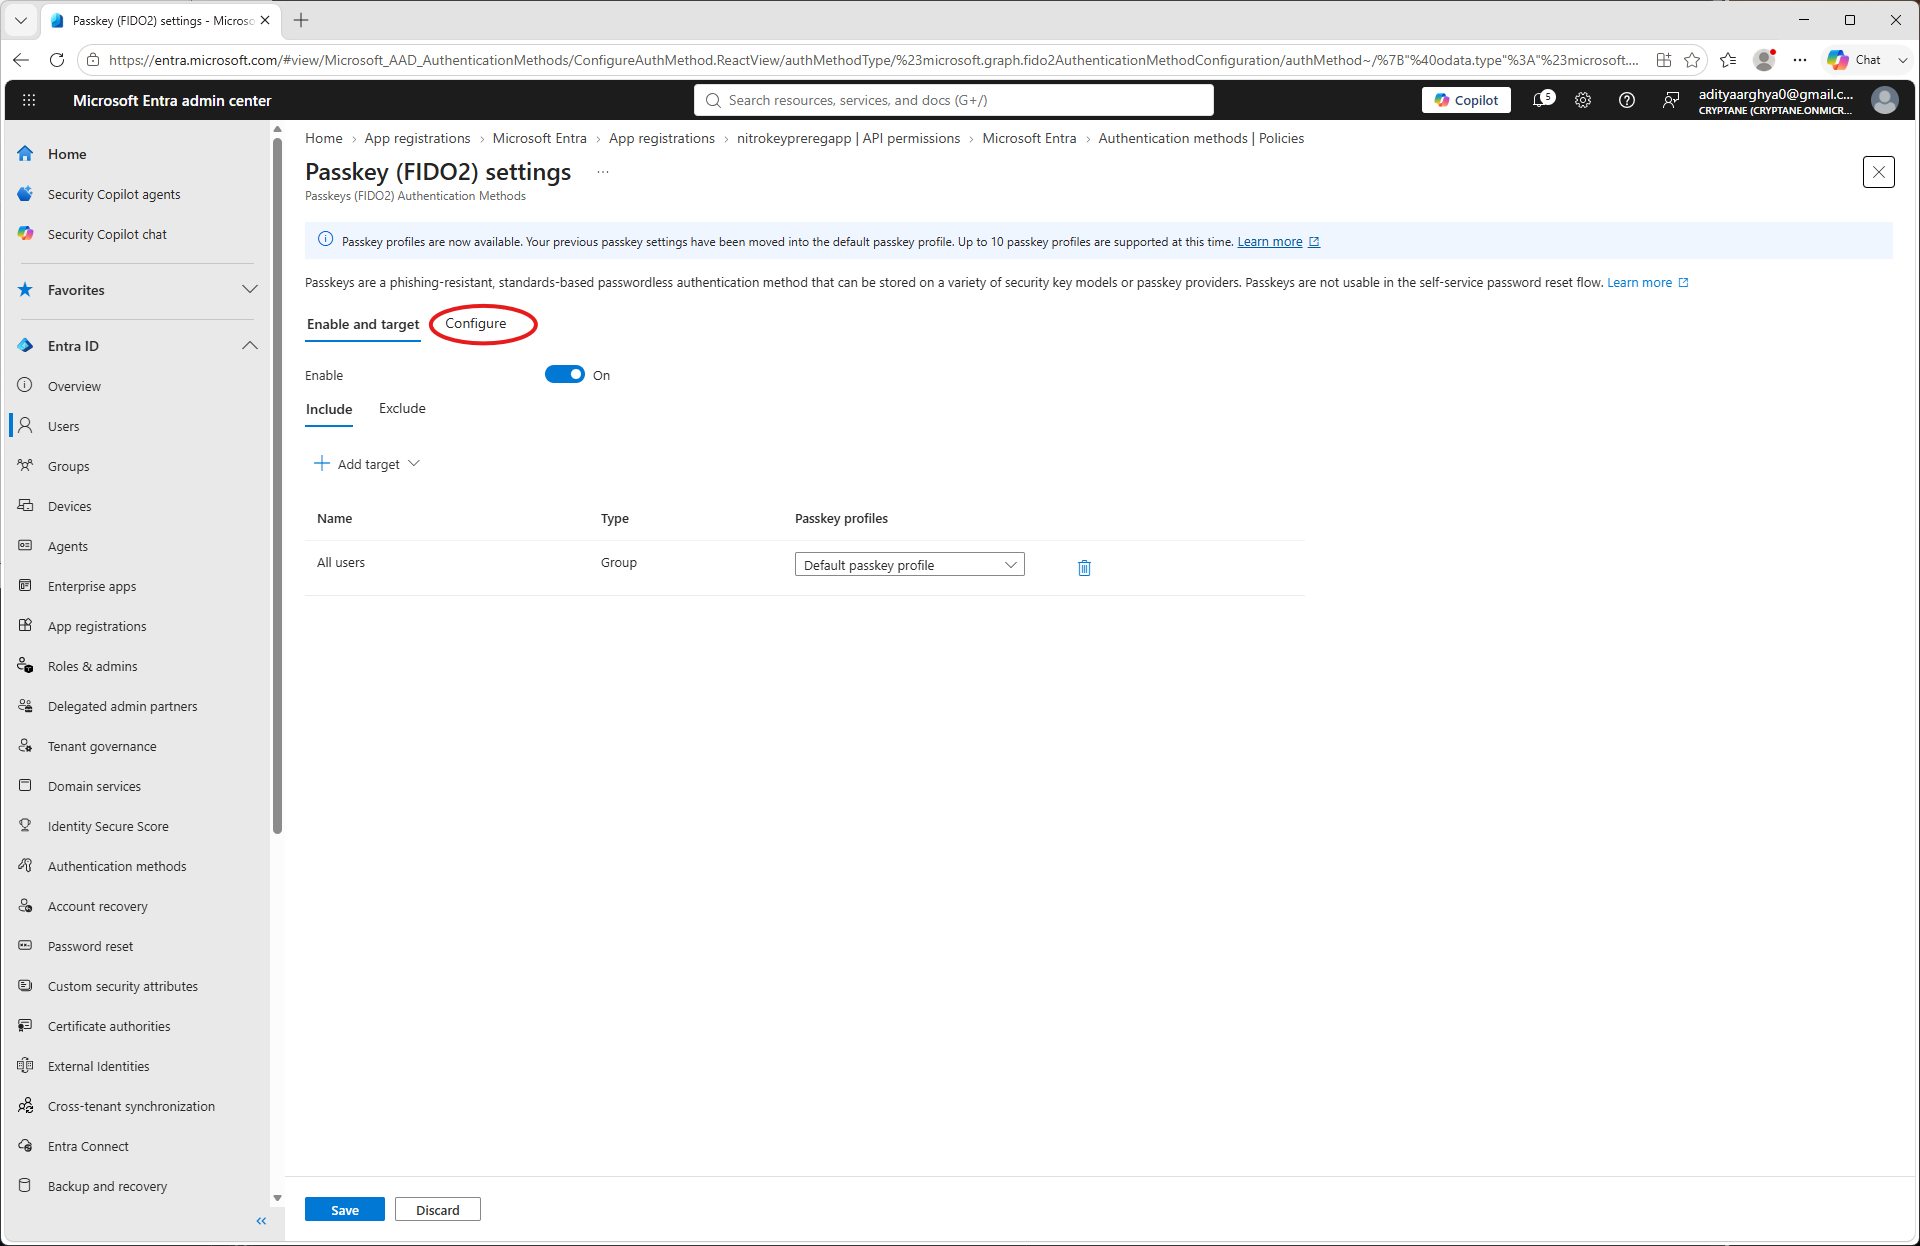
Click on Default Passkey profile
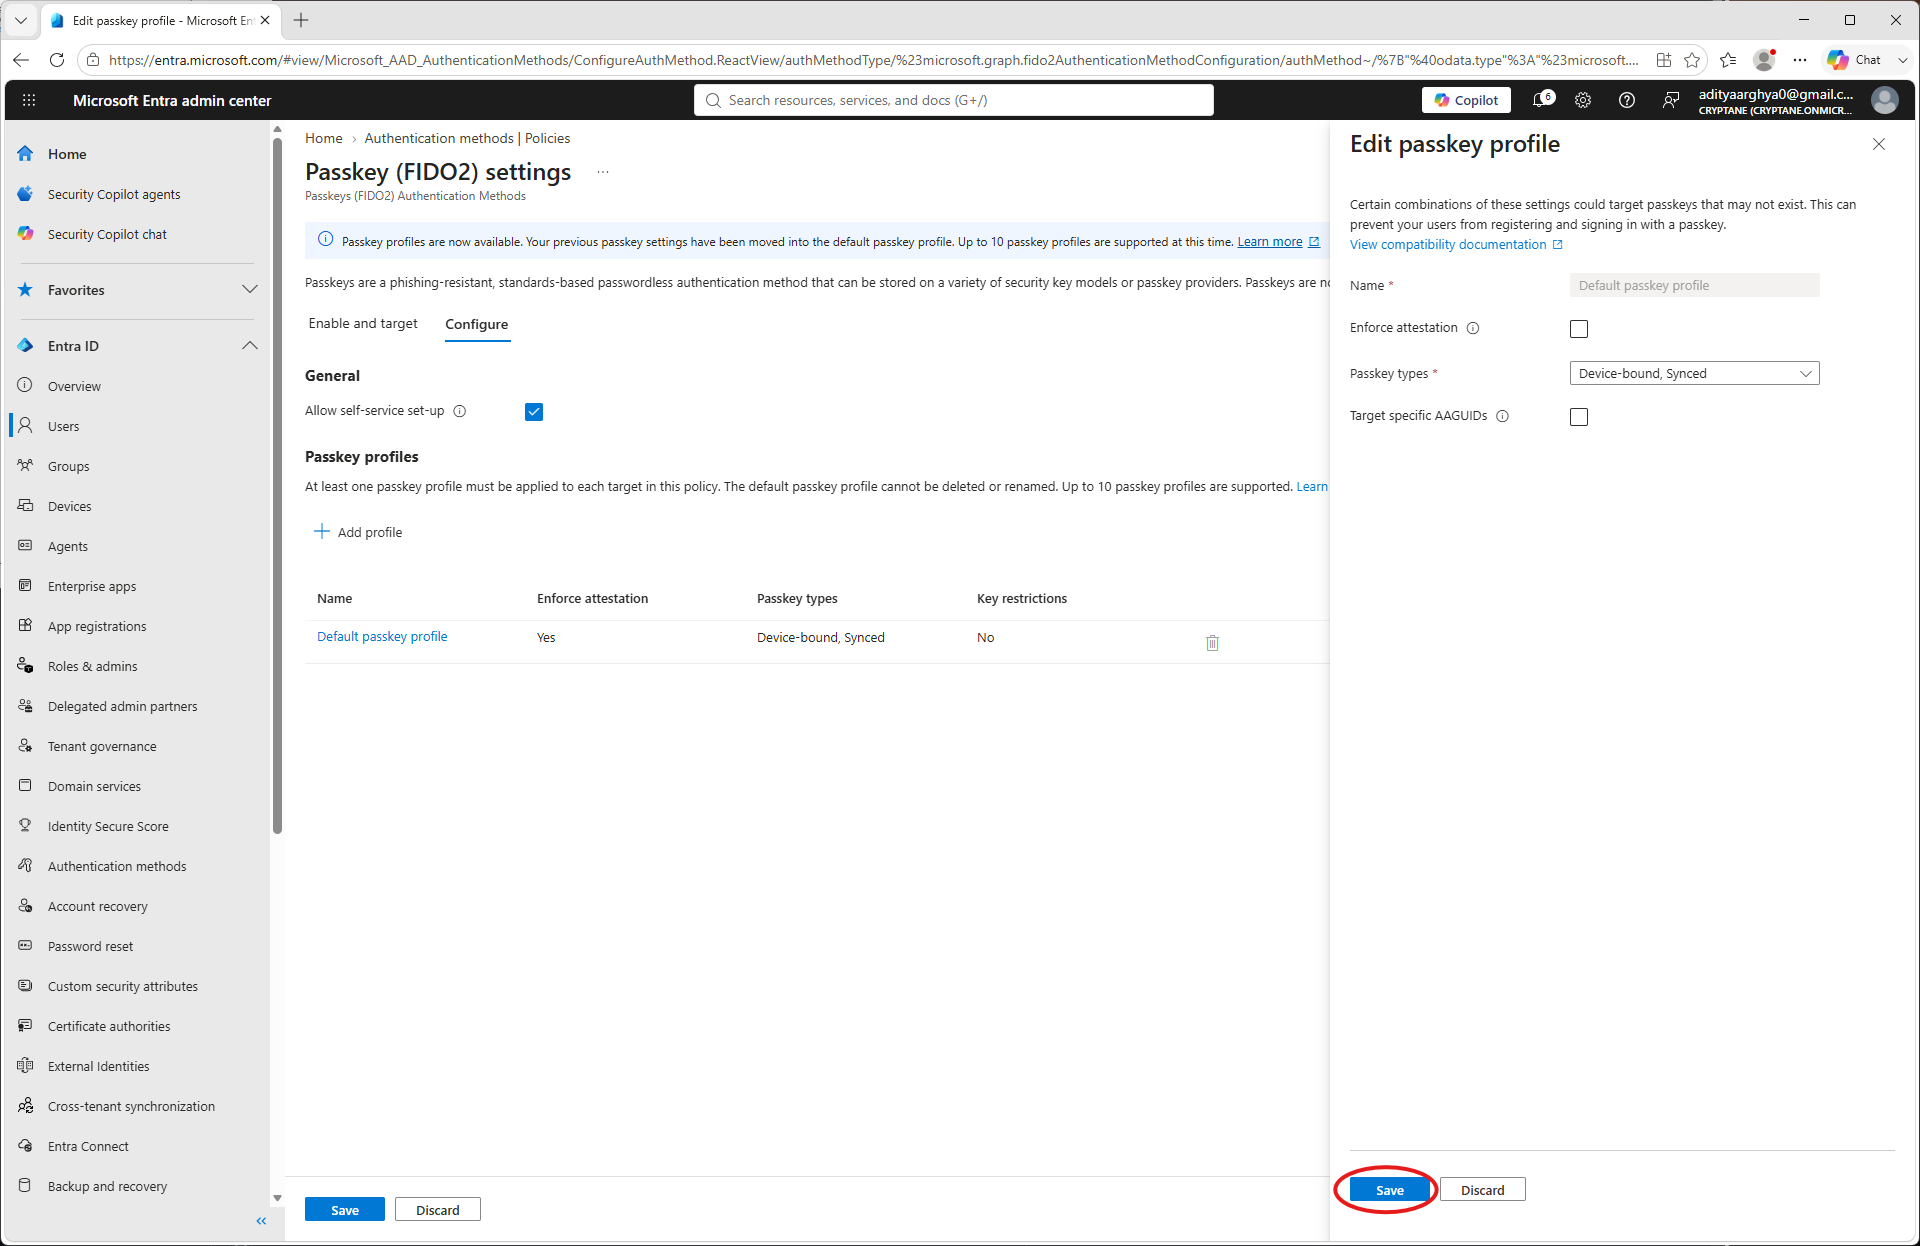
Atceliet atzīmi no izvēles „Piemērot apliecinājumu” (Tikai tad, ja izmantojat Nitrokey, kam nav FIDO Alliance sertifikāta. Šī dokumenta sagatavošanas brīdī šāds sertifikāts ir tikai Nitrokey 3A Mini.)
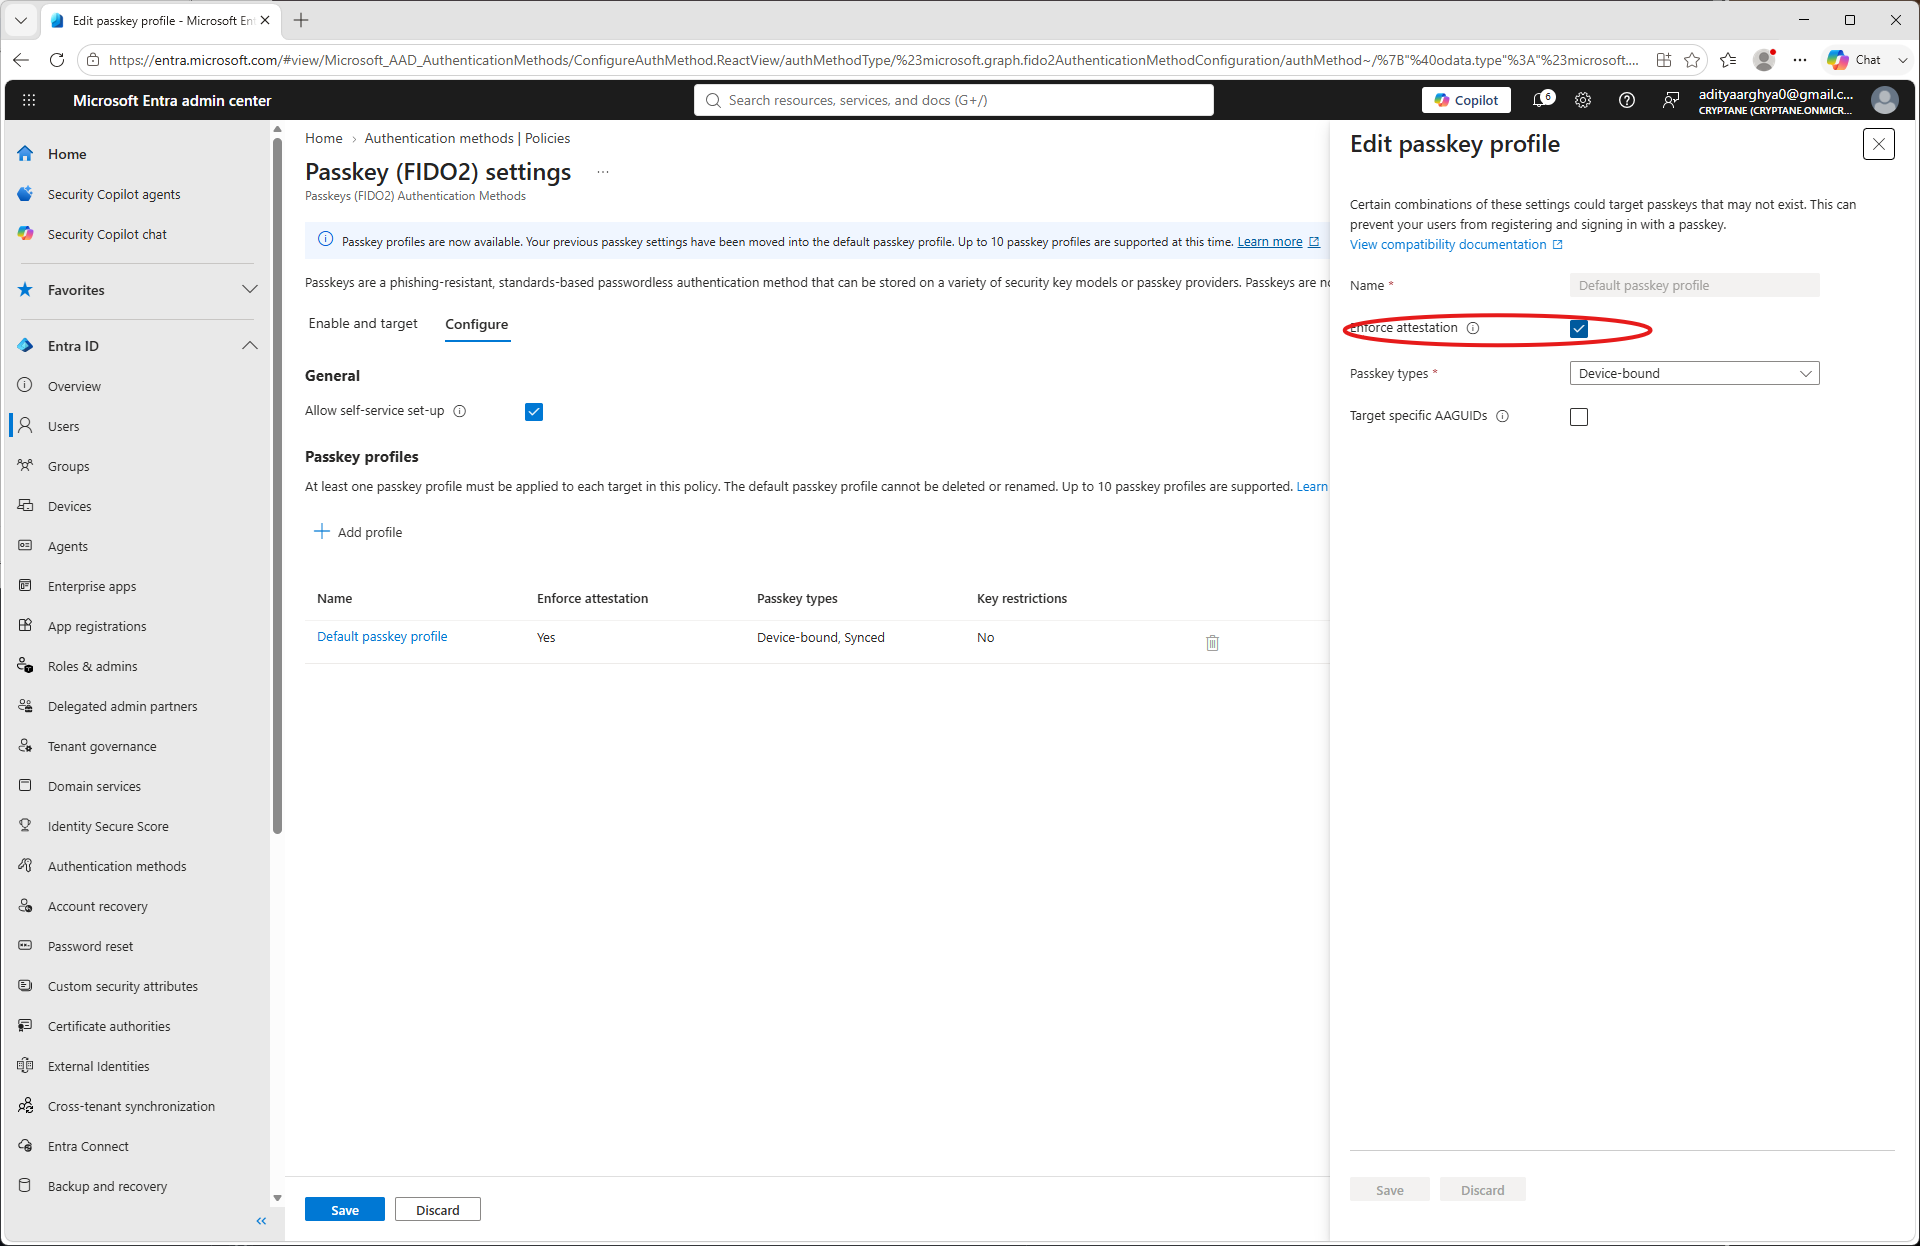
Click Save.
You have taken note of the Tenant ID, Client ID, Client Secret and Primary Domain as a part of the process. Make a
config.jsonfile with the information. An example is shown below.{ "tenant": "49d2c4c8-9144-49ea-b5f3-fc11b848cd72", "client": "e9f25c9c-3870-4aa8-9659-a40f09de093e", "secret": "************************************", "domain": "Cryptane.onmicrosoft.com" }
Lietošana
You may use the pynitrokey utility to provision a Nitrokey for an user in your tenant.
nitropy fido2 provision-credential entra -c config.json <username> --create-user
Here the <username> could be the Email ID of the user (User principal in terms of Microsoft) or a part of it till before the @ sign.
The --create-user flag directs the tool to create the user if it does not exist in the Entra Tenant.
$ nitropy fido2 provision-credential entra -c config.json aditya --create-user
Command line tool to interact with Nitrokey devices 0.12.3
Warning: It is recommended to execute nitropy with admin privileges to be able to access Nitrokey 3 and Nitrokey FIDO 2 devices.
Waiting 5 secs for Graph API to update
User aditya created on Entra
Enter PIN:
Touch your authenticator device now...
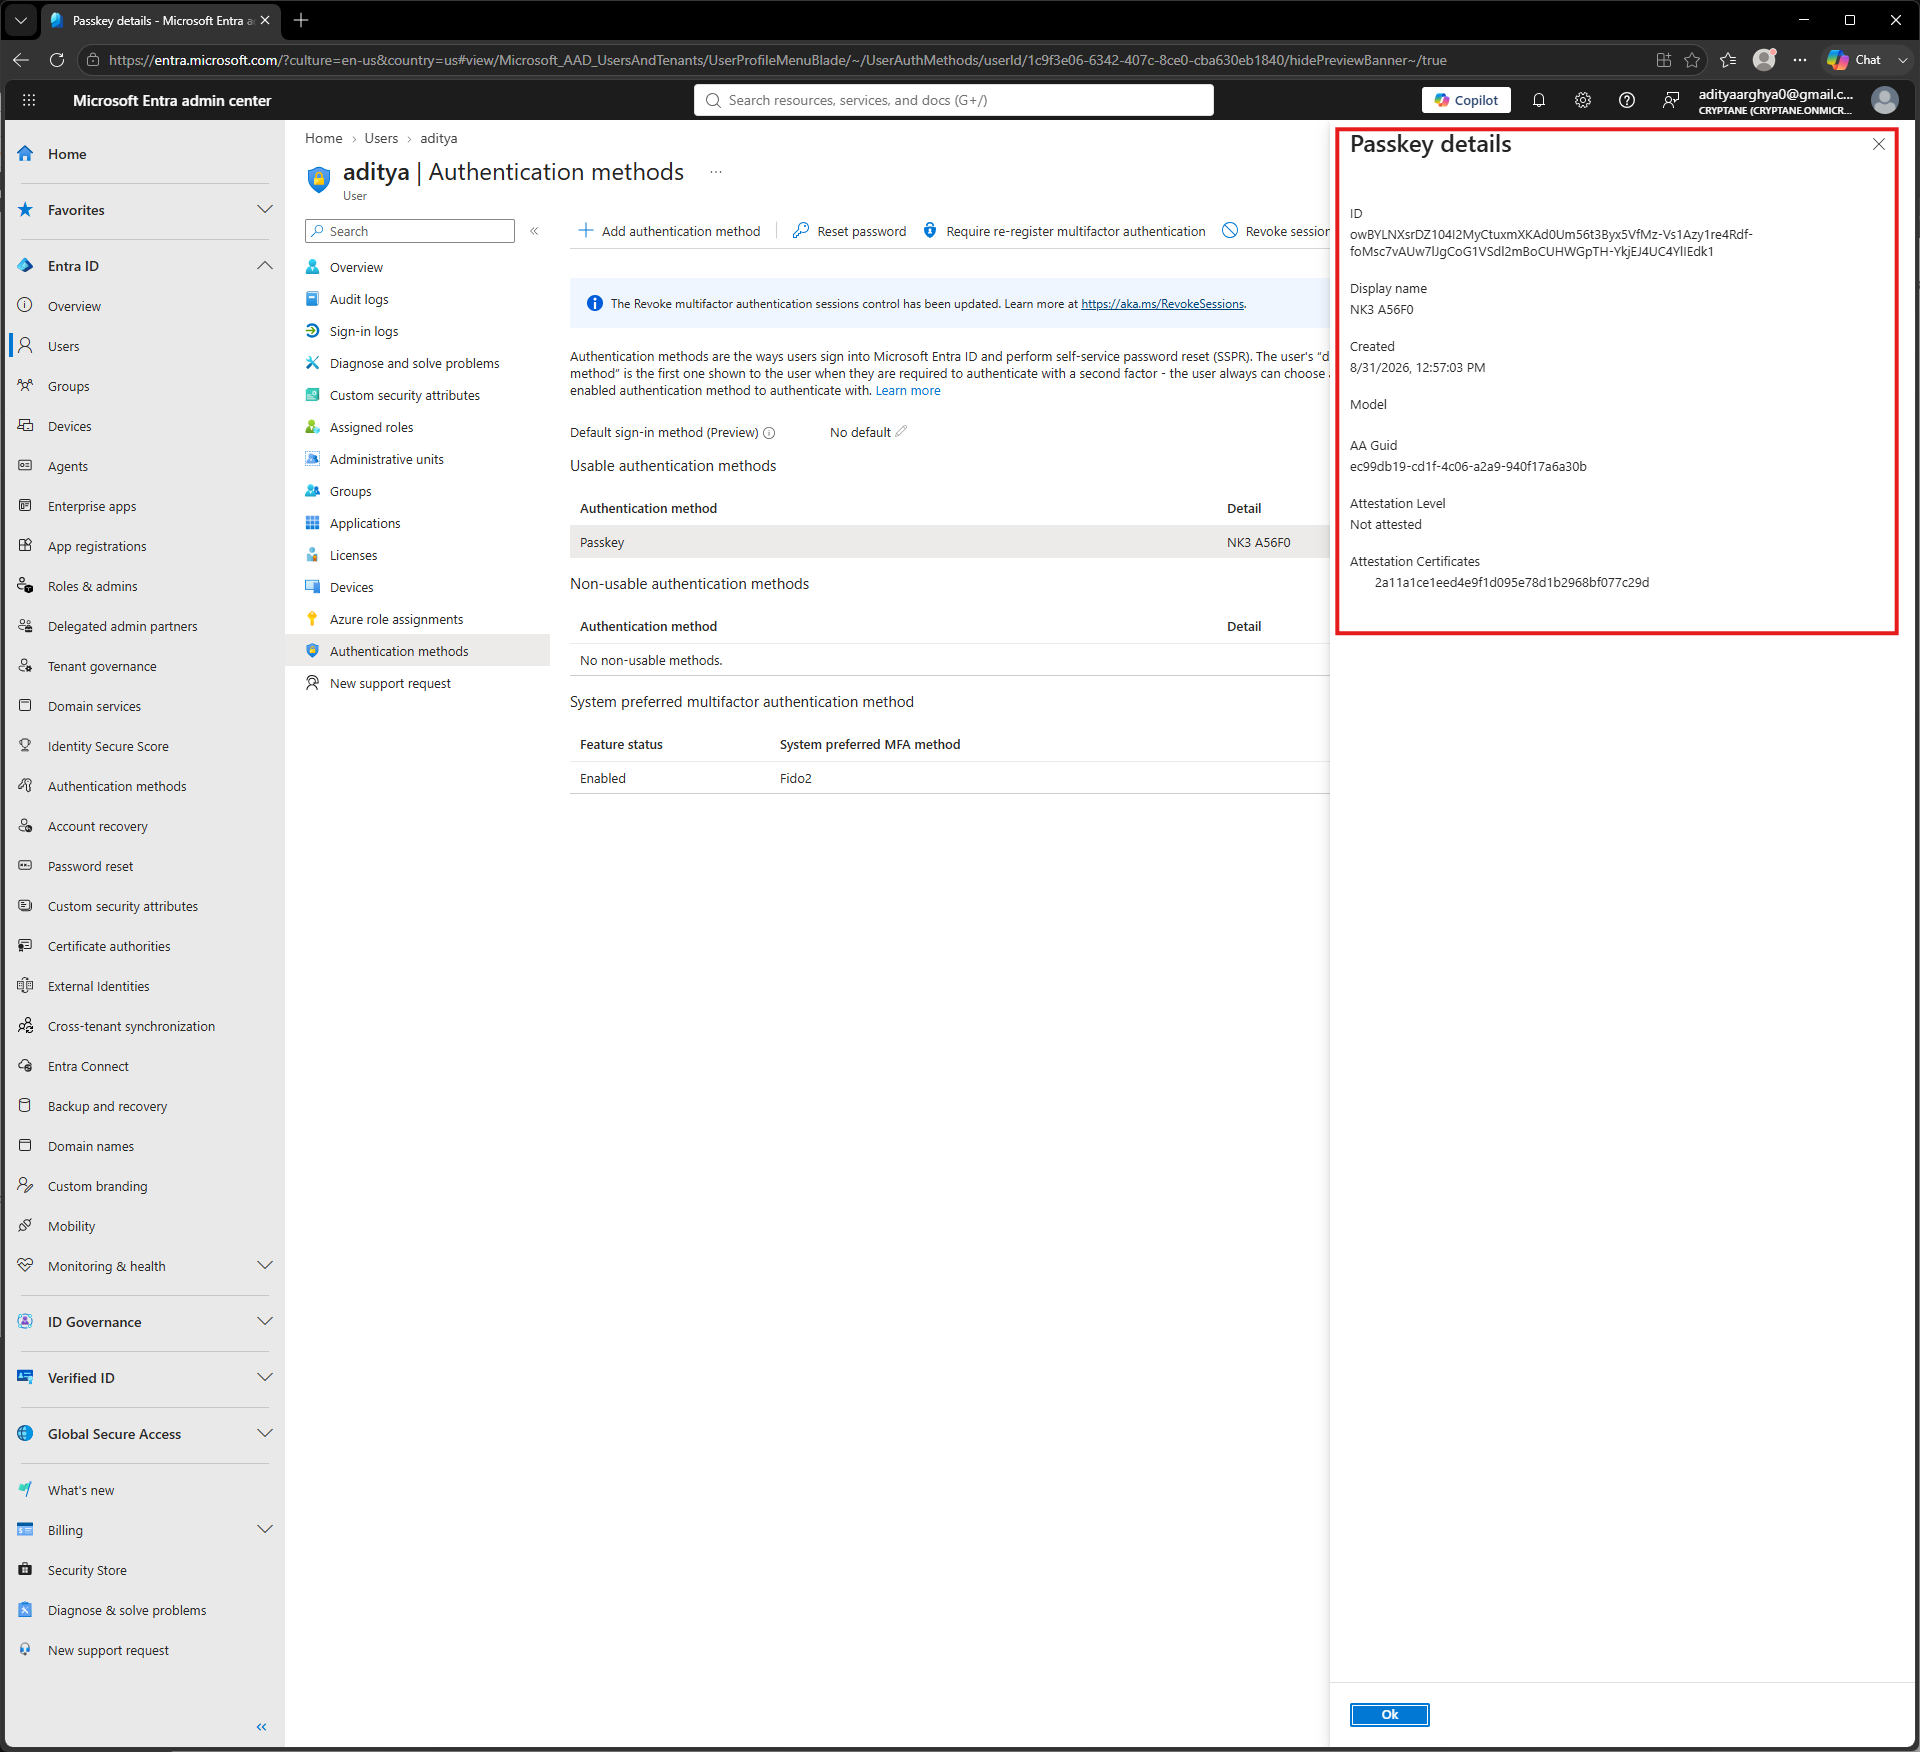
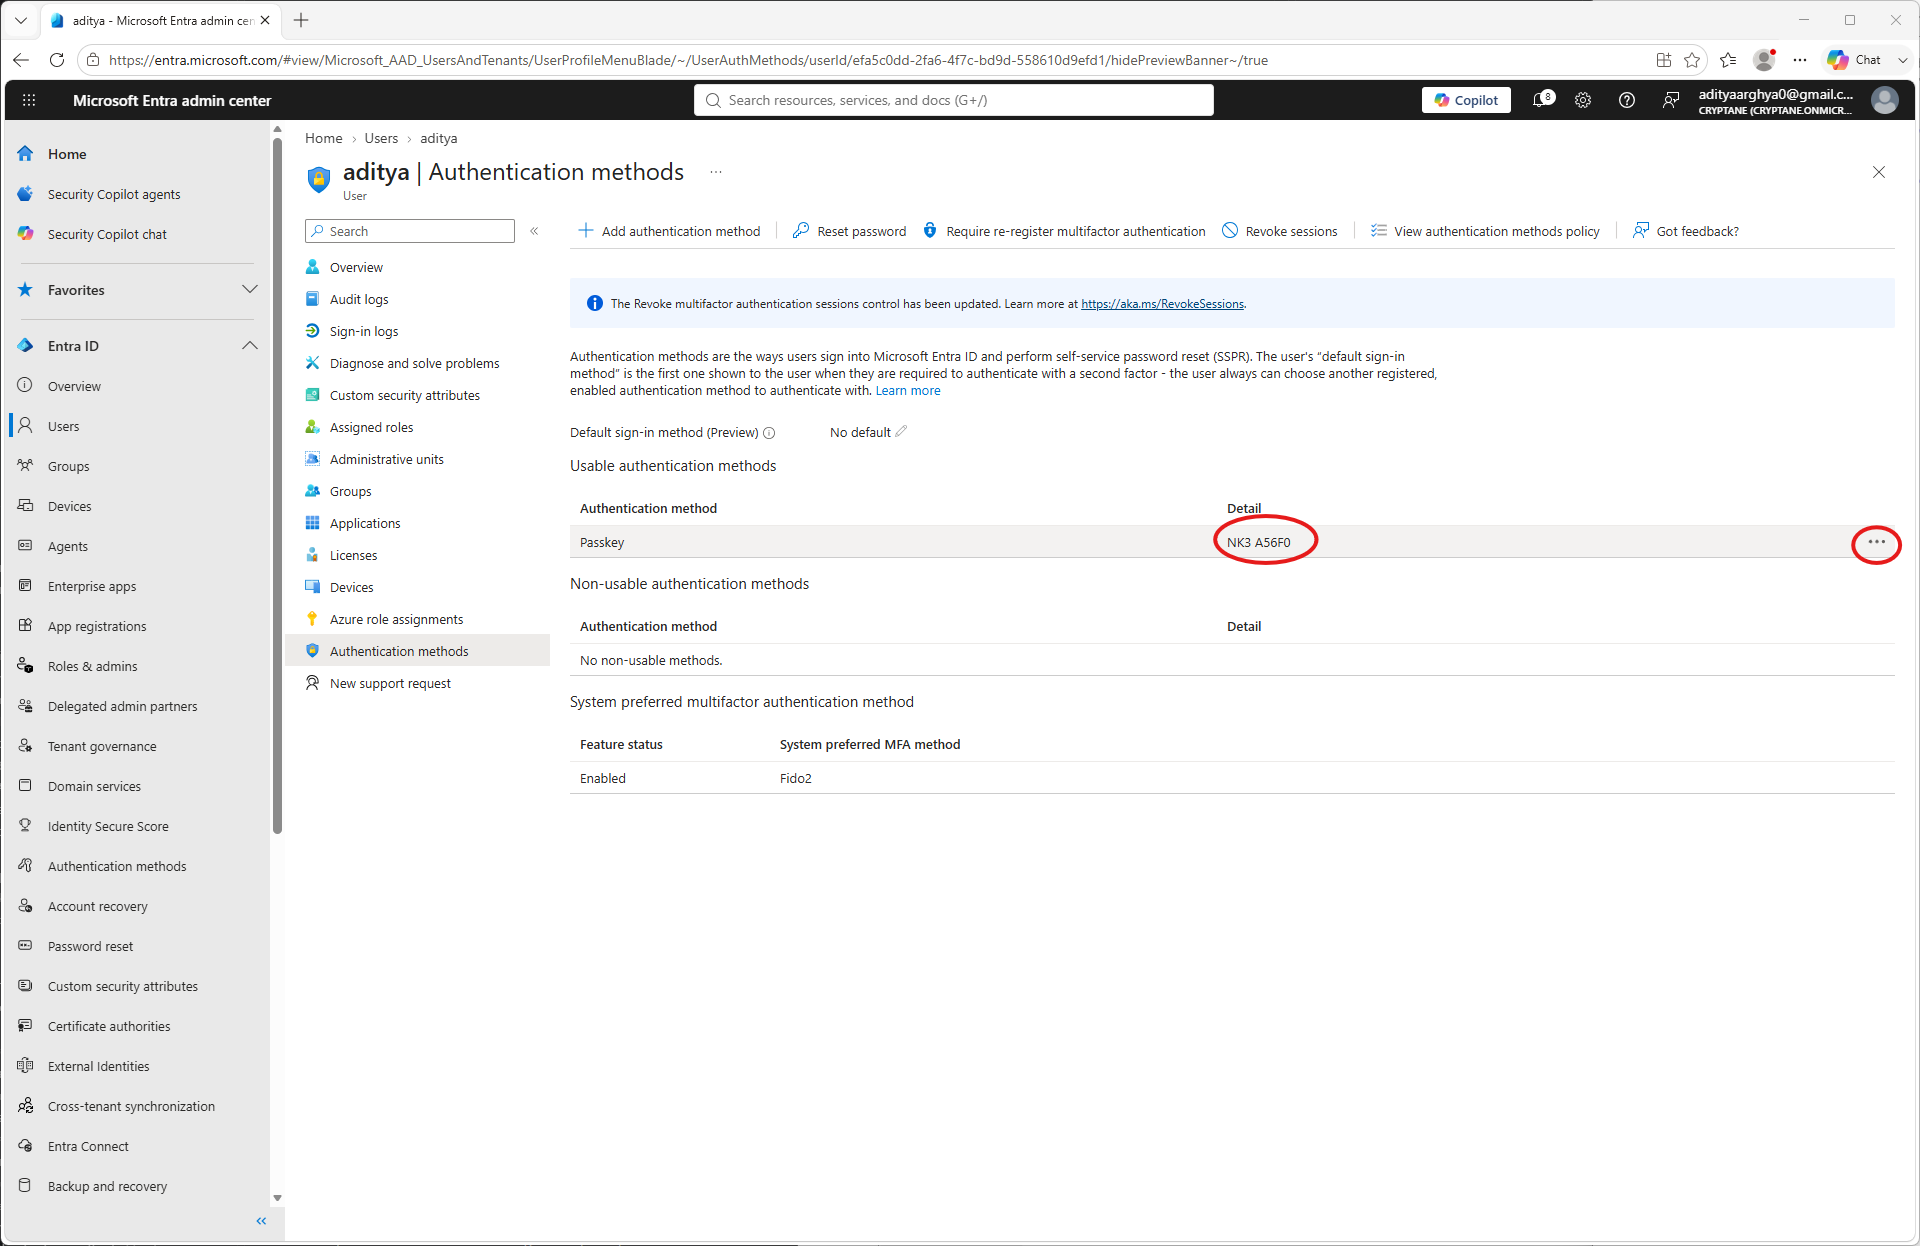
Entra credential for aditya pre-registered on NK3 A56F0 with Credential ID owBYLNXsrDZ104I2MyCtuxmXKAd0Um56t3Byx5VfMz-Vs1Azy1re4Rdf-foMsc7vAUw7lJgCoG1VSdl2mBoCUHWGpTH-YkjEJ4UC4YlIEdk1.
Verification
Lietotājs var izmantot nesen aktivizēto Nitrokey, lai pieteiktos savā Microsoft kontā. Sekojiet saitei , lai apskatītu piemēru, kā pieteikties Microsoft kontā ar Nitrokey, lai pieteiktos, izmantojot šo nesen aktivizēto Nitrokey.
Jūs varat pārbaudīt piešķirtās piekļuves tiesības Entra administratora portālā, izpildot šos soļus.
Entra administrācijas centrā kreisajā panelī atveriet opciju „Lietotāji”.
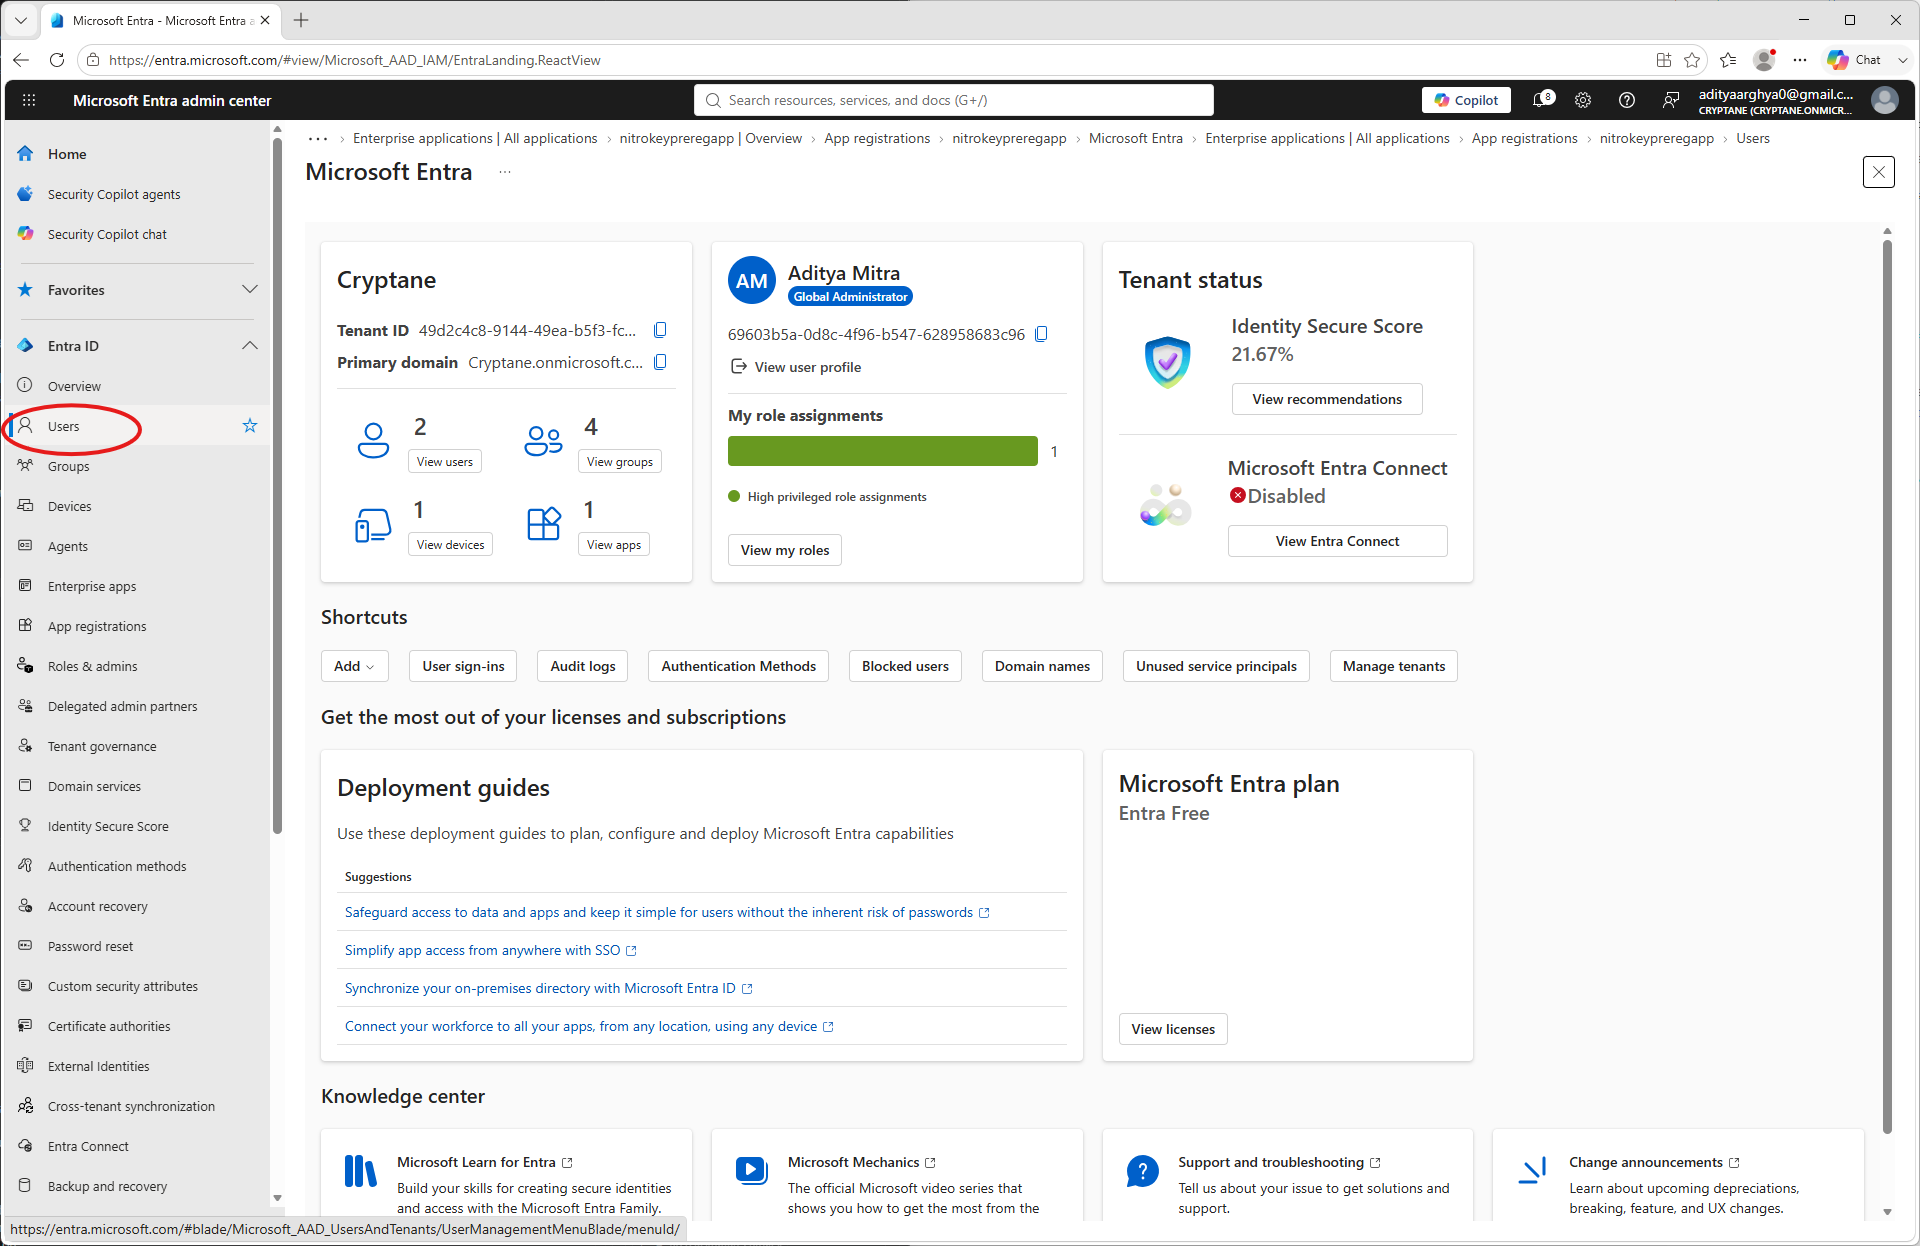
If the user was created with the
--create-userflag you may be able to find the entry on the list. If it is a pre-existing user, it would also be there. Click on the user to which the credential was enrolled.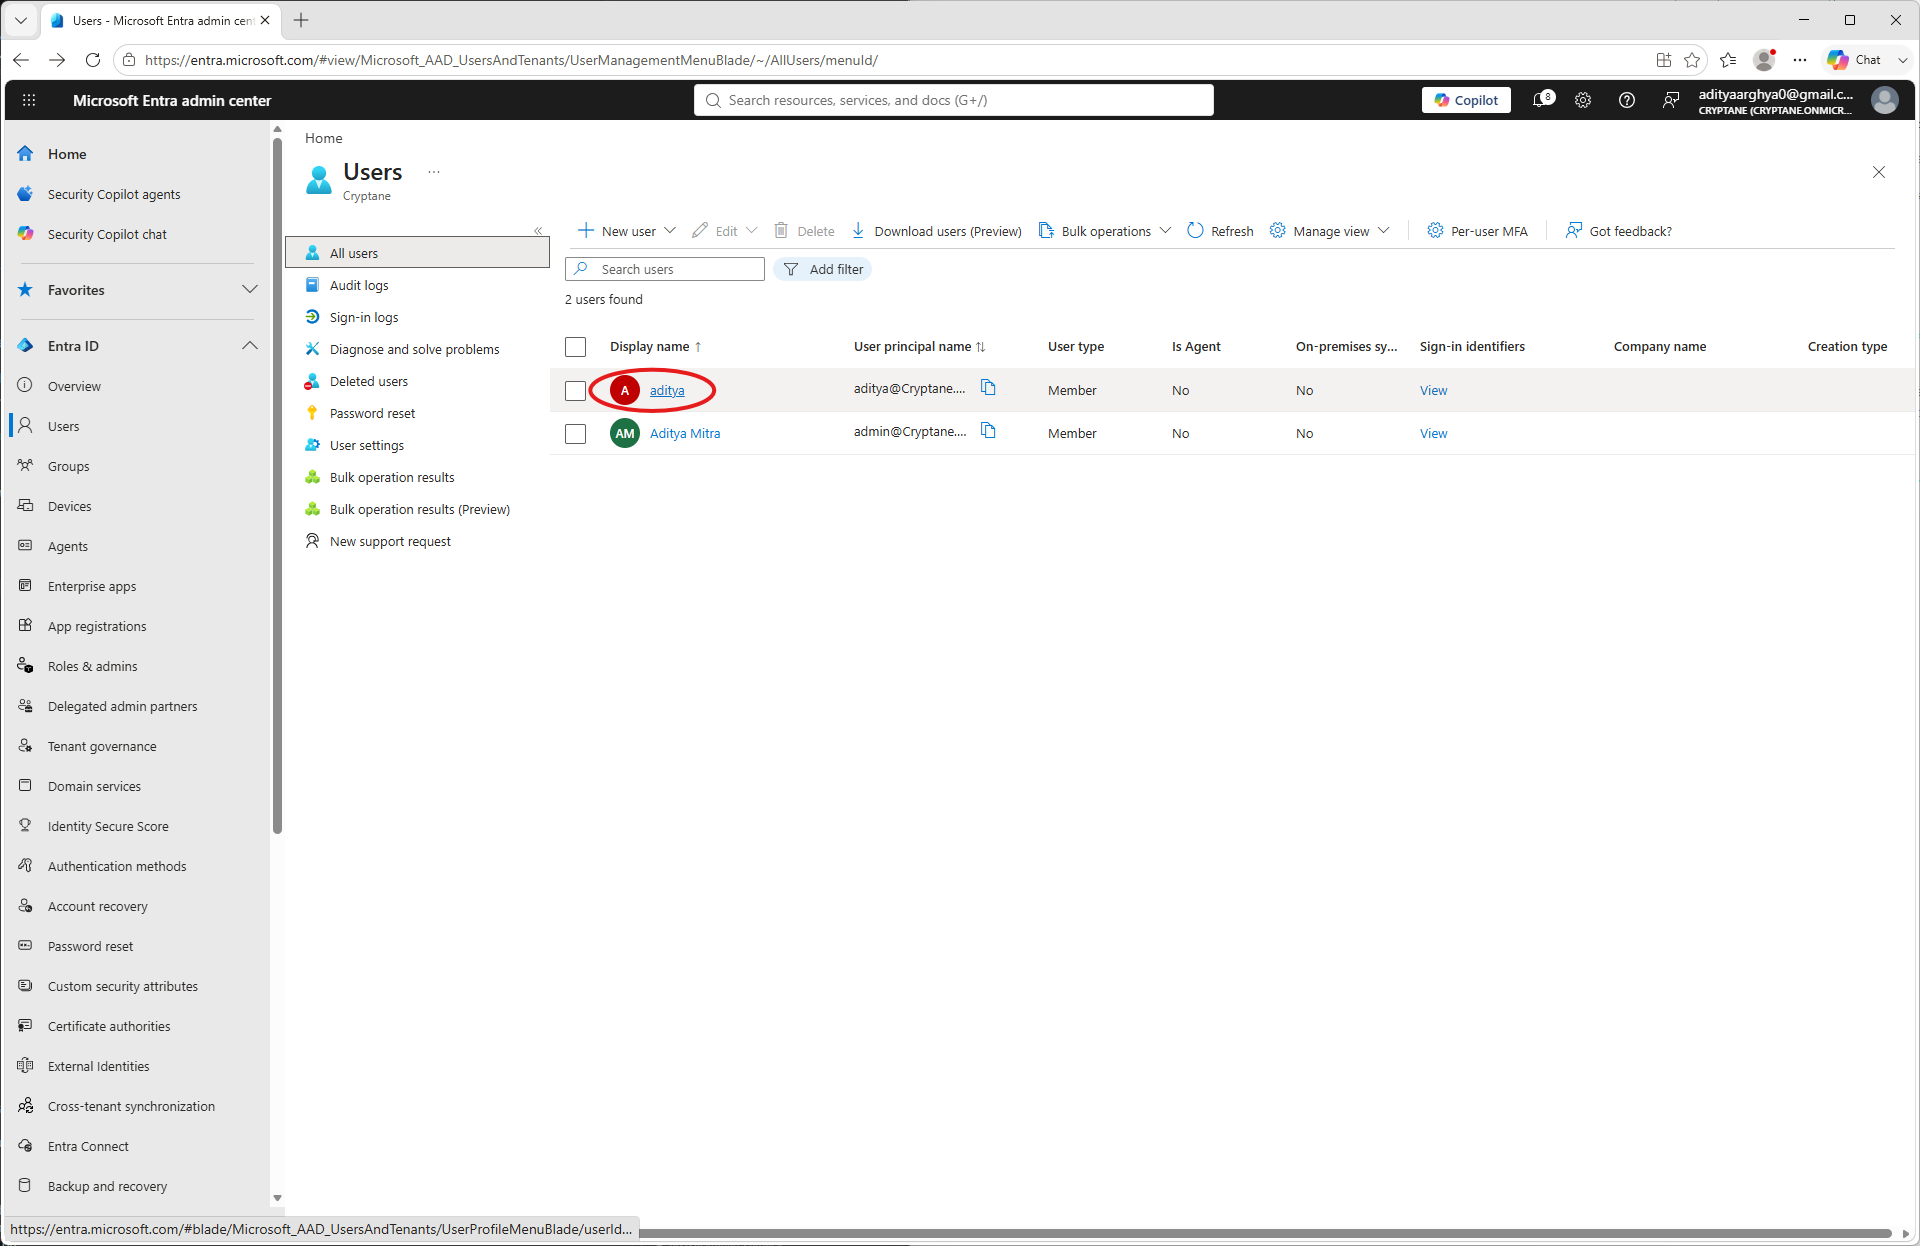
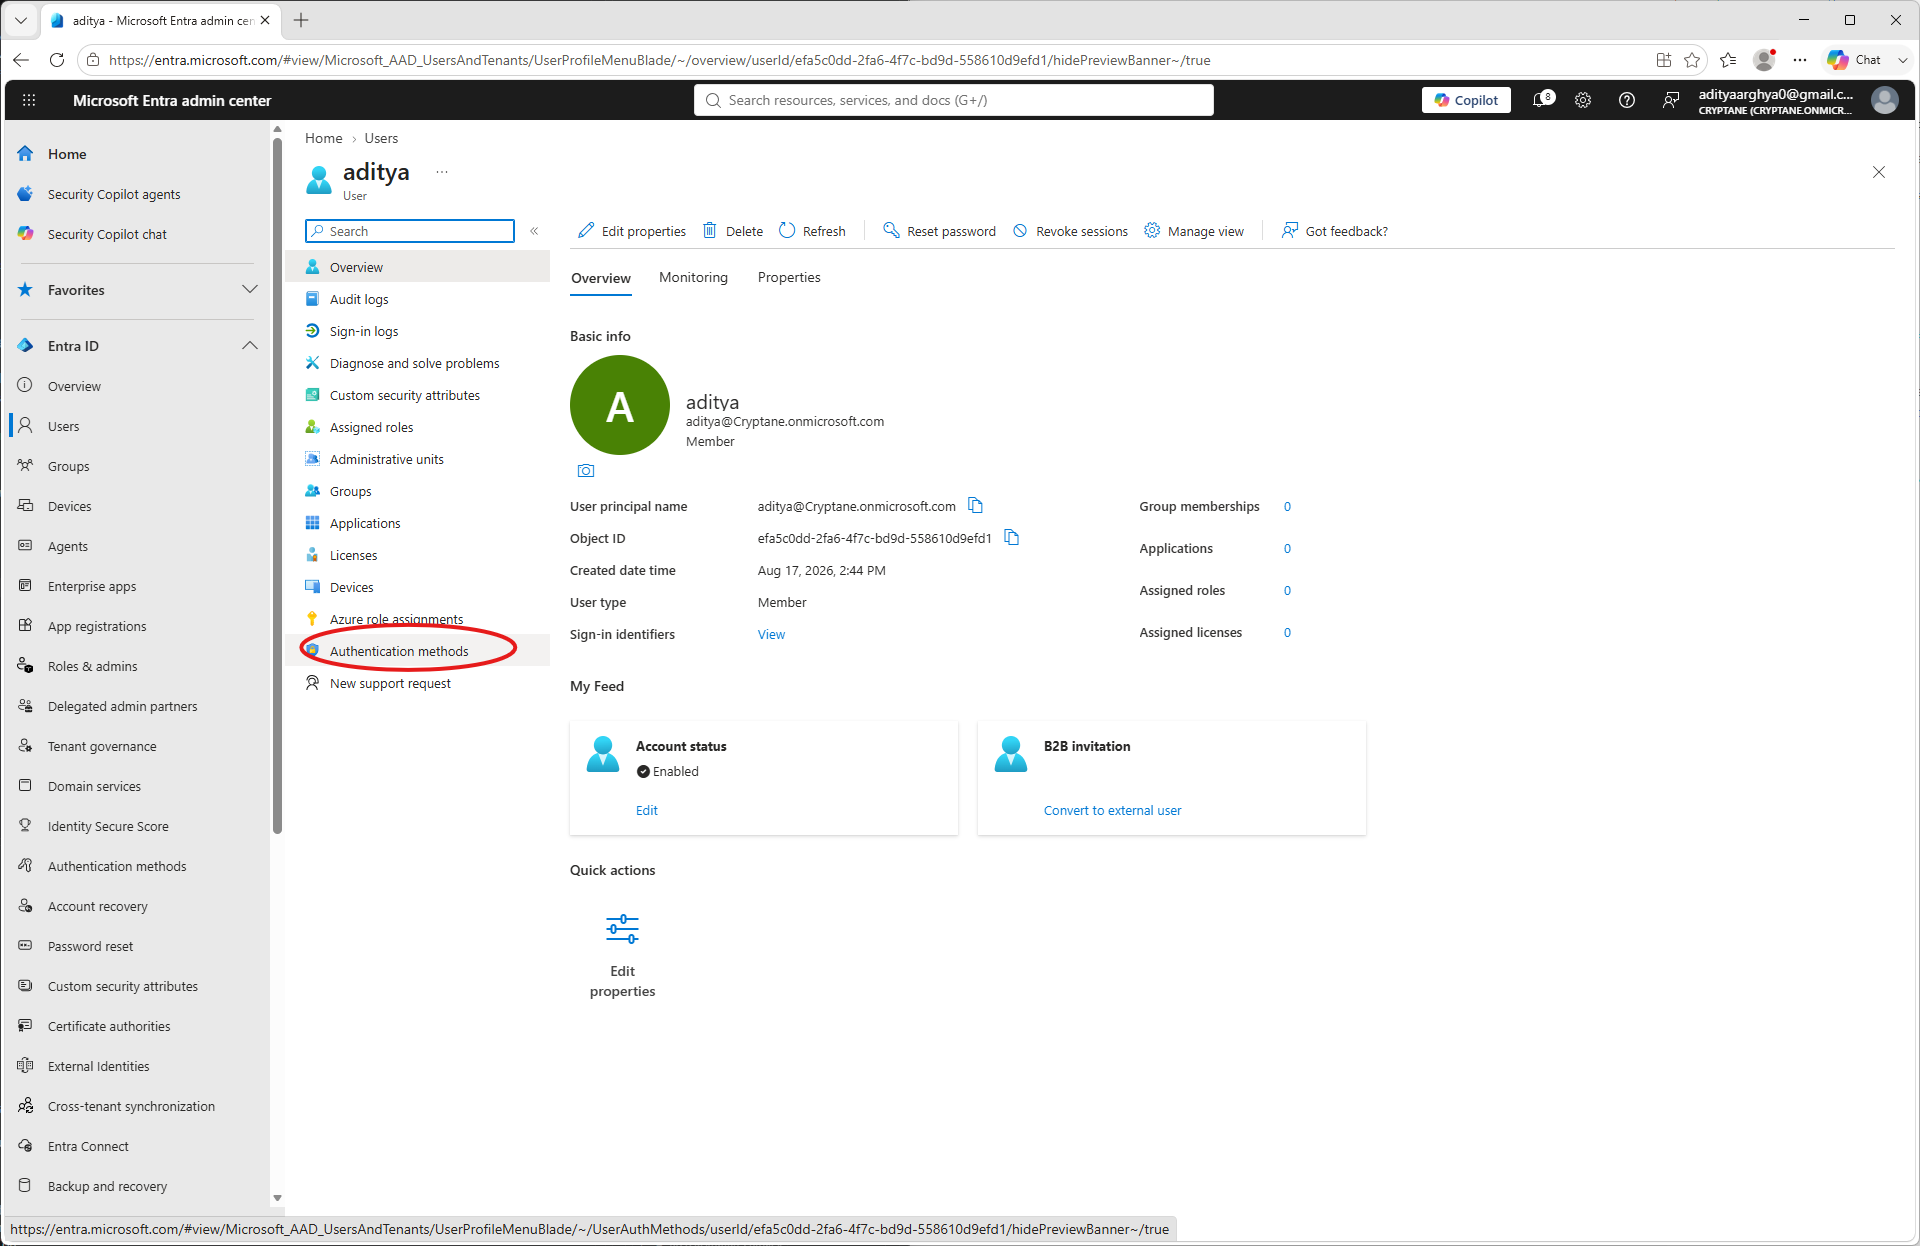
Click on Authentication methods on the user blade.
Būs redzama reģistrētā piekļuves informācija ar pirmajiem 5 Nitrokey UUID simboliem. Lai apskatītu sīkāku informāciju par reģistrēto piekļuves informāciju, varat noklikšķināt uz trīs punktiņiem un pēc tam uz „Skatīt detaļas”.
Būtu redzama papildu informācija par šīm apliecībām. Jūs varat pārbaudīt to derīgumu.