Nastavitev Nitrokeyja za Entra ID
Compatible Nitrokeys |
|||||||
|---|---|---|---|---|---|---|---|
✓ active |
✓ active |
⨯ inactive |
⨯ inactive |
⨯ inactive |
⨯ inactive |
⨯ inactive |
⨯ inactive |
The Nitrokey 3 and Nitrokey Passkey support provisioning credentials for Microsoft Entra for seamless employee on-boarding in enterprise scenarios.
Nastavitev
Za programsko registracijo uporabniških poverilnic je potrebna aplikacija Microsoft Entra. Tukaj vam ponujamo navodila za njeno nastavitev, če imate za to ustrezne pravice.
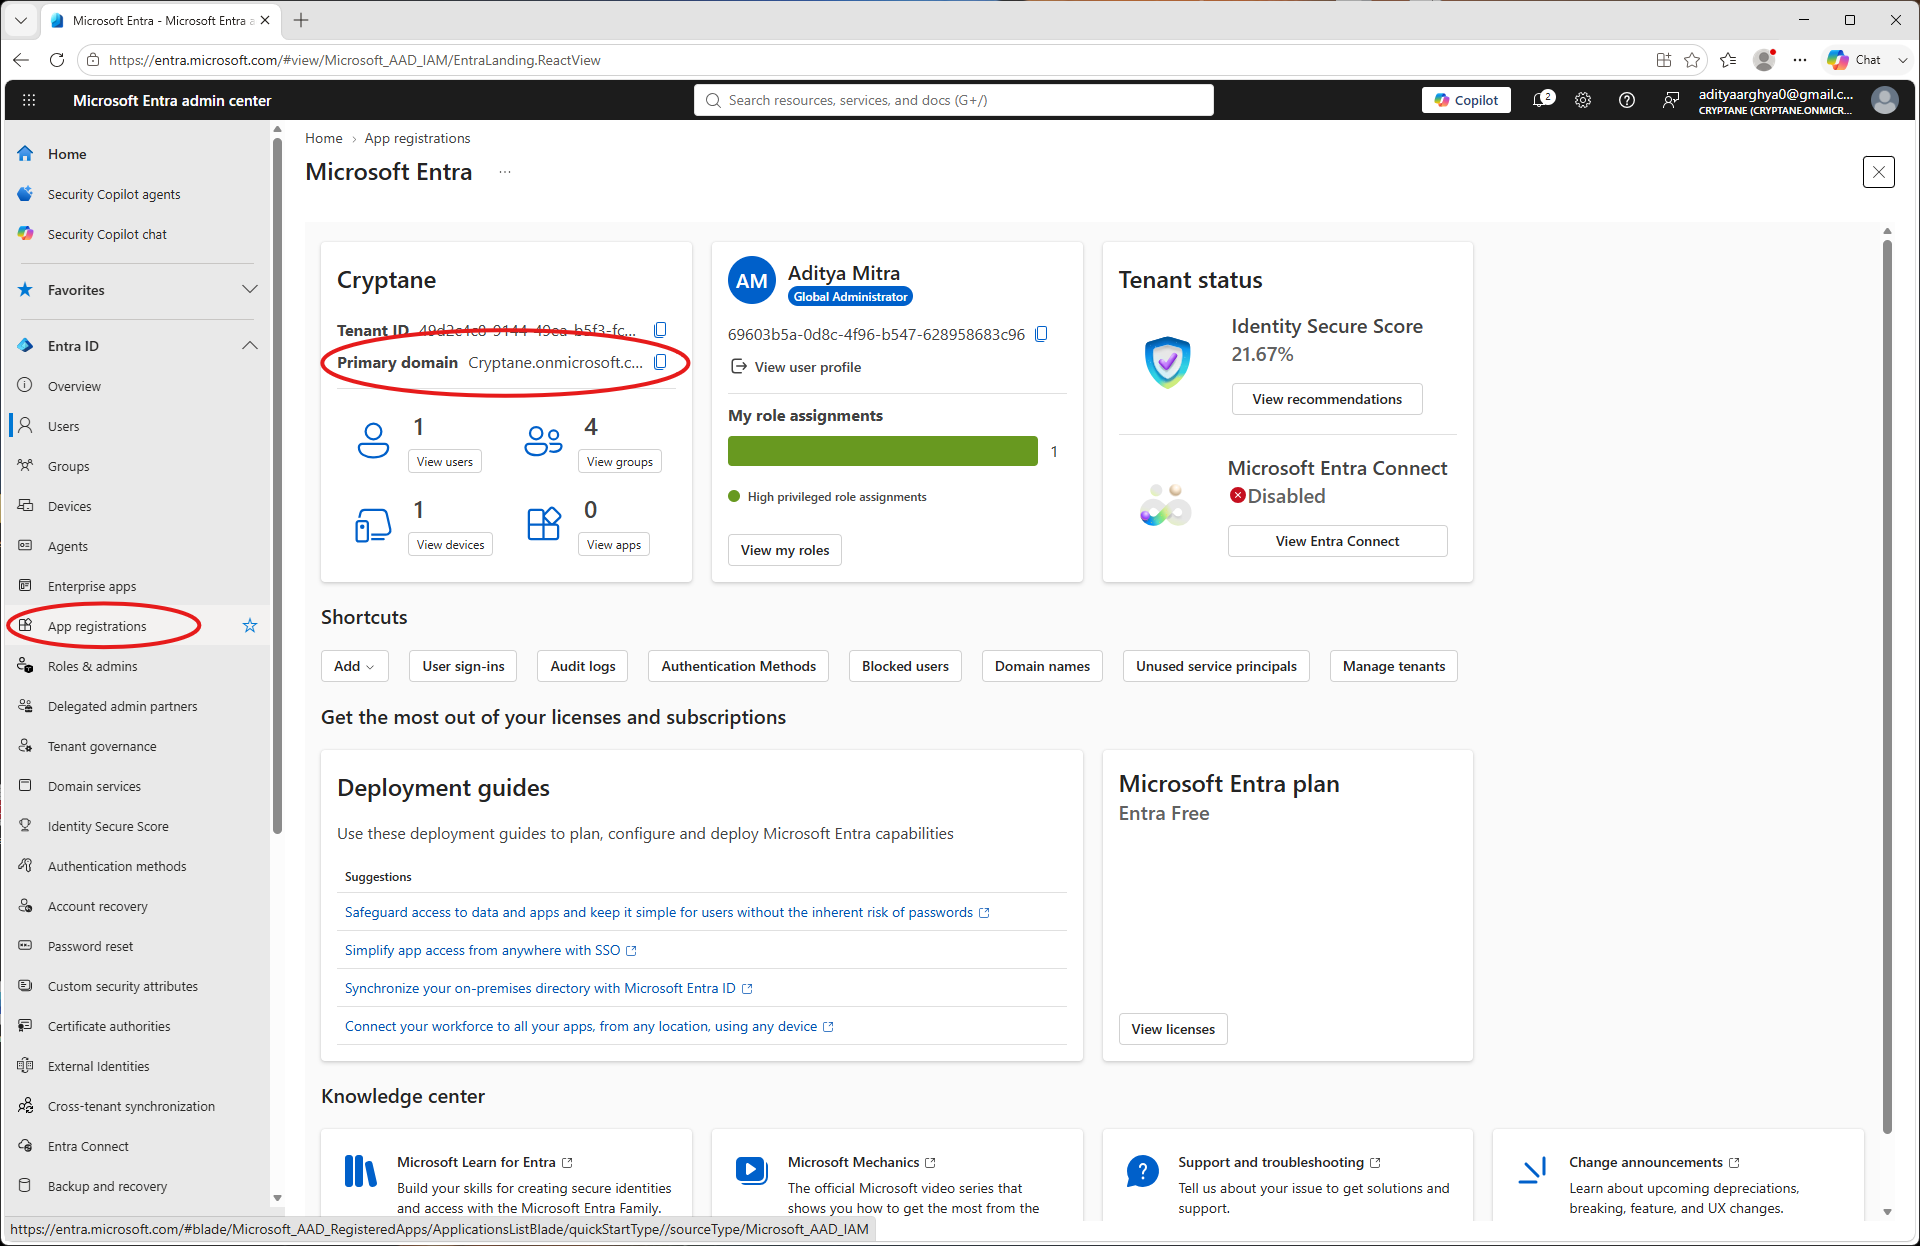
Login to Entra Admin portal. Take a note of the primary domain which you will need later. Go to App Registrations on the left blade.
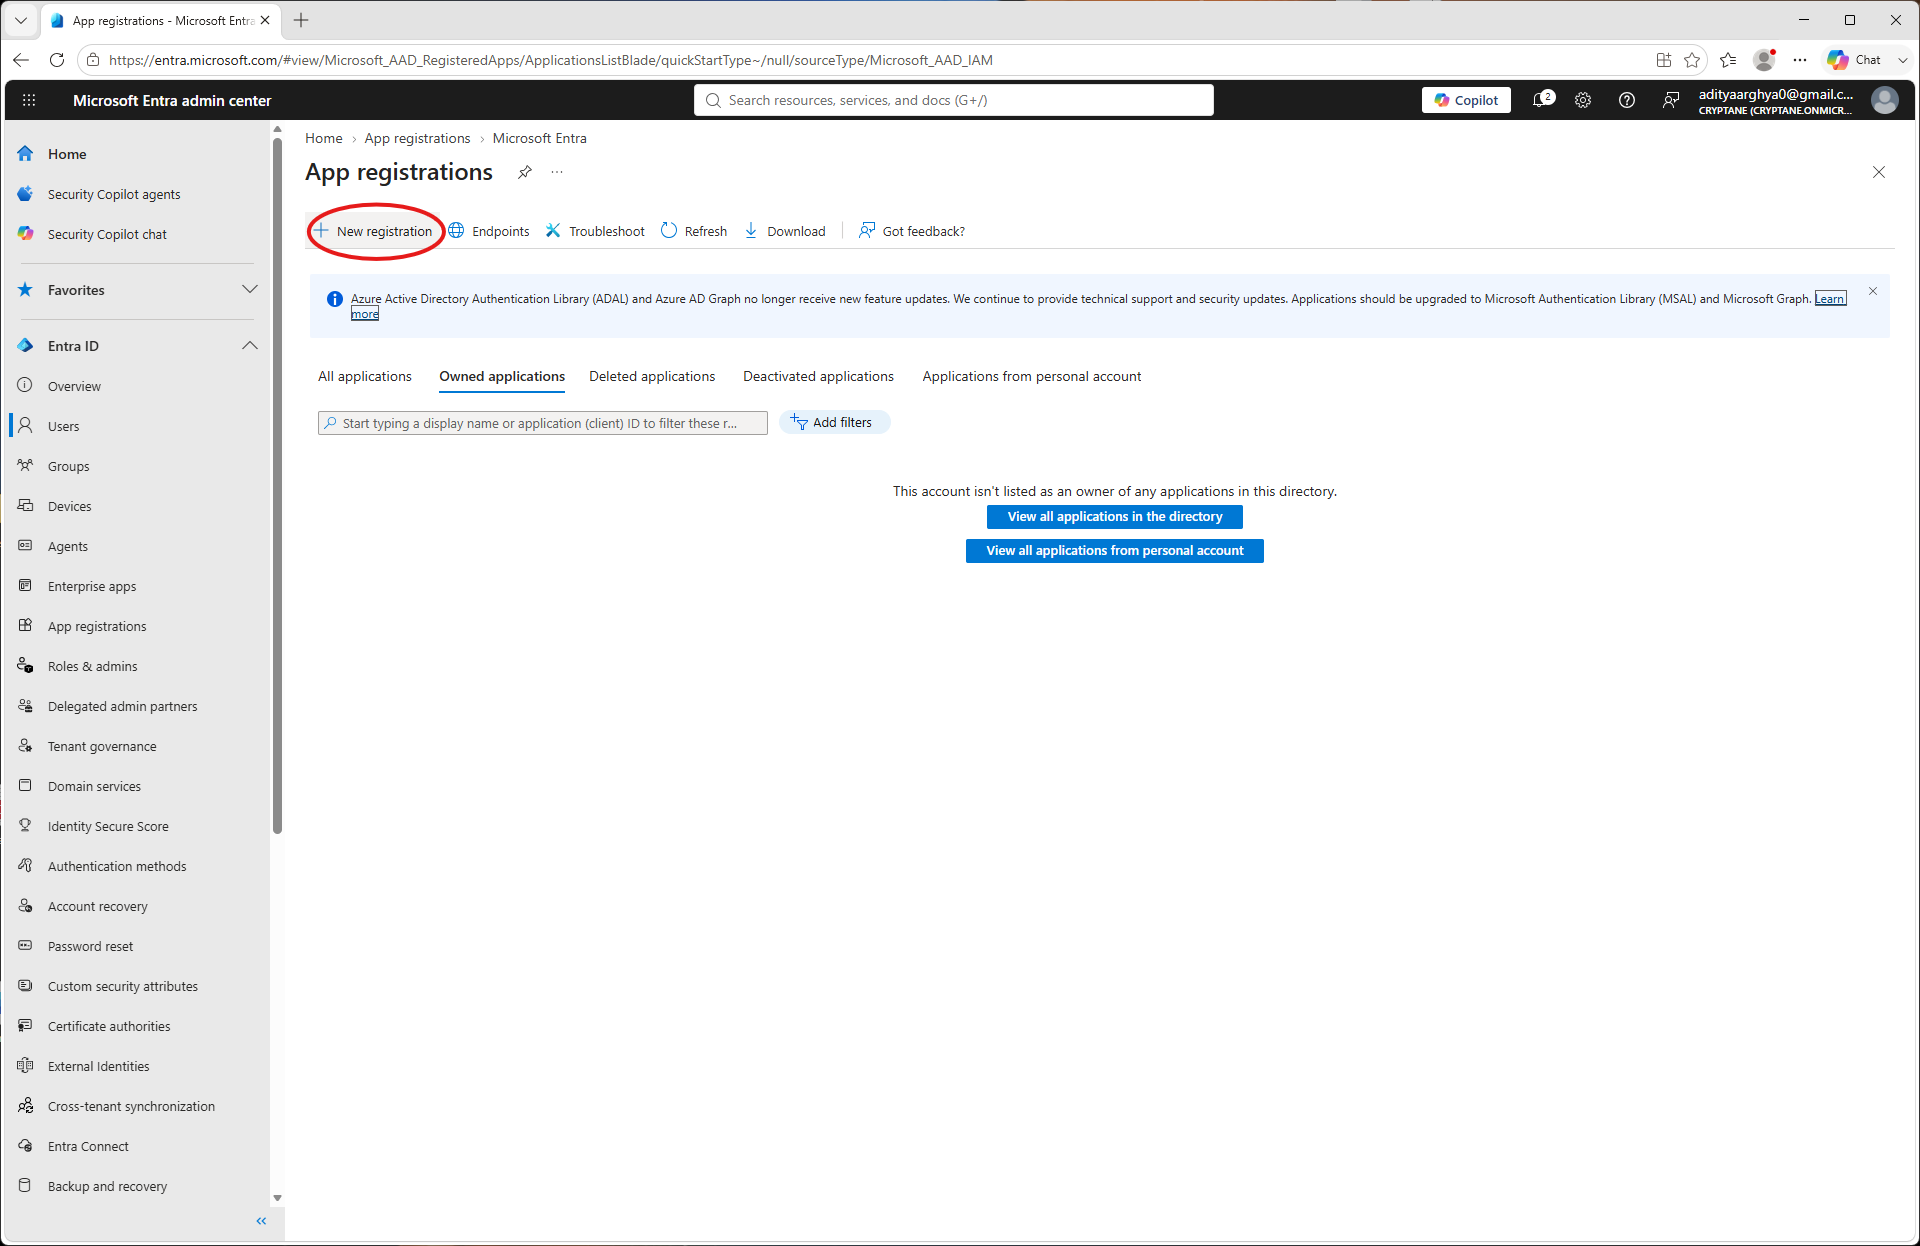
Izberite »Nova registracija«.
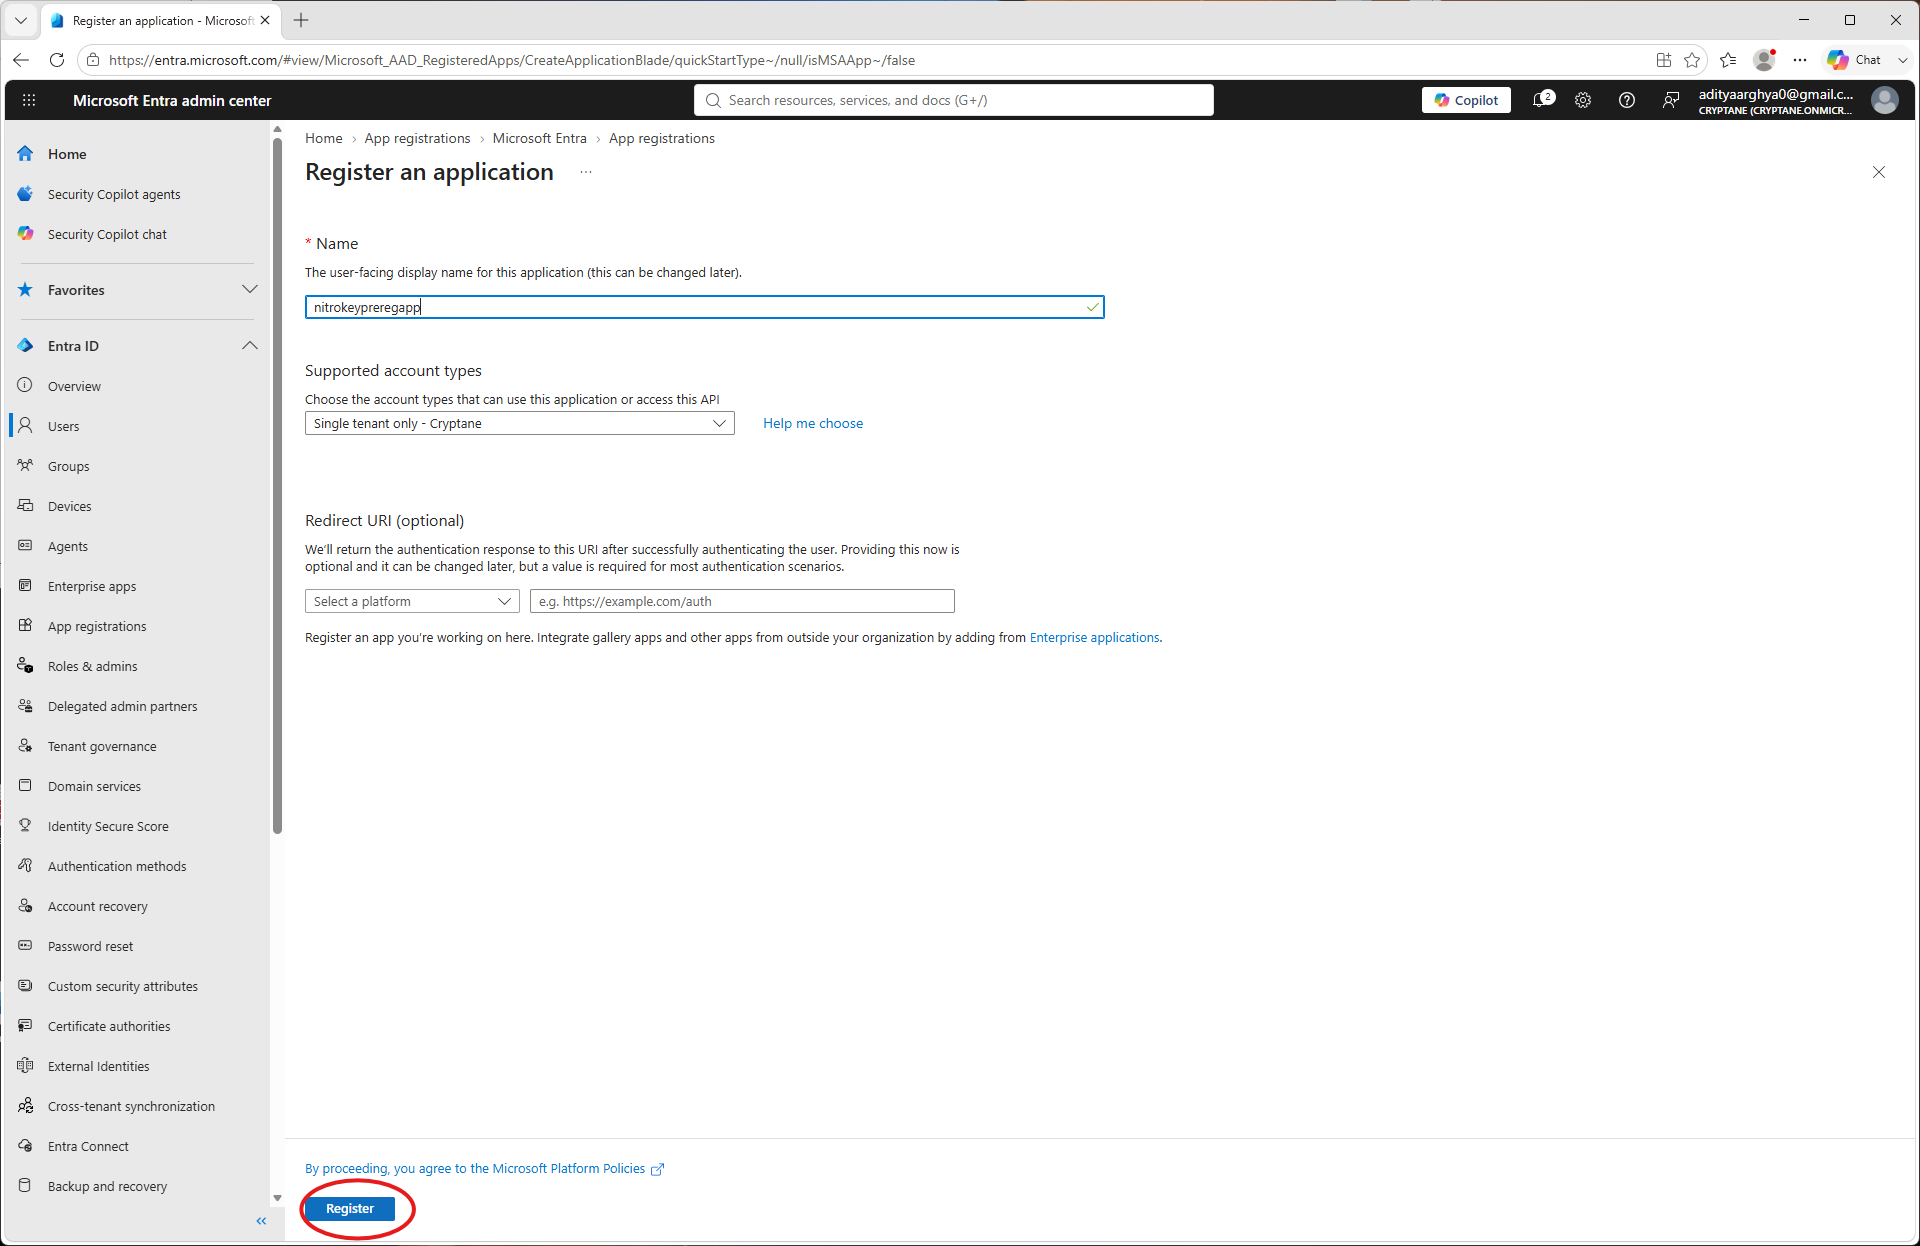
Ustvarite novo aplikacijo in ji določite ime. Kliknite na »Registriraj«.
Tukaj si zapišite ID stranke in ID najemnika. Potrebovali ju boste kasneje. V oknu aplikacije odprite razdelek »Dovoljenja API«.
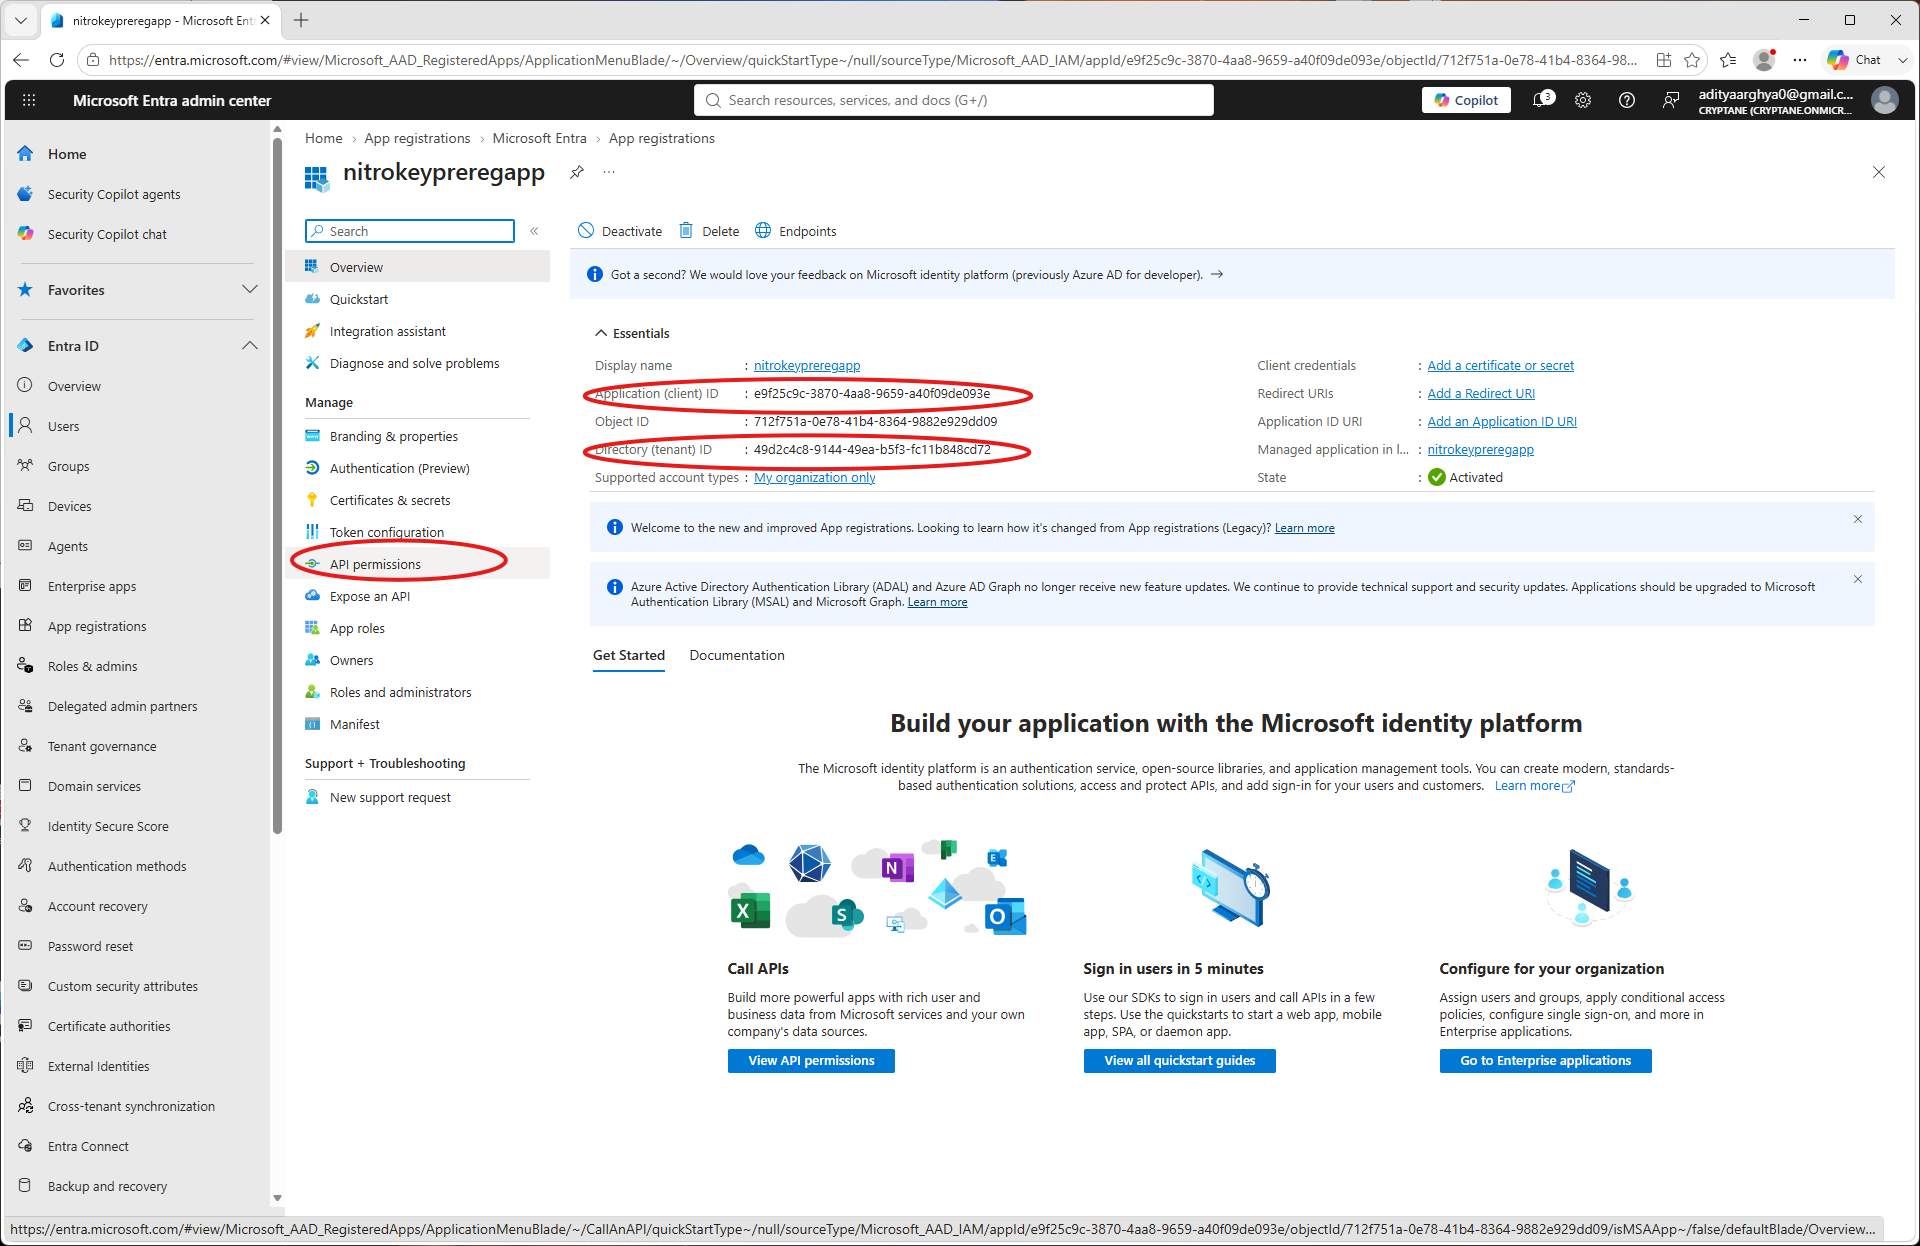
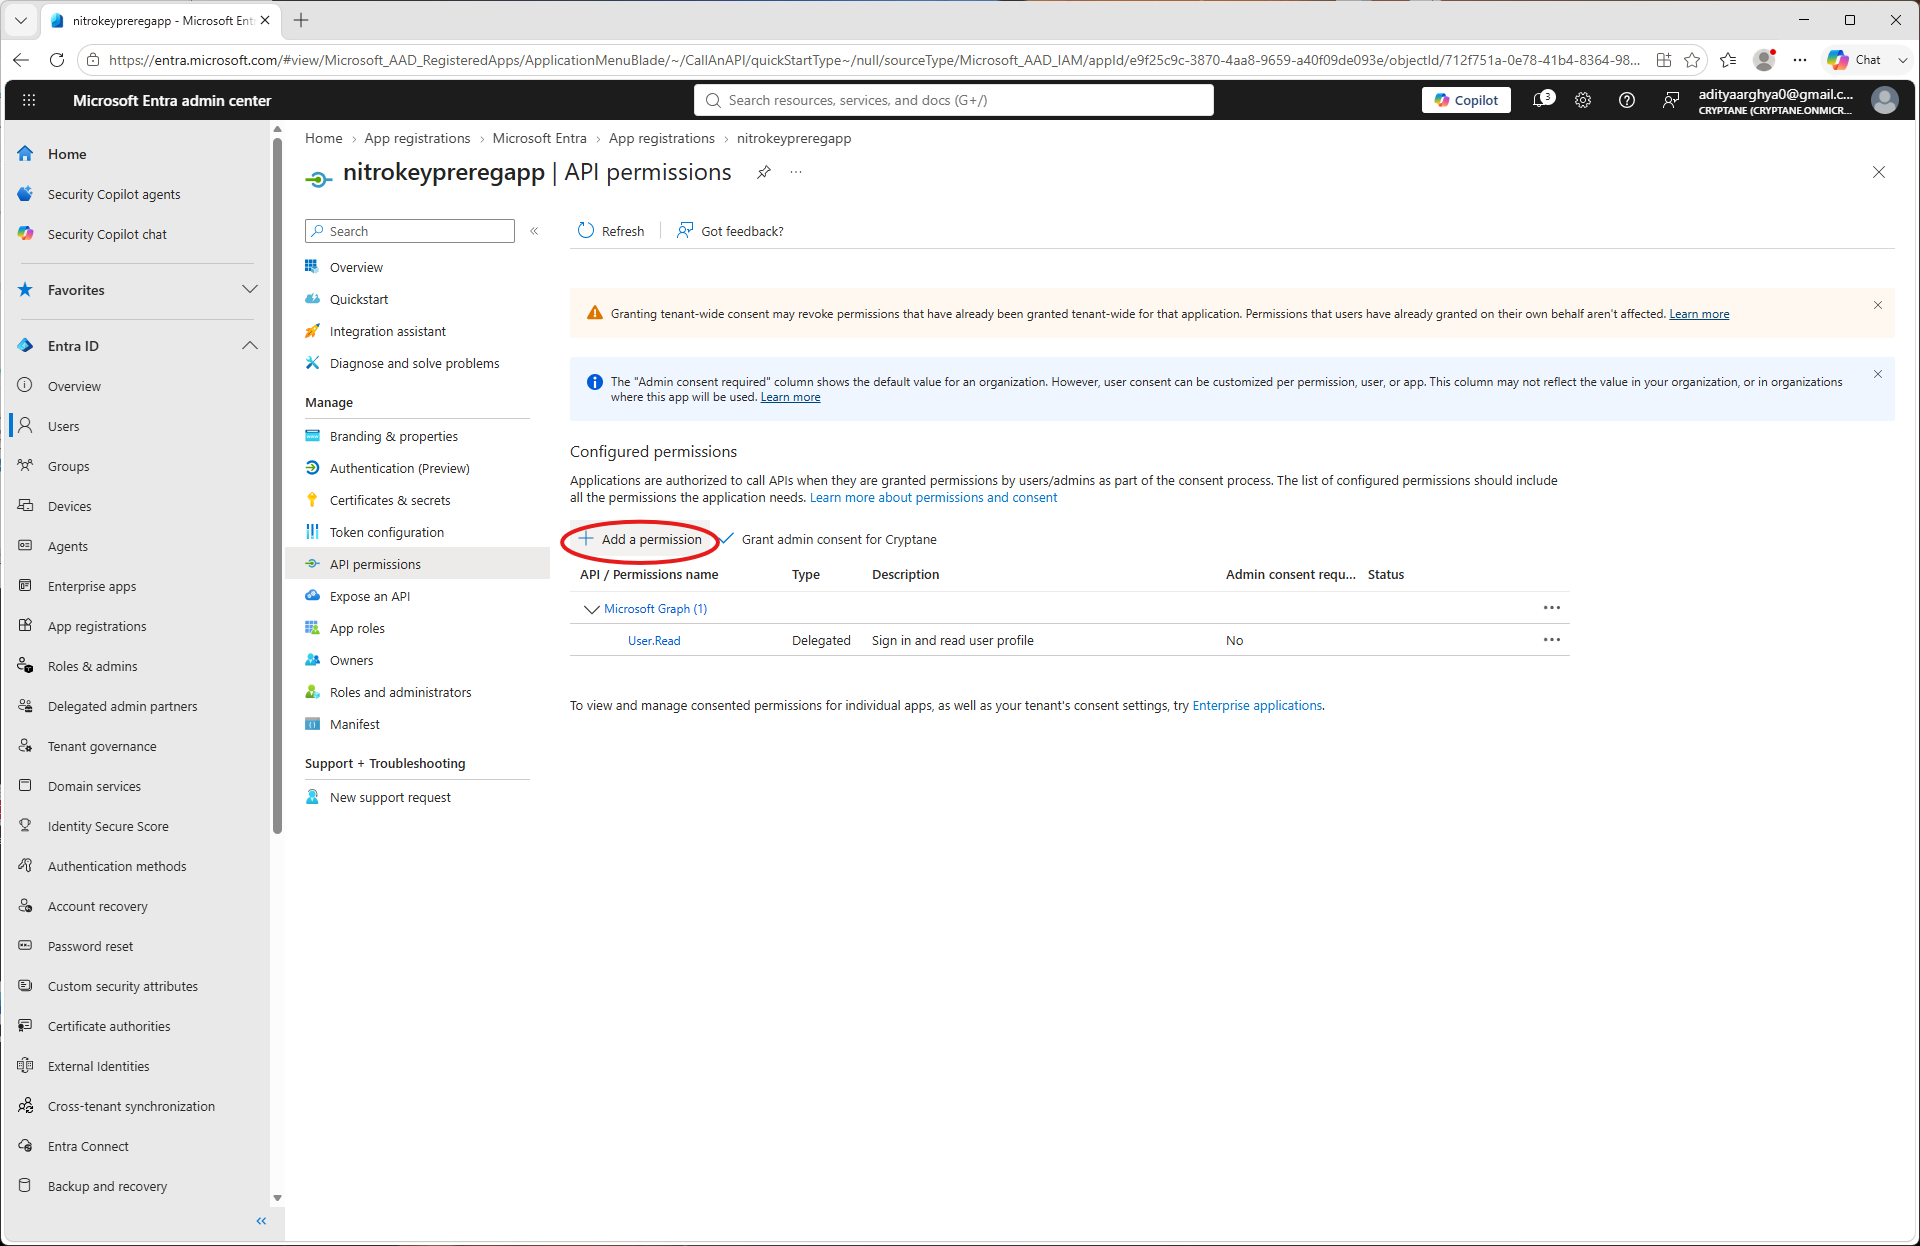
Click on Add a permission.
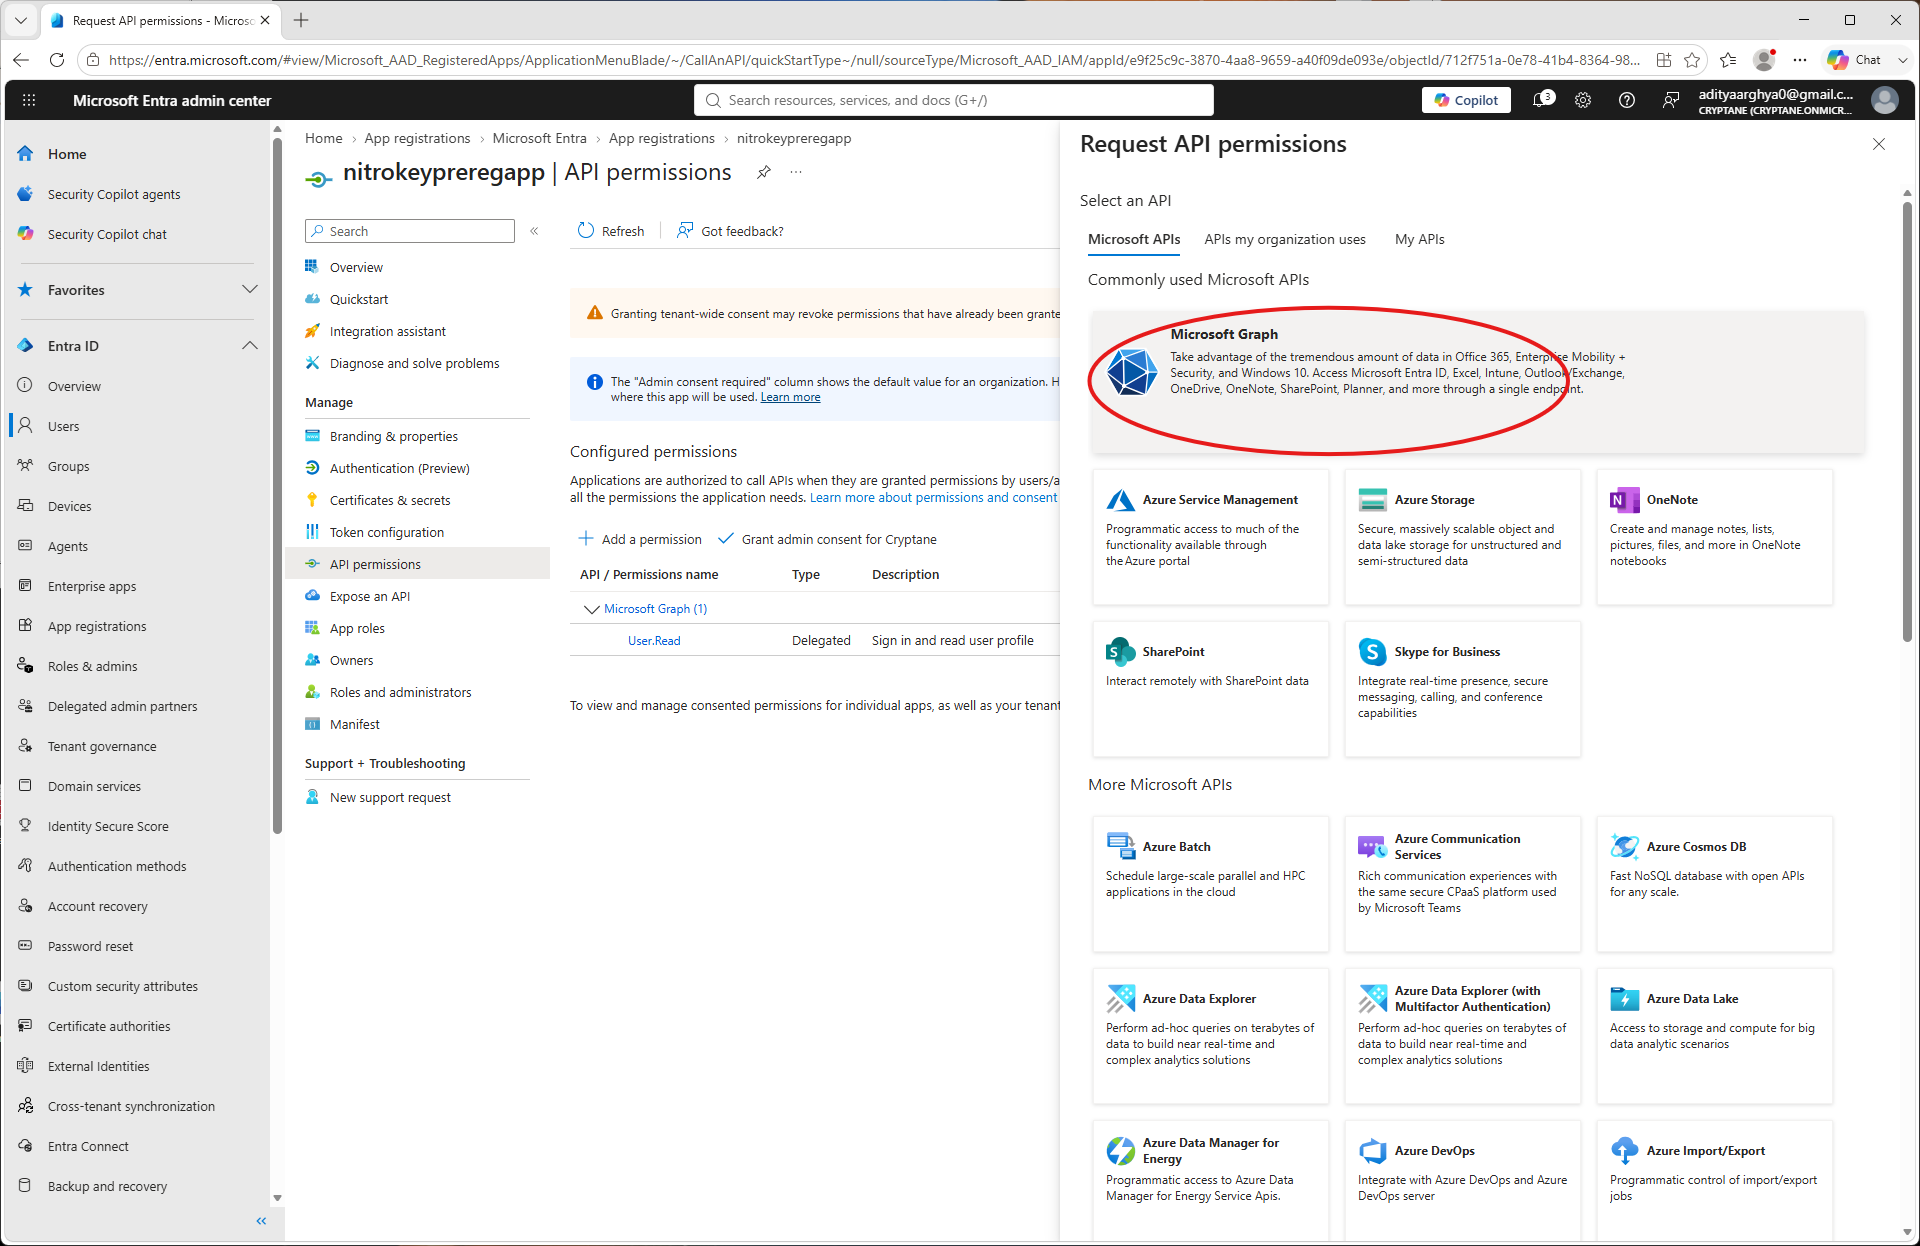
Select Microsoft Graph.
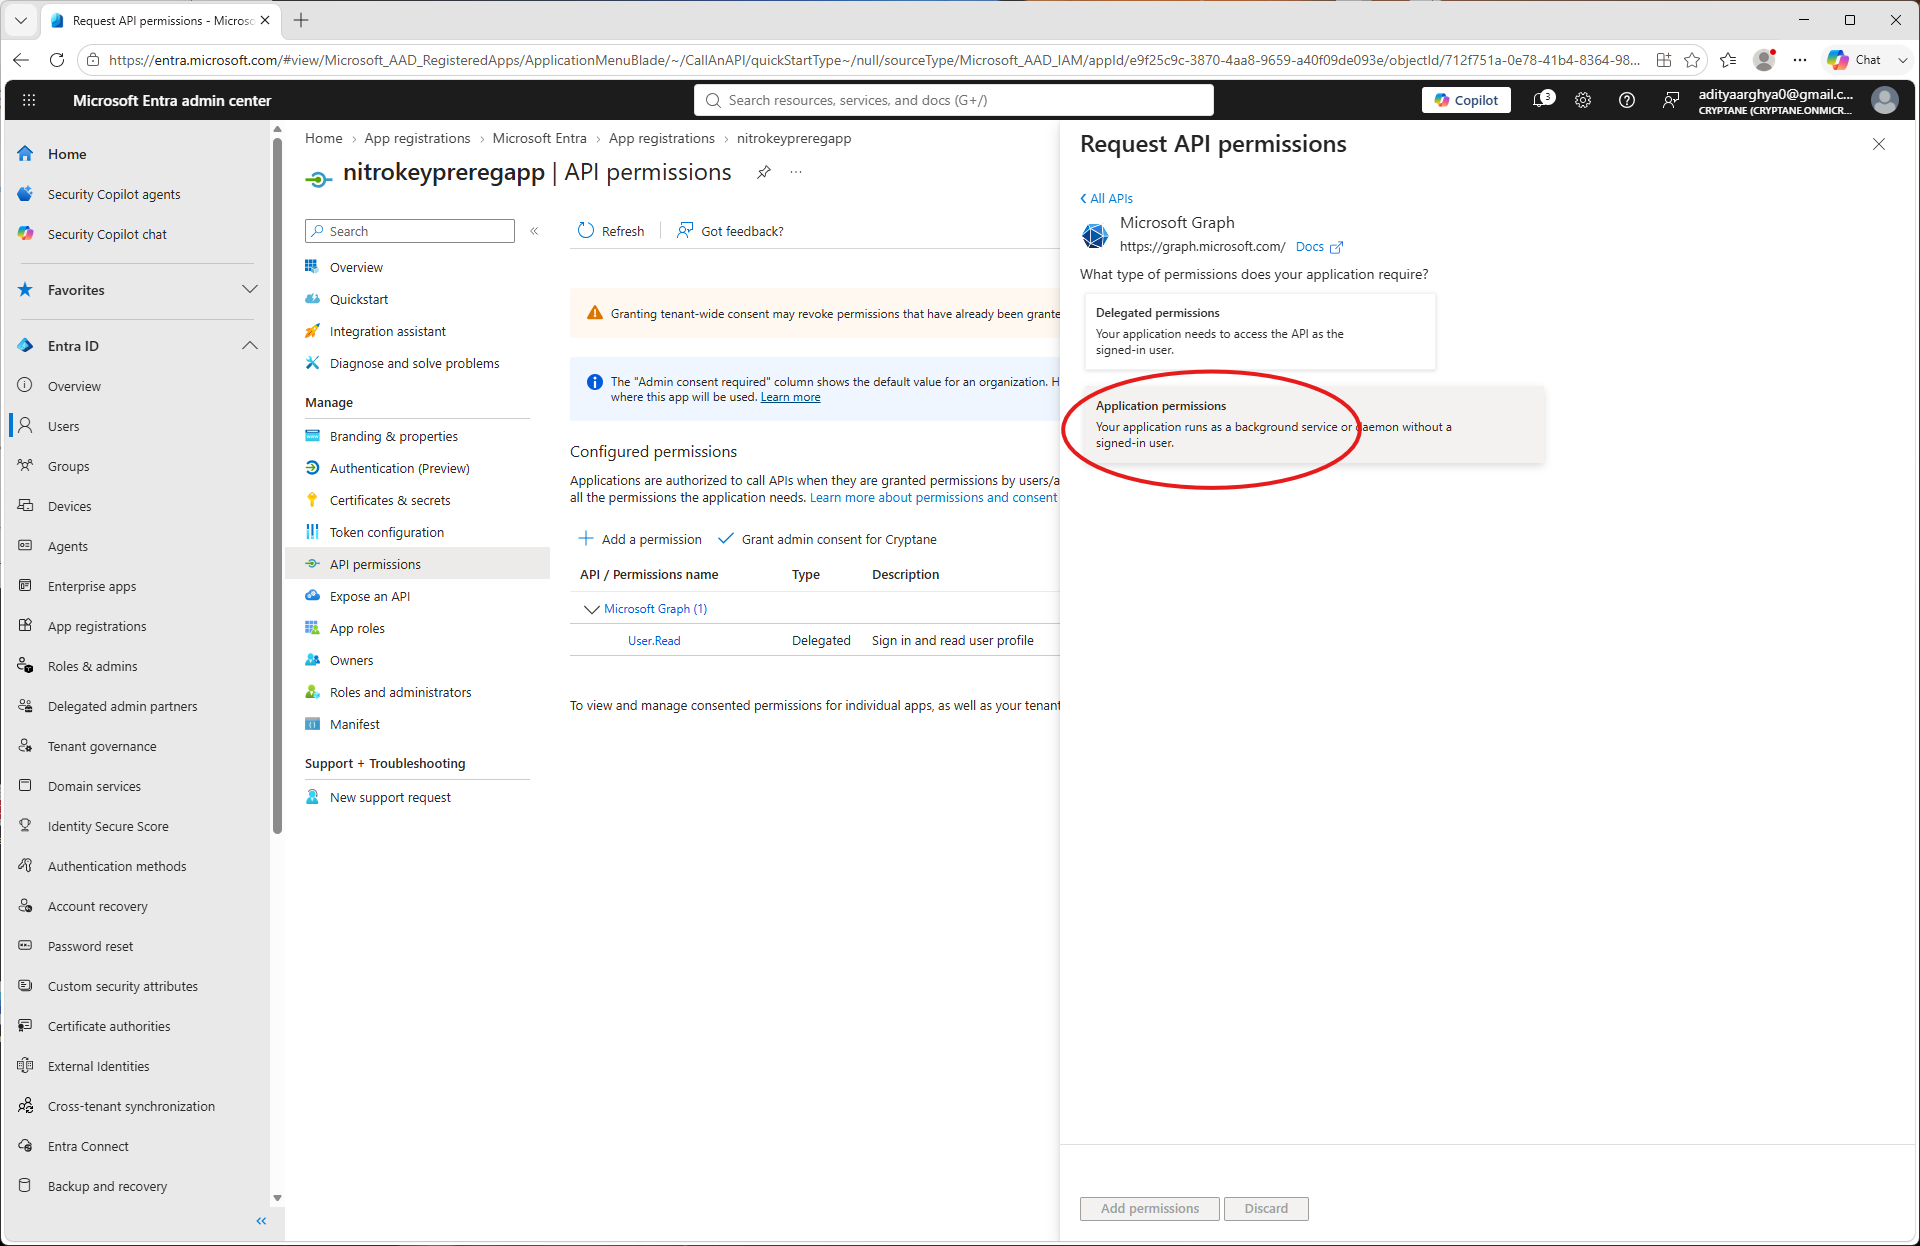
Izberite »Dovoljenja za aplikacijo«.
Search for
UserAuthenticationMethod.ReadWrite.Alland select it.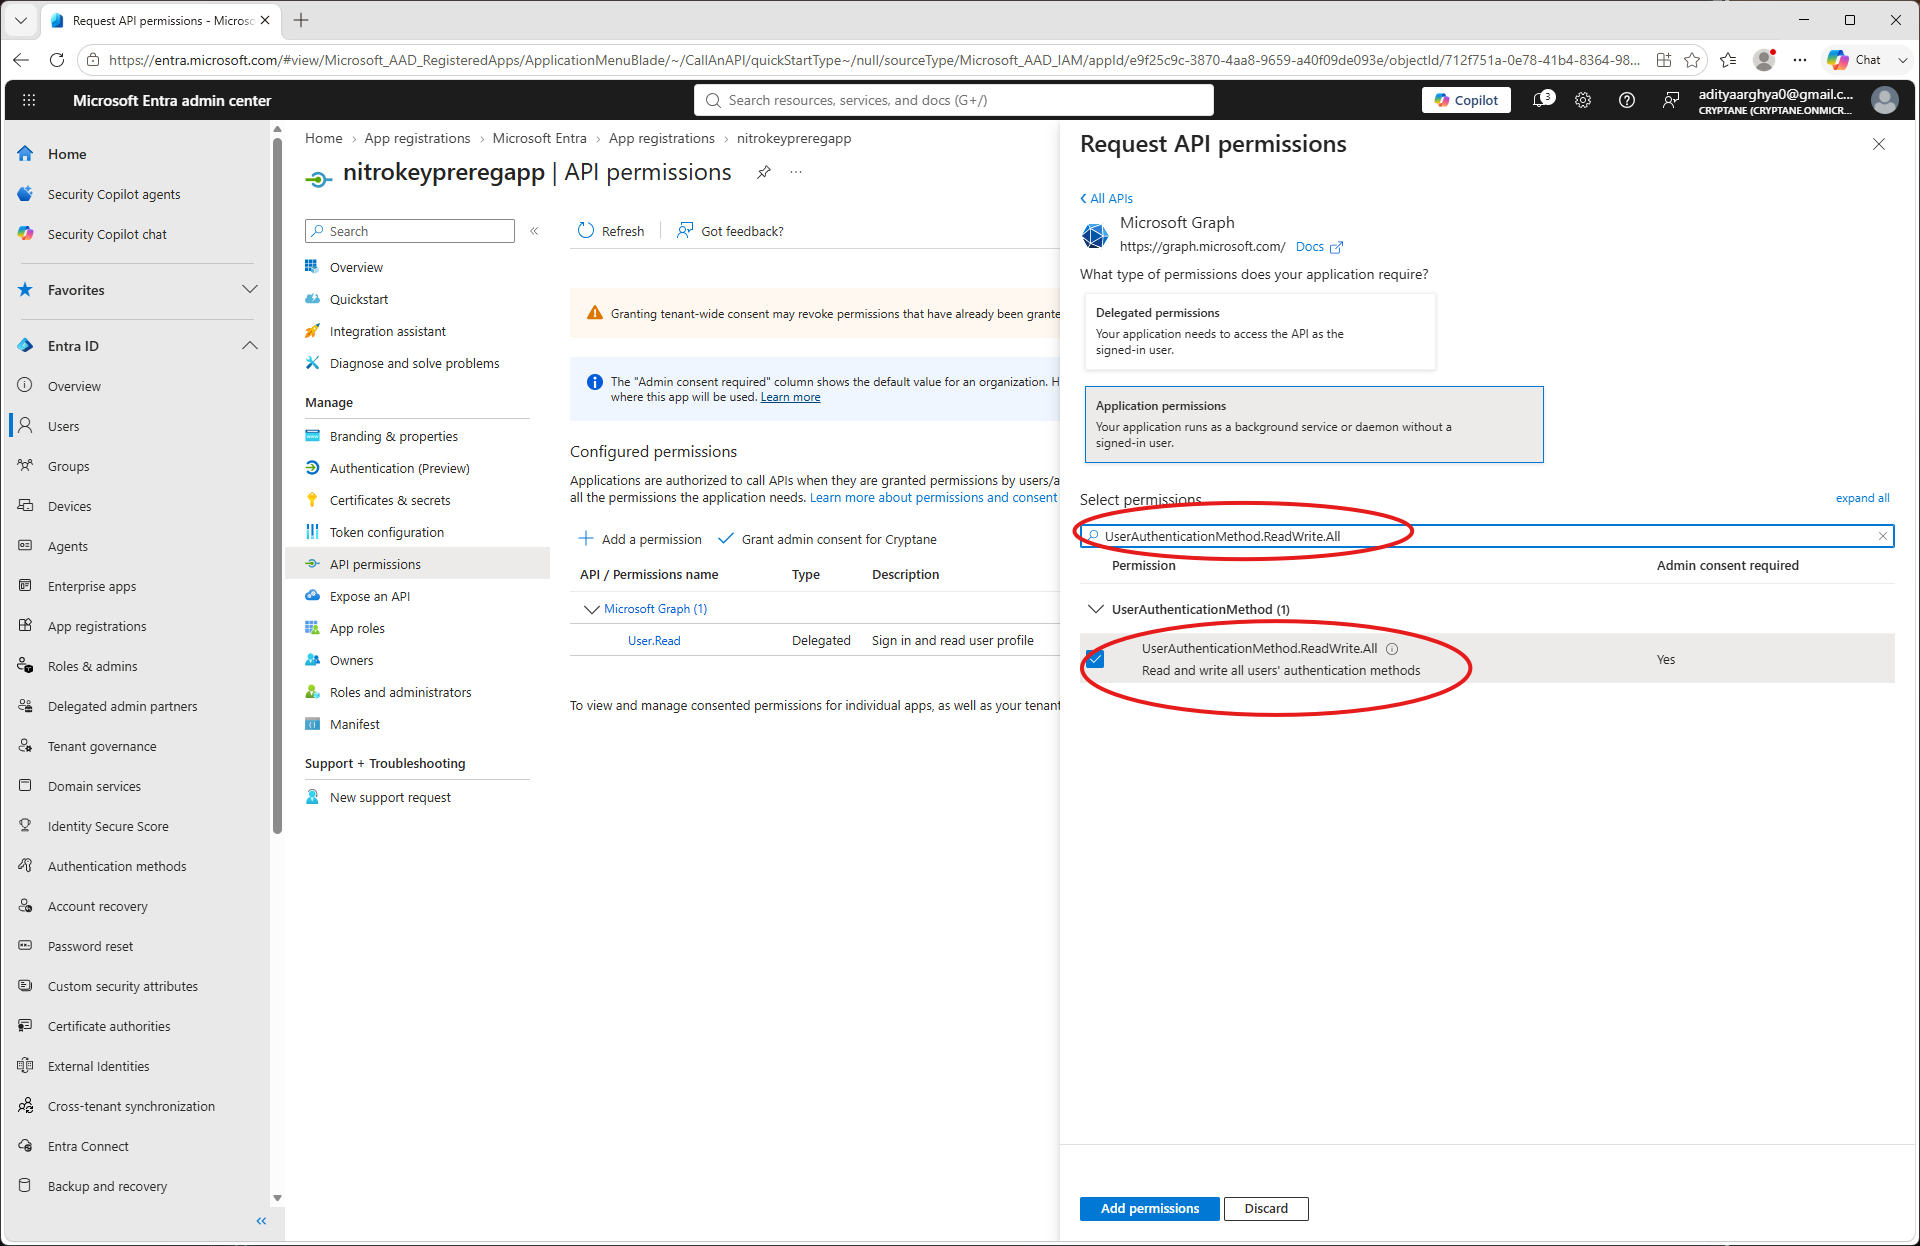
Search for
User.ReadWrite.Alland select it (Only if you want to be able to create users frompynitrokey). Click on the Add Permissions button.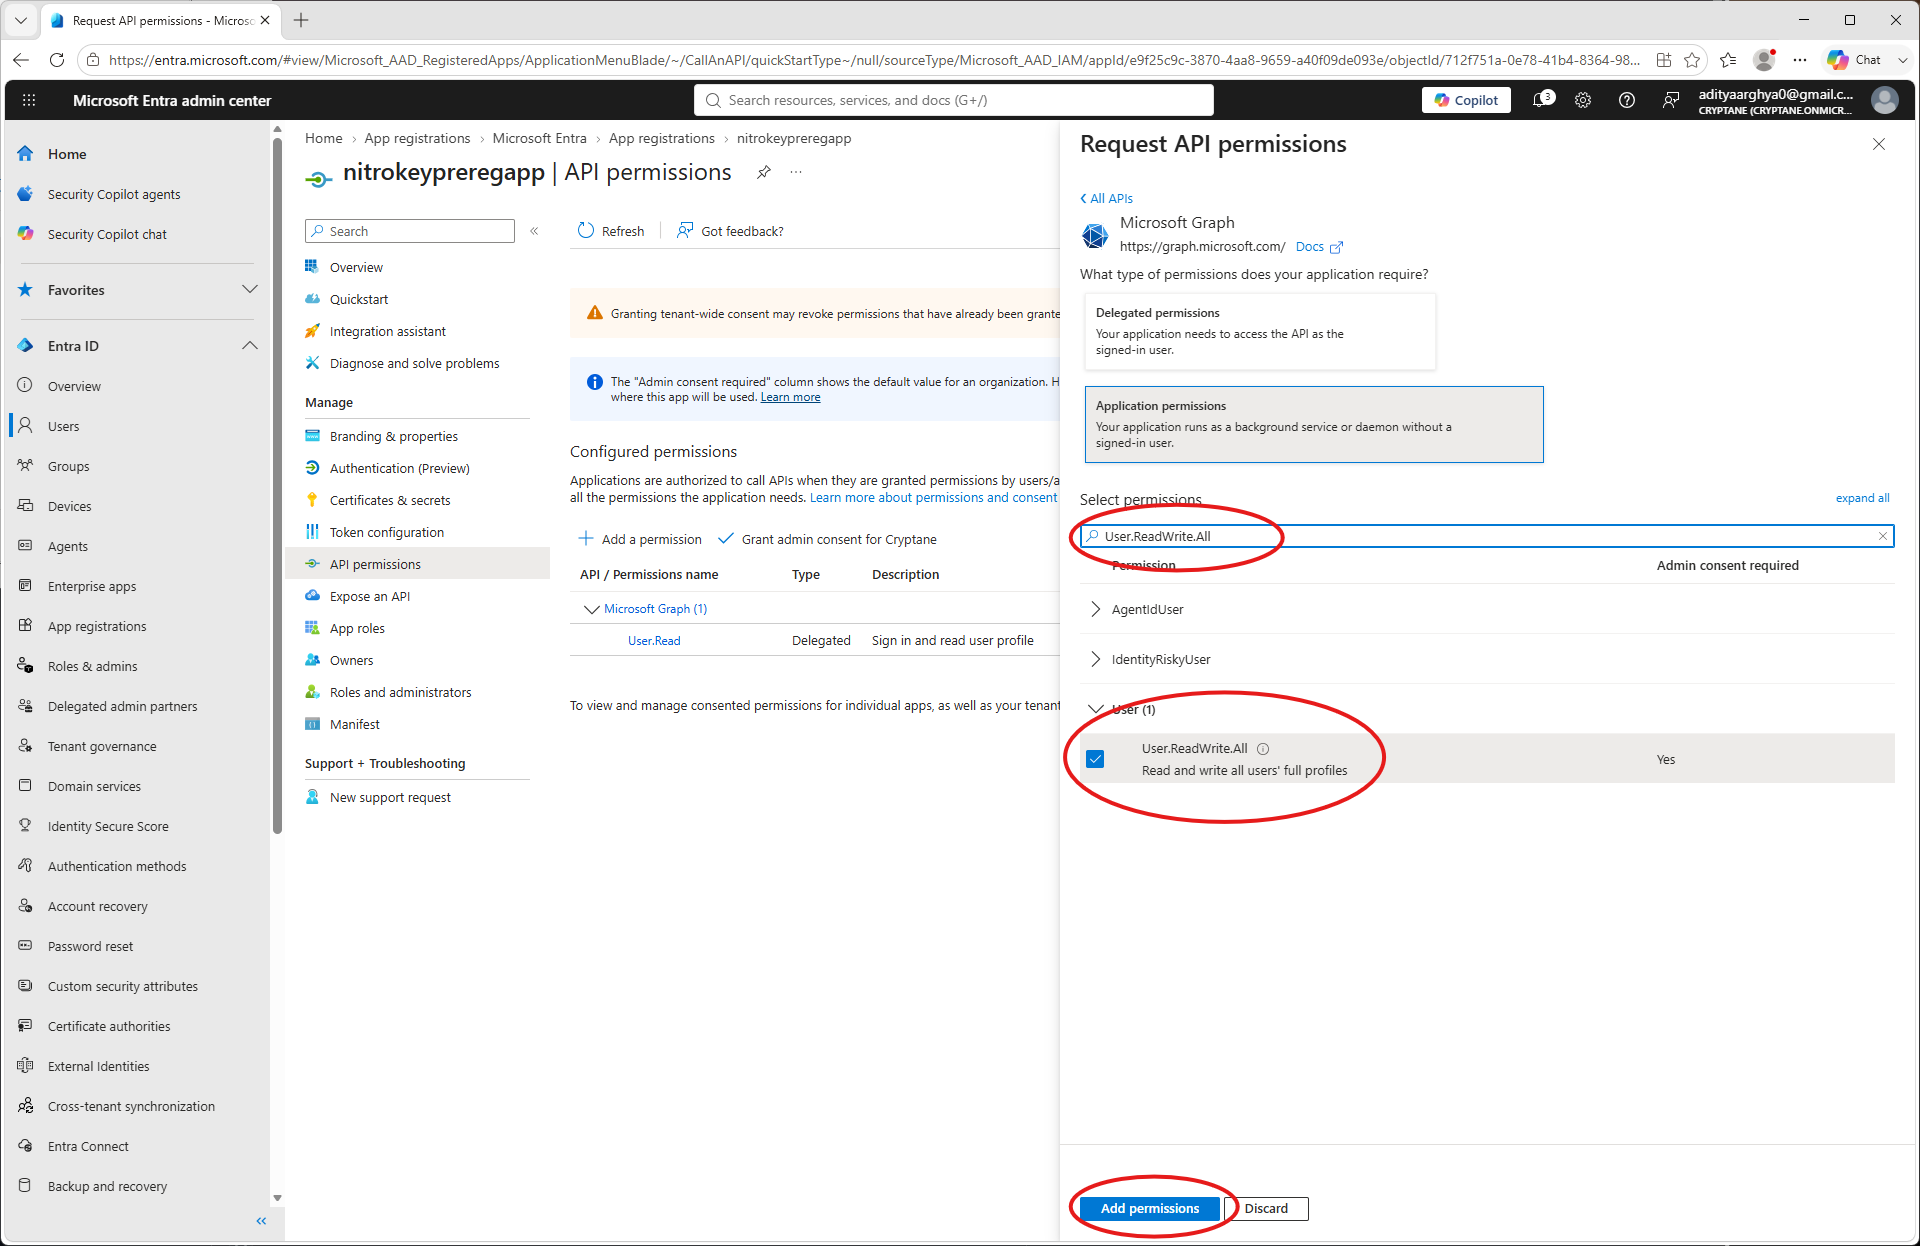
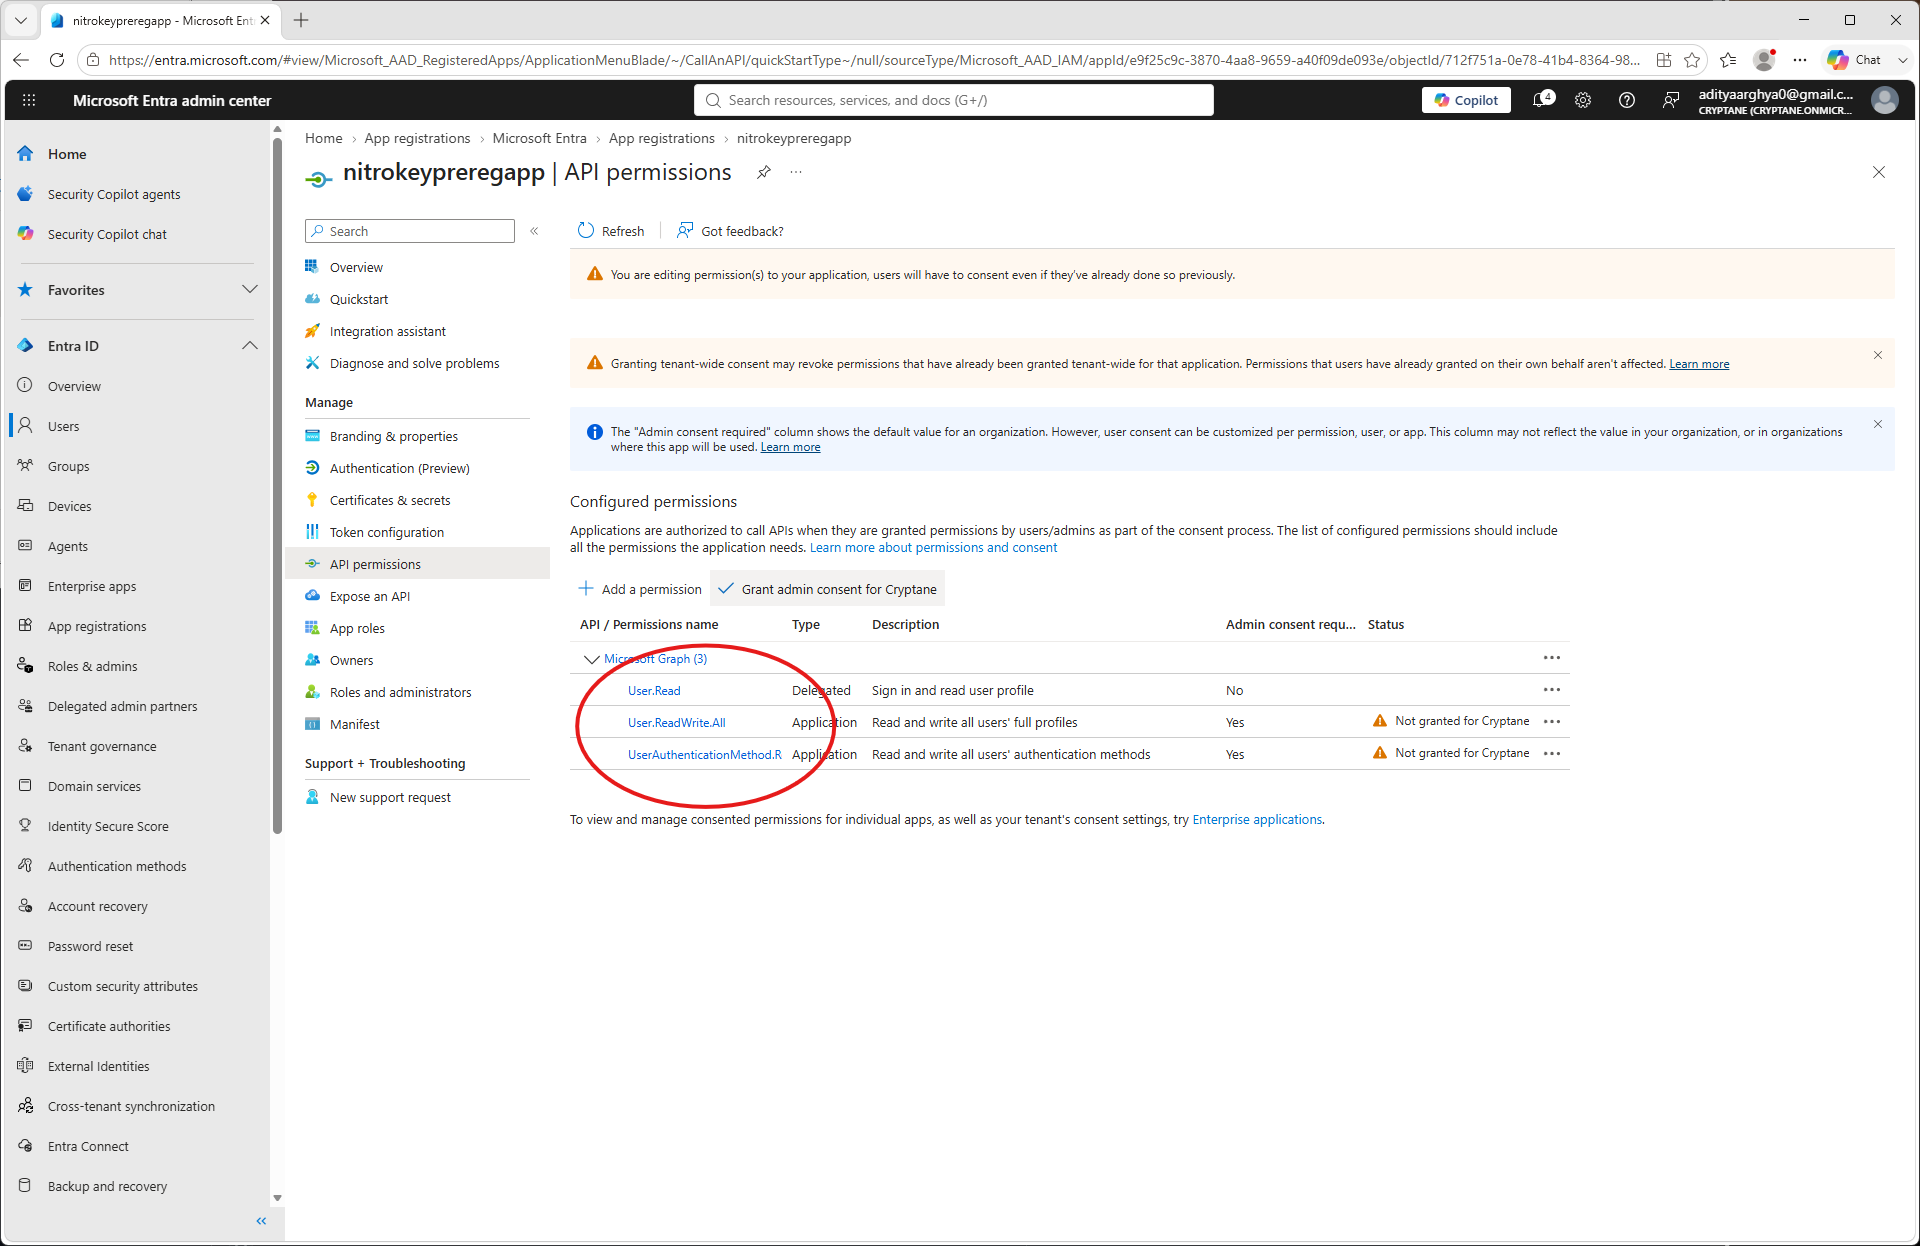
Preverite dodeljena dovoljenja.
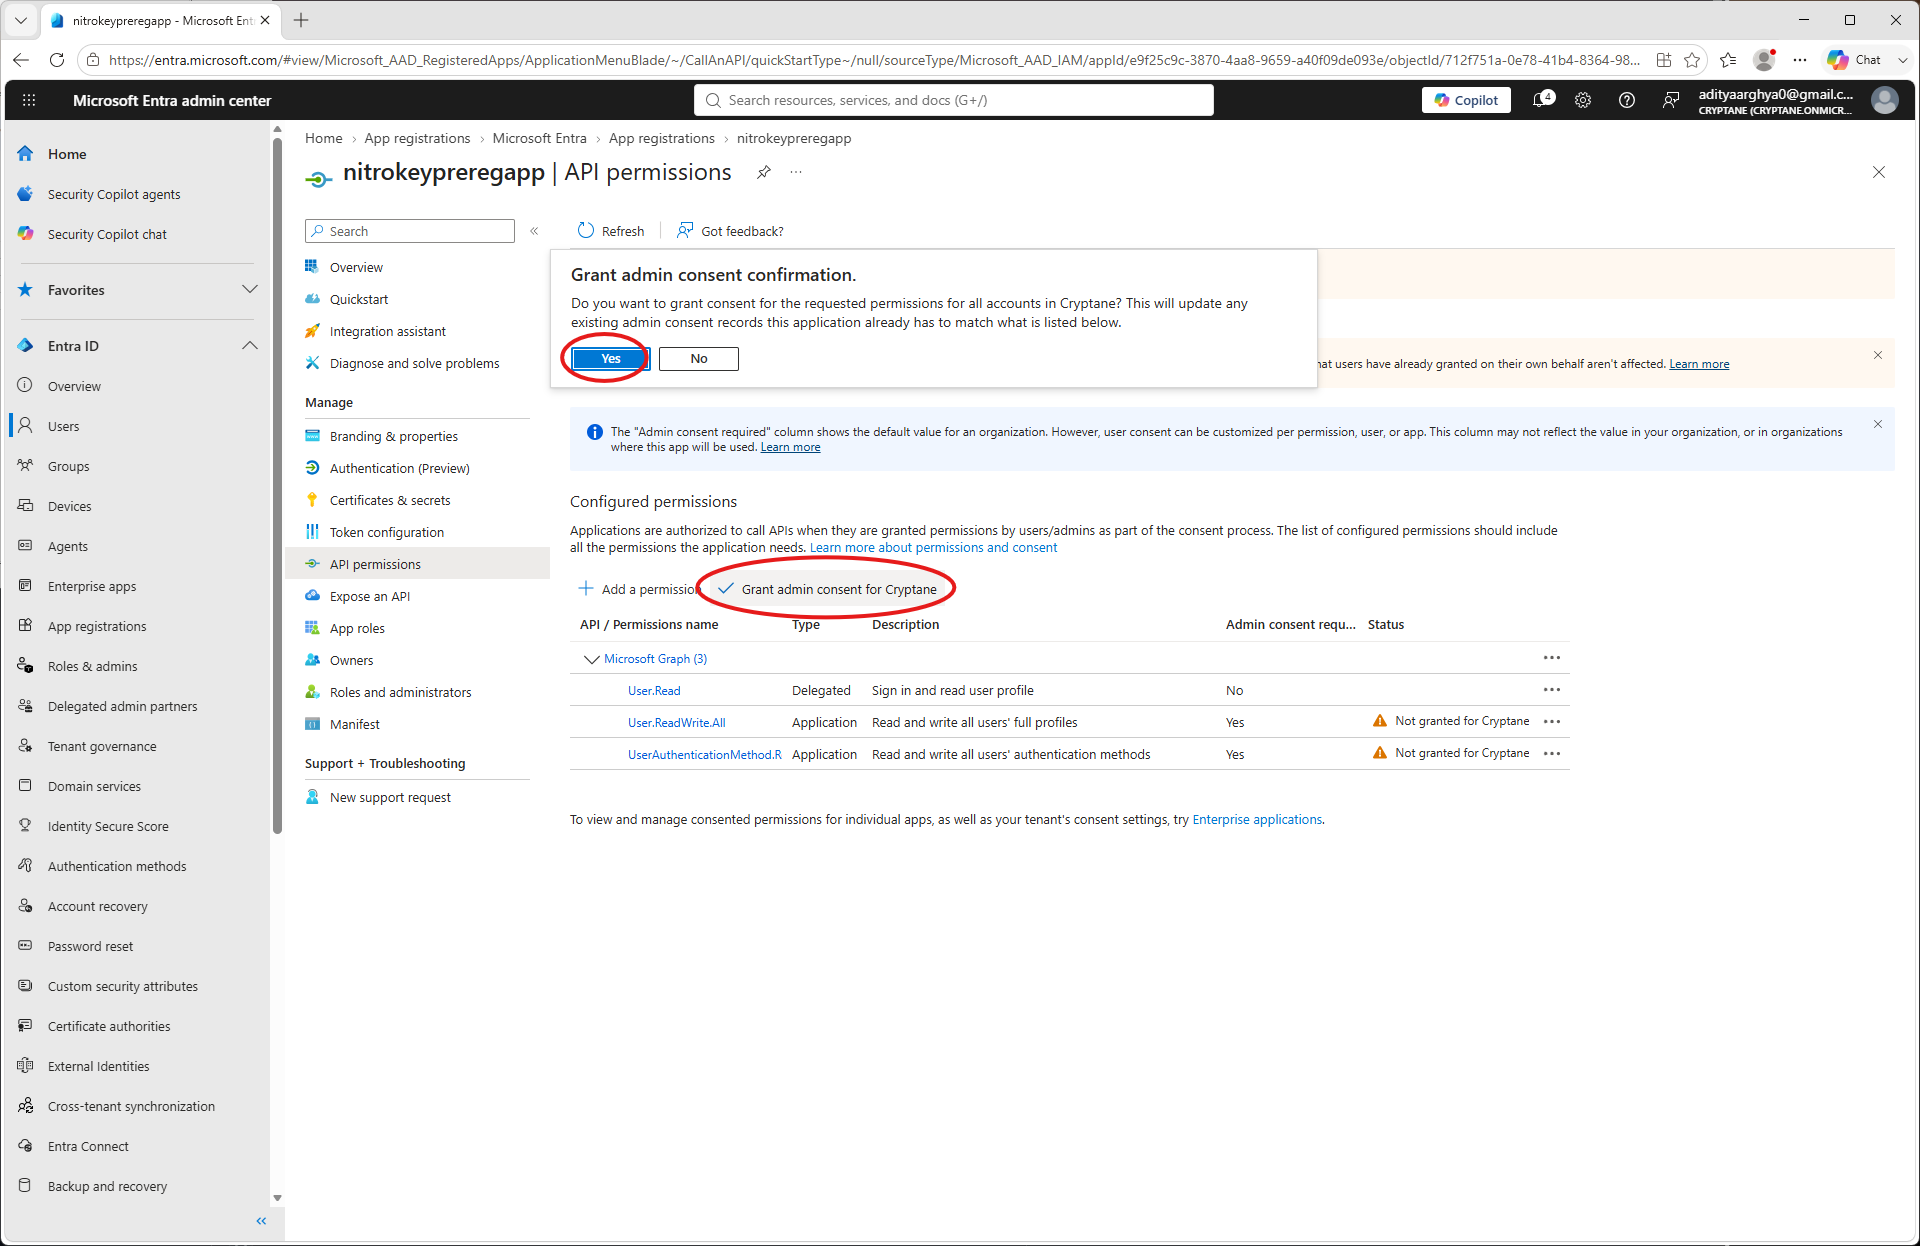
Kliknite na »Daj soglasje skrbniku« in ga potrdite.
Vrnite se na začetno stran aplikacije in v levem meniju izberite »Certifikati in skrivnosti«
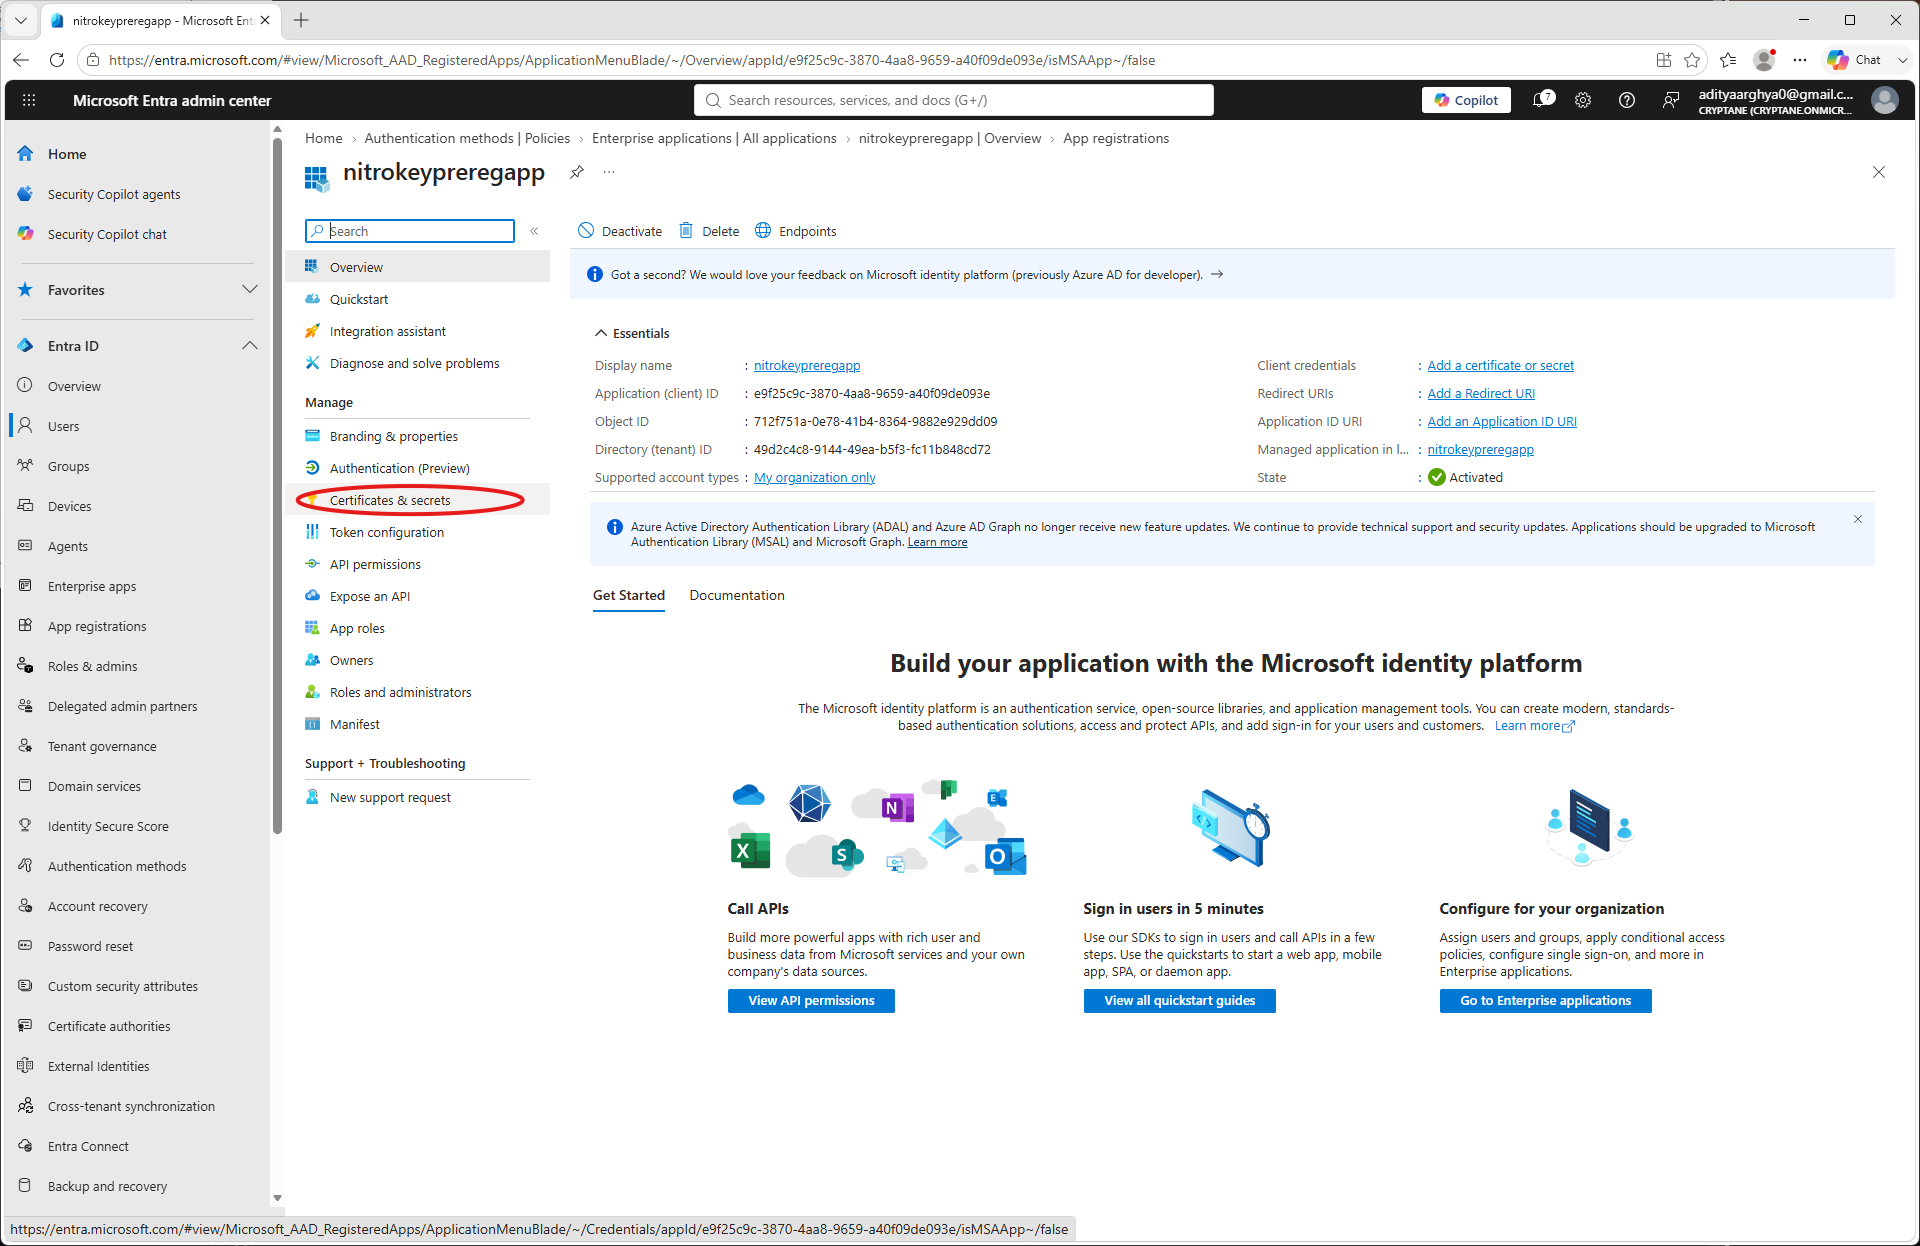
Kliknite »Nova skrivna ključa stranke«
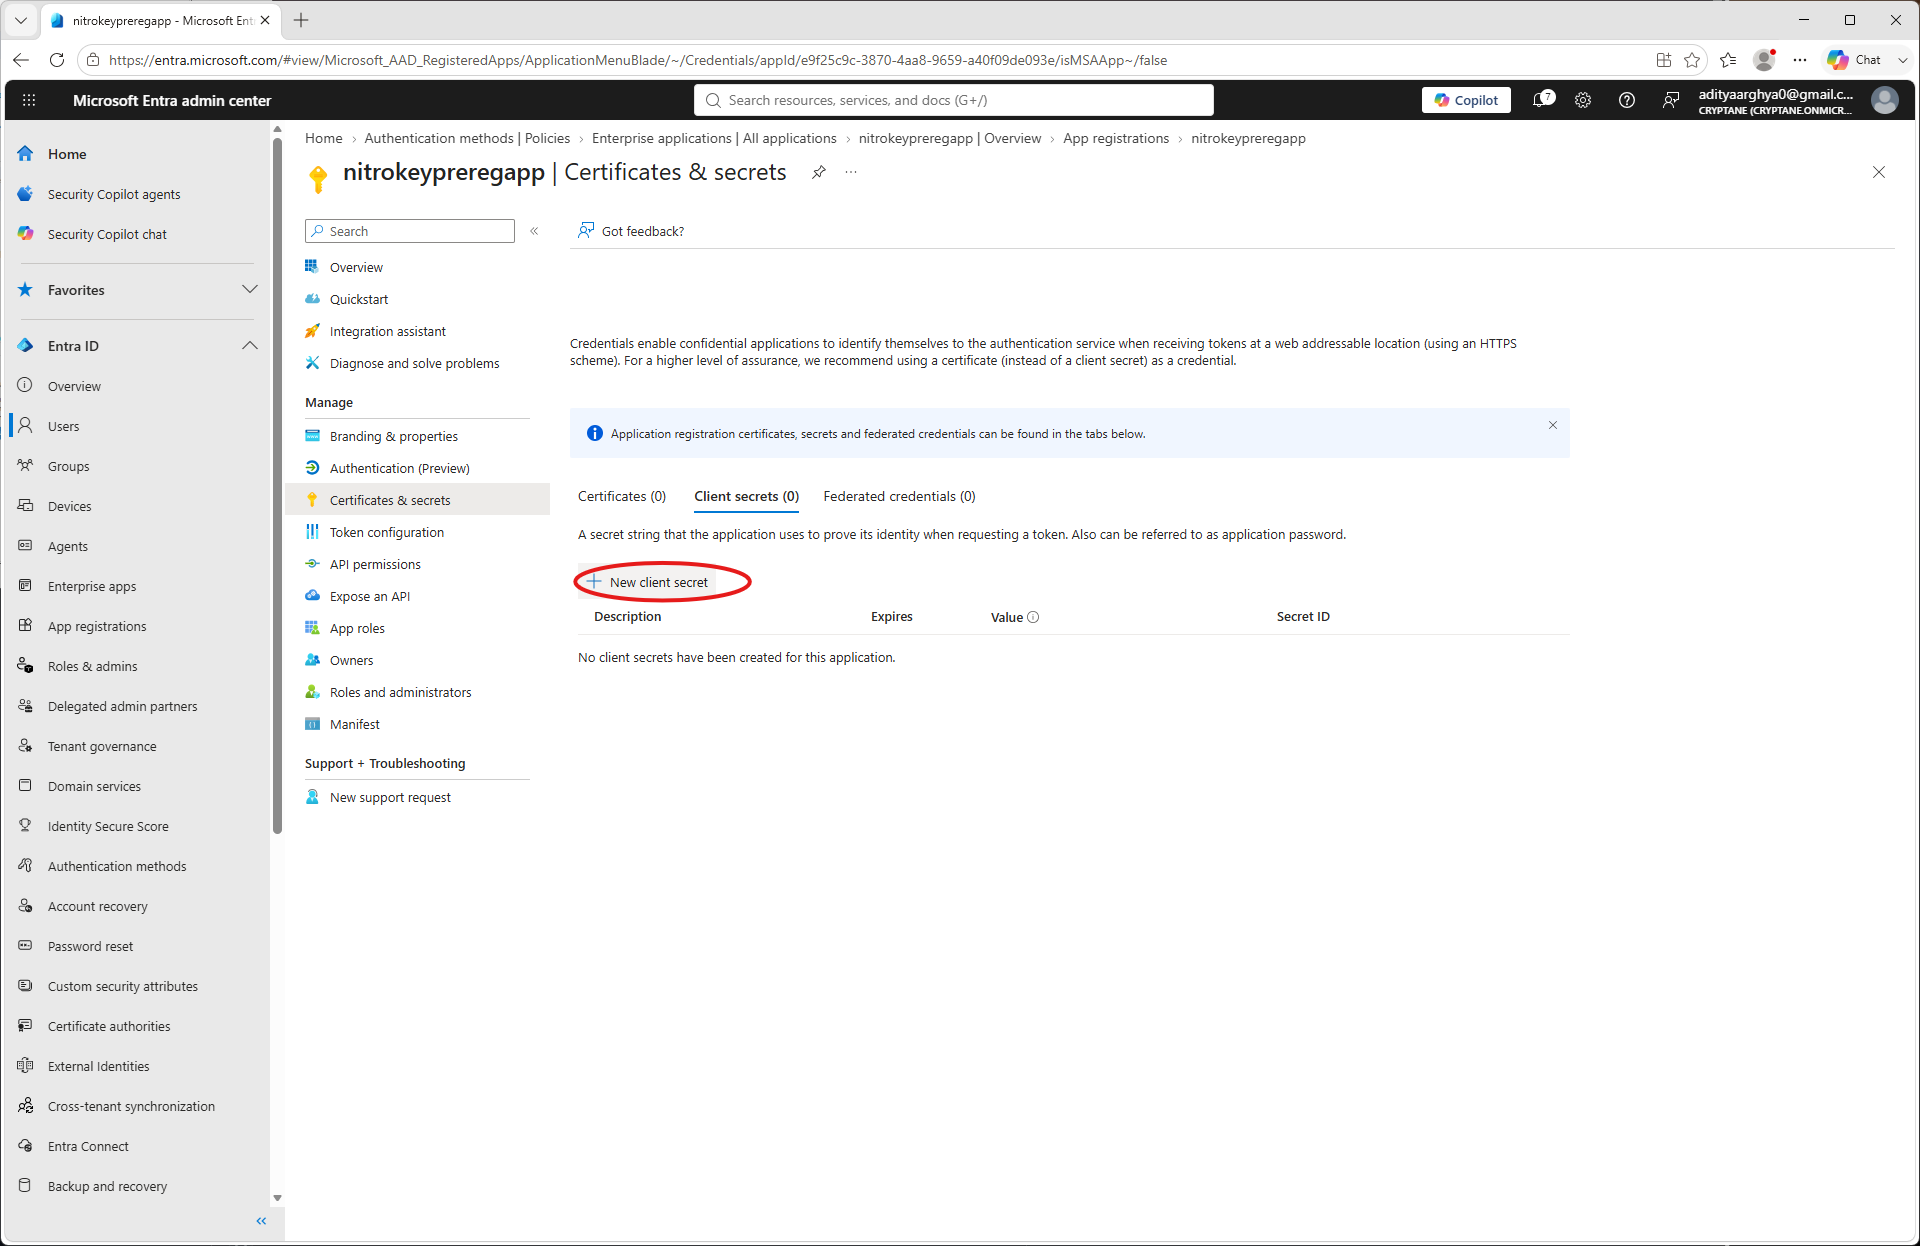
Vnesite ime in datum poteka veljavnosti, nato pa kliknite »Dodaj«
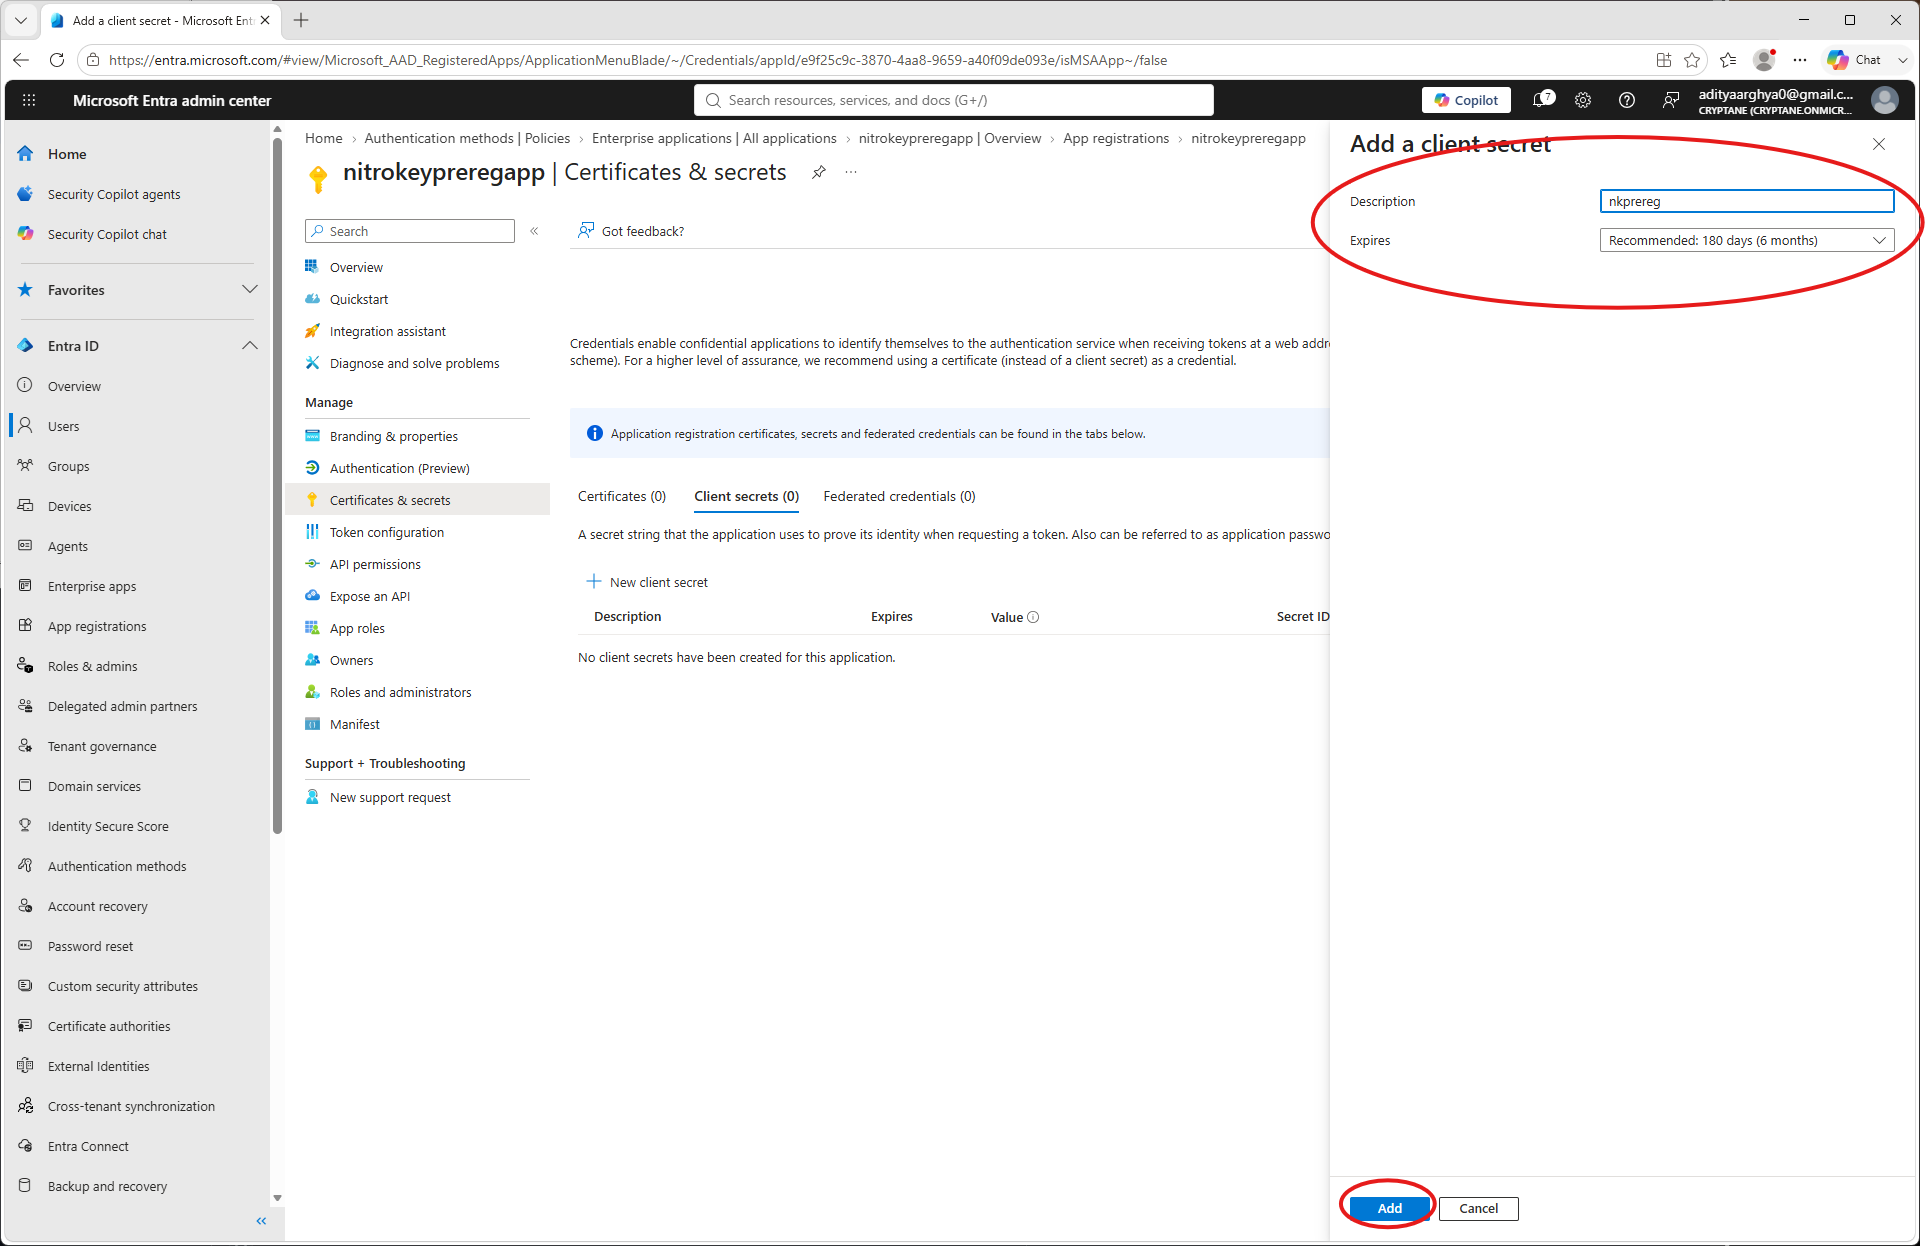
Zapišite si skrivni ključ stranke (kasneje ga ne boste mogli več videti).
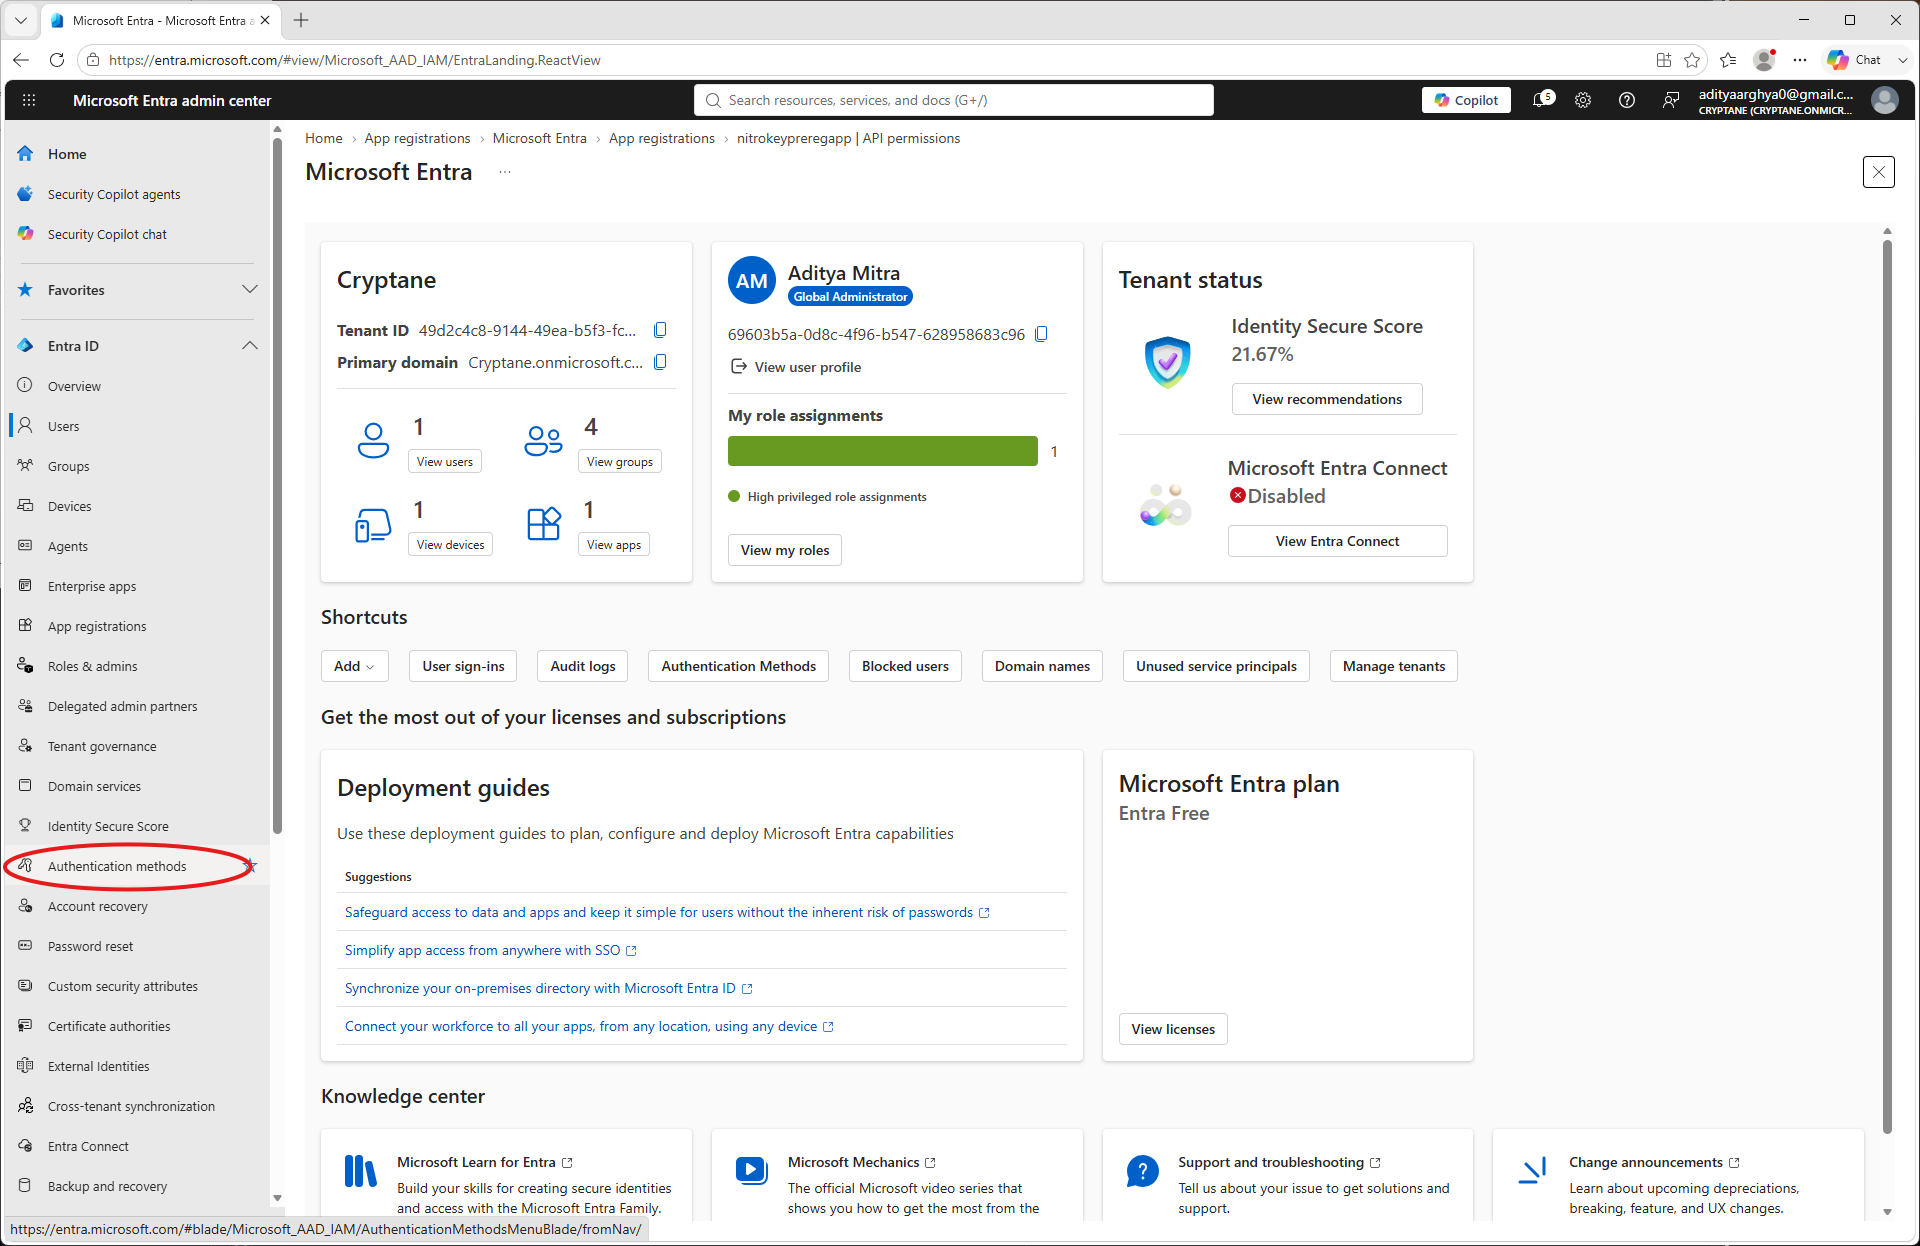
V levem meniju kliknite na »Načini avtentifikacije«.
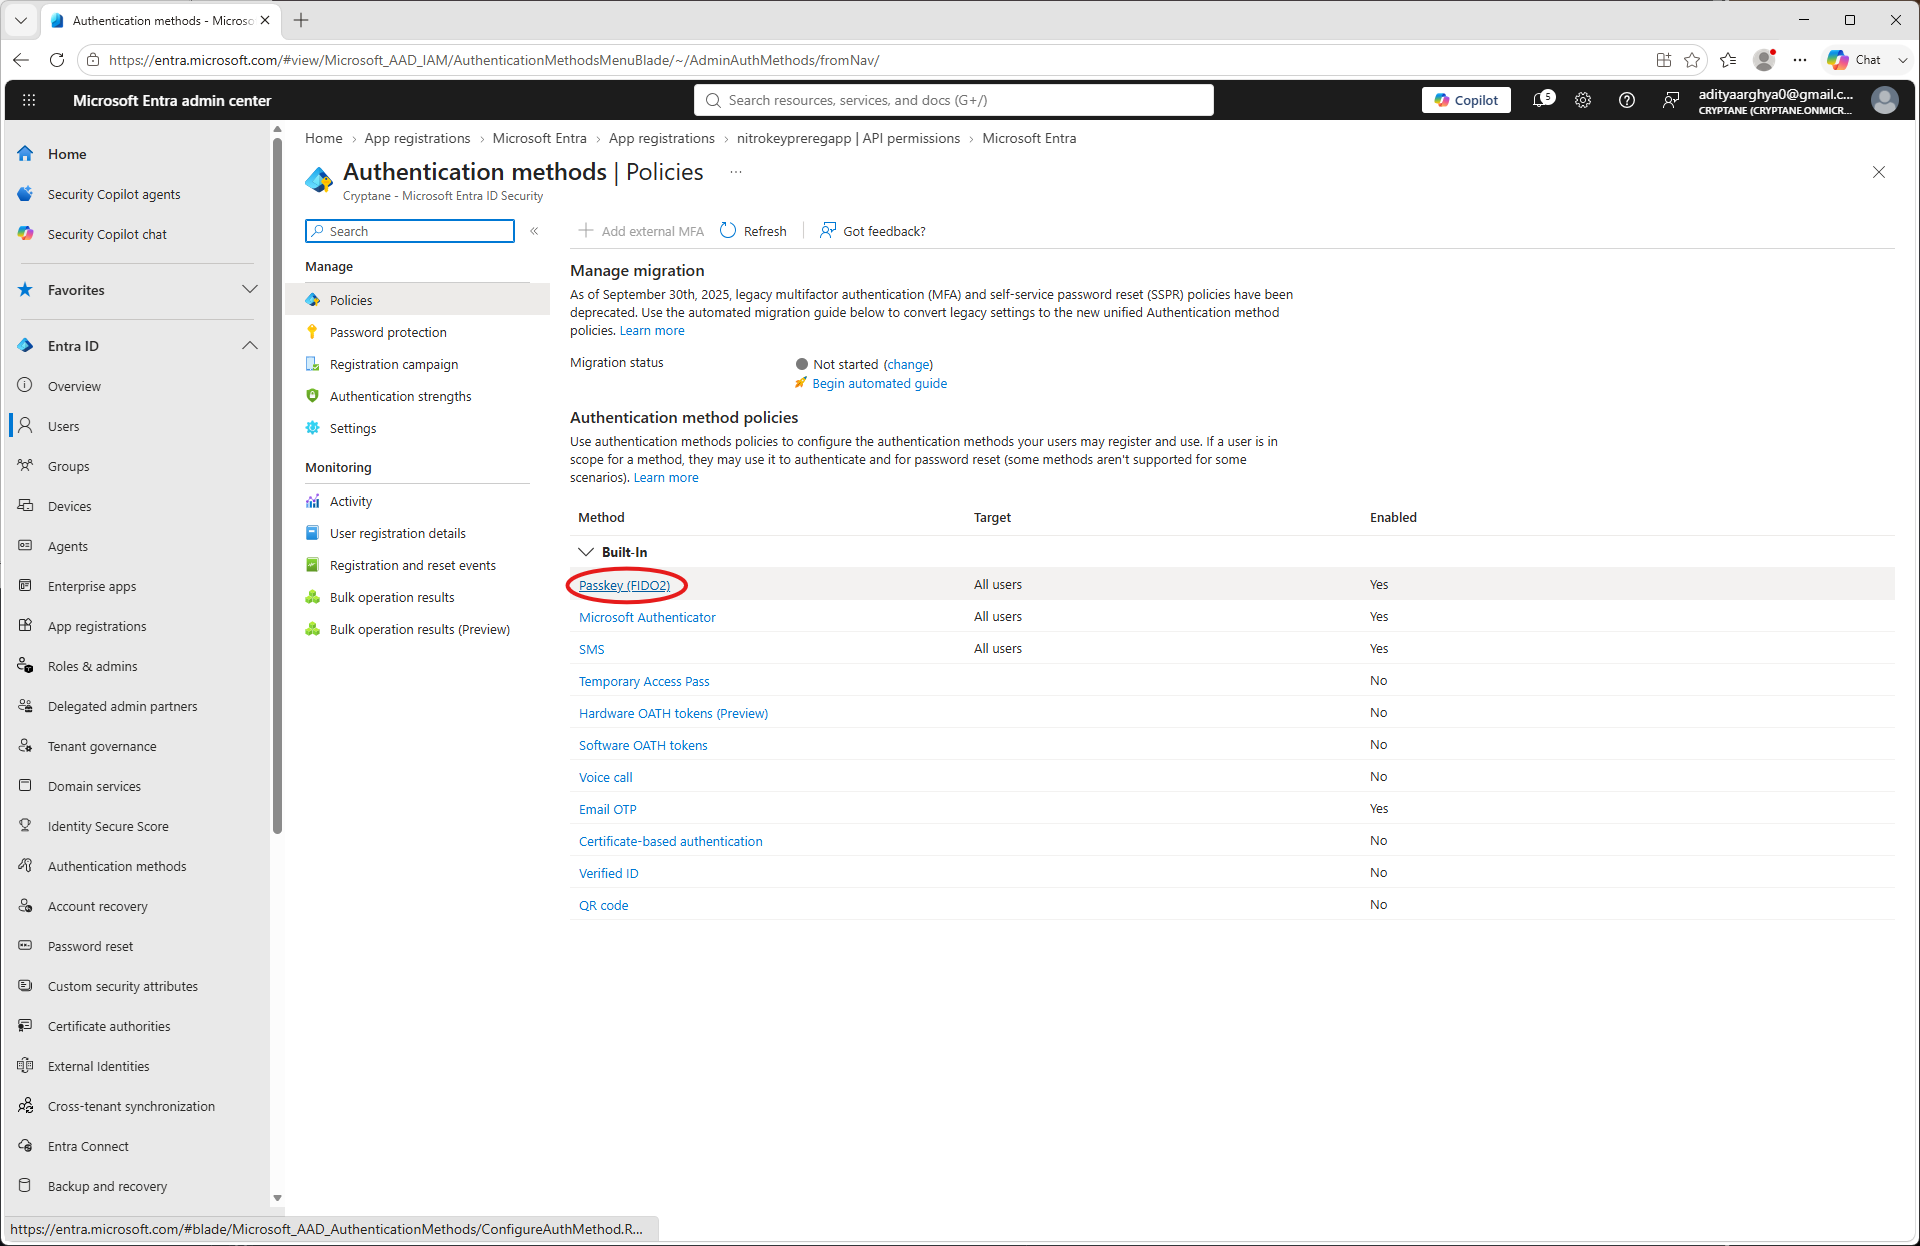
Select Passkey (FIDO2).
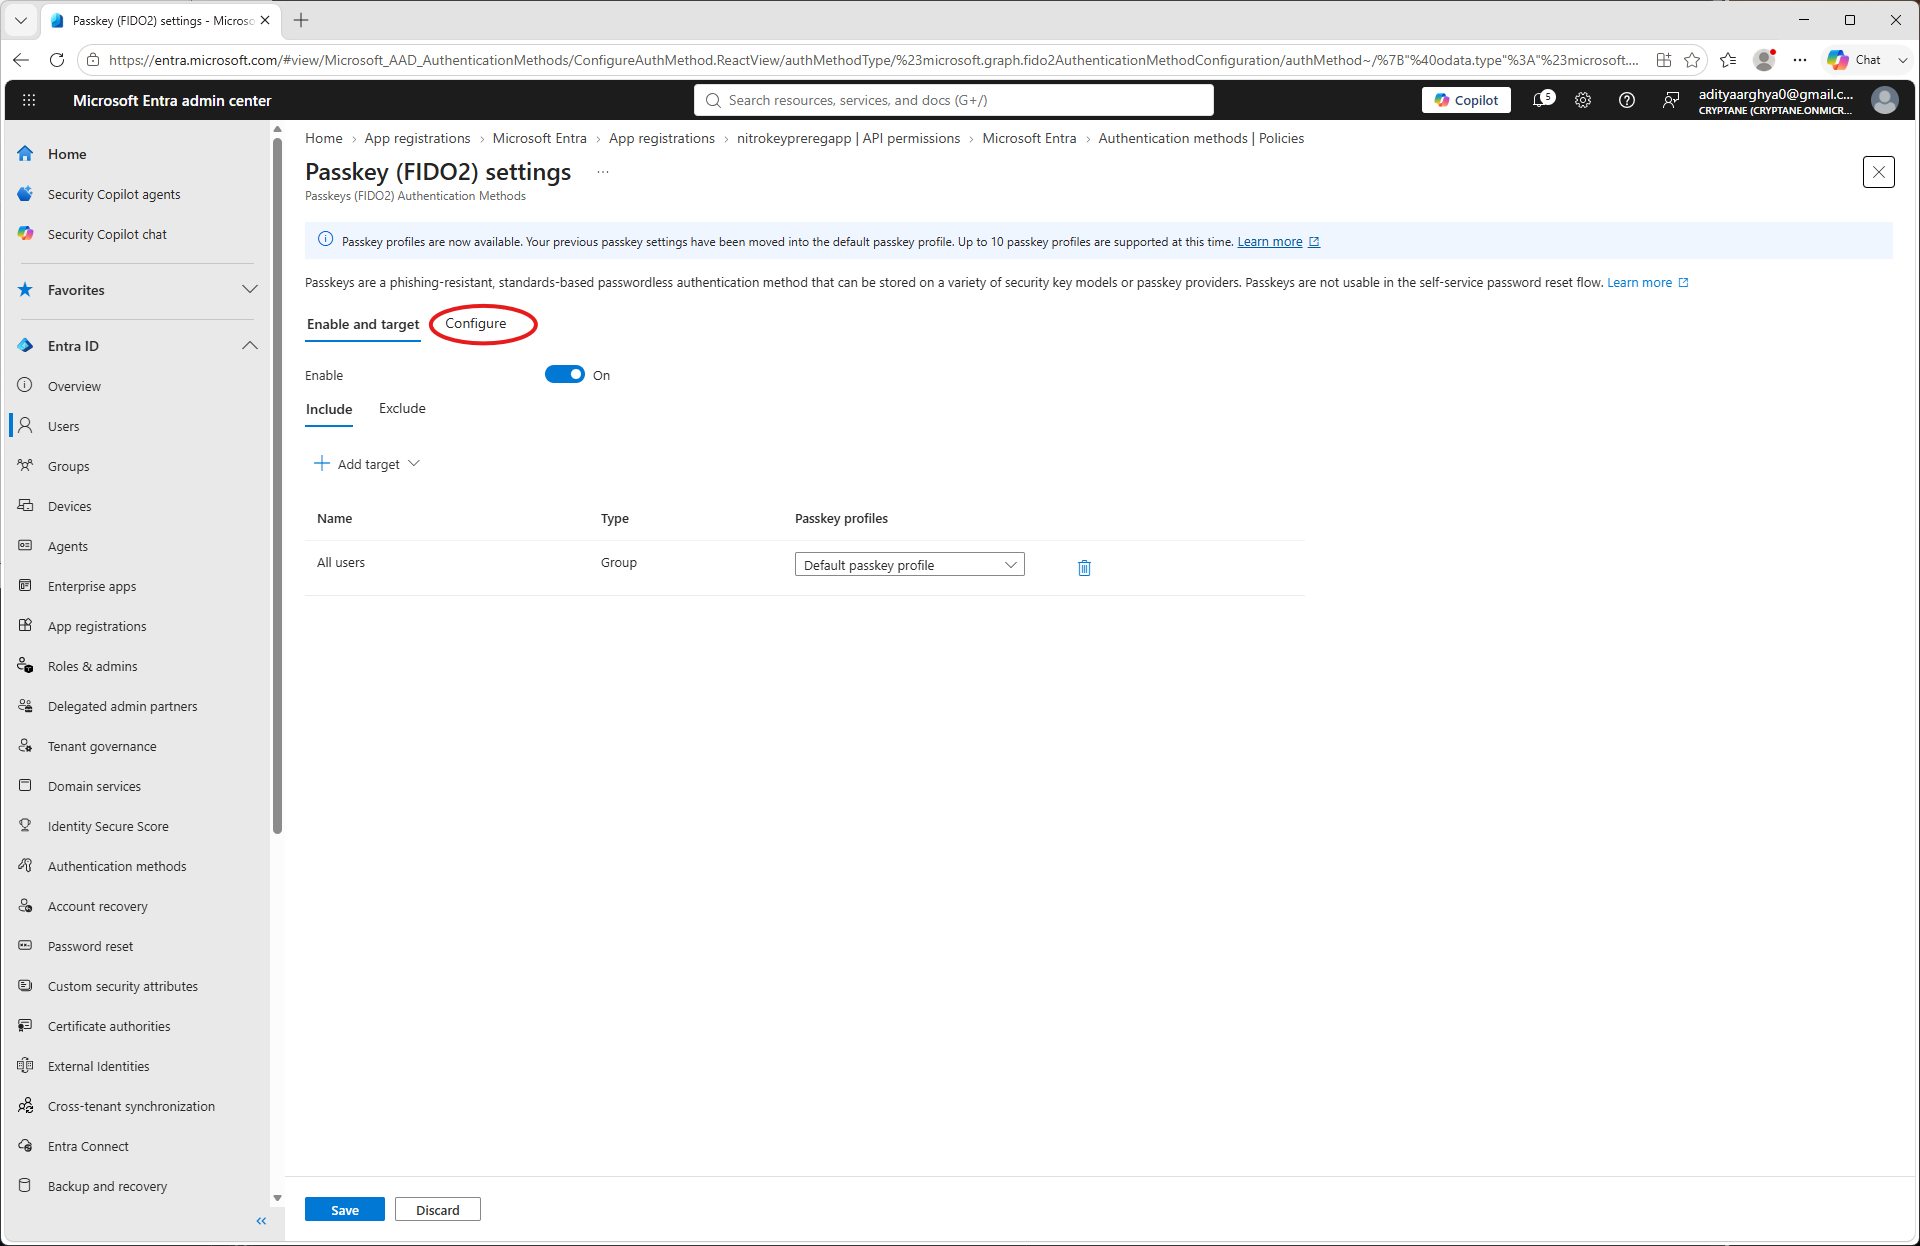
Click on the Configure tab.
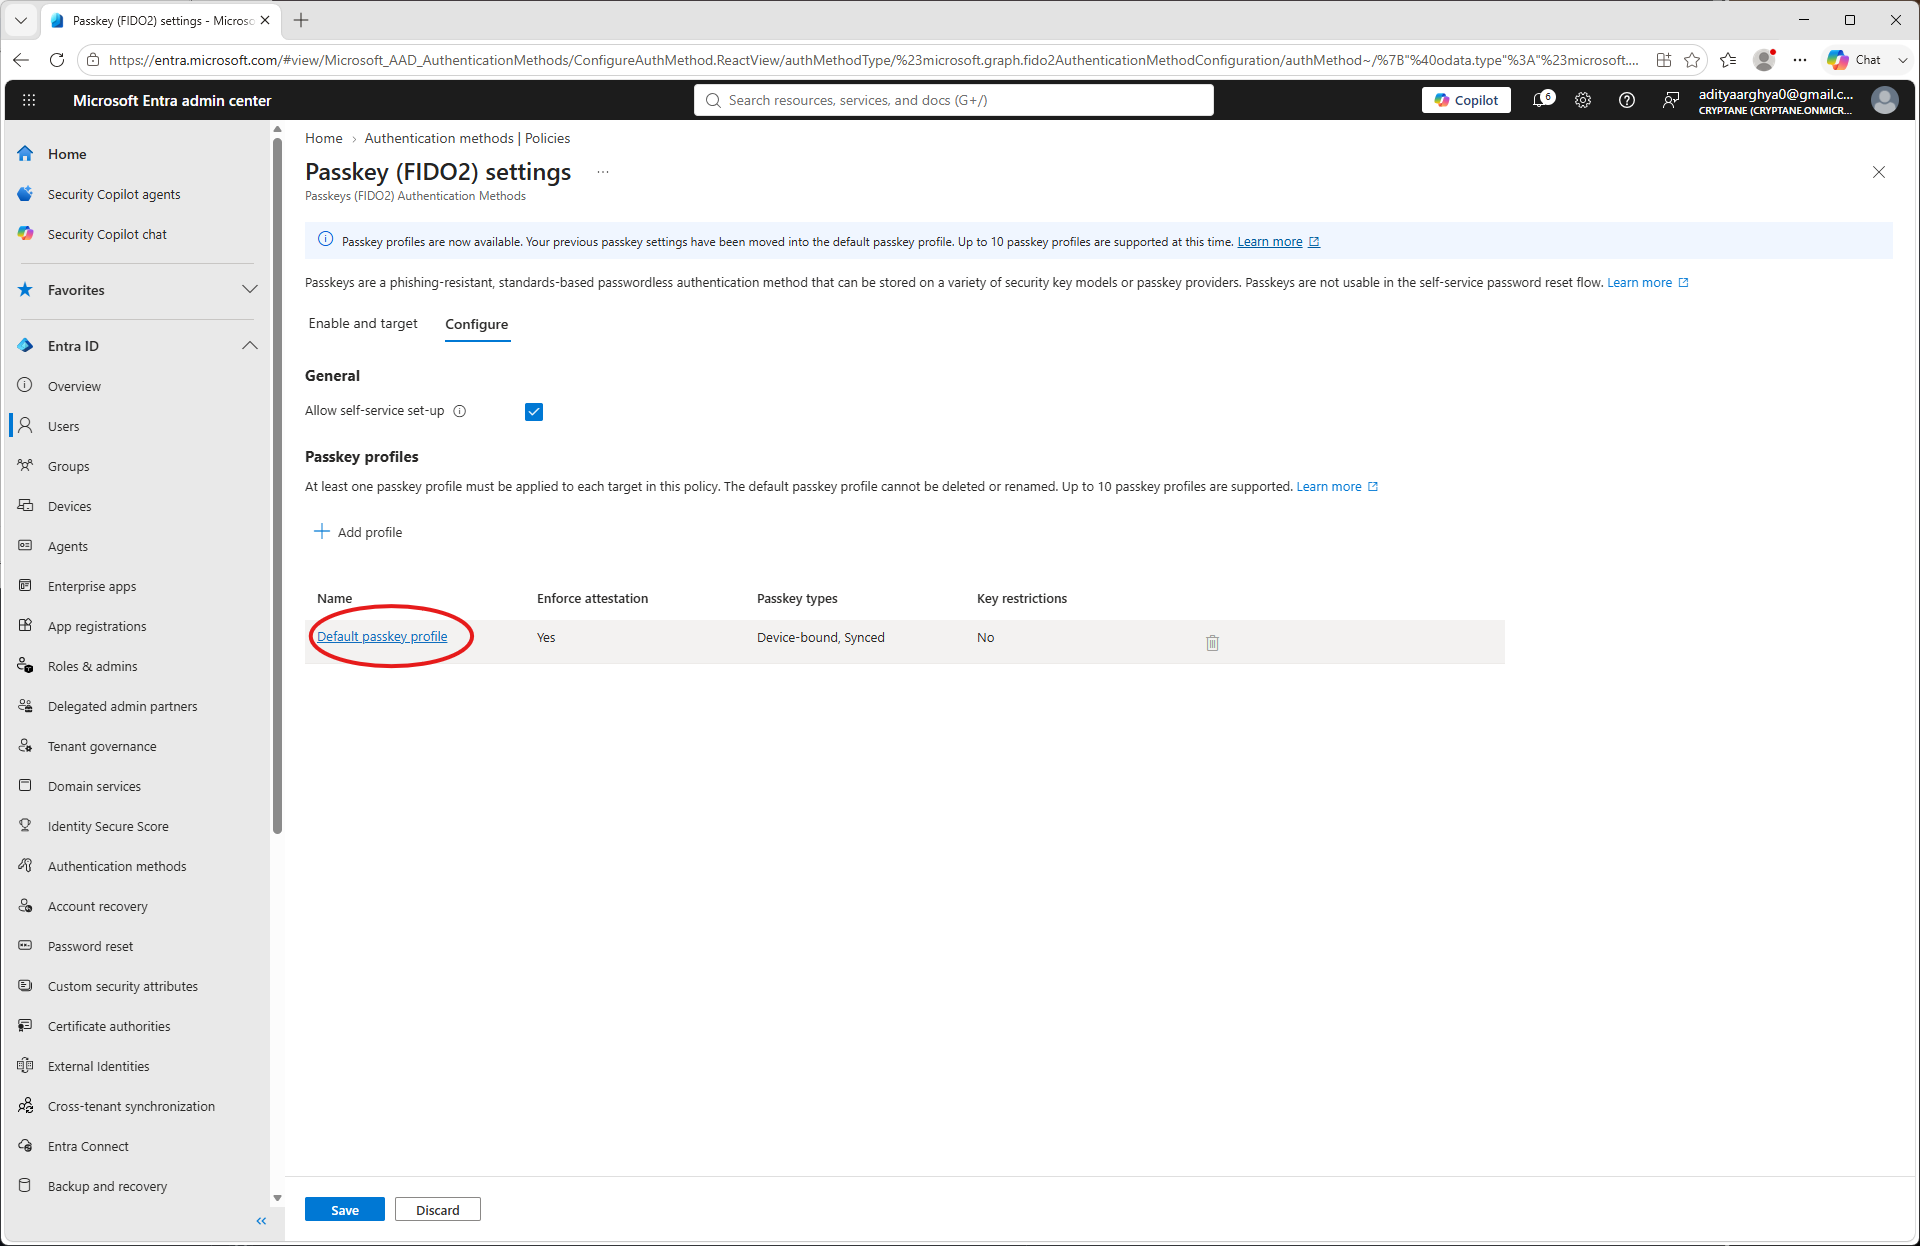
Click on Default Passkey profile
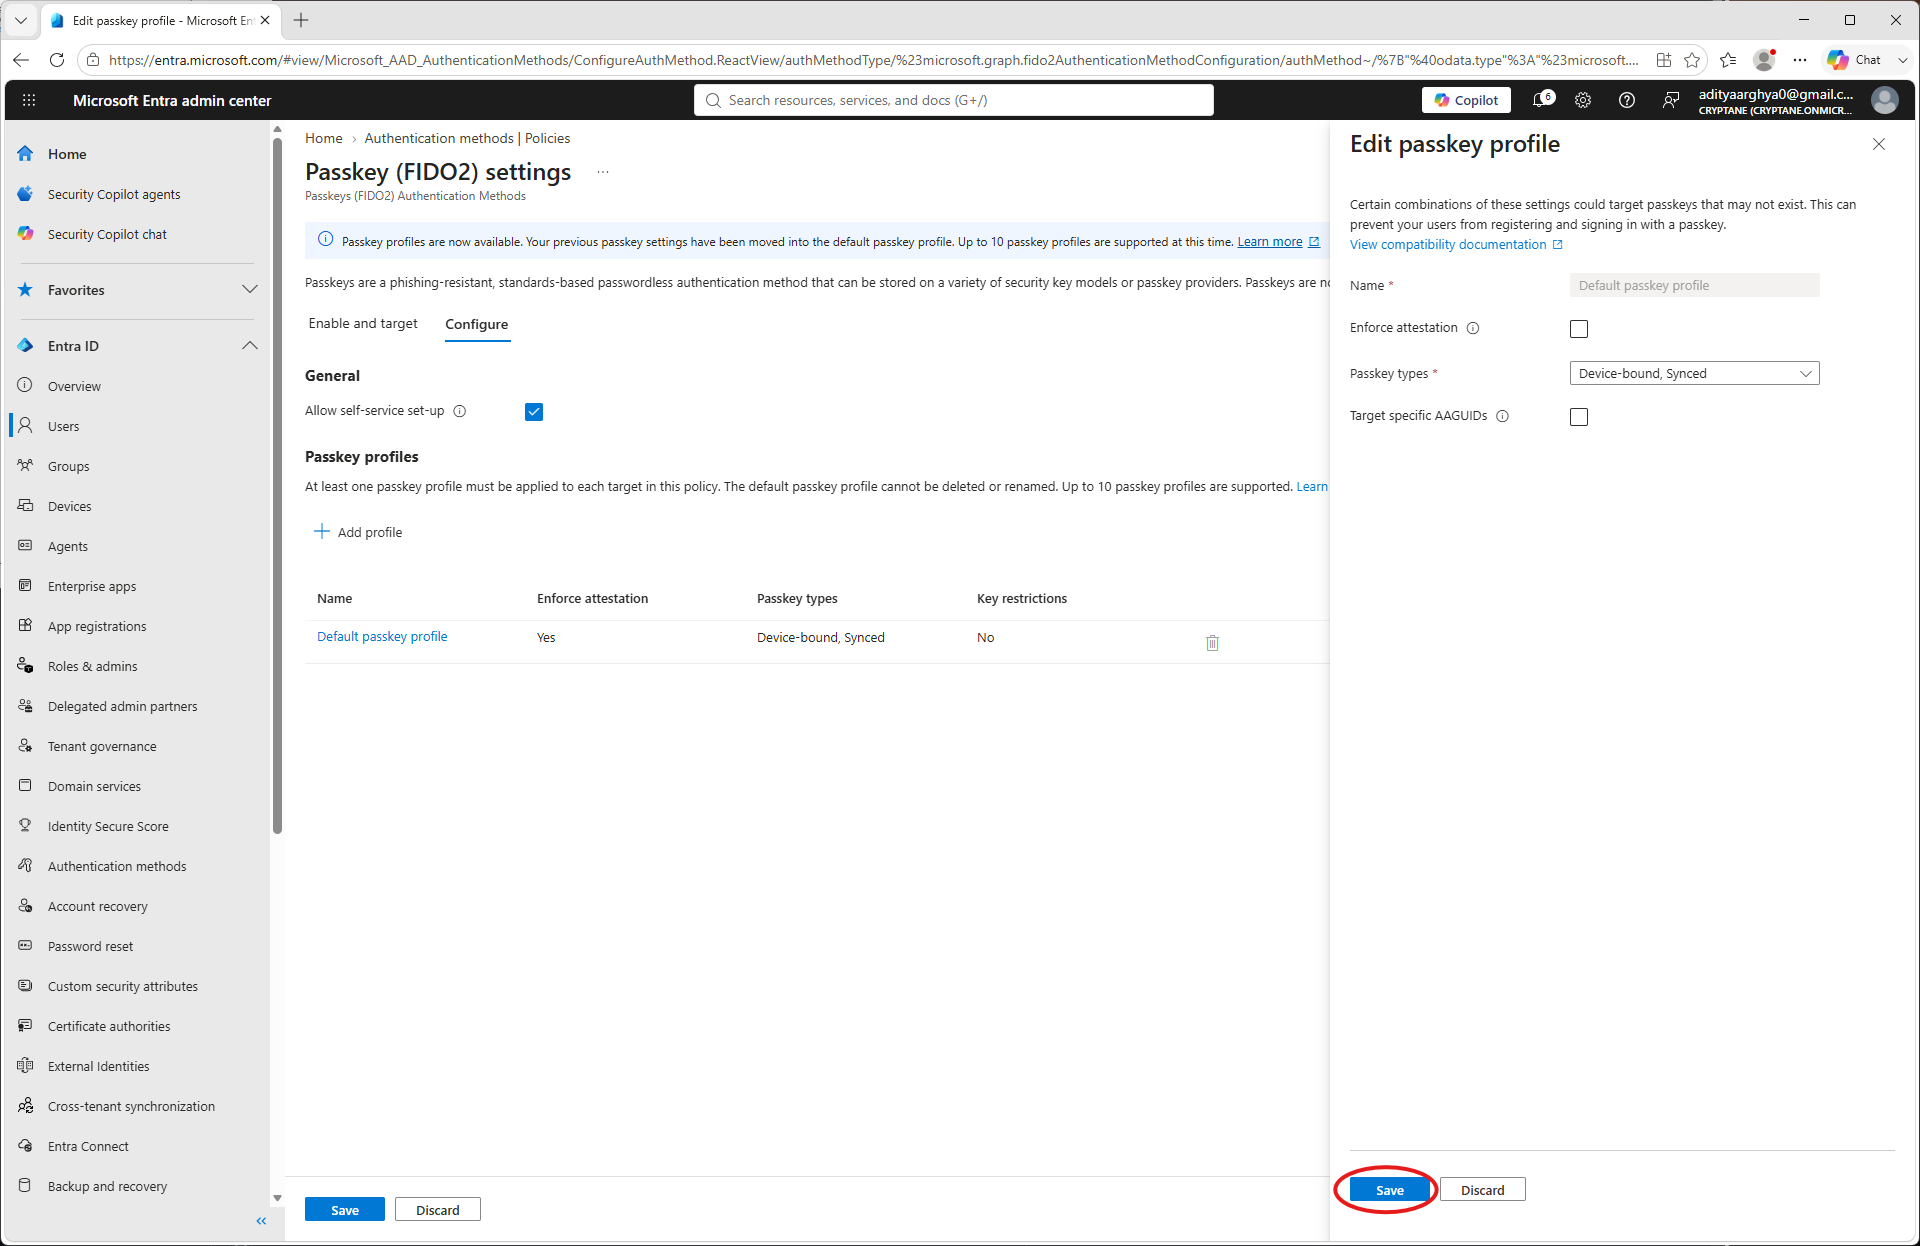
Odkljukajte možnost »Enforce Attestation« (Samo če uporabljate Nitrokey, ki nima certifikata zveze FIDO Alliance. Ob pisanju tega dokumenta ima ta certifikat le Nitrokey 3A Mini.)
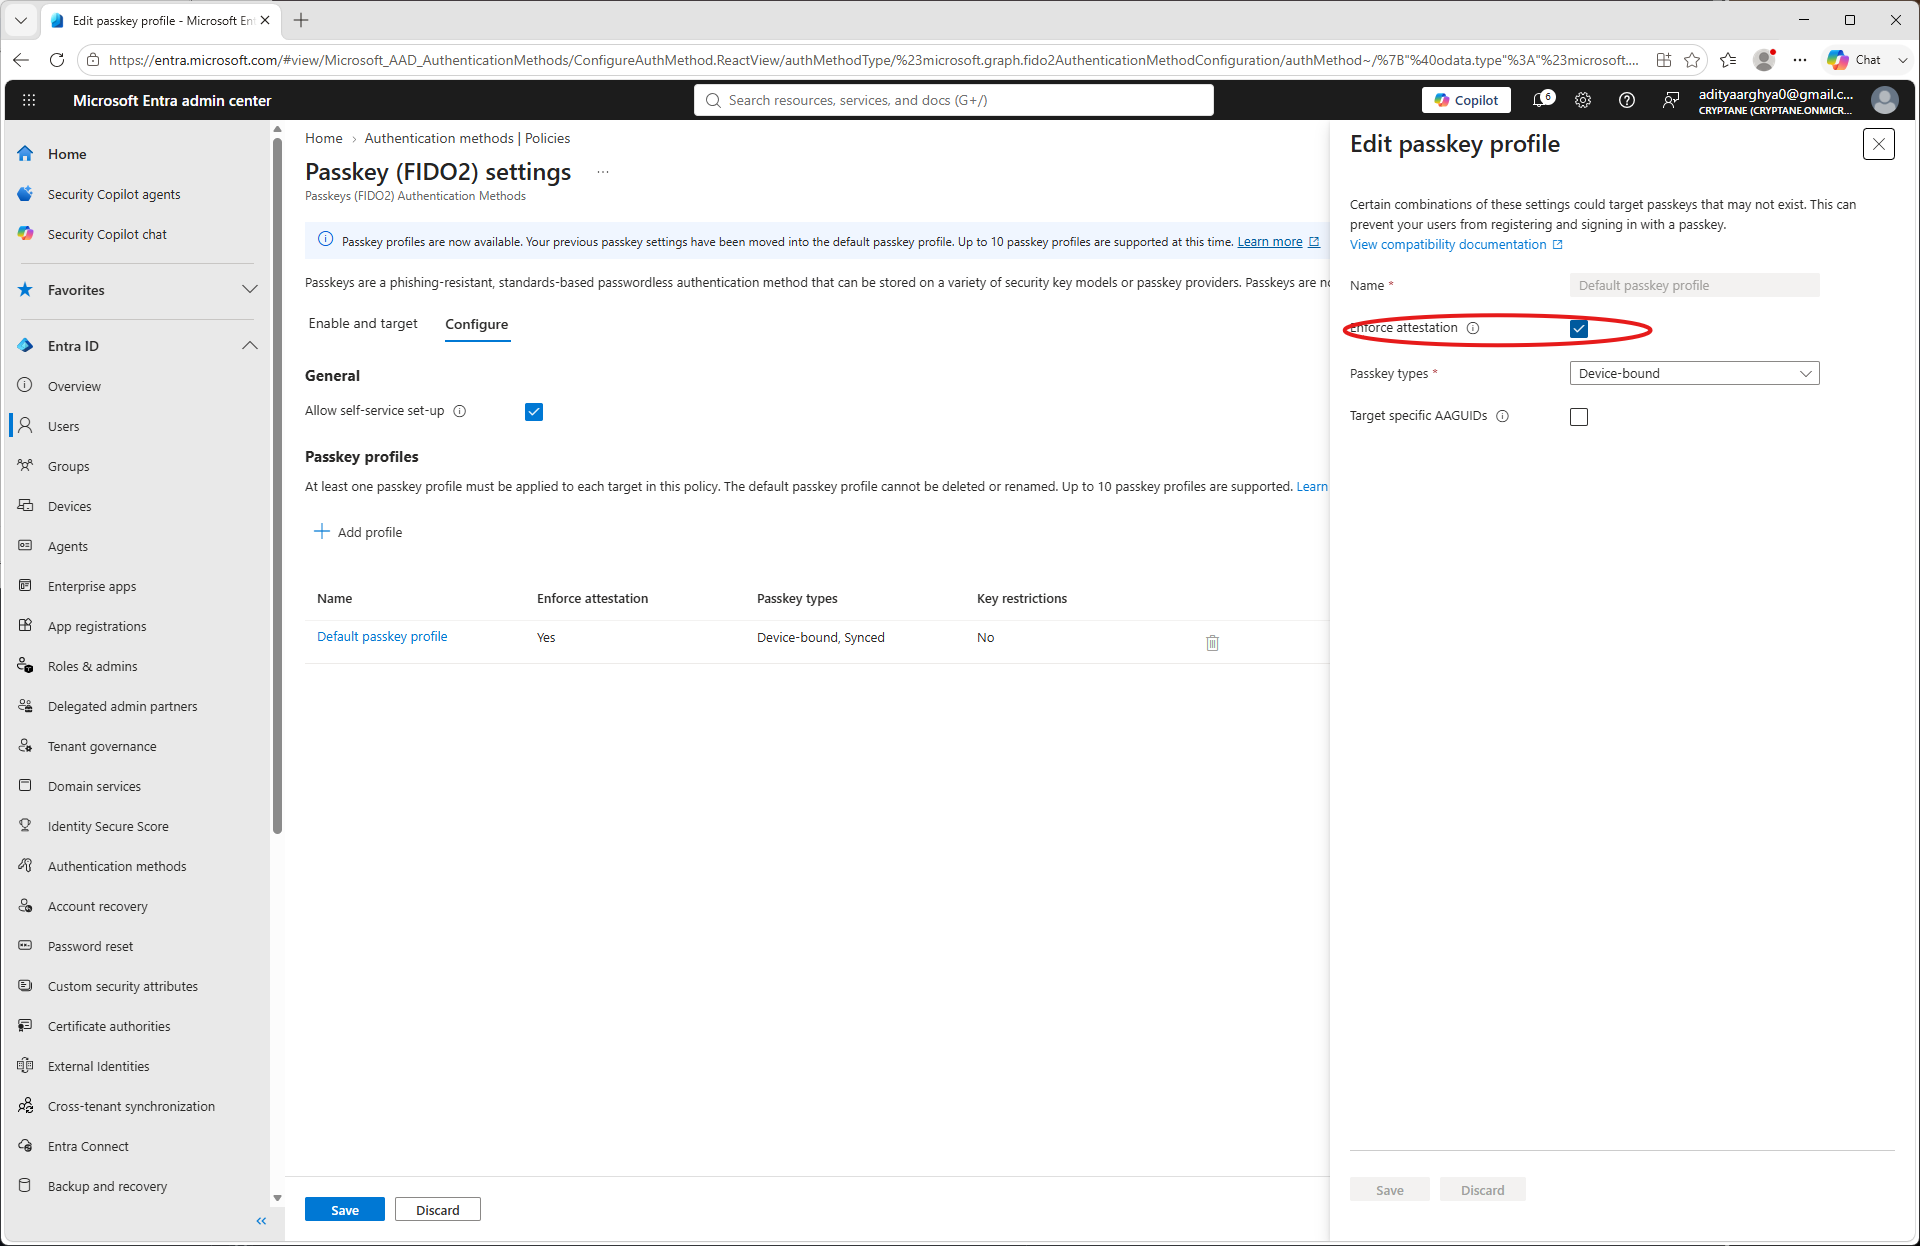
Click Save.
You have taken note of the Tenant ID, Client ID, Client Secret and Primary Domain as a part of the process. Make a
config.jsonfile with the information. An example is shown below.{ "tenant": "49d2c4c8-9144-49ea-b5f3-fc11b848cd72", "client": "e9f25c9c-3870-4aa8-9659-a40f09de093e", "secret": "************************************", "domain": "Cryptane.onmicrosoft.com" }
Uporaba
You may use the pynitrokey utility to provision a Nitrokey for an user in your tenant.
nitropy fido2 provision-credential entra -c config.json <username> --create-user
Here the <username> could be the Email ID of the user (User principal in terms of Microsoft) or a part of it till before the @ sign.
The --create-user flag directs the tool to create the user if it does not exist in the Entra Tenant.
$ nitropy fido2 provision-credential entra -c config.json aditya --create-user
Command line tool to interact with Nitrokey devices 0.12.3
Warning: It is recommended to execute nitropy with admin privileges to be able to access Nitrokey 3 and Nitrokey FIDO 2 devices.
Waiting 5 secs for Graph API to update
User aditya created on Entra
Enter PIN:
Touch your authenticator device now...
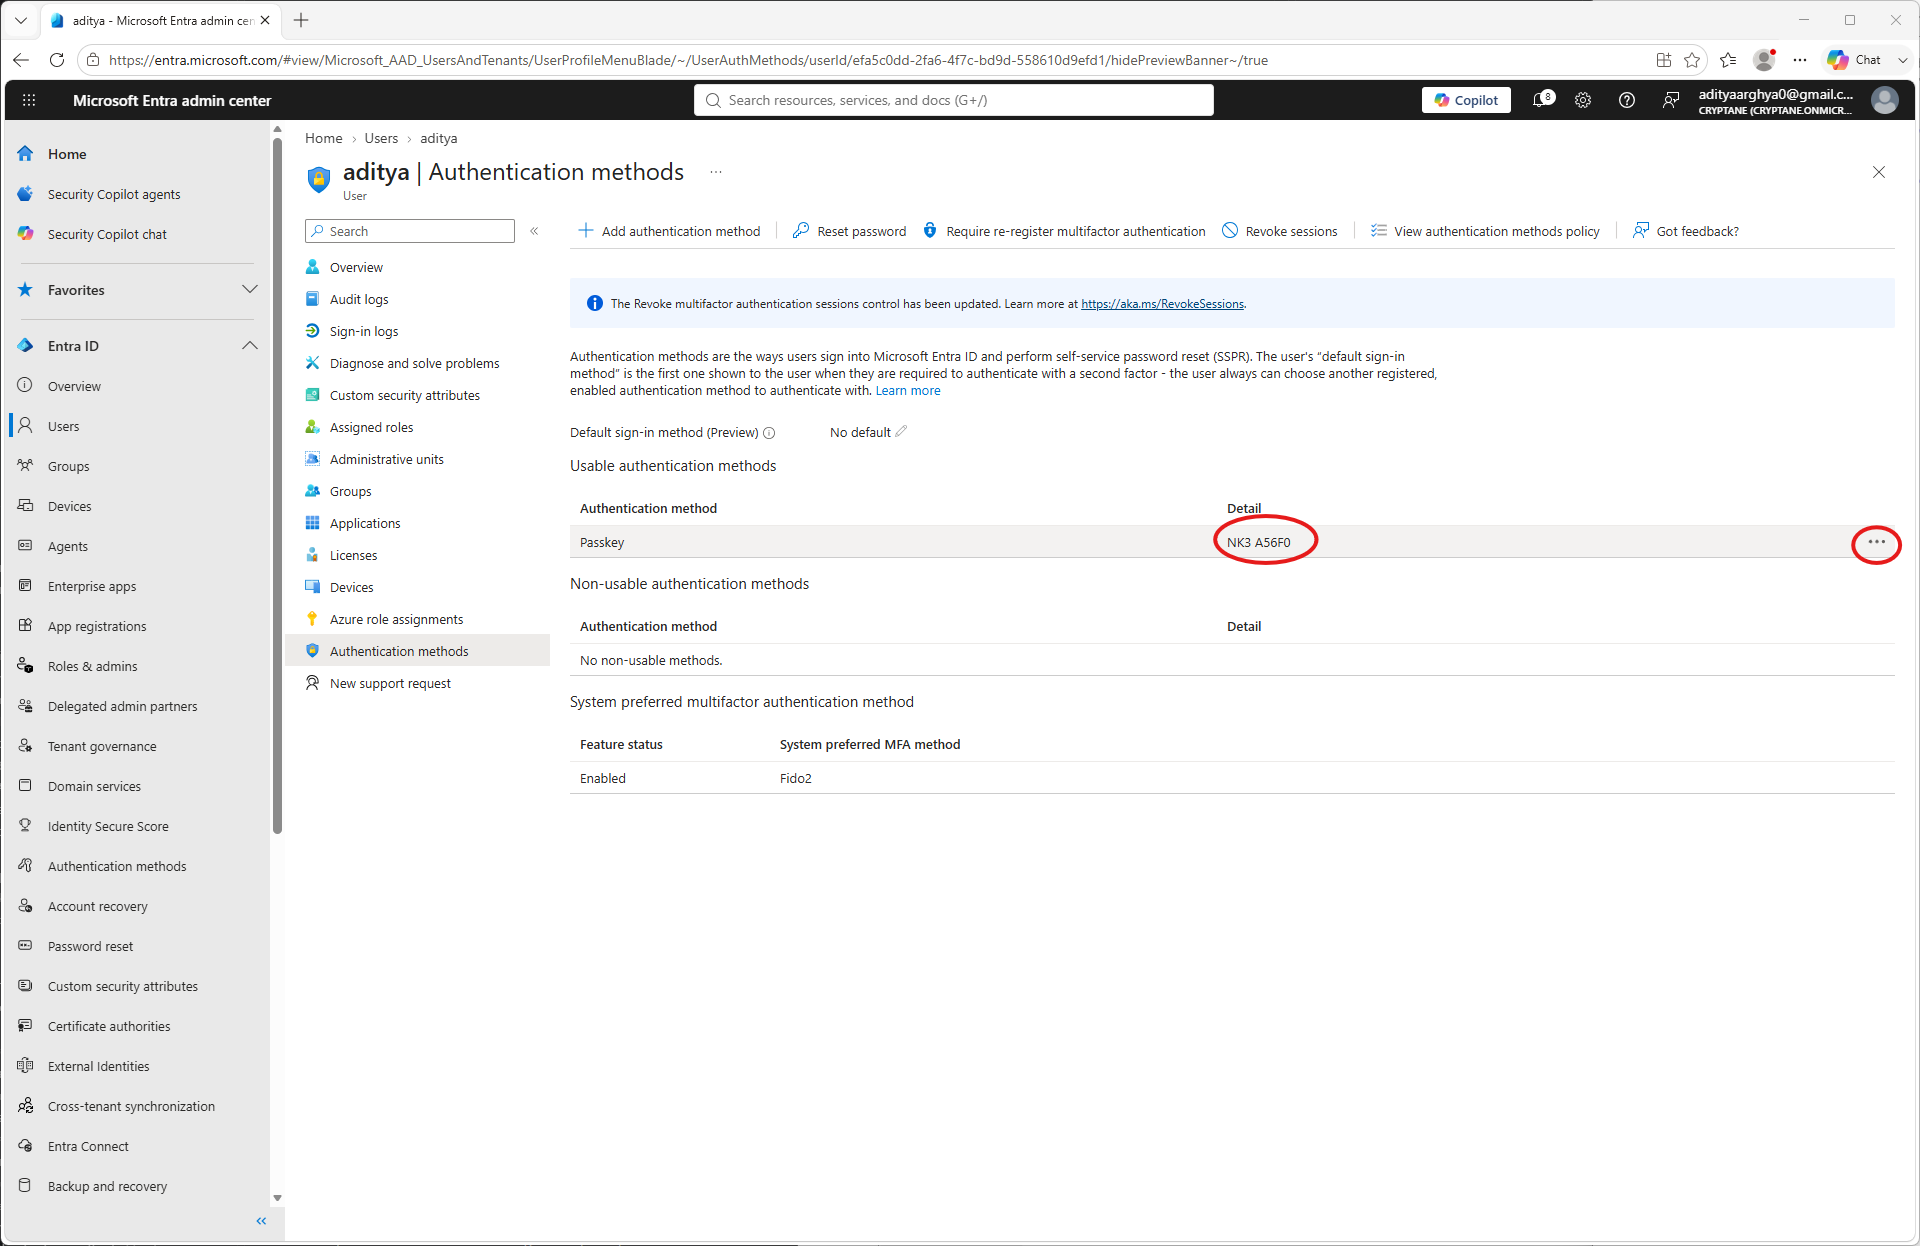
Entra credential for aditya pre-registered on NK3 A56F0 with Credential ID owBYLNXsrDZ104I2MyCtuxmXKAd0Um56t3Byx5VfMz-Vs1Azy1re4Rdf-foMsc7vAUw7lJgCoG1VSdl2mBoCUHWGpTH-YkjEJ4UC4YlIEdk1.
Verification
Uporabnik se lahko s sveže pripravljenim ključem Nitrokey prijavi v svoj Microsoftov račun. Sledite povezavi Primer prijave v Microsoft z Nitrokeyjem za prijavo s tem sveže pripravljenim ključem Nitrokey.
Dodeljene poverilnice lahko preverite v upraviteljskem portalu Entra tako, da sledite navedenim korakom.
V upravnem centru Entra odprite možnost »Uporabniki« v levem meniju.
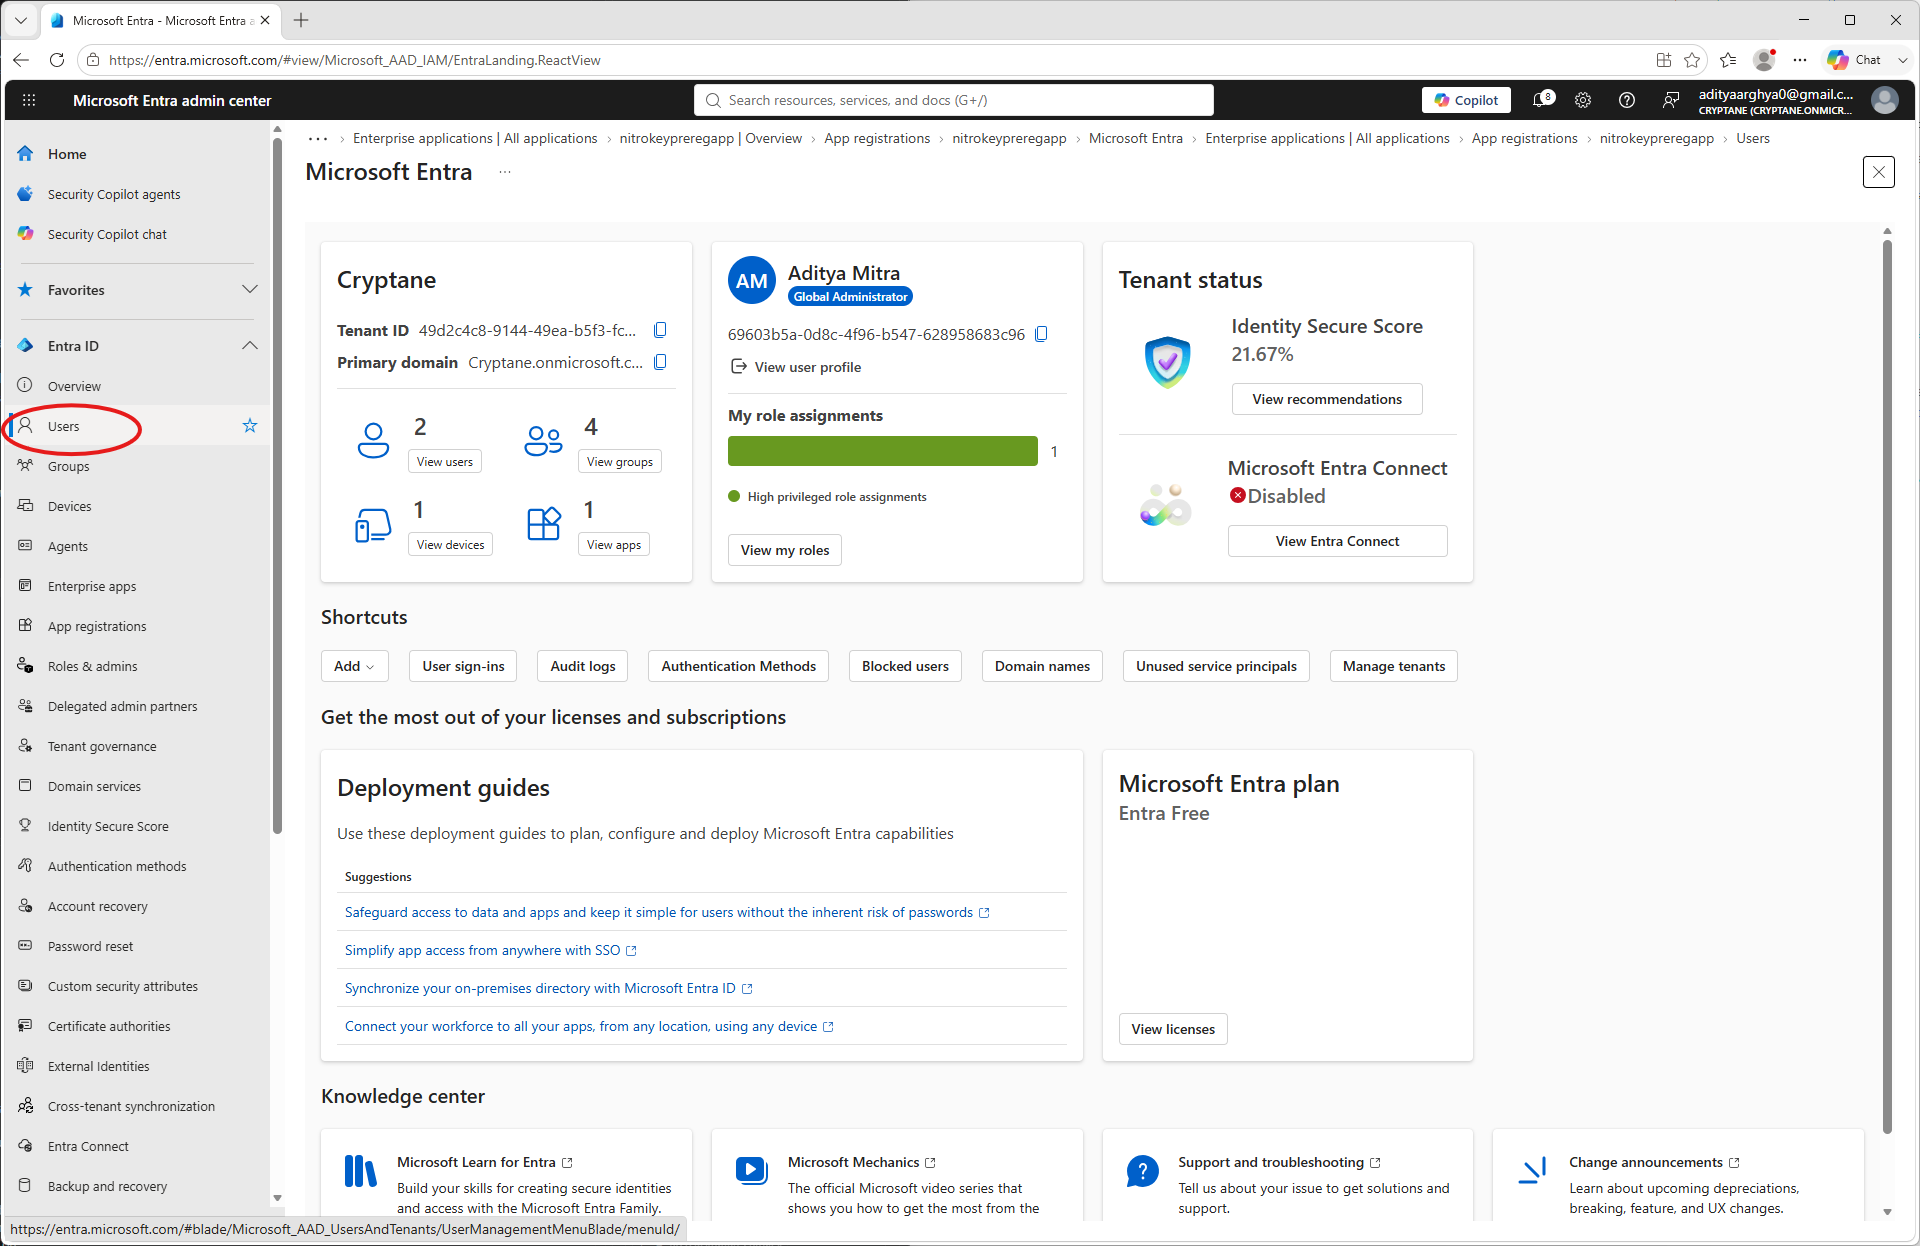
If the user was created with the
--create-userflag you may be able to find the entry on the list. If it is a pre-existing user, it would also be there. Click on the user to which the credential was enrolled.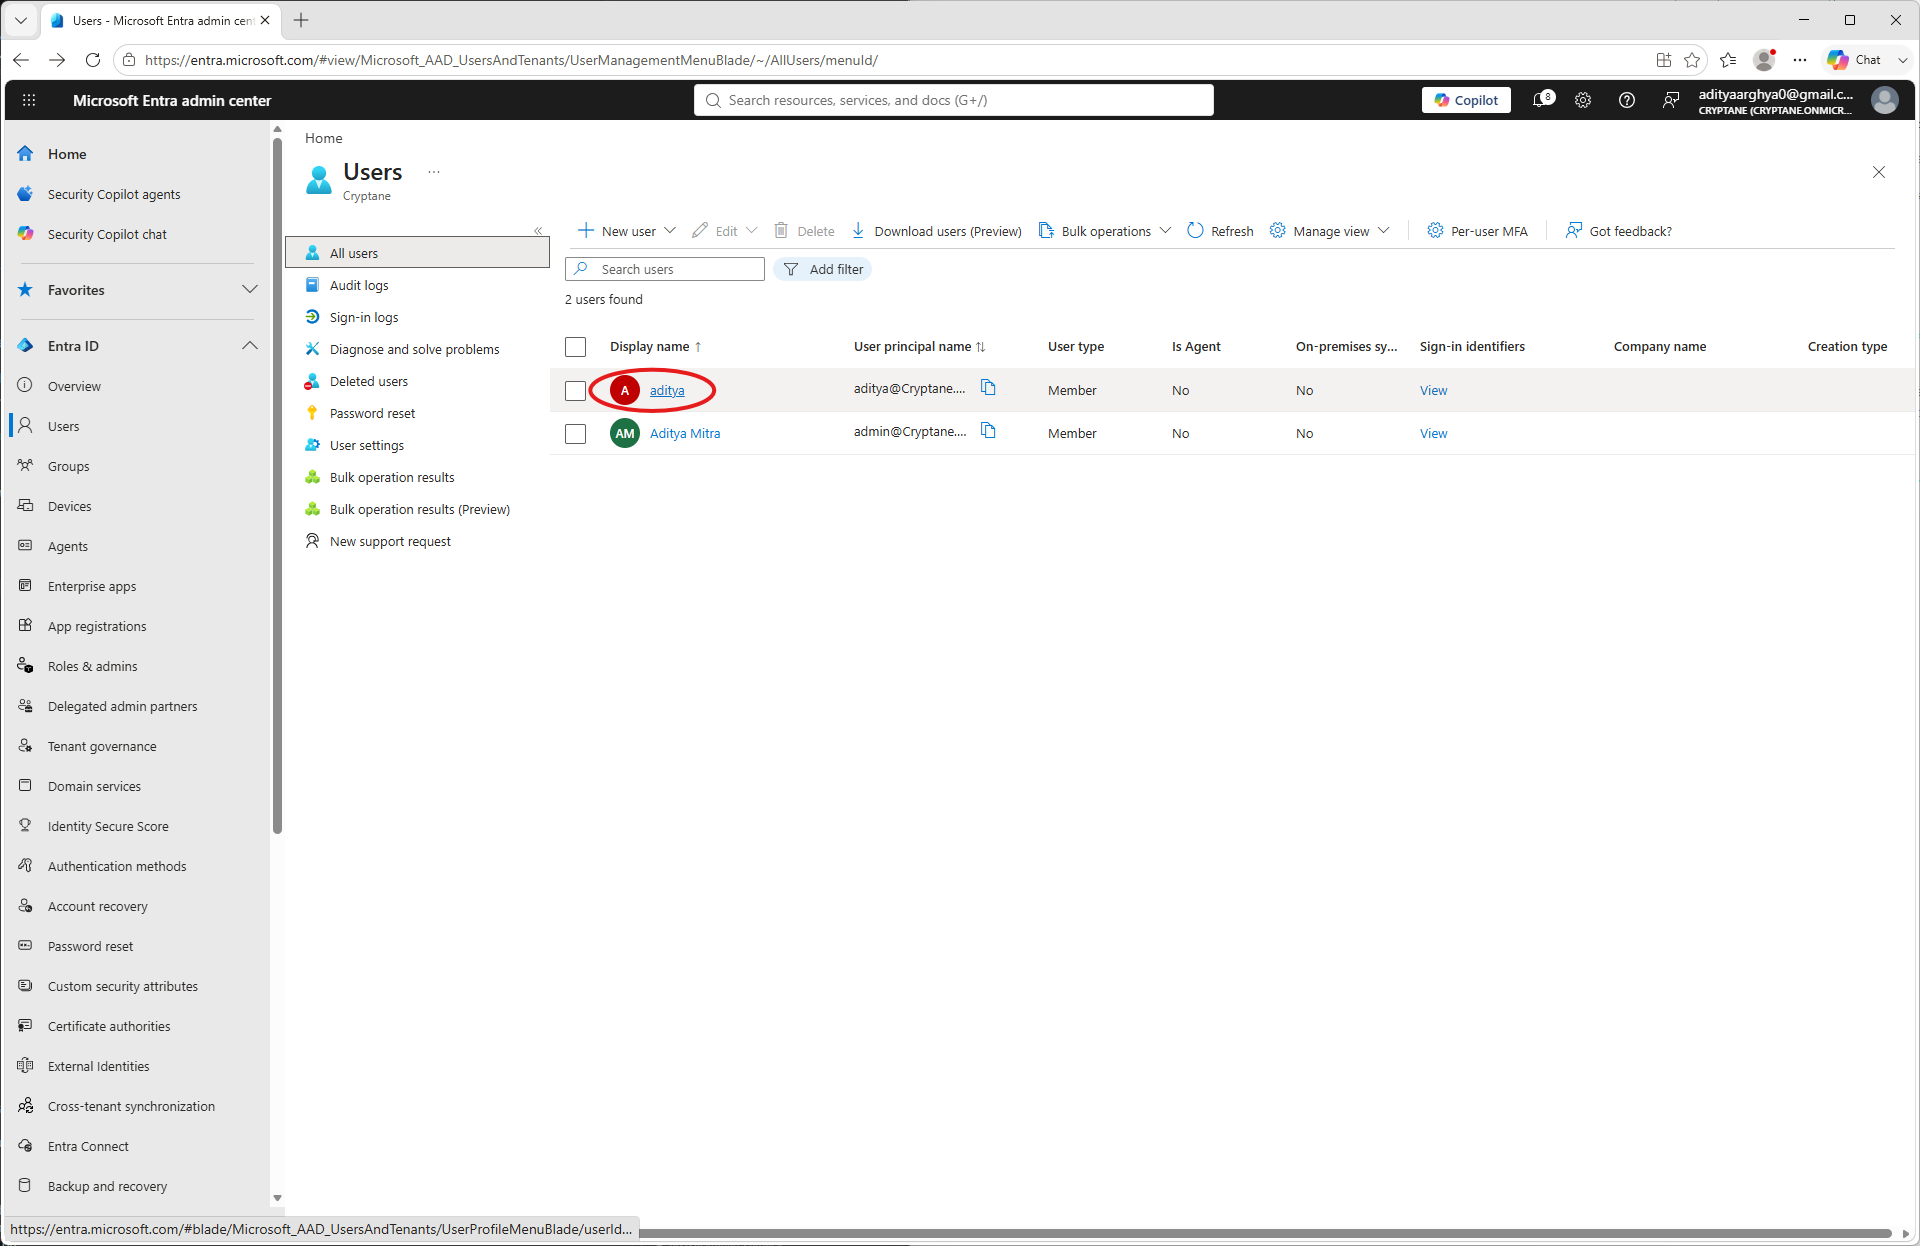
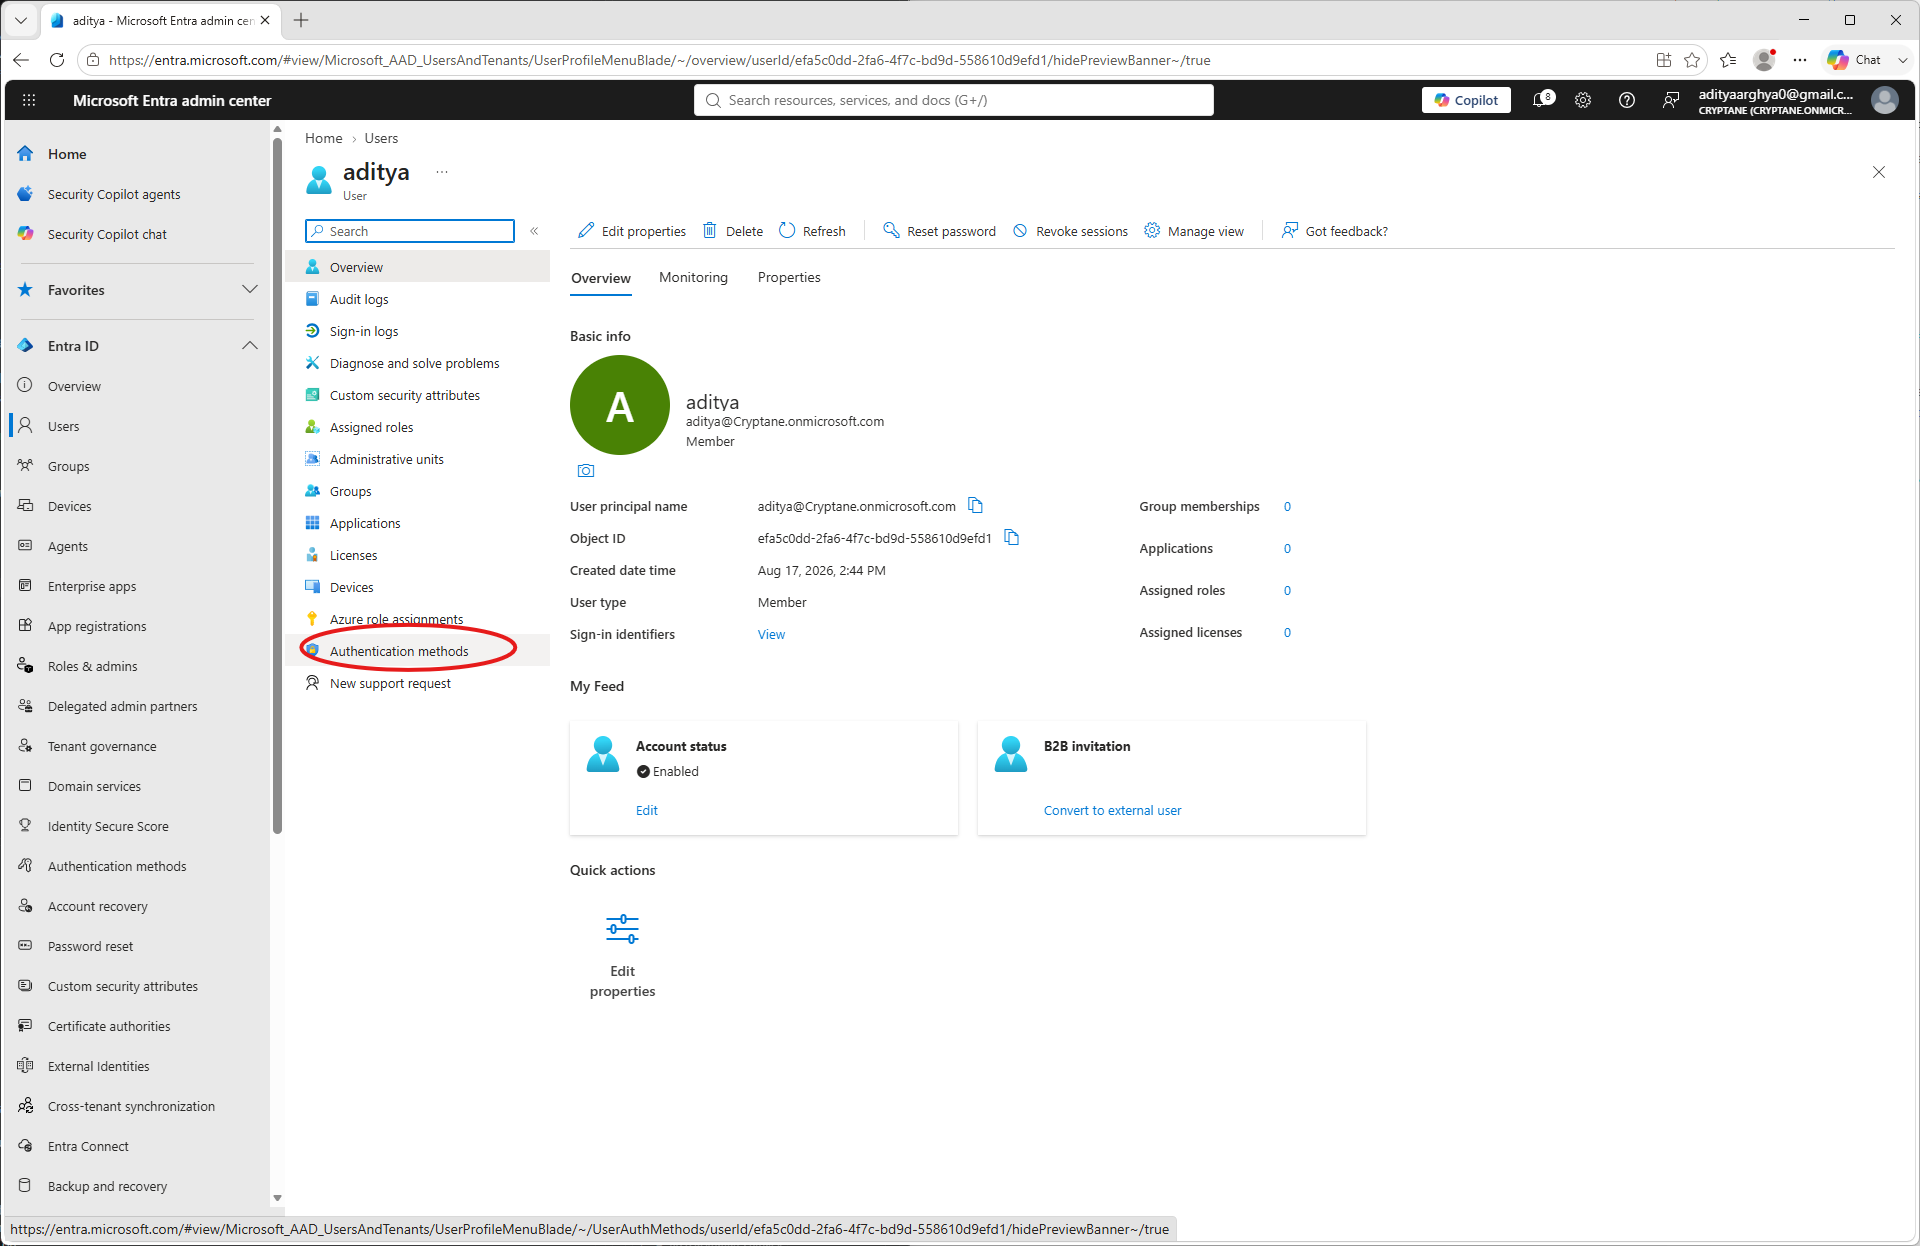
Click on Authentication methods on the user blade.
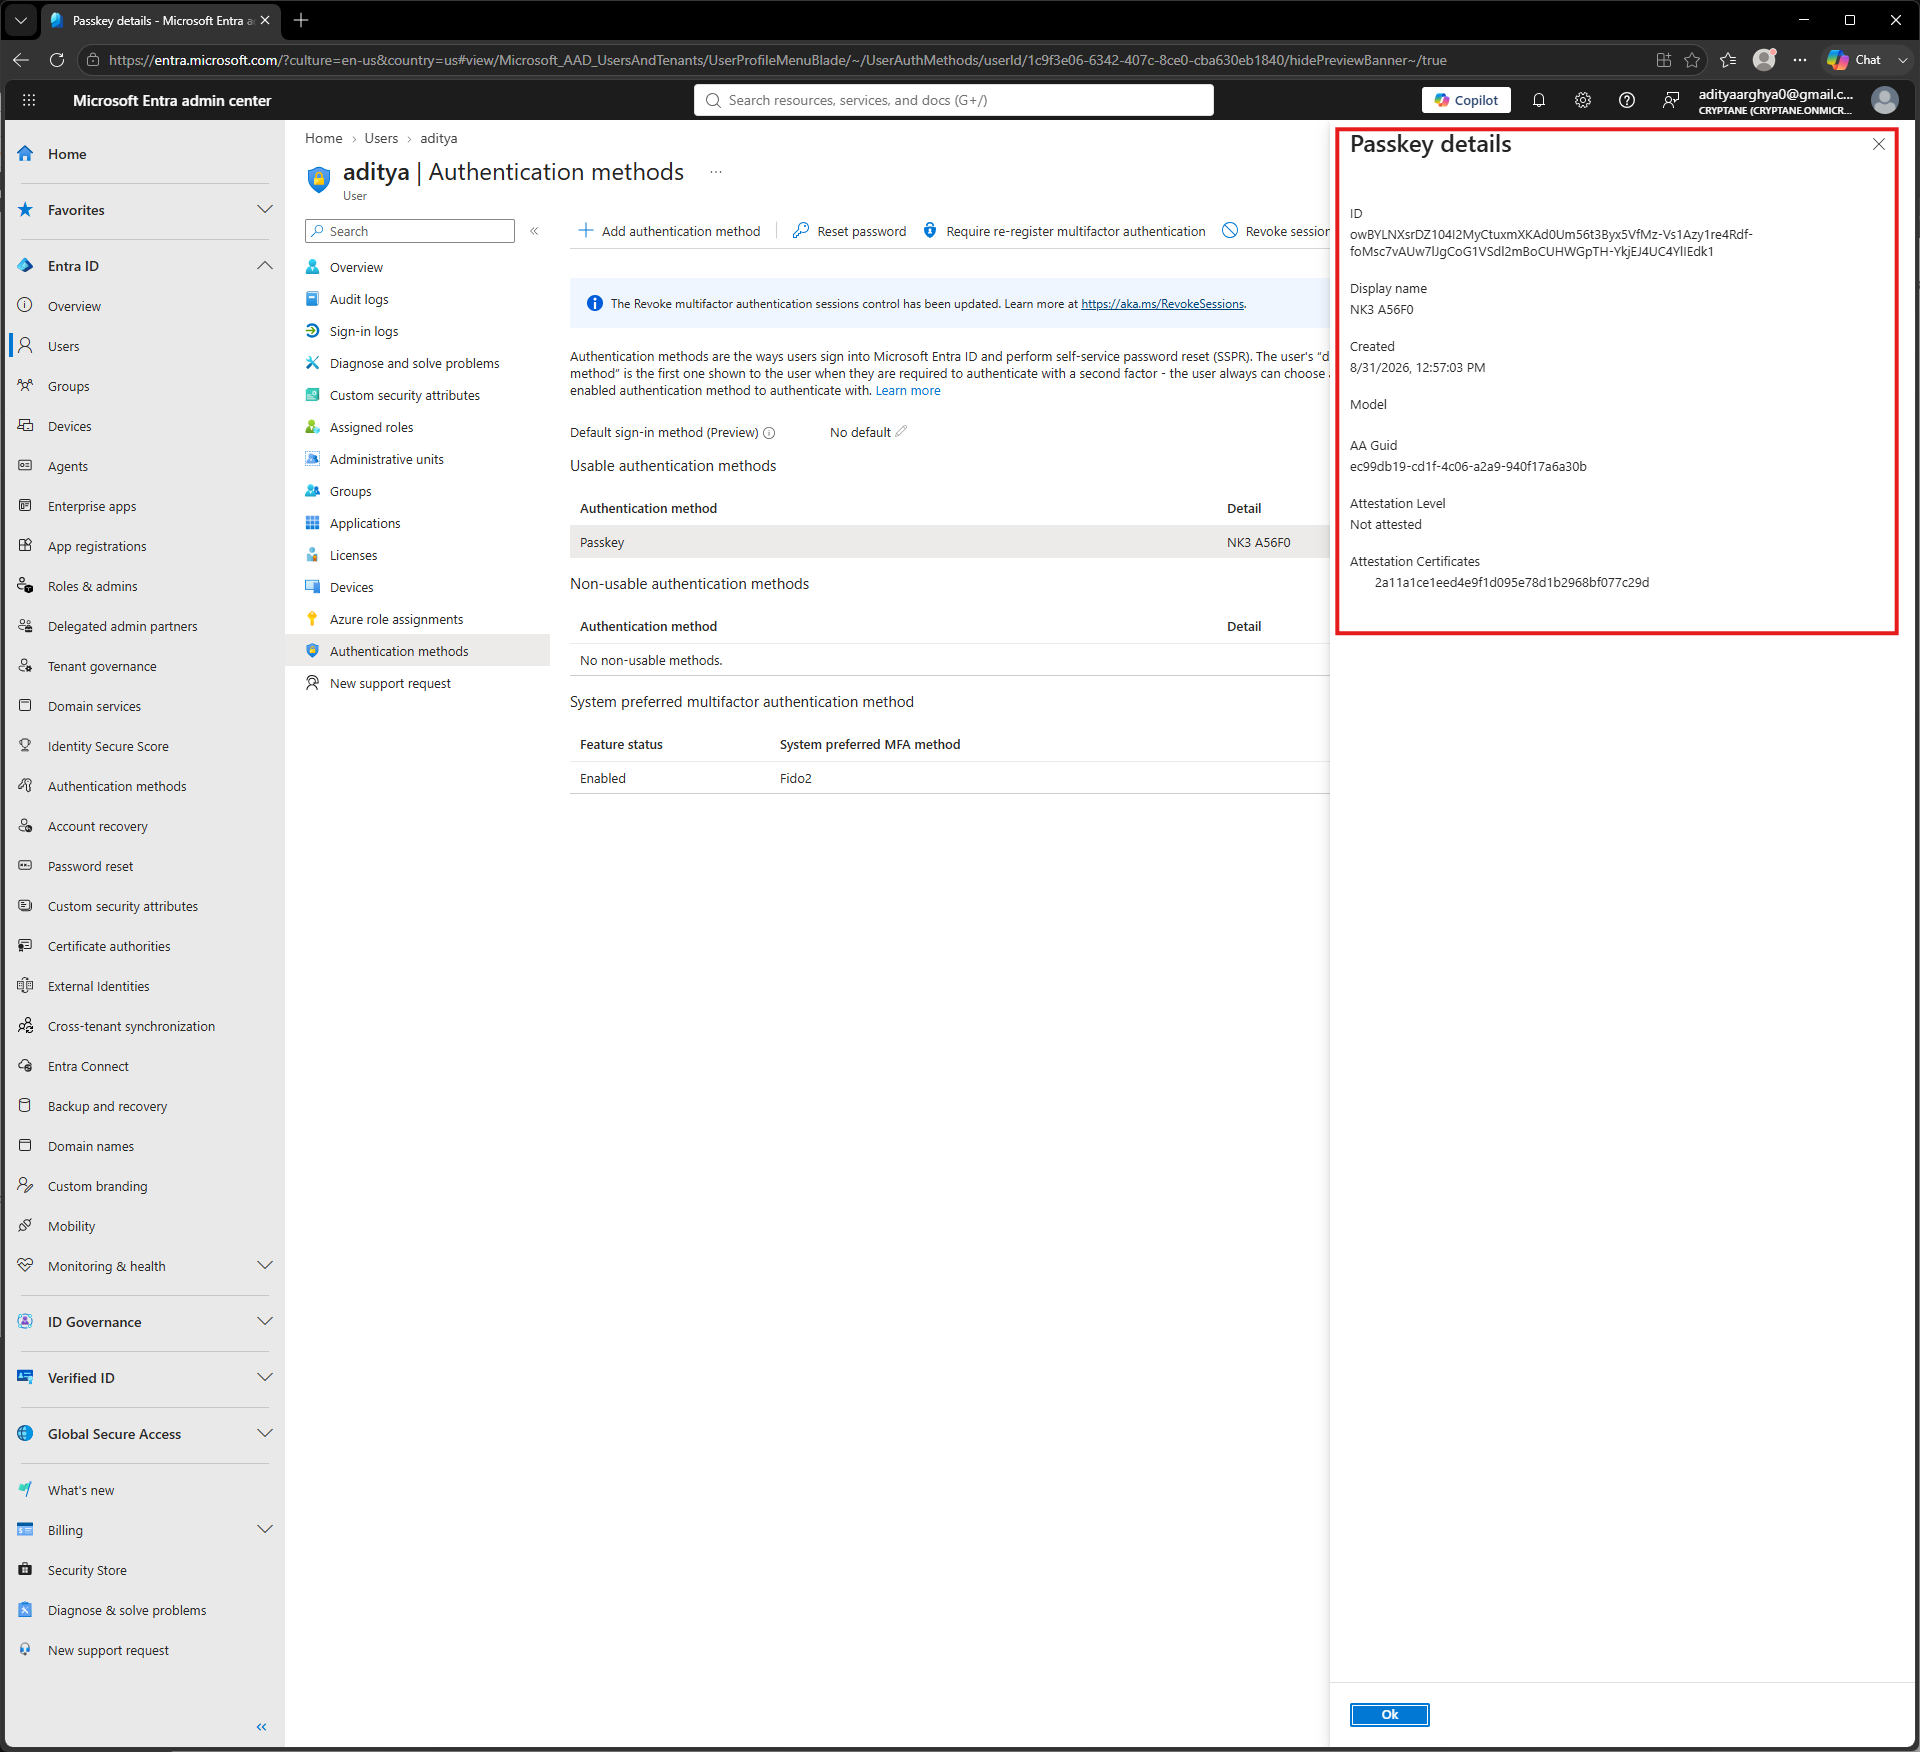
Prikazale se bodo registrirane poverilnice s prvimi 5 znaki UUID-ja Nitrokeyja. Če želite videti podrobne informacije o registrirani poverilnici, kliknite na tri pikice in nato na »Poglej podrobnosti«.
Na voljo bodo dodatne informacije o potrdilu. Te lahko preverite.