Nitrokey-configuratie voor Entra ID
Compatible Nitrokeys |
|||||||
|---|---|---|---|---|---|---|---|
✓ active |
✓ active |
⨯ inactive |
⨯ inactive |
⨯ inactive |
⨯ inactive |
⨯ inactive |
⨯ inactive |
The Nitrokey 3 and Nitrokey Passkey support provisioning credentials for Microsoft Entra for seamless employee on-boarding in enterprise scenarios.
Setup
Er is een Microsoft Entra-applicatie nodig om de programmatische registratie van gebruikersgegevens mogelijk te maken. Hier vindt u de handleiding om dit in te stellen, mits u over de benodigde rechten beschikt.
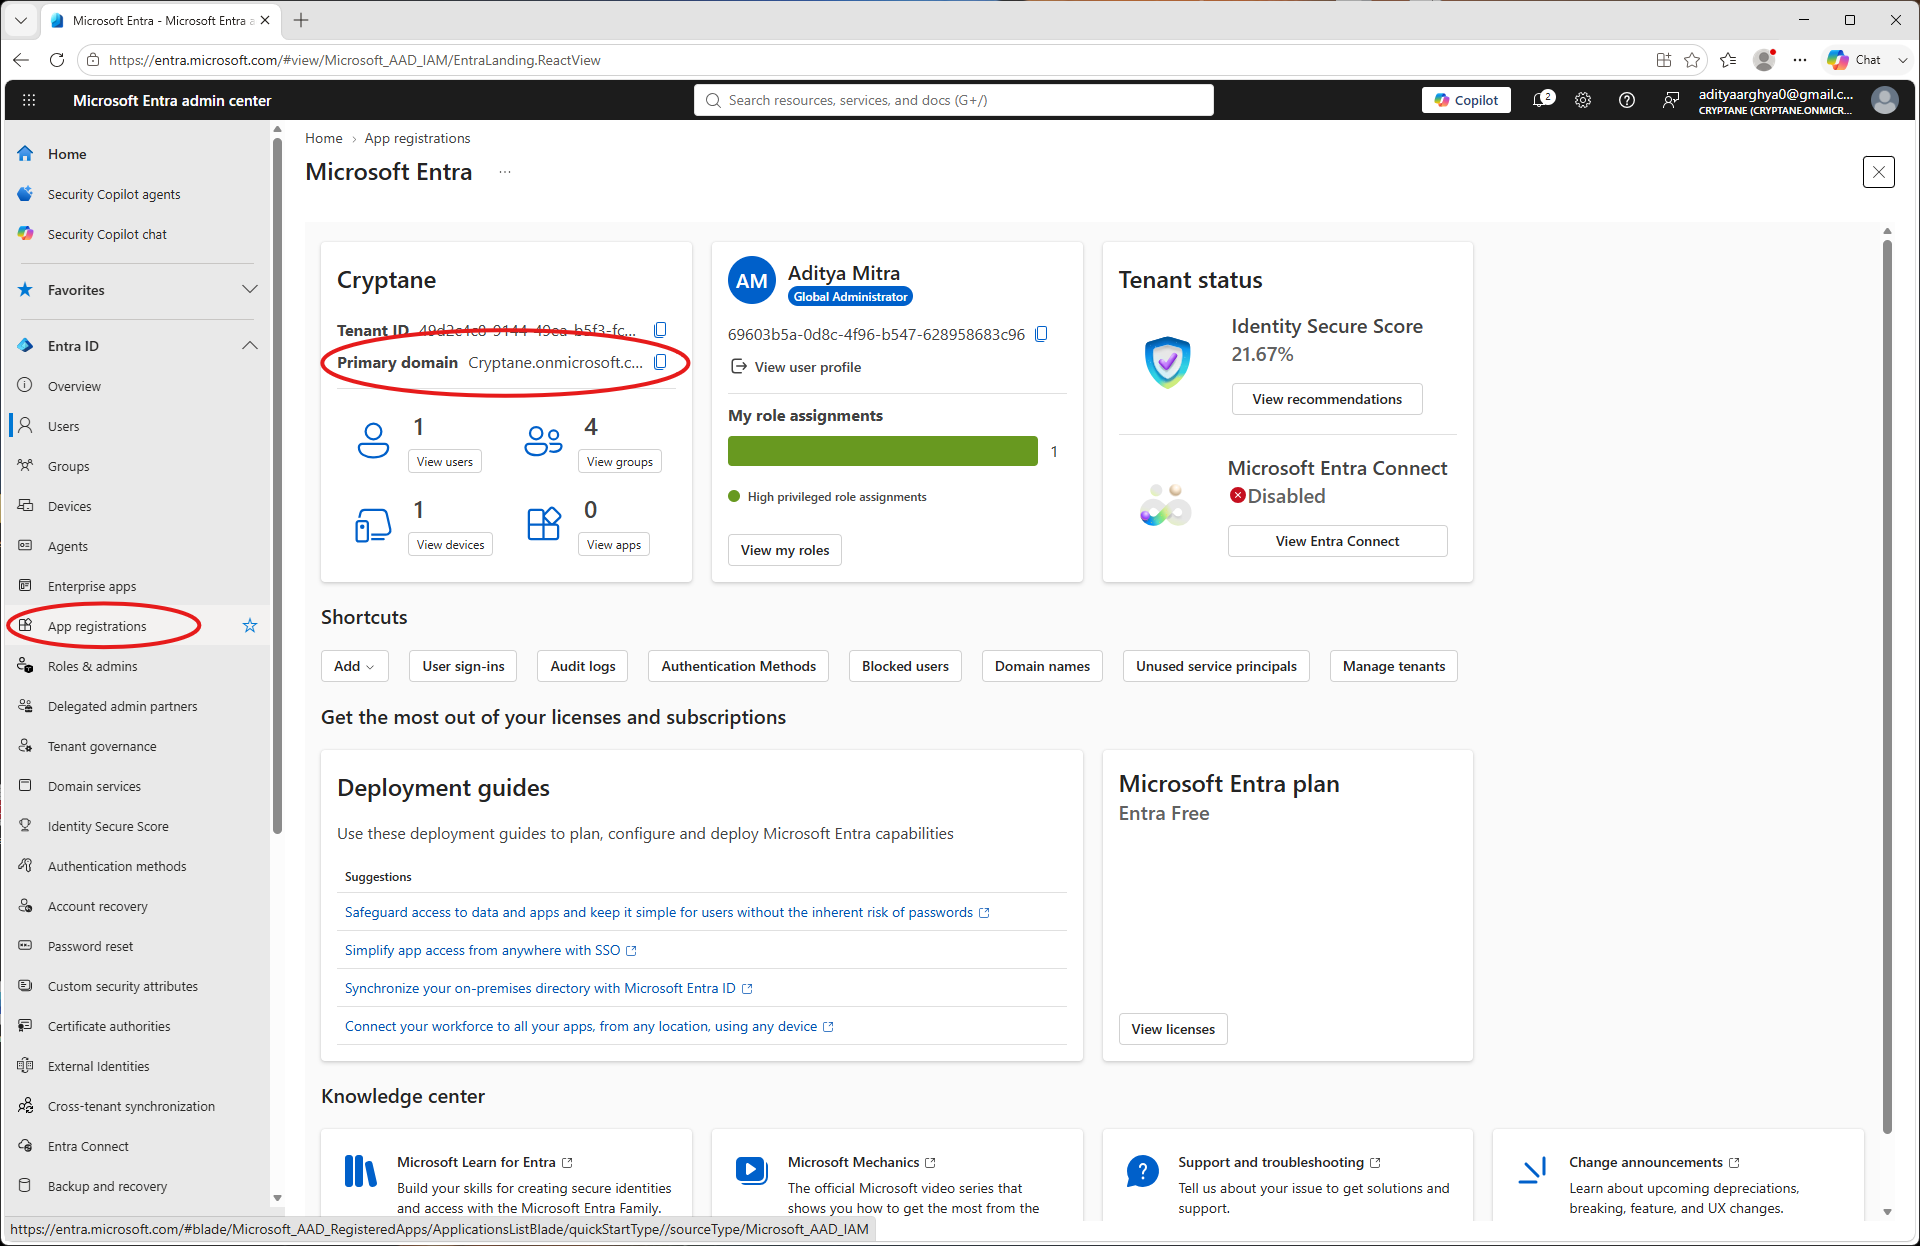
Login to Entra Admin portal. Take a note of the primary domain which you will need later. Go to App Registrations on the left blade.
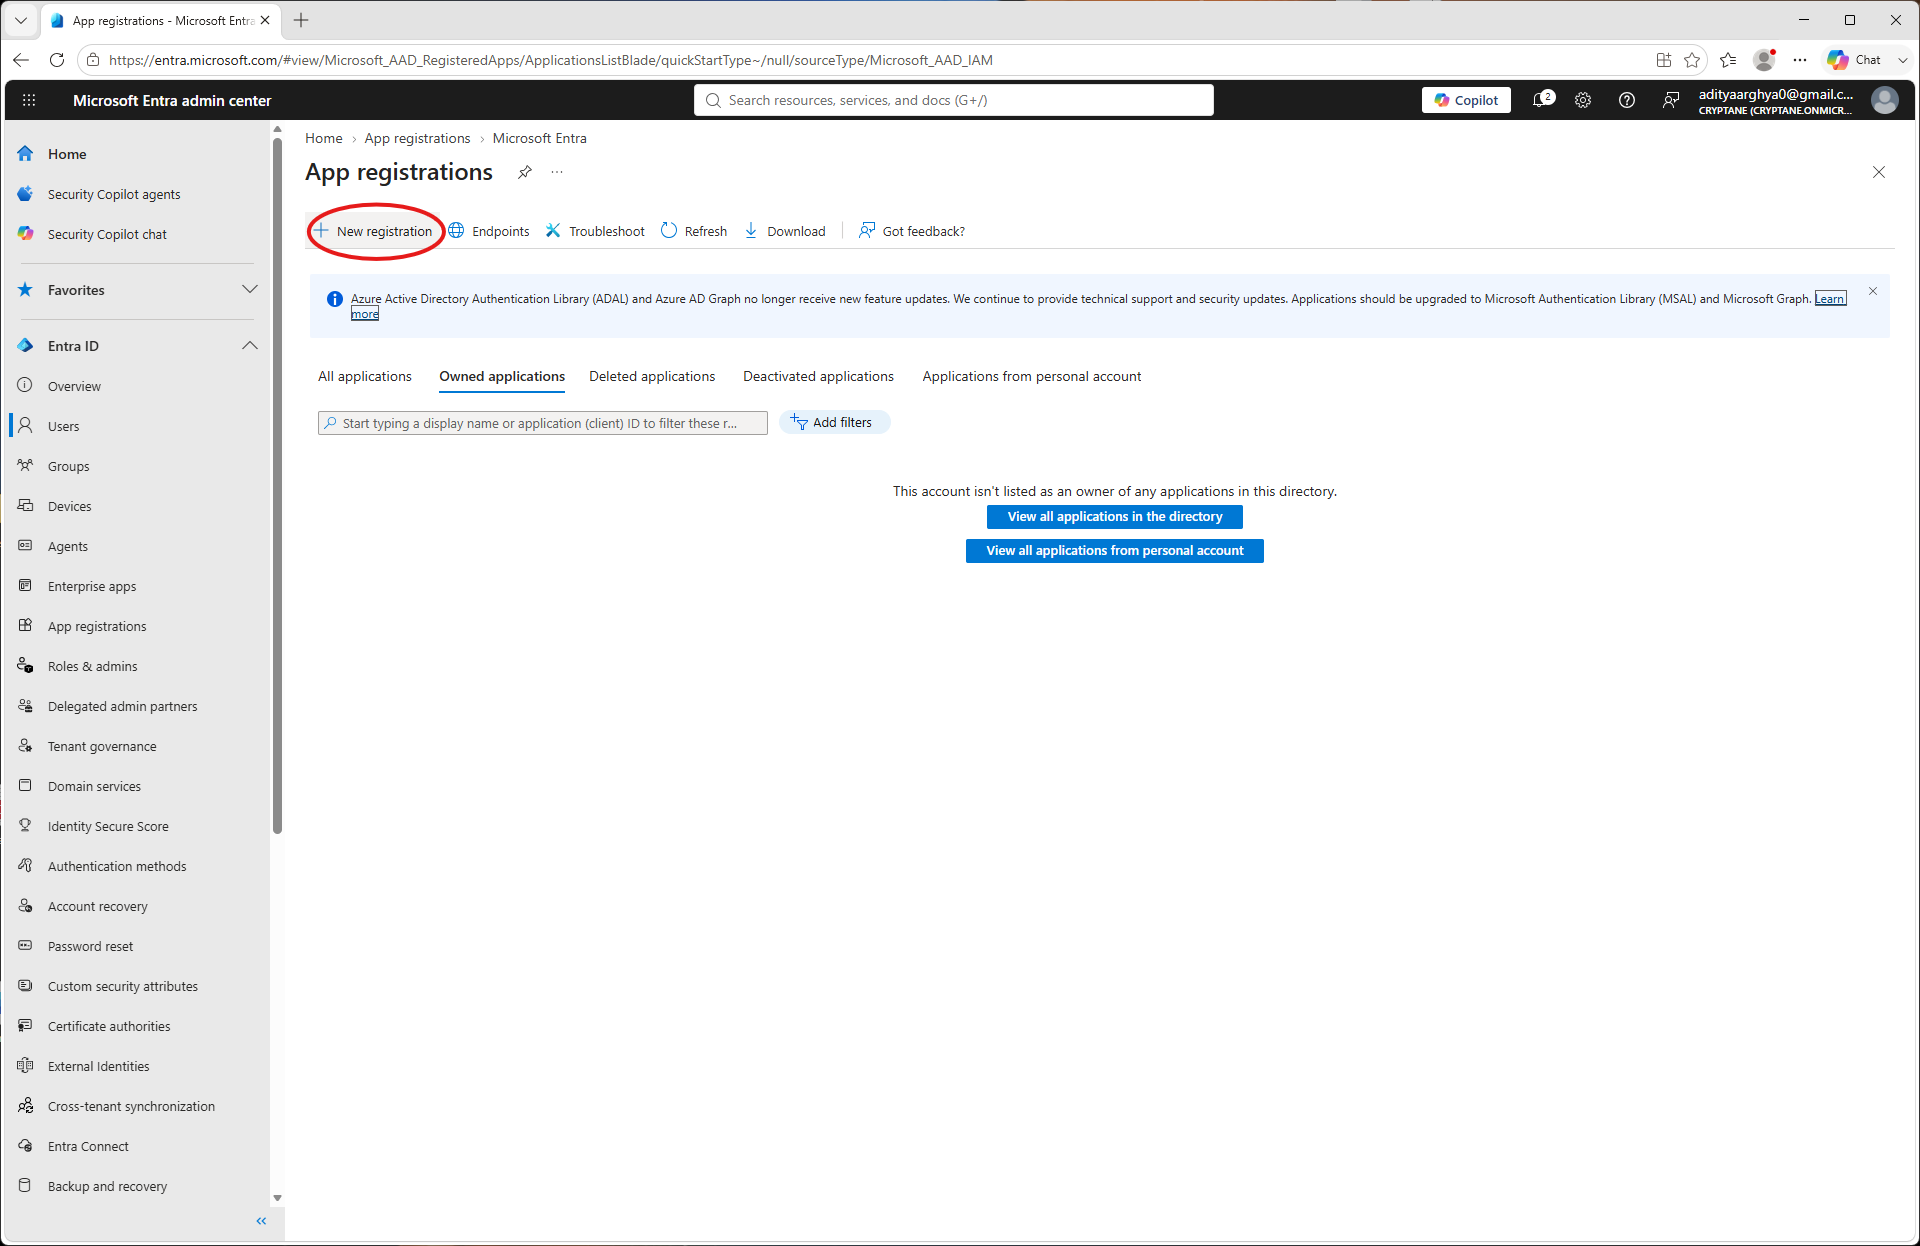
Kies ‘Nieuwe registratie’.
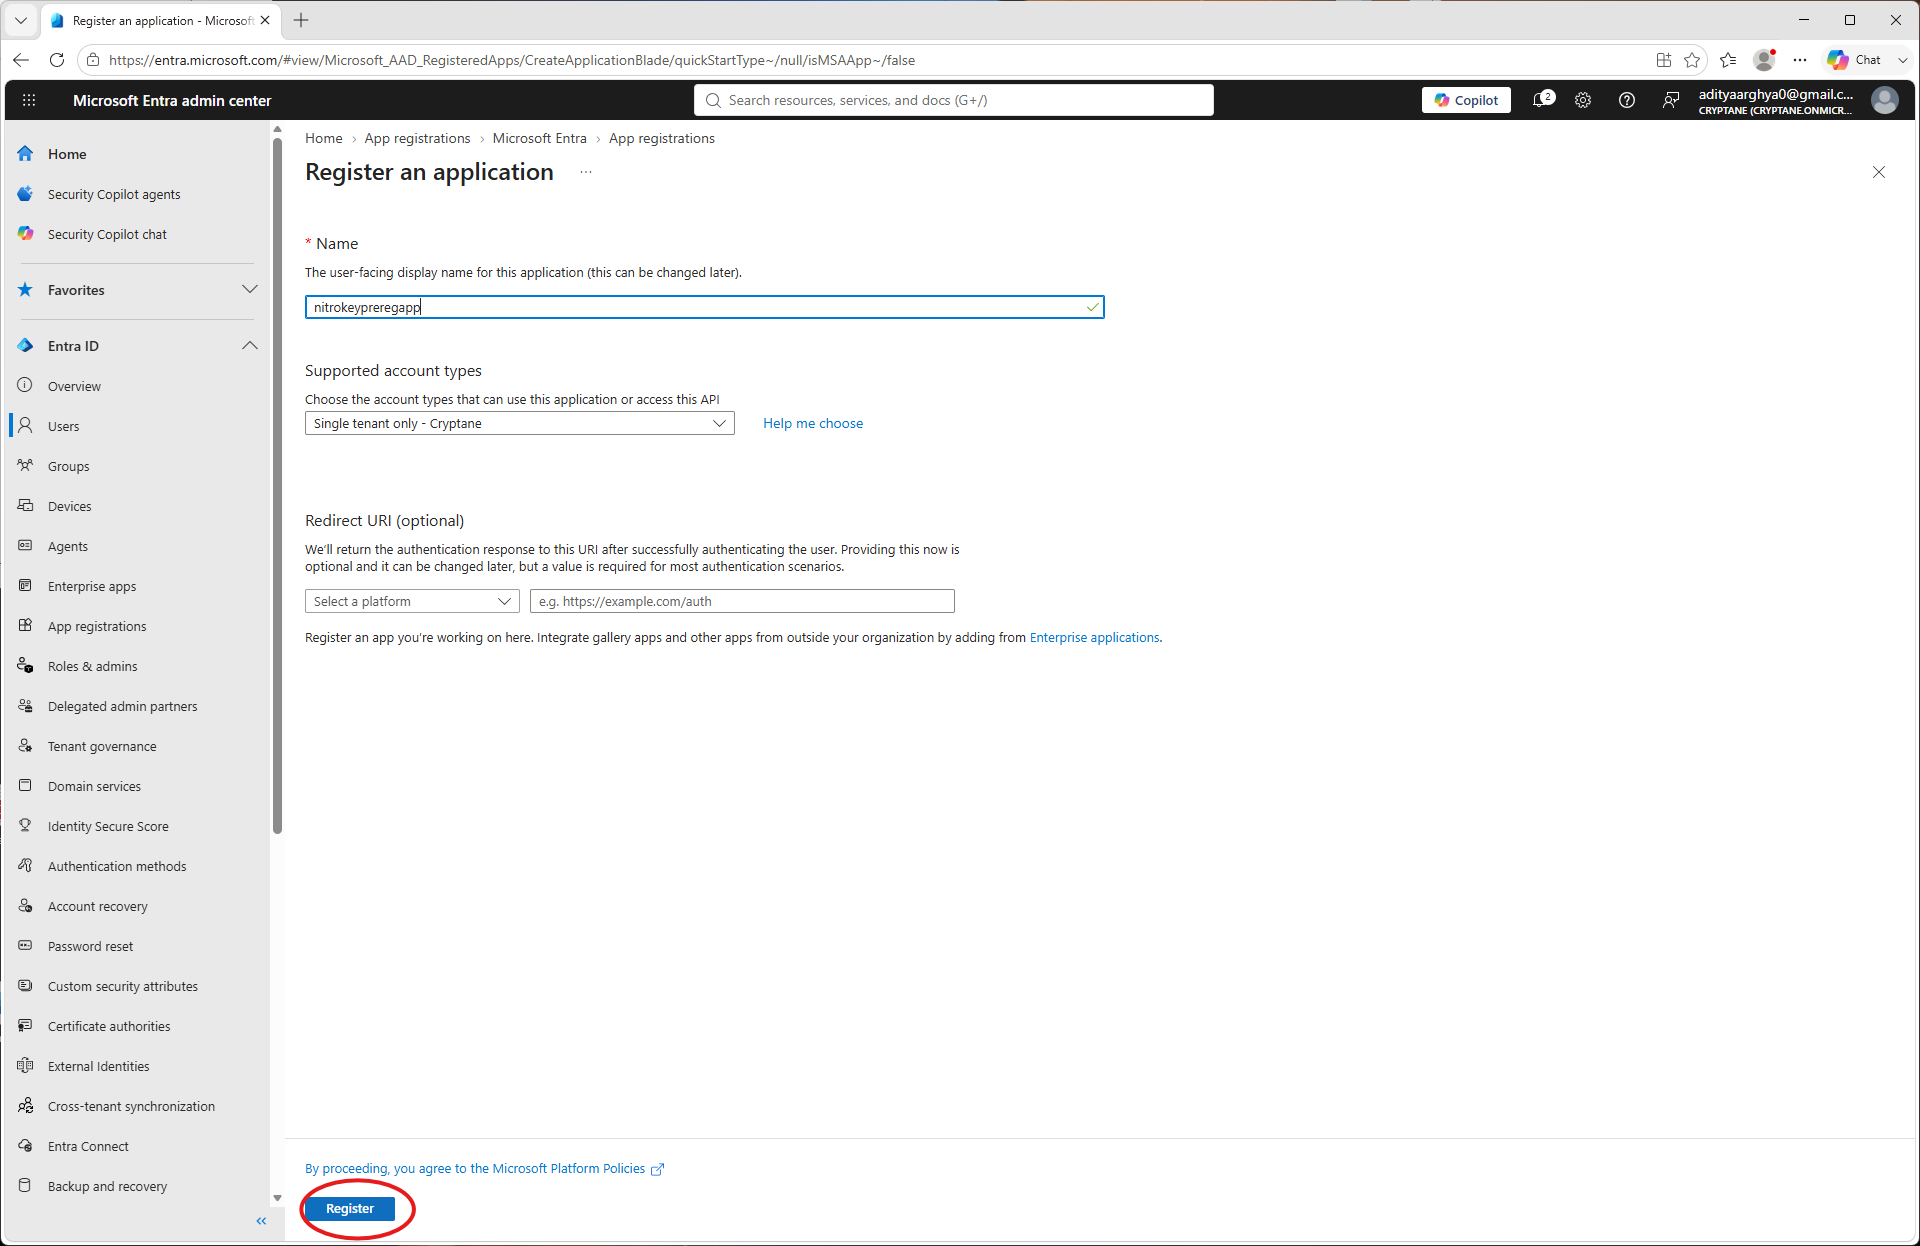
Maak een nieuwe app aan en geef deze een naam. Klik op ‘Registreren’.
Noteer hier het Client-ID en het Tenant-ID. Je hebt deze later nodig. Ga naar ‘API-machtigingen’ op het app-scherm.
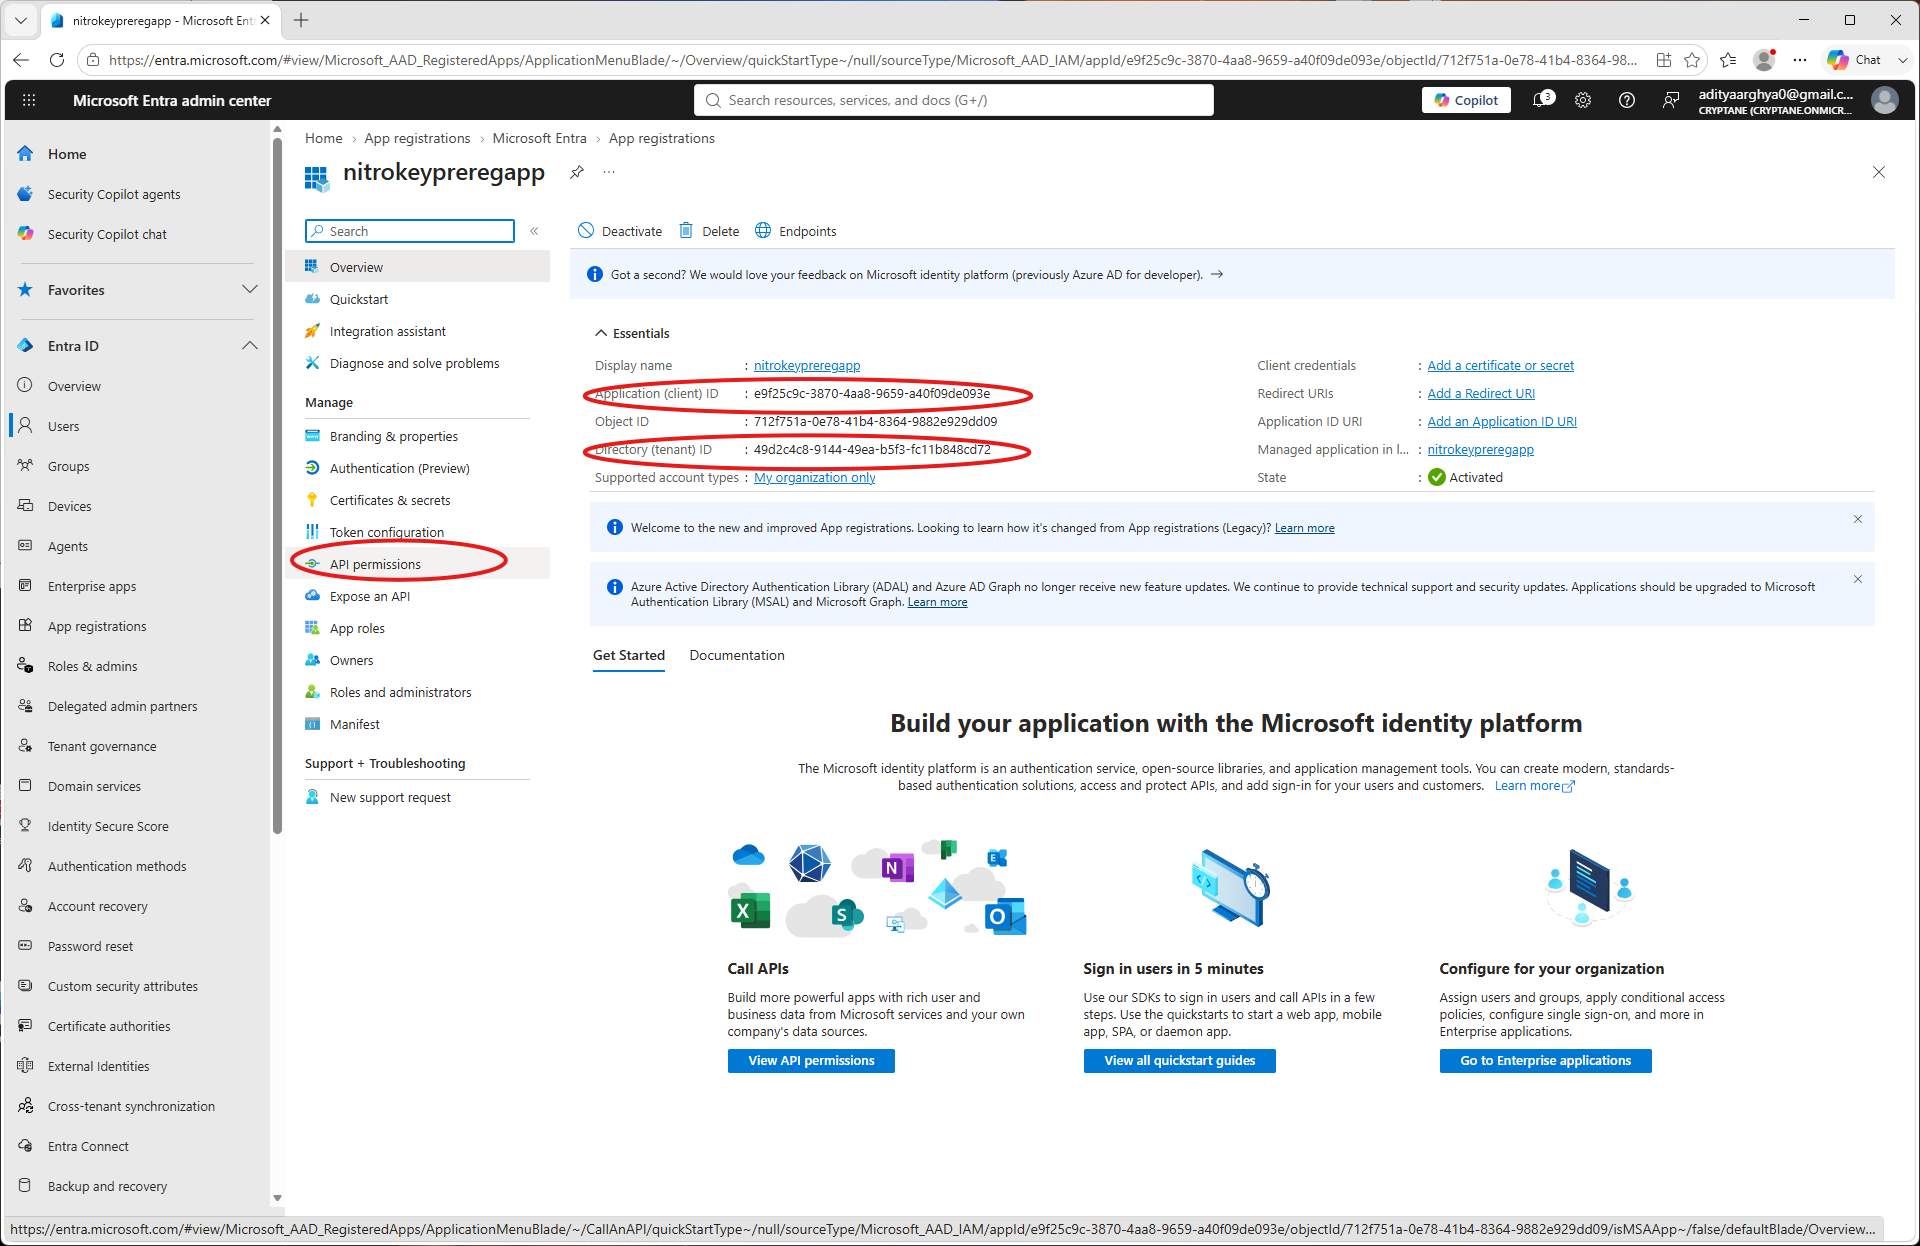
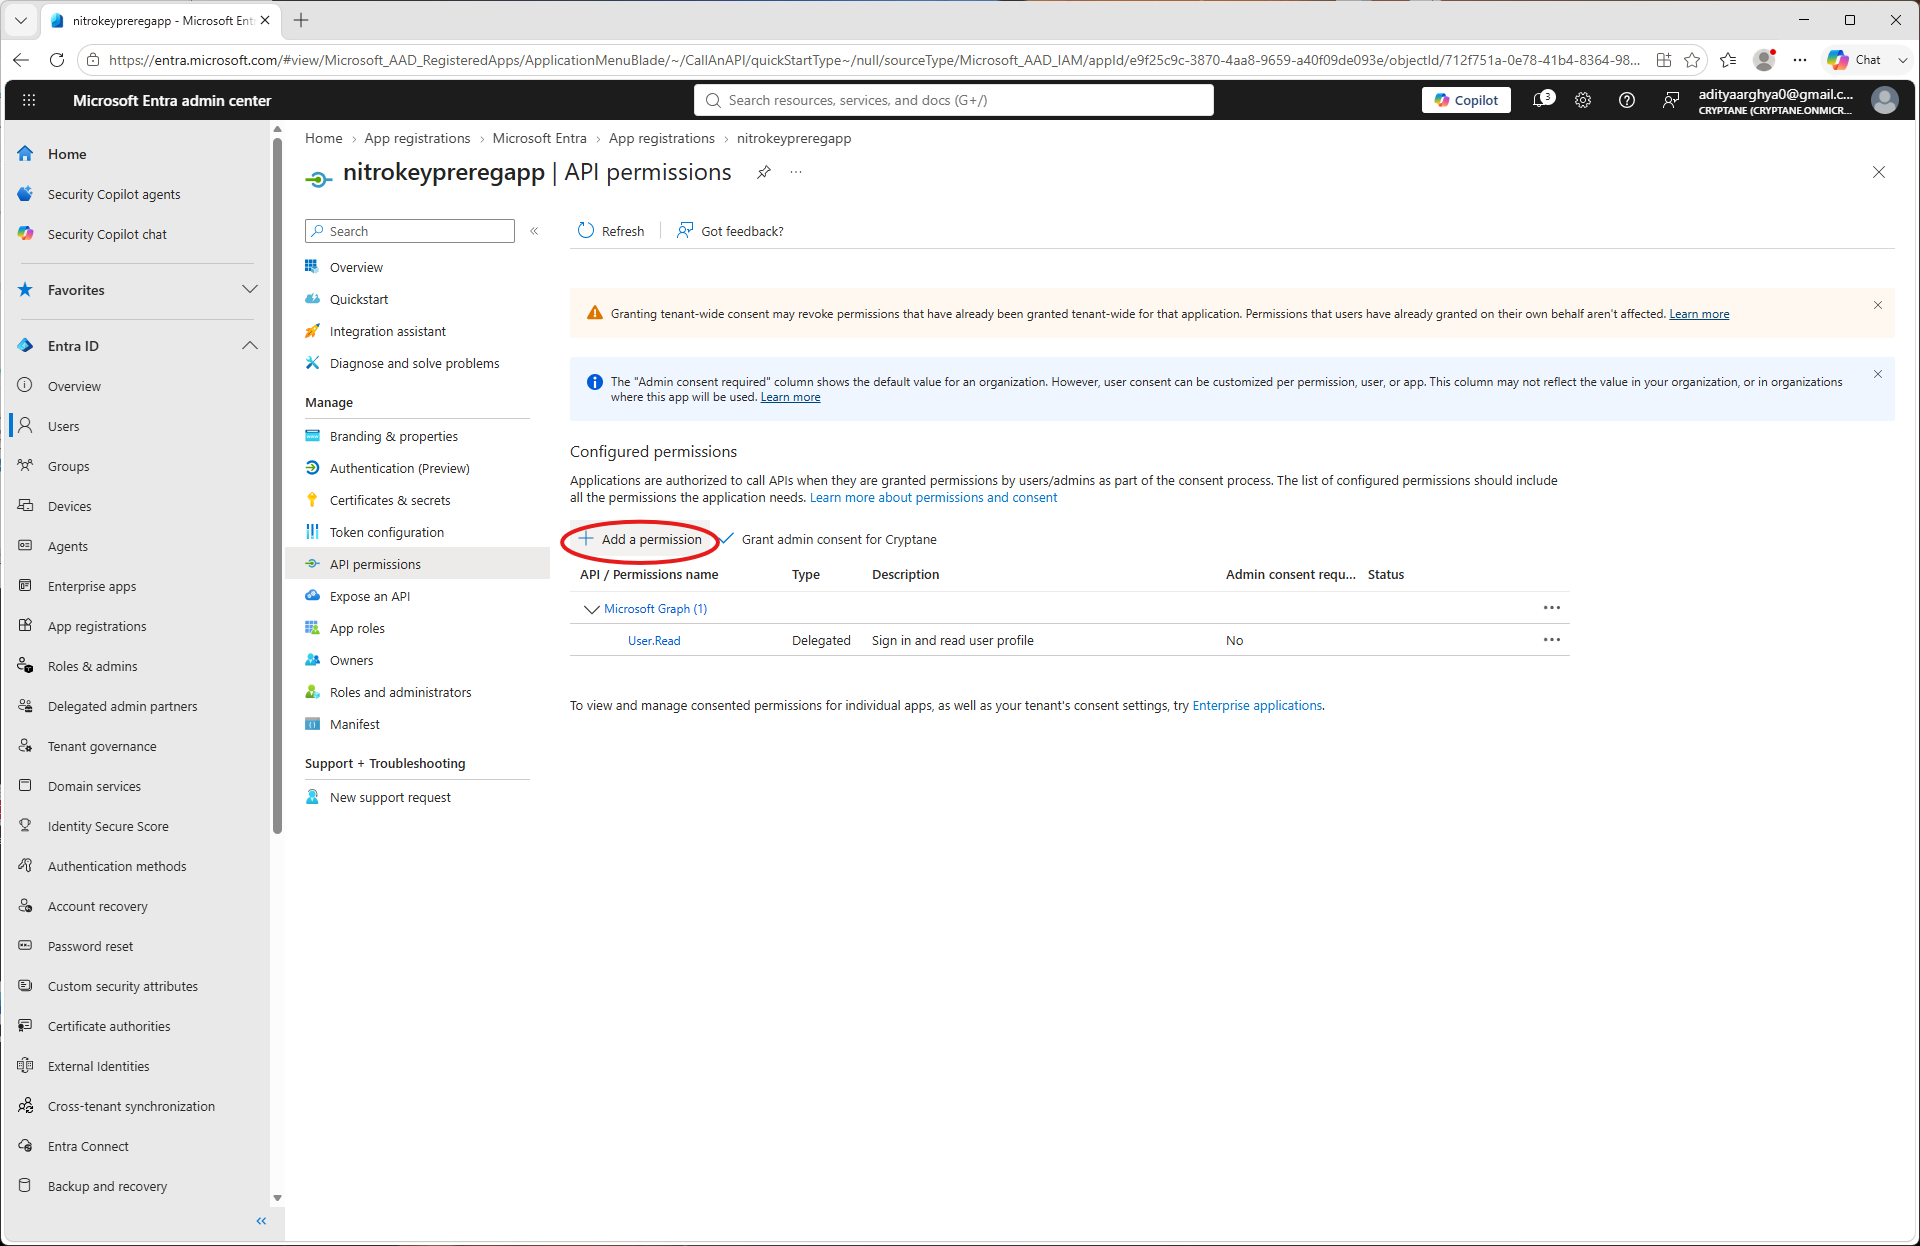
Click on Add a permission.
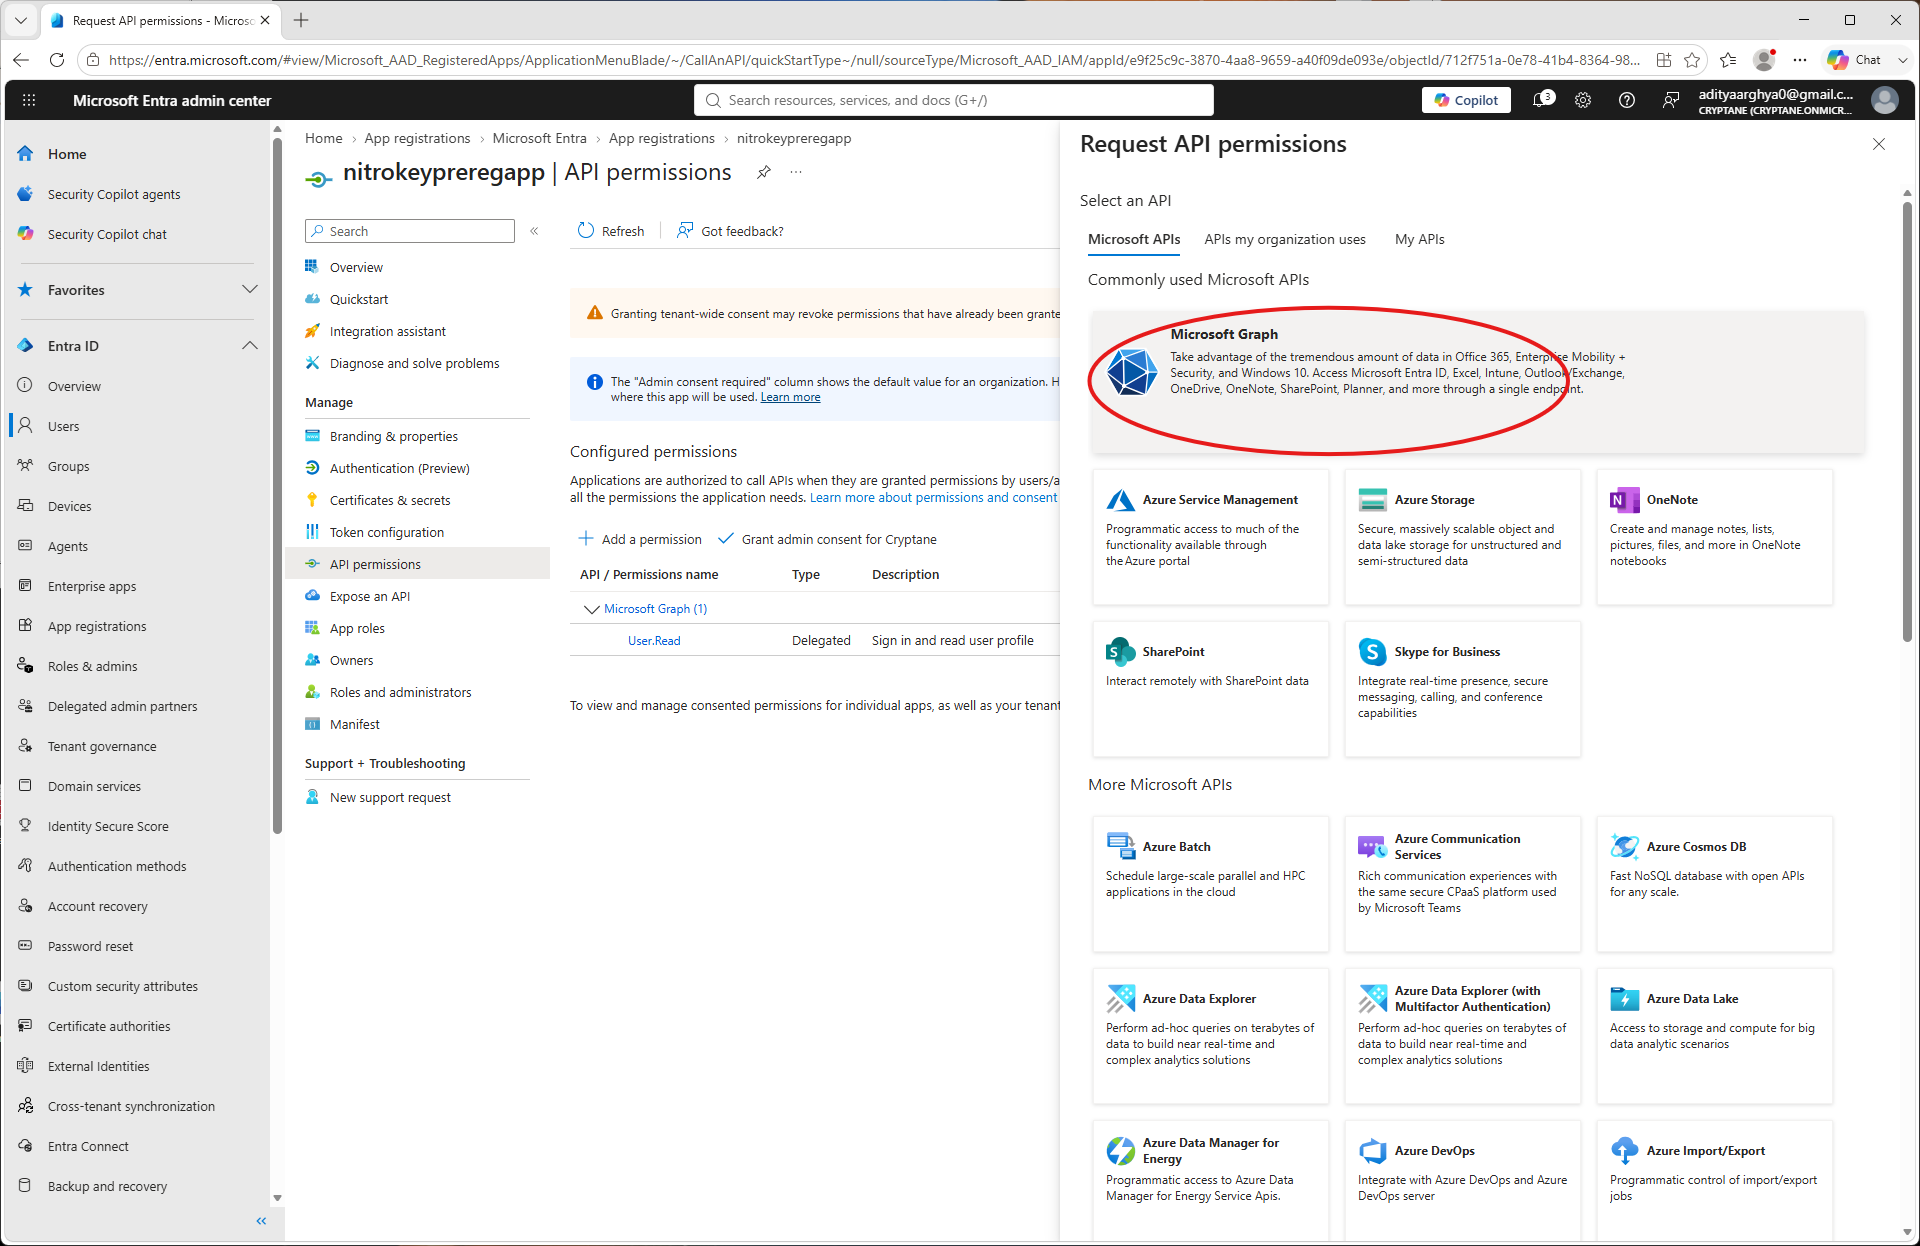
Select Microsoft Graph.
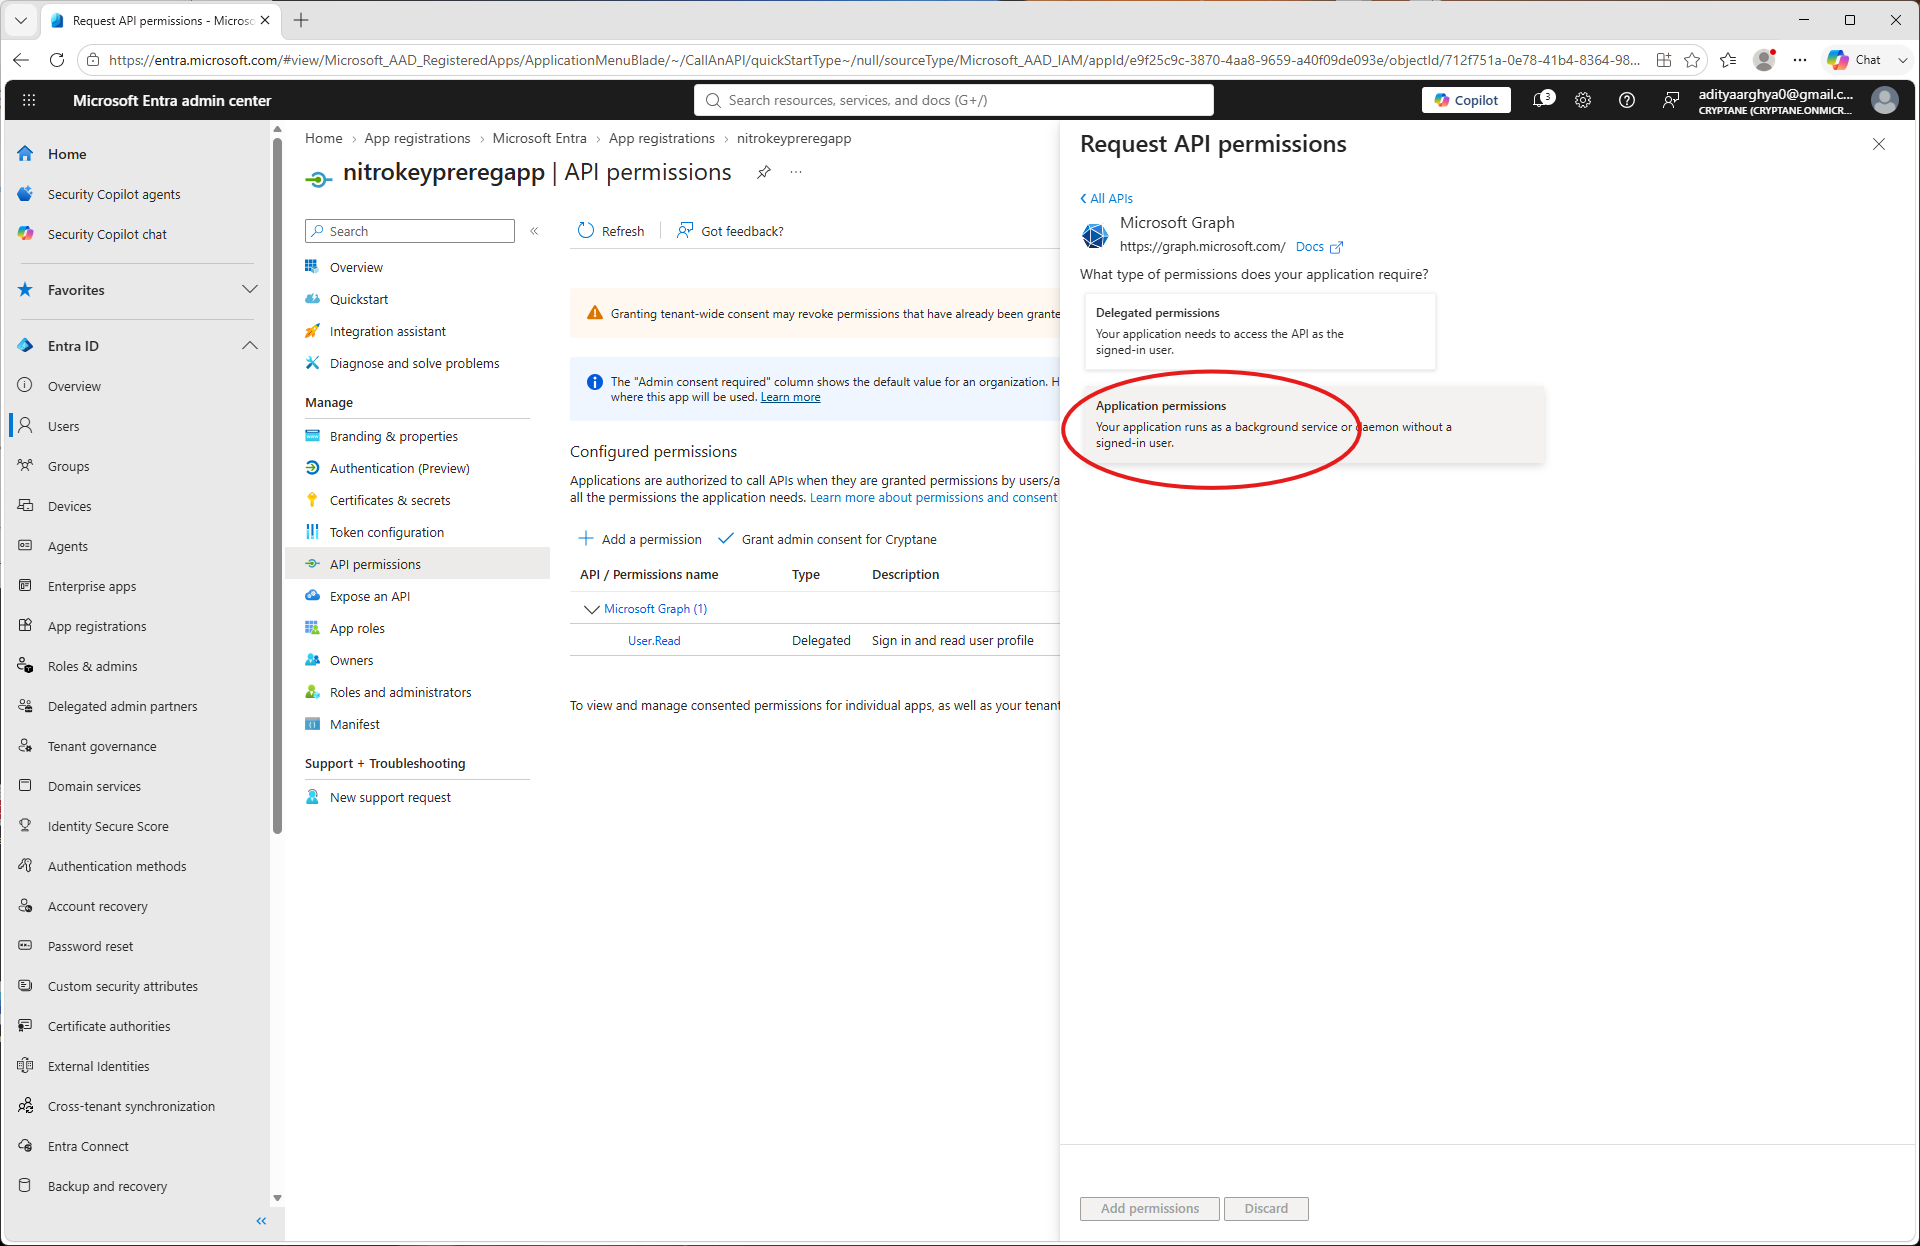
Selecteer ‘Toepassingsrechten’.
Search for
UserAuthenticationMethod.ReadWrite.Alland select it.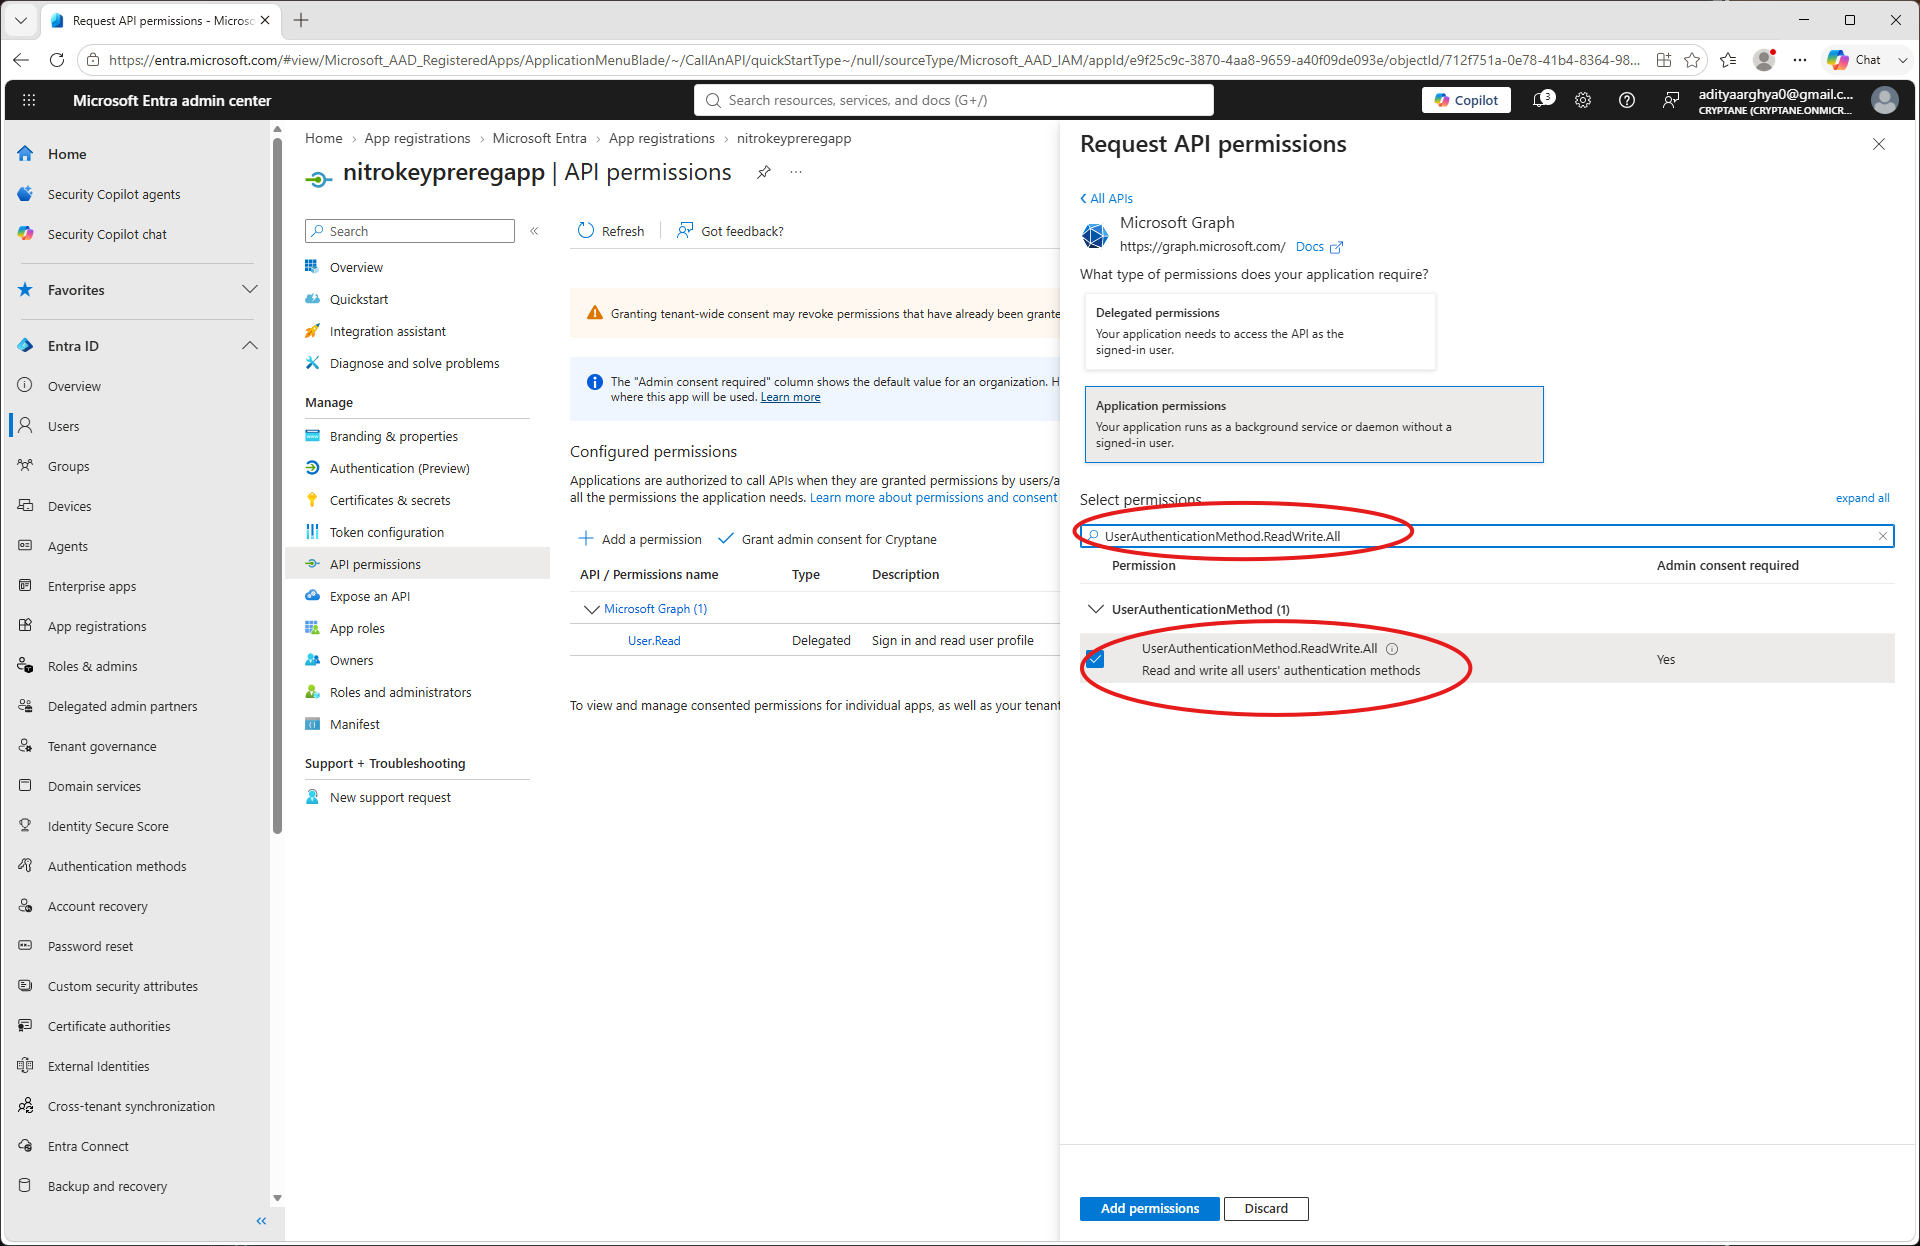
Search for
User.ReadWrite.Alland select it (Only if you want to be able to create users frompynitrokey). Click on the Add Permissions button.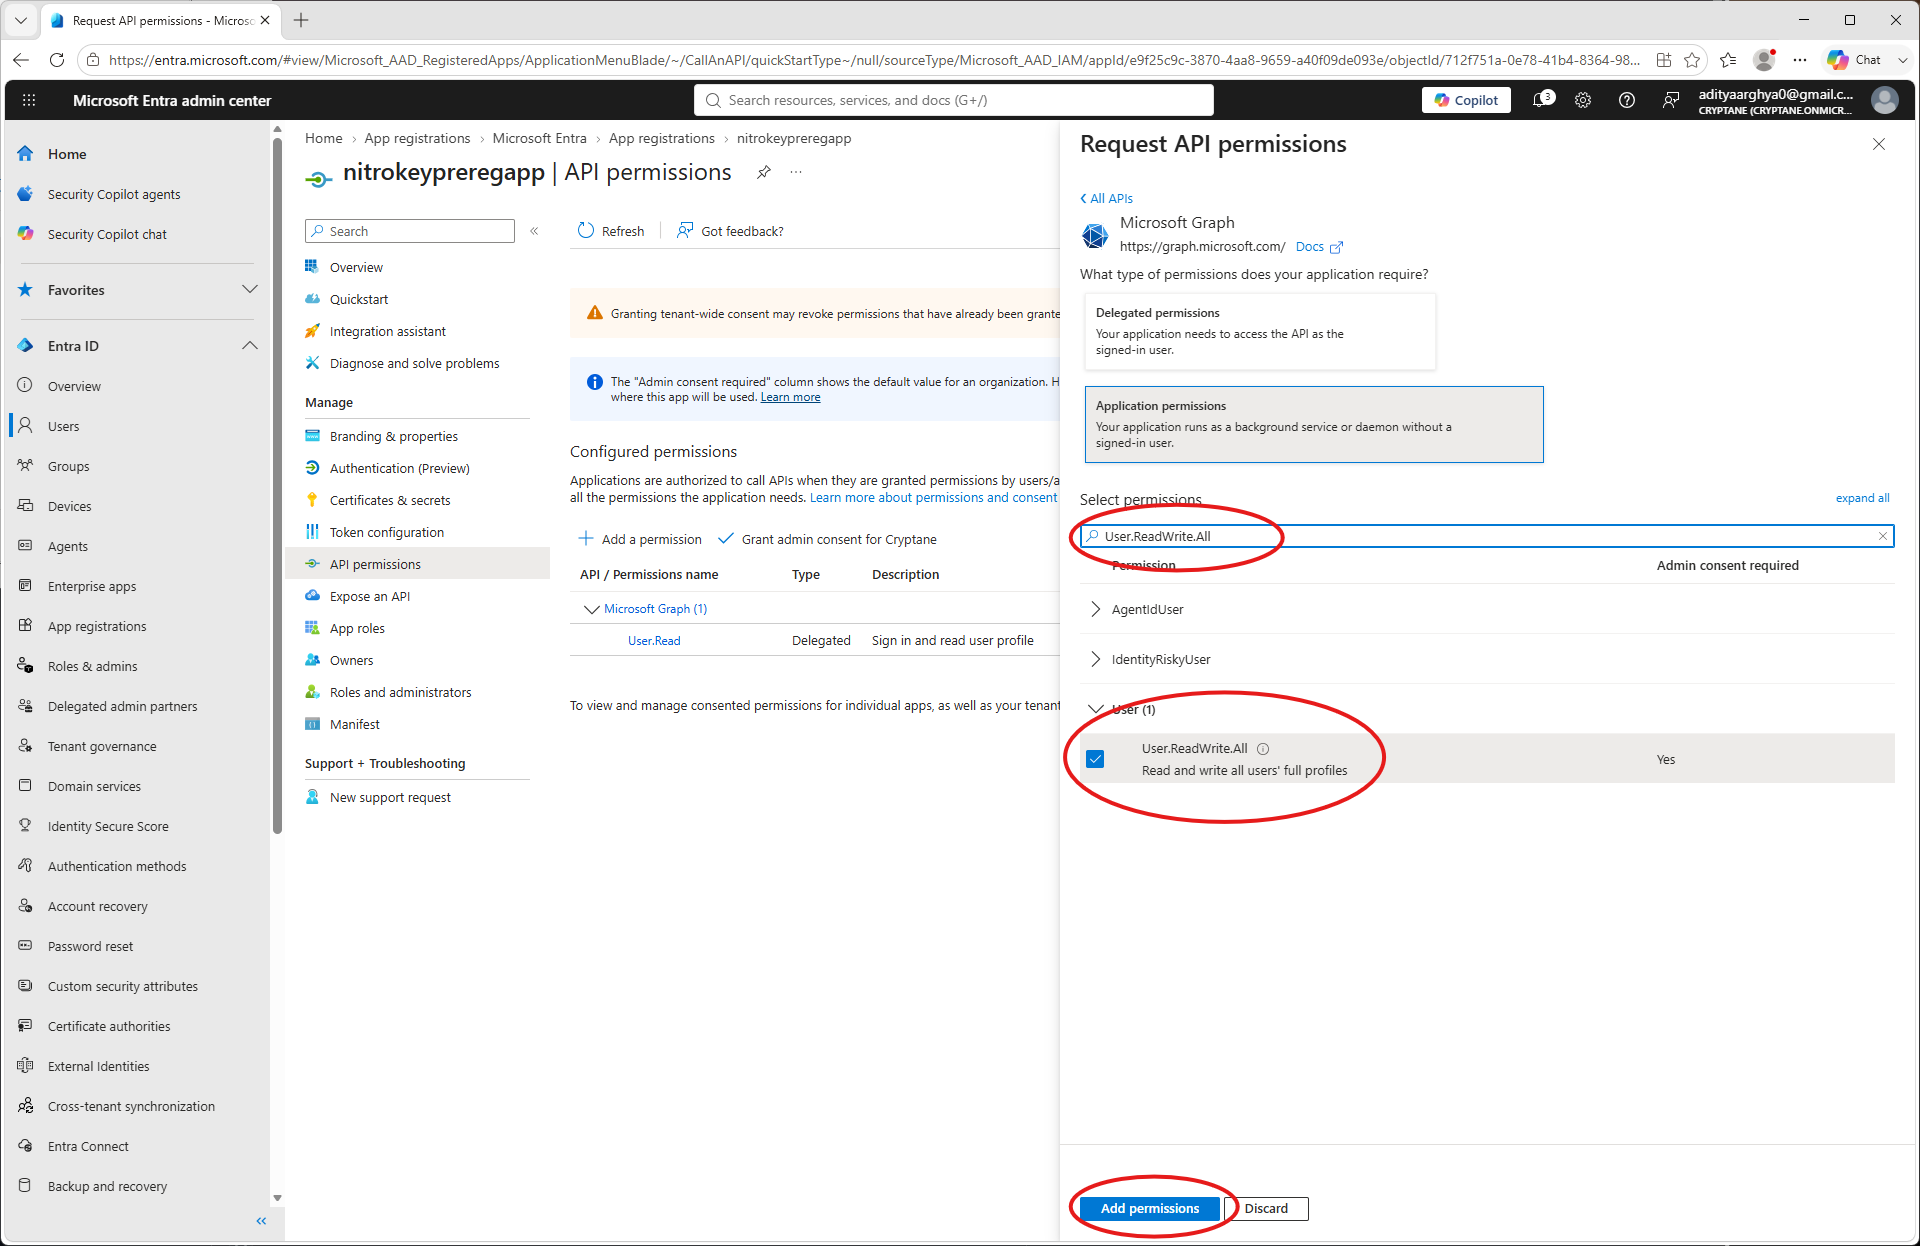
Controleer de toegekende machtigingen.
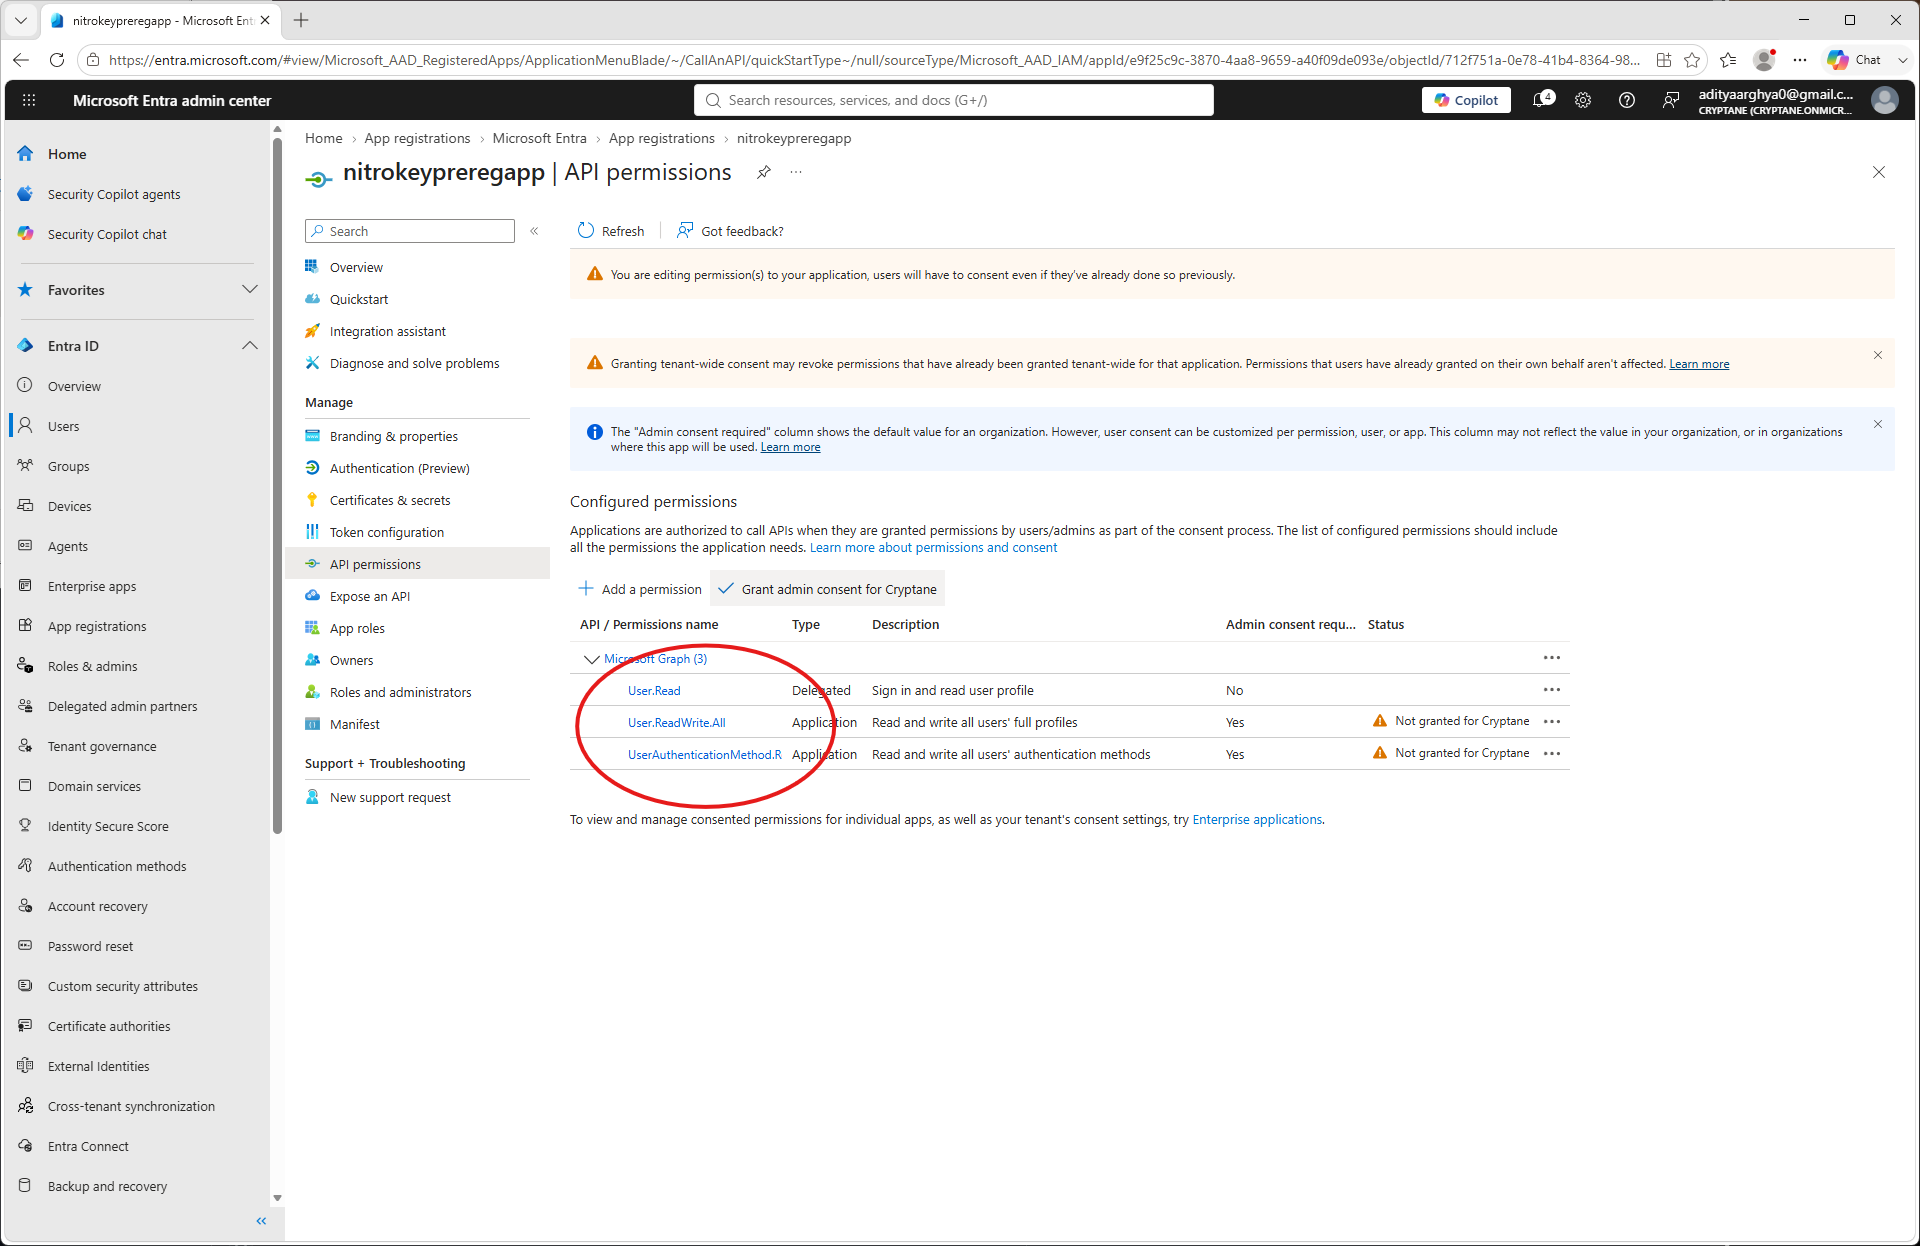
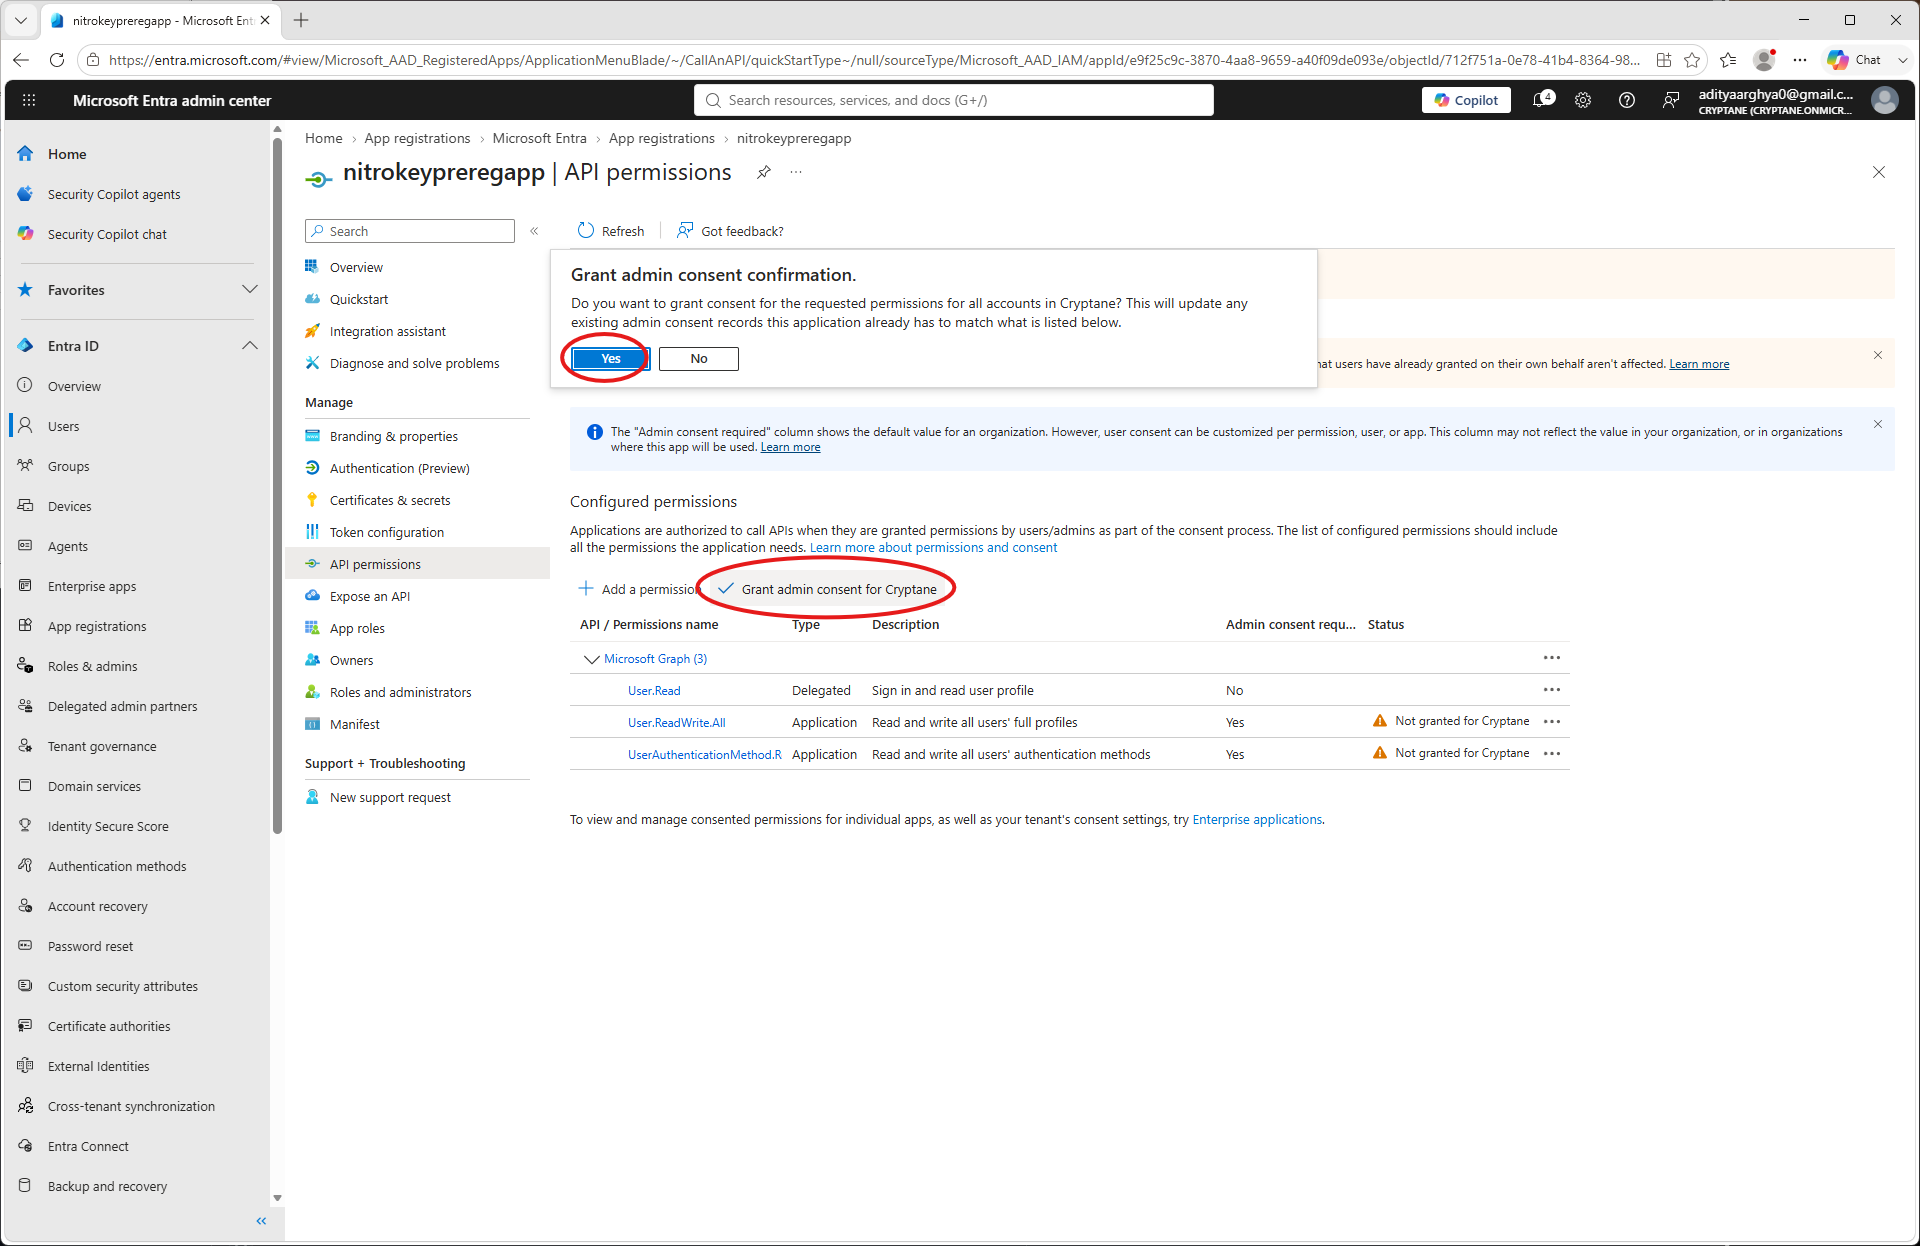
Klik op ‘Toestemming van de beheerder verlenen’ en keur dit goed.
Ga terug naar het startscherm van de app en selecteer ‘Certificaten en geheimen’ in het linkerpaneel
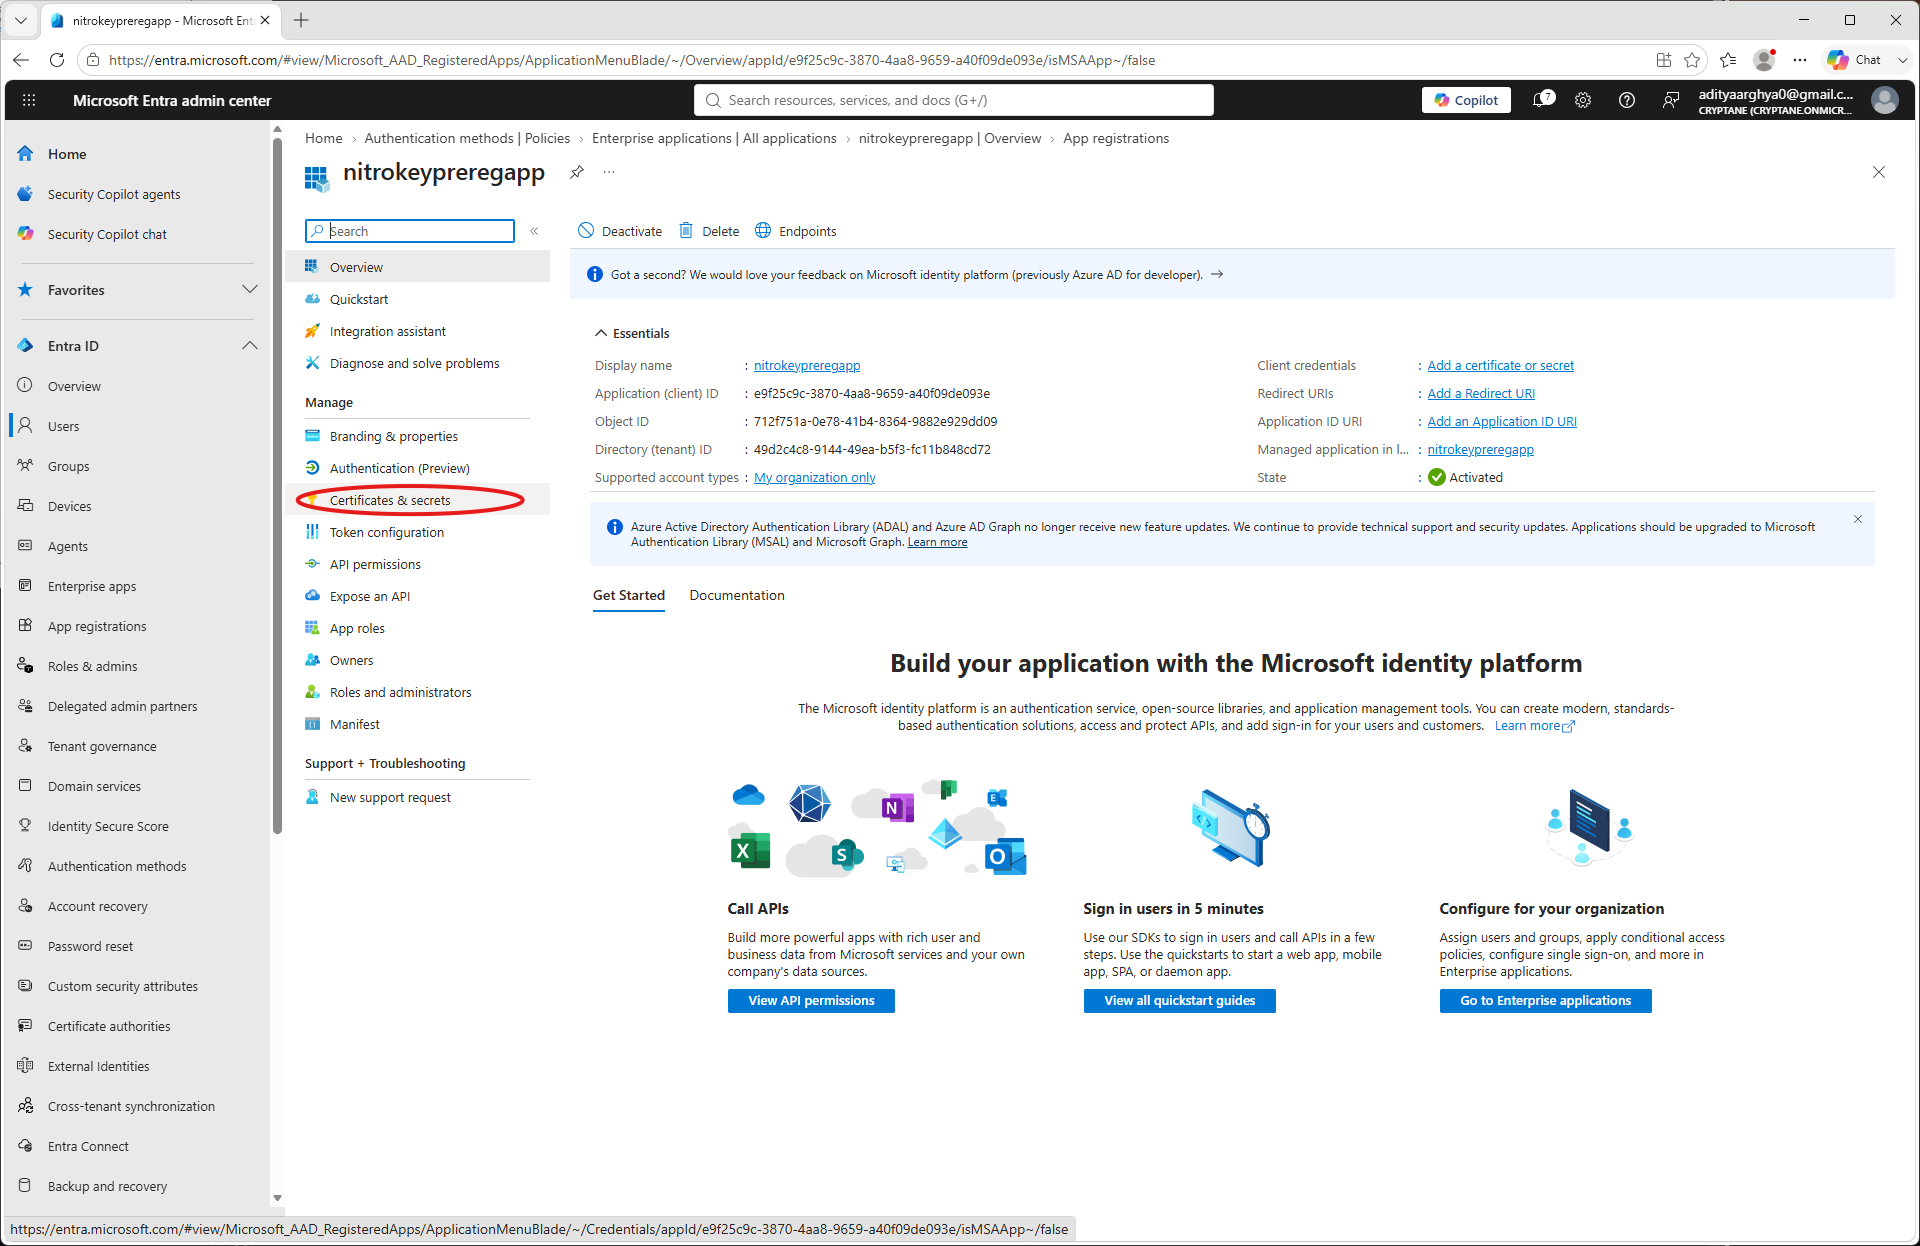
Klik op ‘Nieuw clientgeheim’
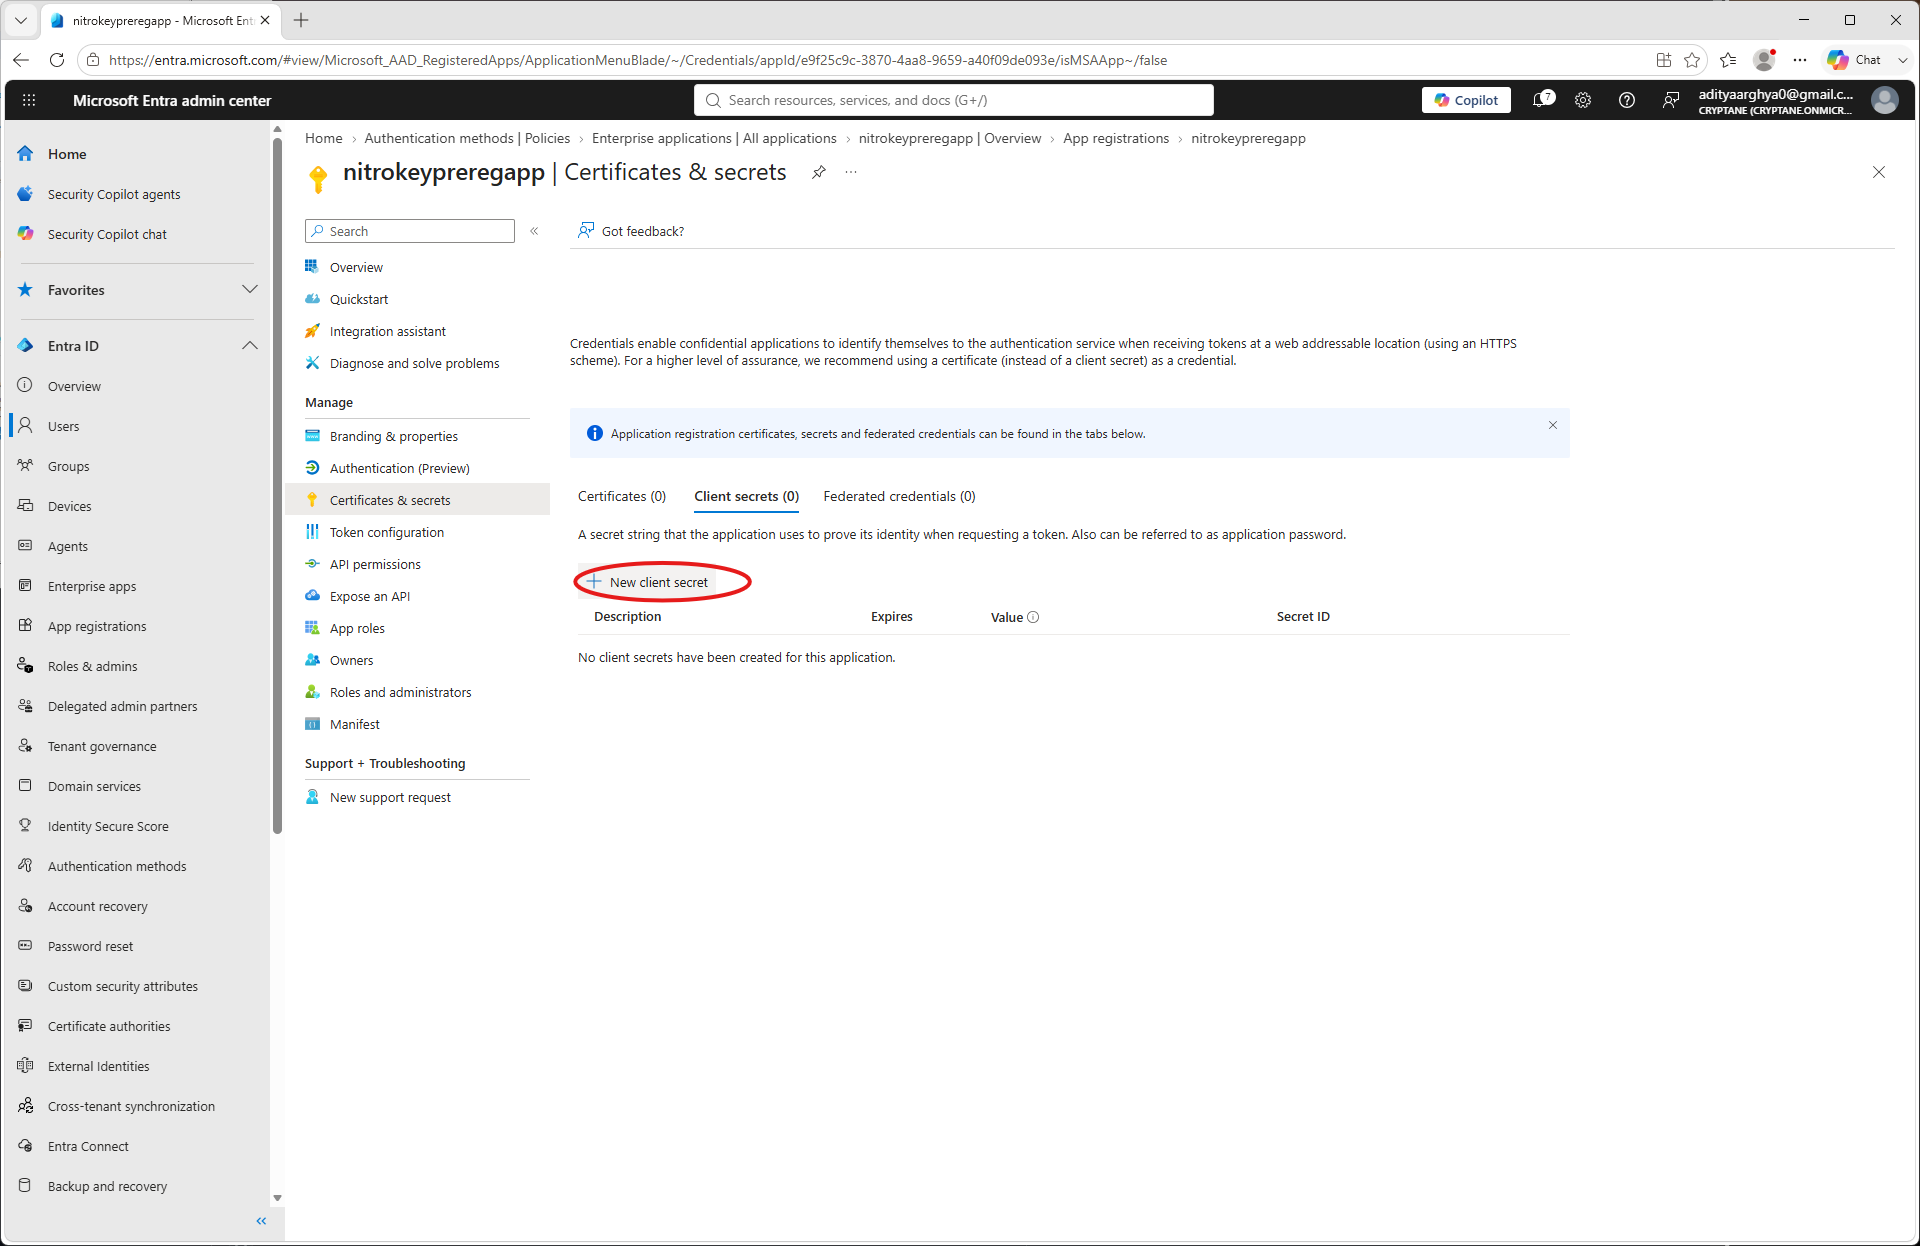
Voer een naam en een vervaldatum in en klik vervolgens op ‘Toevoegen’
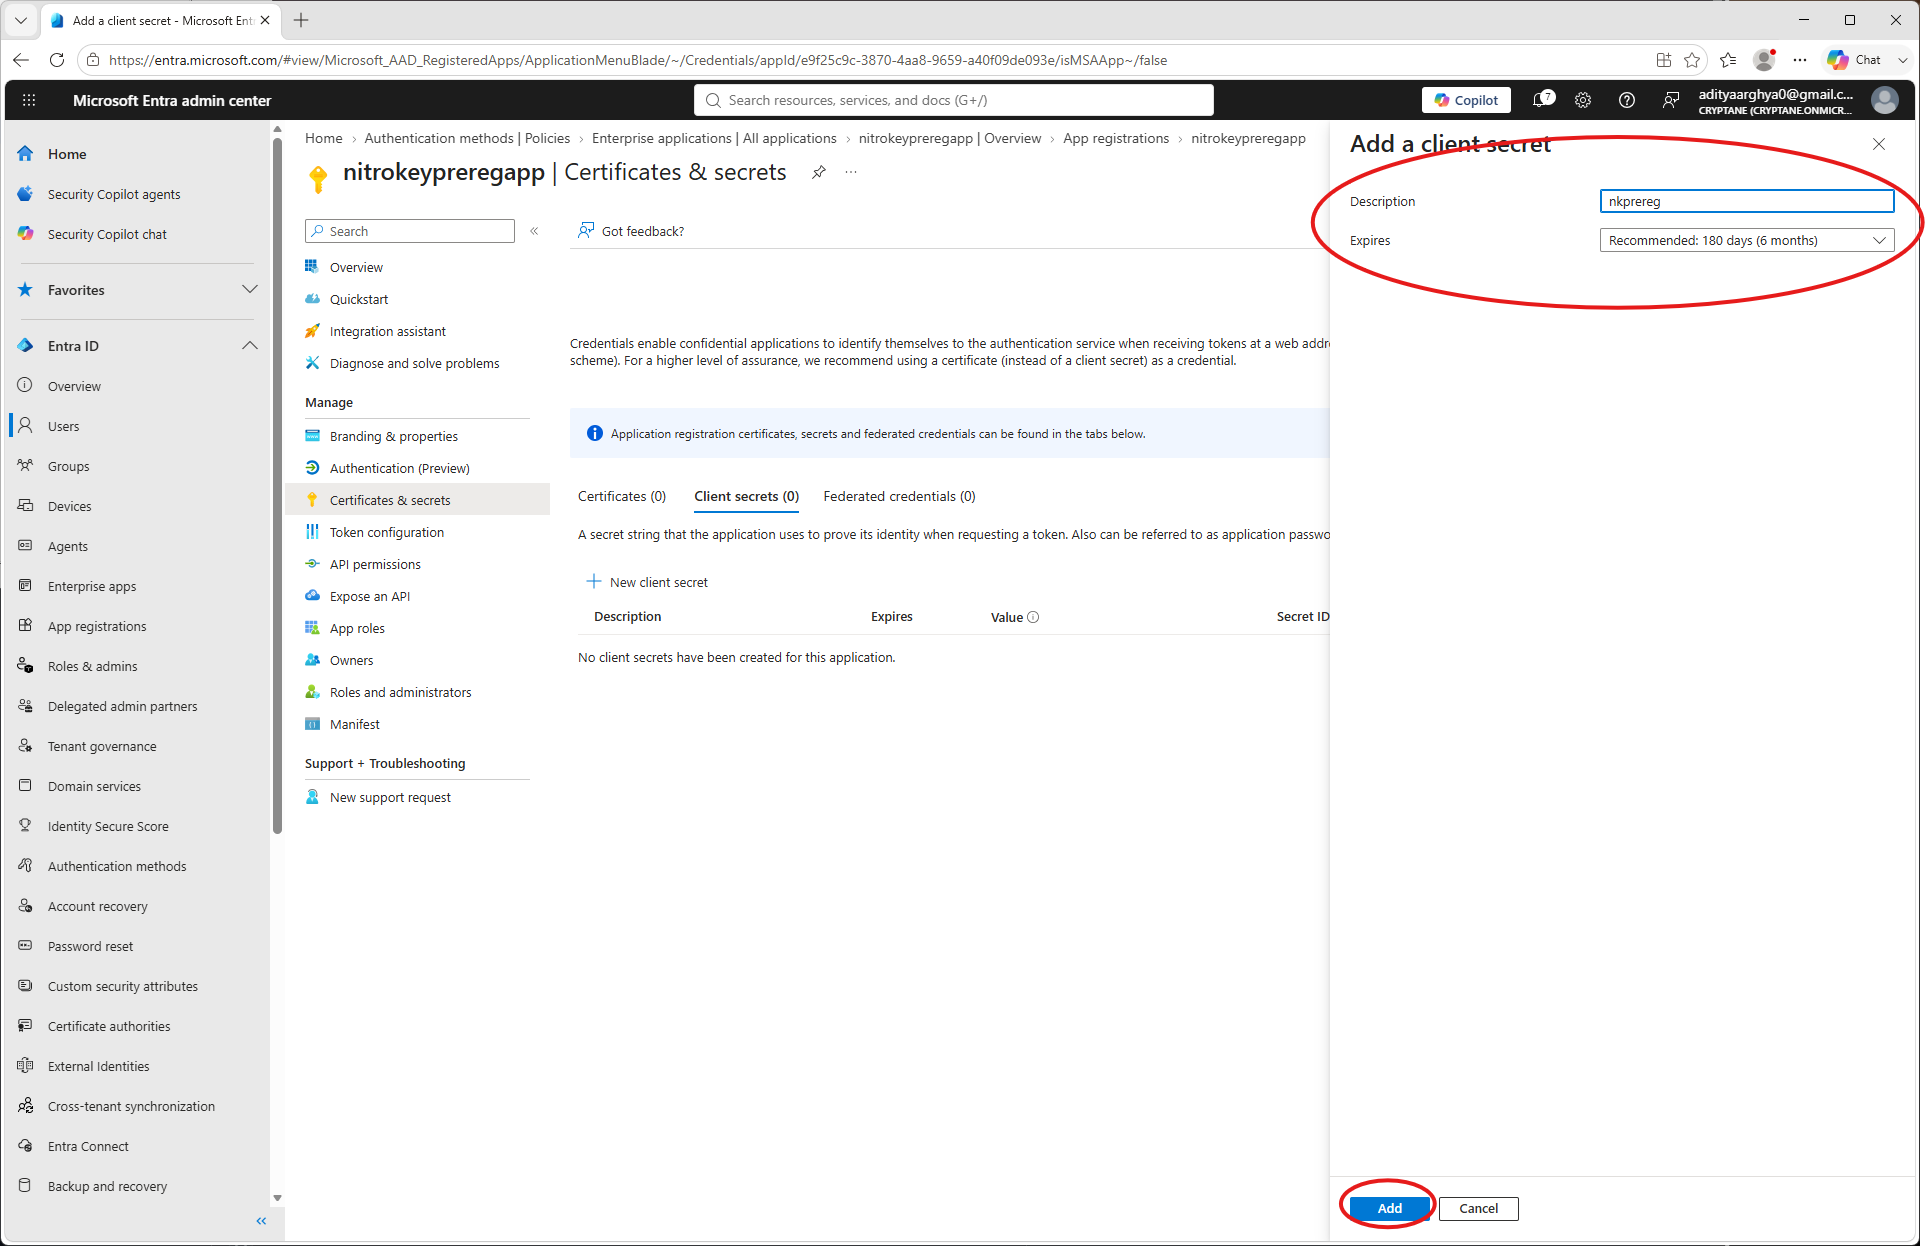
Noteer het Client Secret (je kunt het later niet meer bekijken.)
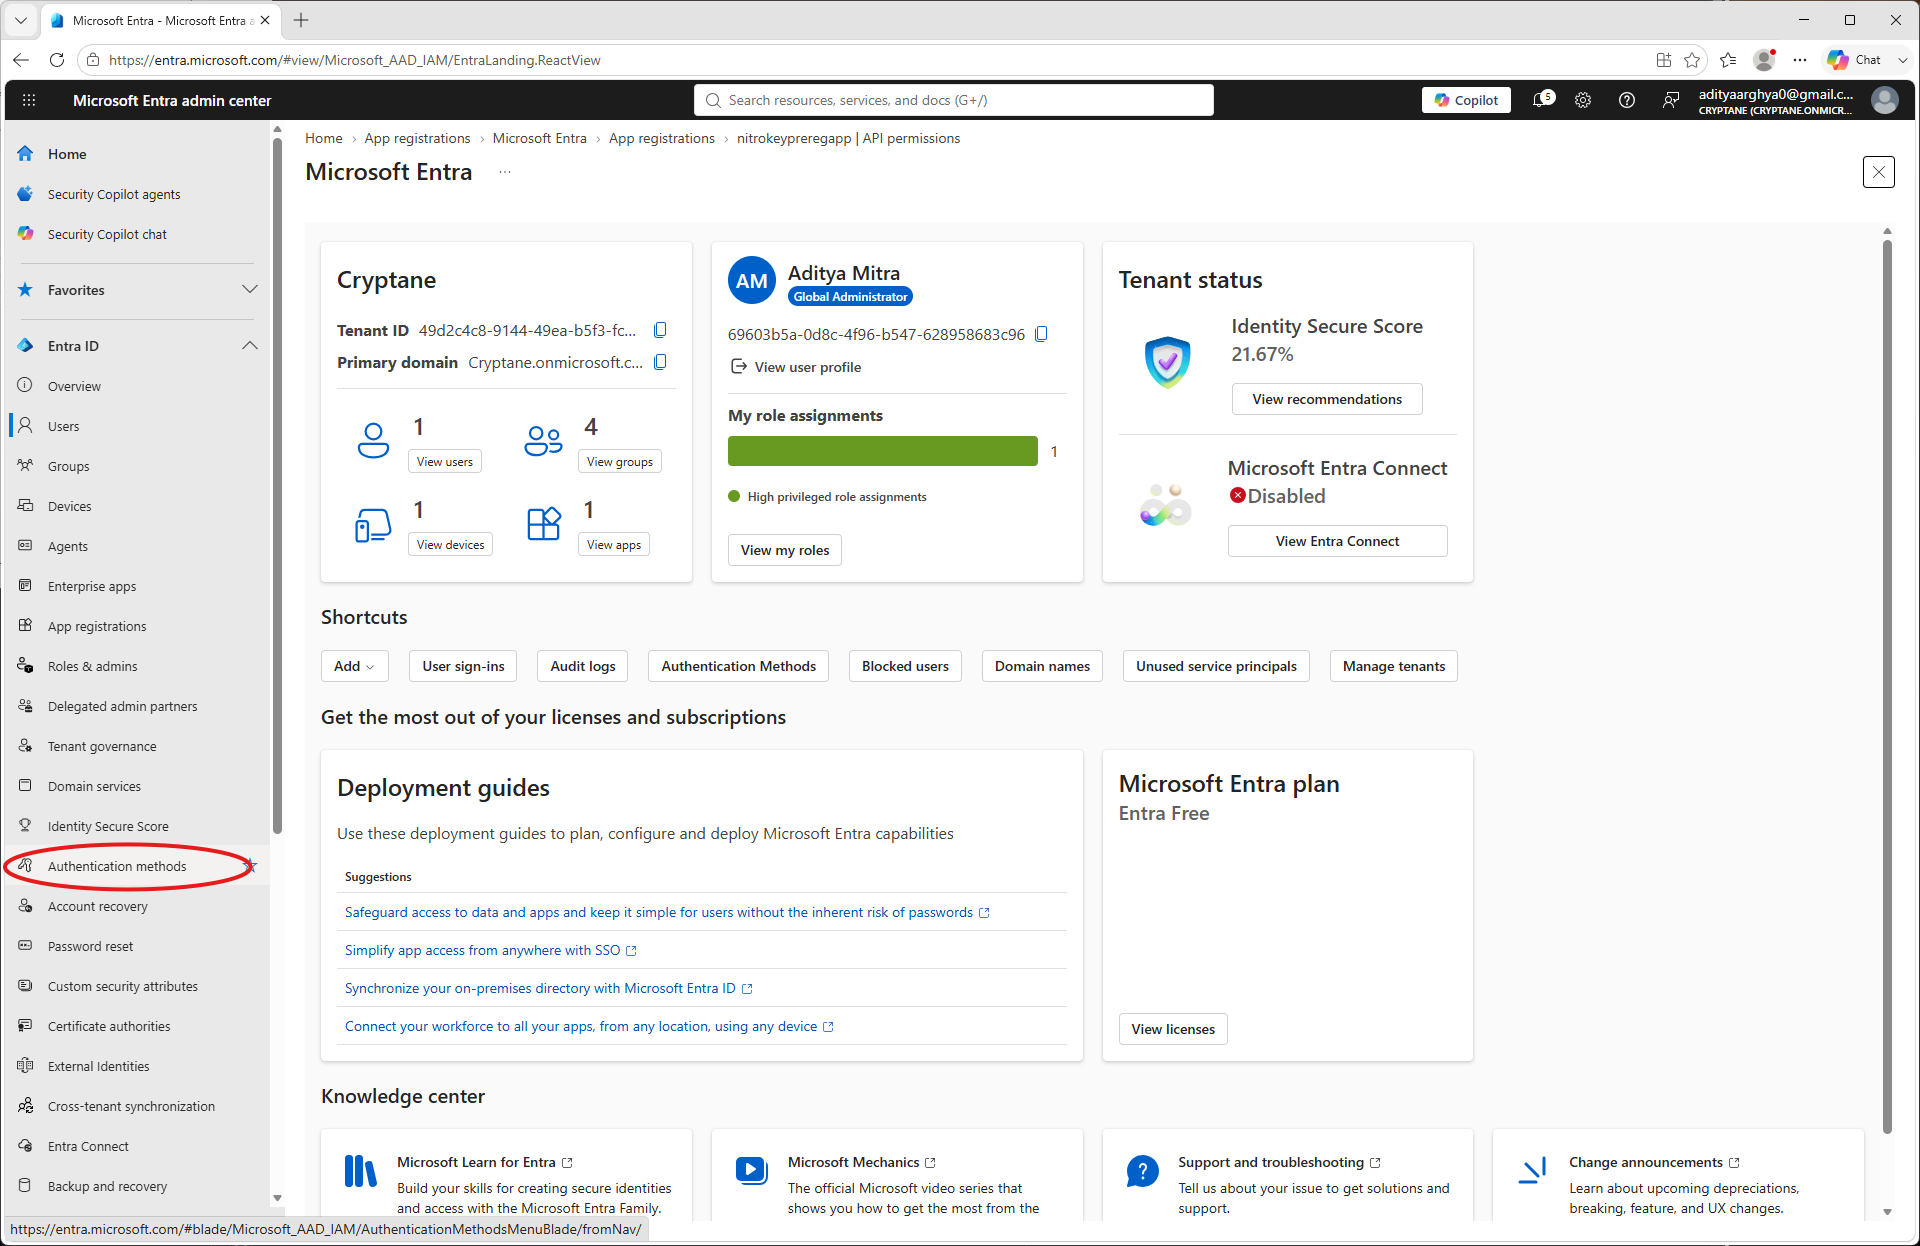
Klik in het linkerpaneel op ‘Verificatiemethoden’.
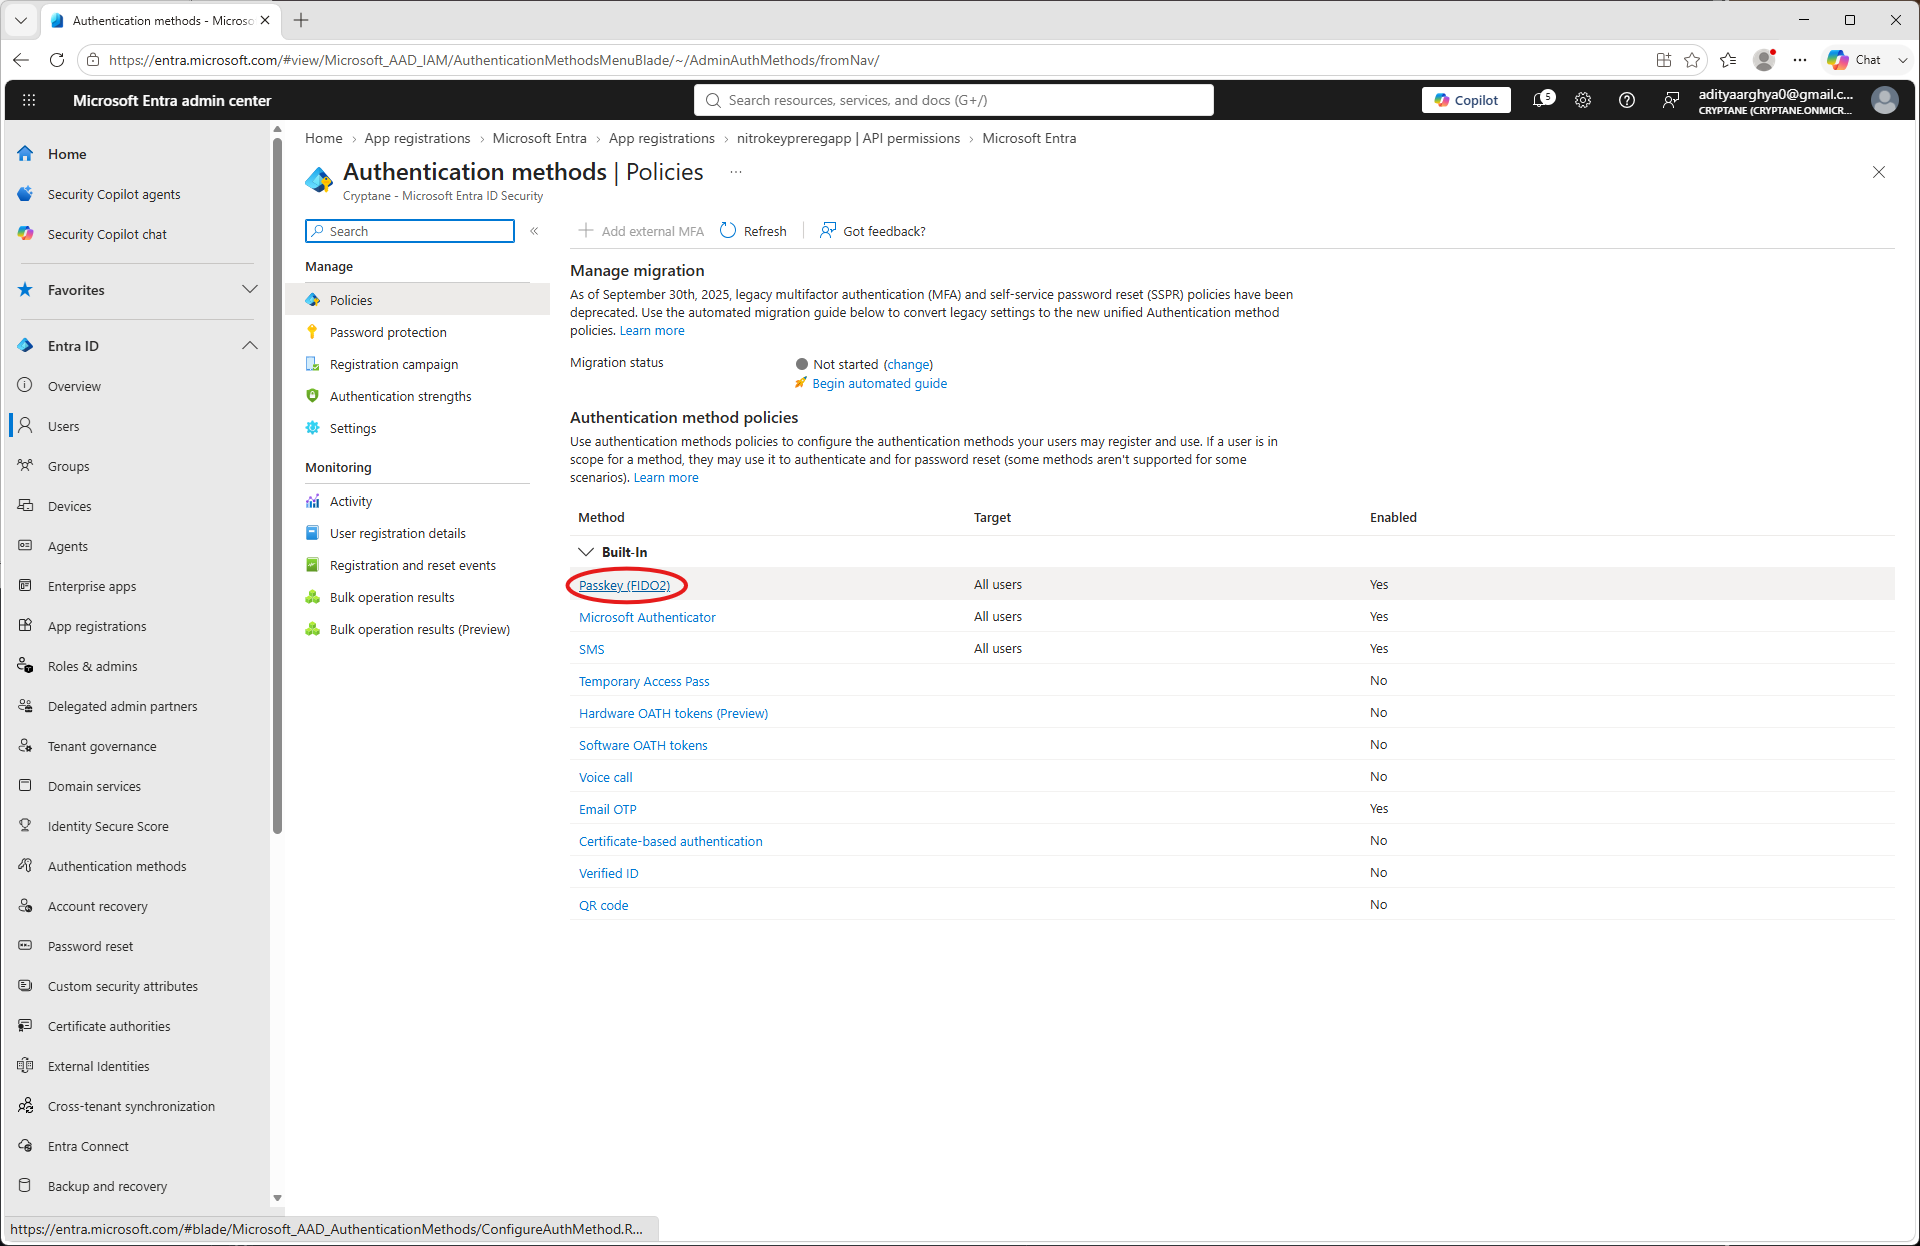
Select Passkey (FIDO2).
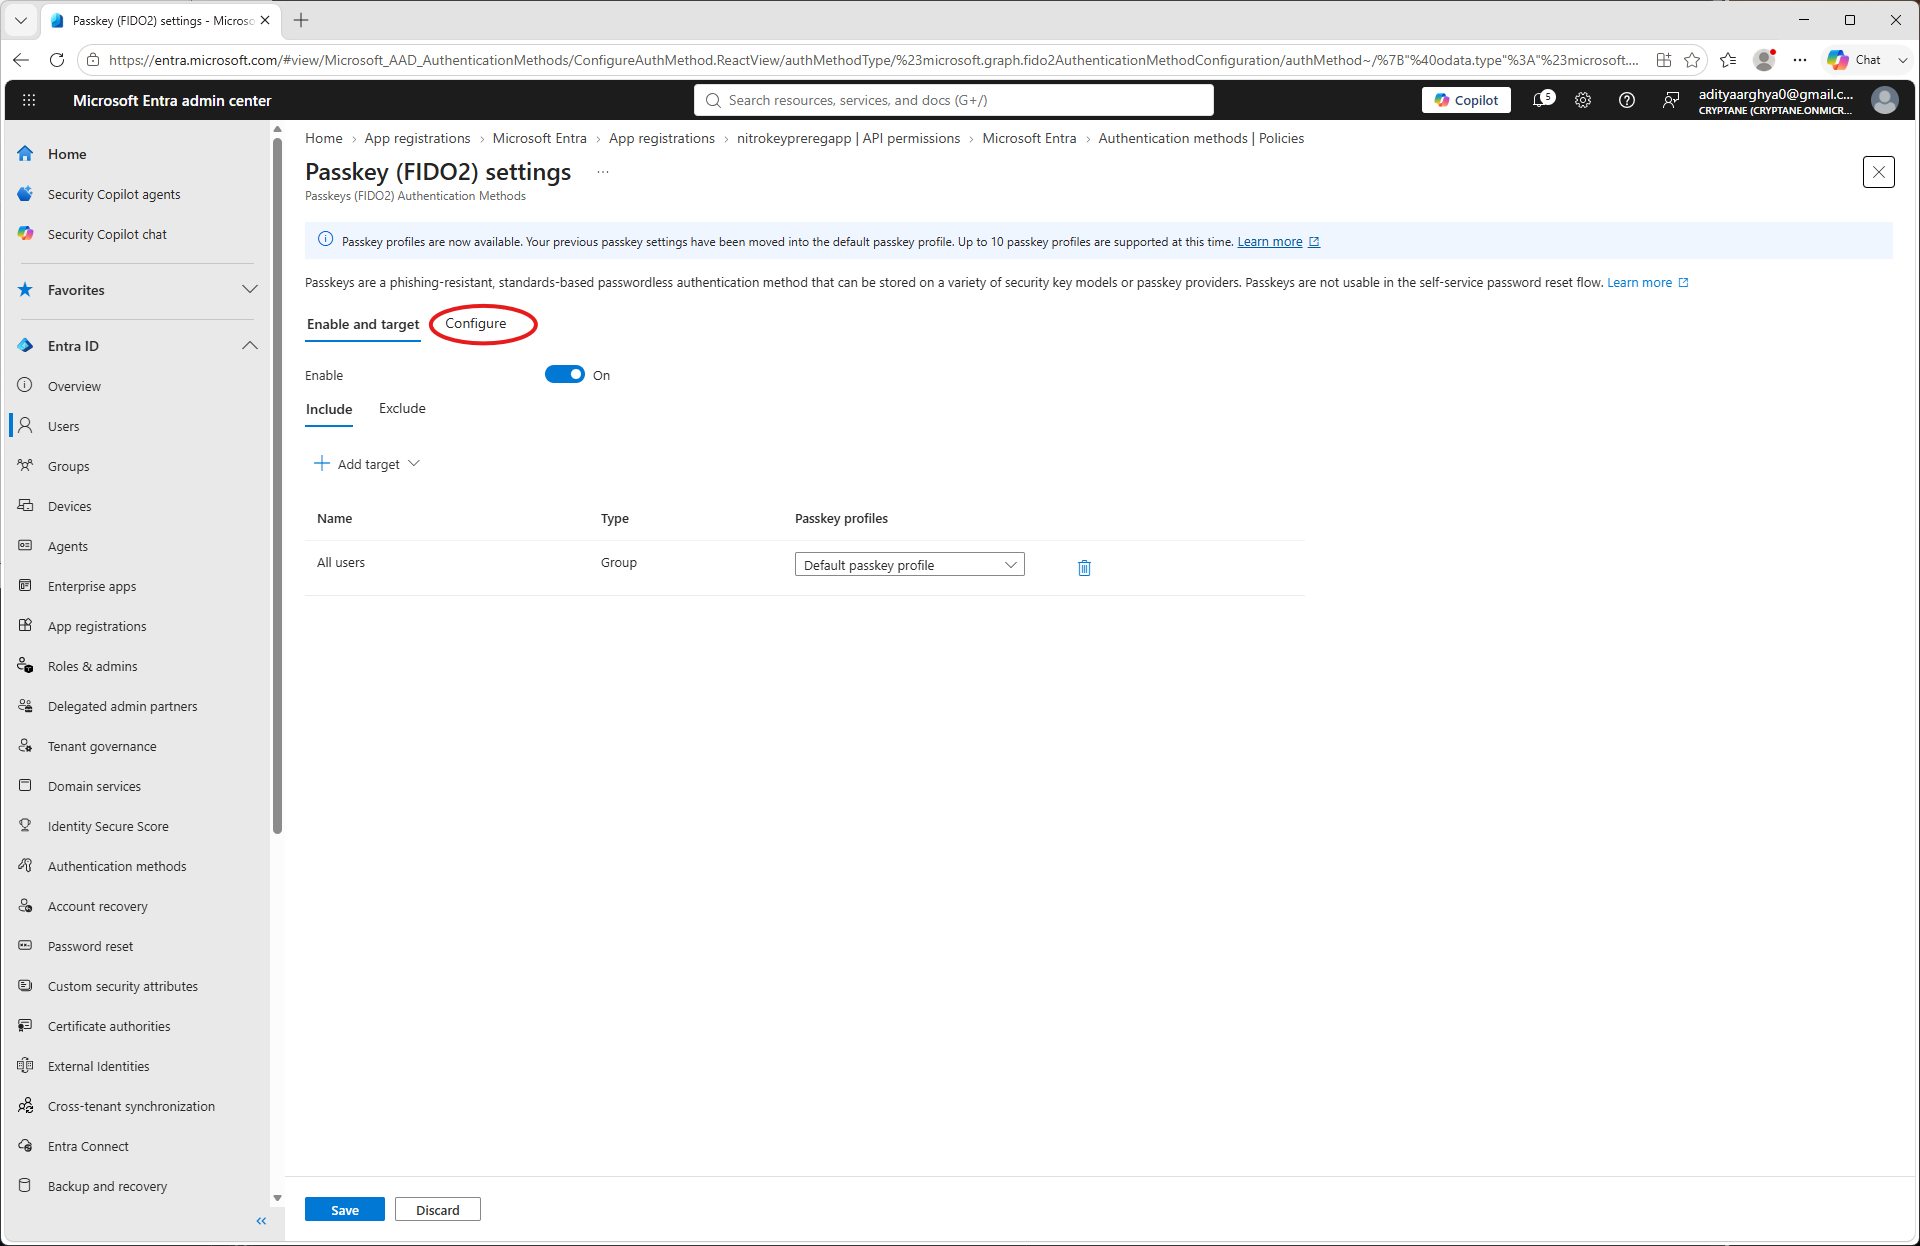
Click on the Configure tab.
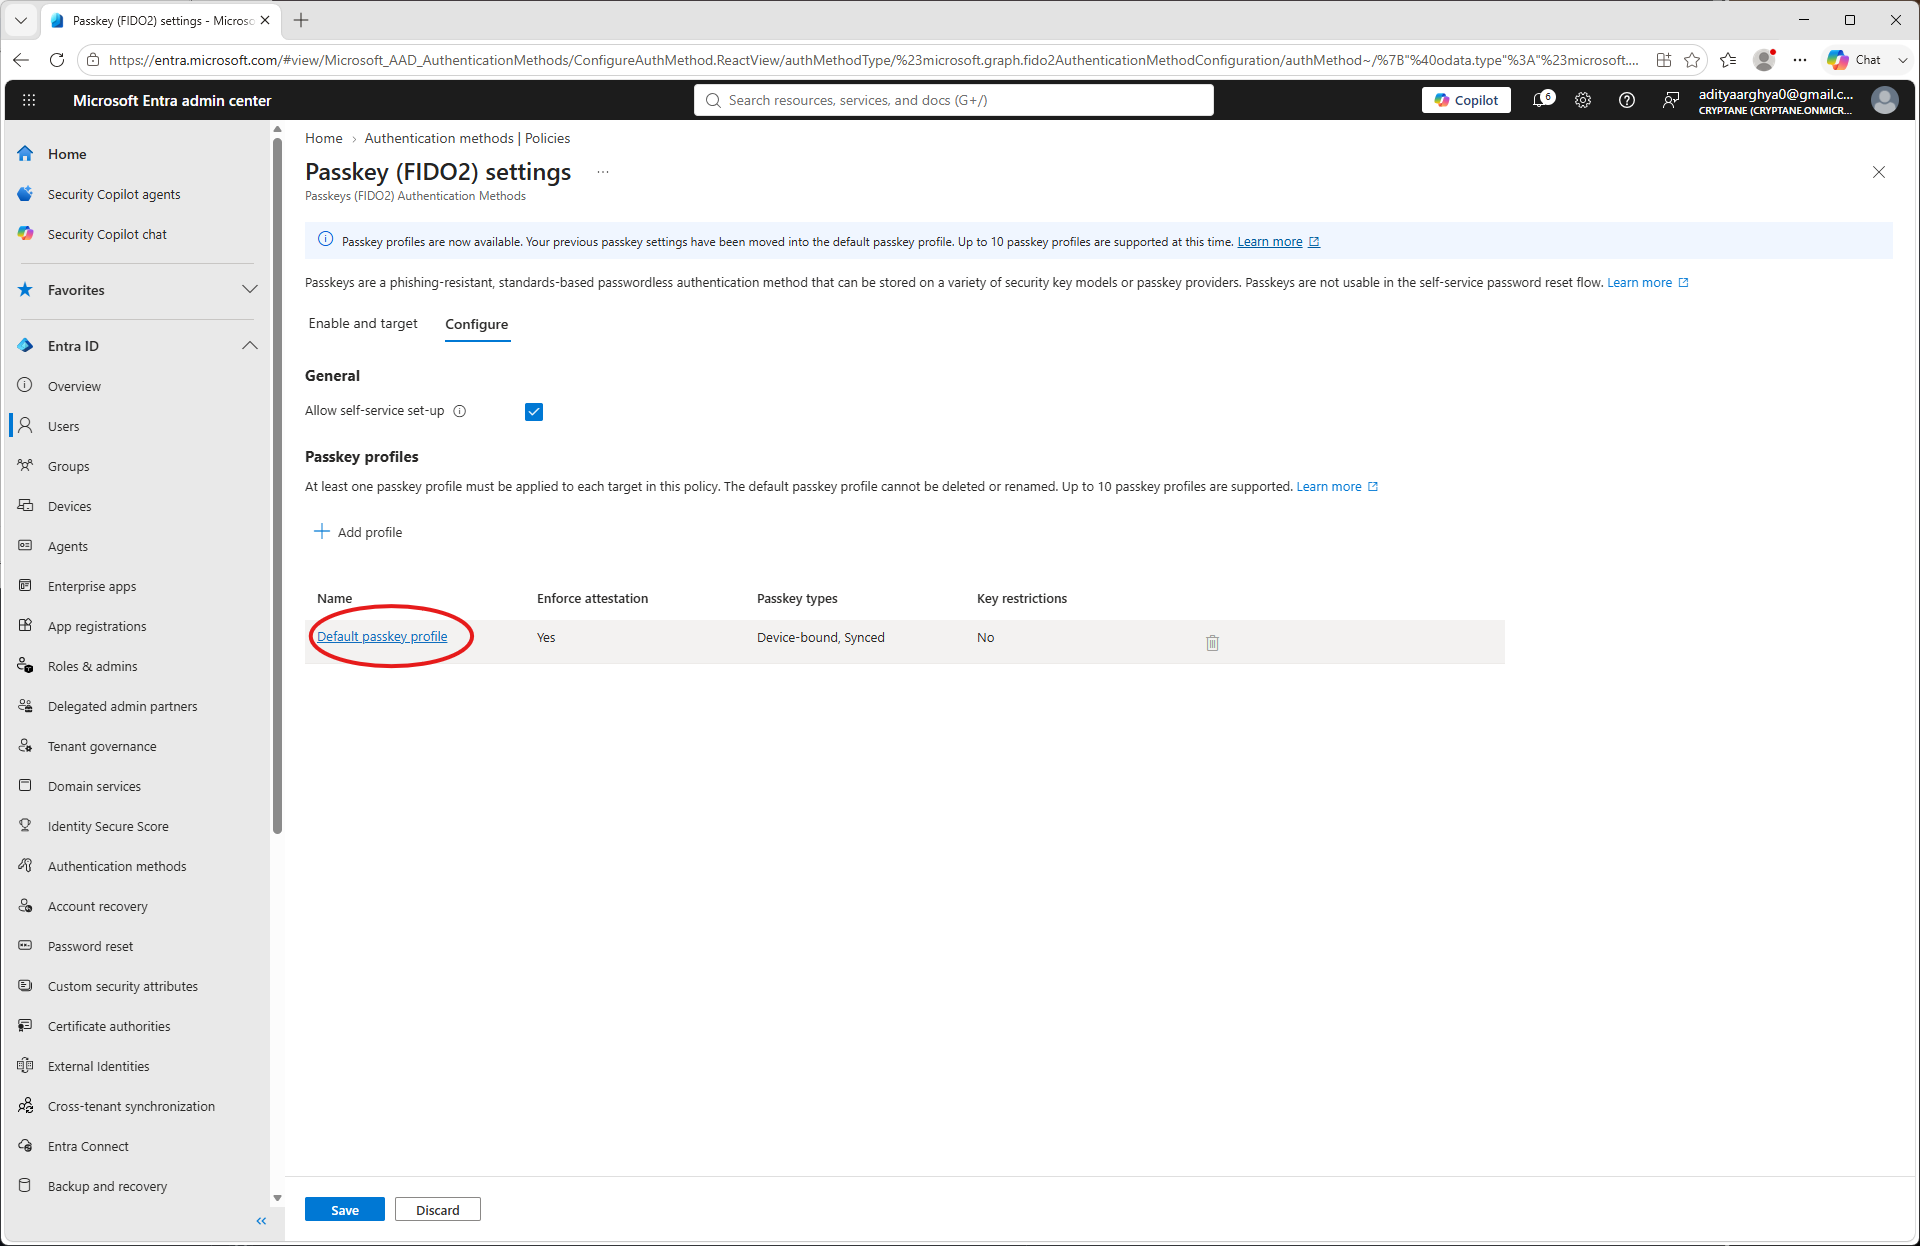
Click on Default Passkey profile
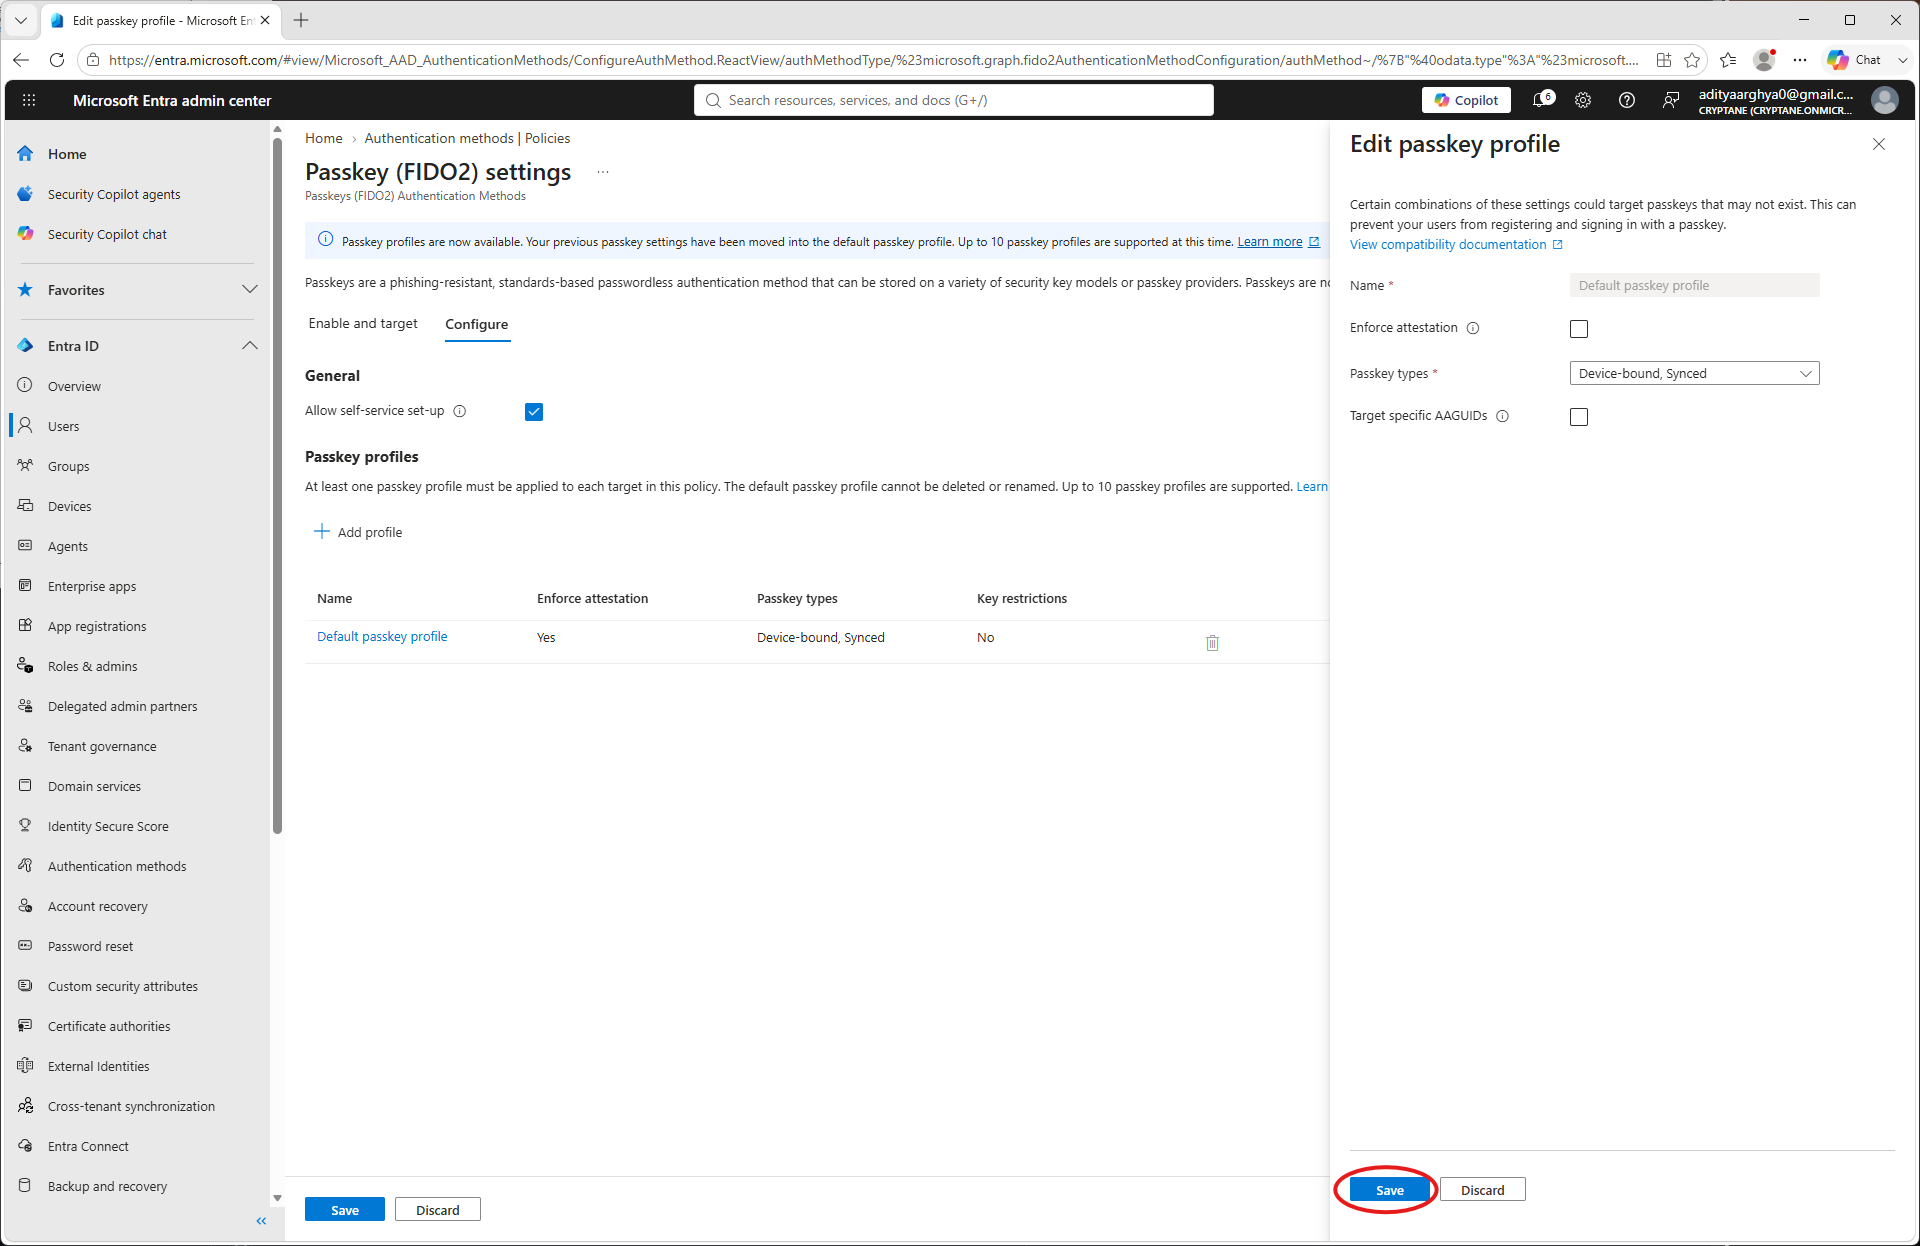
Schakel het selectievakje ‘Enforce Attestation’ uit (alleen als je een Nitrokey gebruikt die niet door de FIDO Alliance is gecertificeerd. Op het moment van schrijven beschikt alleen de Nitrokey 3A Mini over deze certificering.)
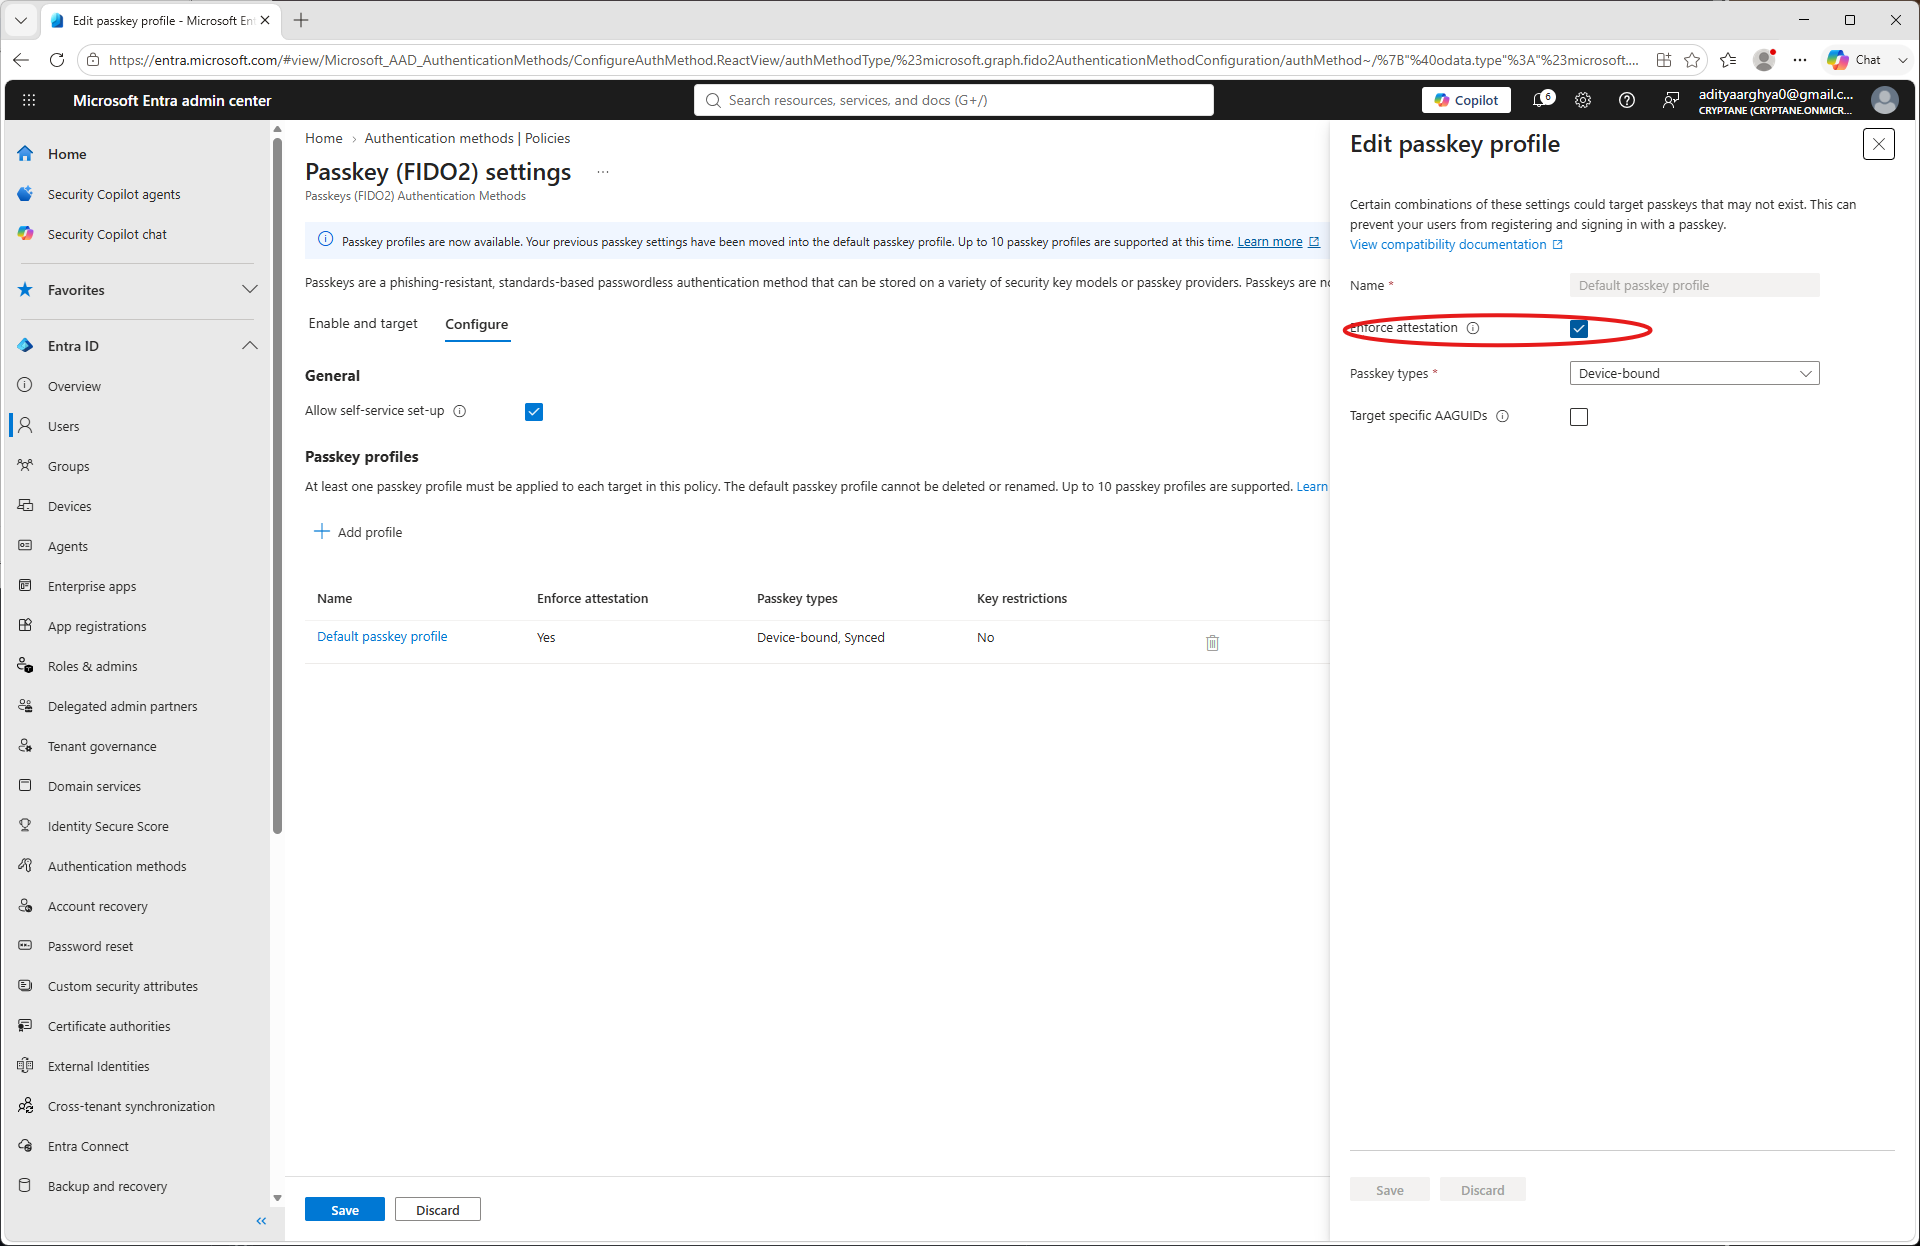
Click Save.
You have taken note of the Tenant ID, Client ID, Client Secret and Primary Domain as a part of the process. Make a
config.jsonfile with the information. An example is shown below.{ "tenant": "49d2c4c8-9144-49ea-b5f3-fc11b848cd72", "client": "e9f25c9c-3870-4aa8-9659-a40f09de093e", "secret": "************************************", "domain": "Cryptane.onmicrosoft.com" }
Gebruik
You may use the pynitrokey utility to provision a Nitrokey for an user in your tenant.
nitropy fido2 provision-credential entra -c config.json <username> --create-user
Here the <username> could be the Email ID of the user (User principal in terms of Microsoft) or a part of it till before the @ sign.
The --create-user flag directs the tool to create the user if it does not exist in the Entra Tenant.
$ nitropy fido2 provision-credential entra -c config.json aditya --create-user
Command line tool to interact with Nitrokey devices 0.12.3
Warning: It is recommended to execute nitropy with admin privileges to be able to access Nitrokey 3 and Nitrokey FIDO 2 devices.
Waiting 5 secs for Graph API to update
User aditya created on Entra
Enter PIN:
Touch your authenticator device now...
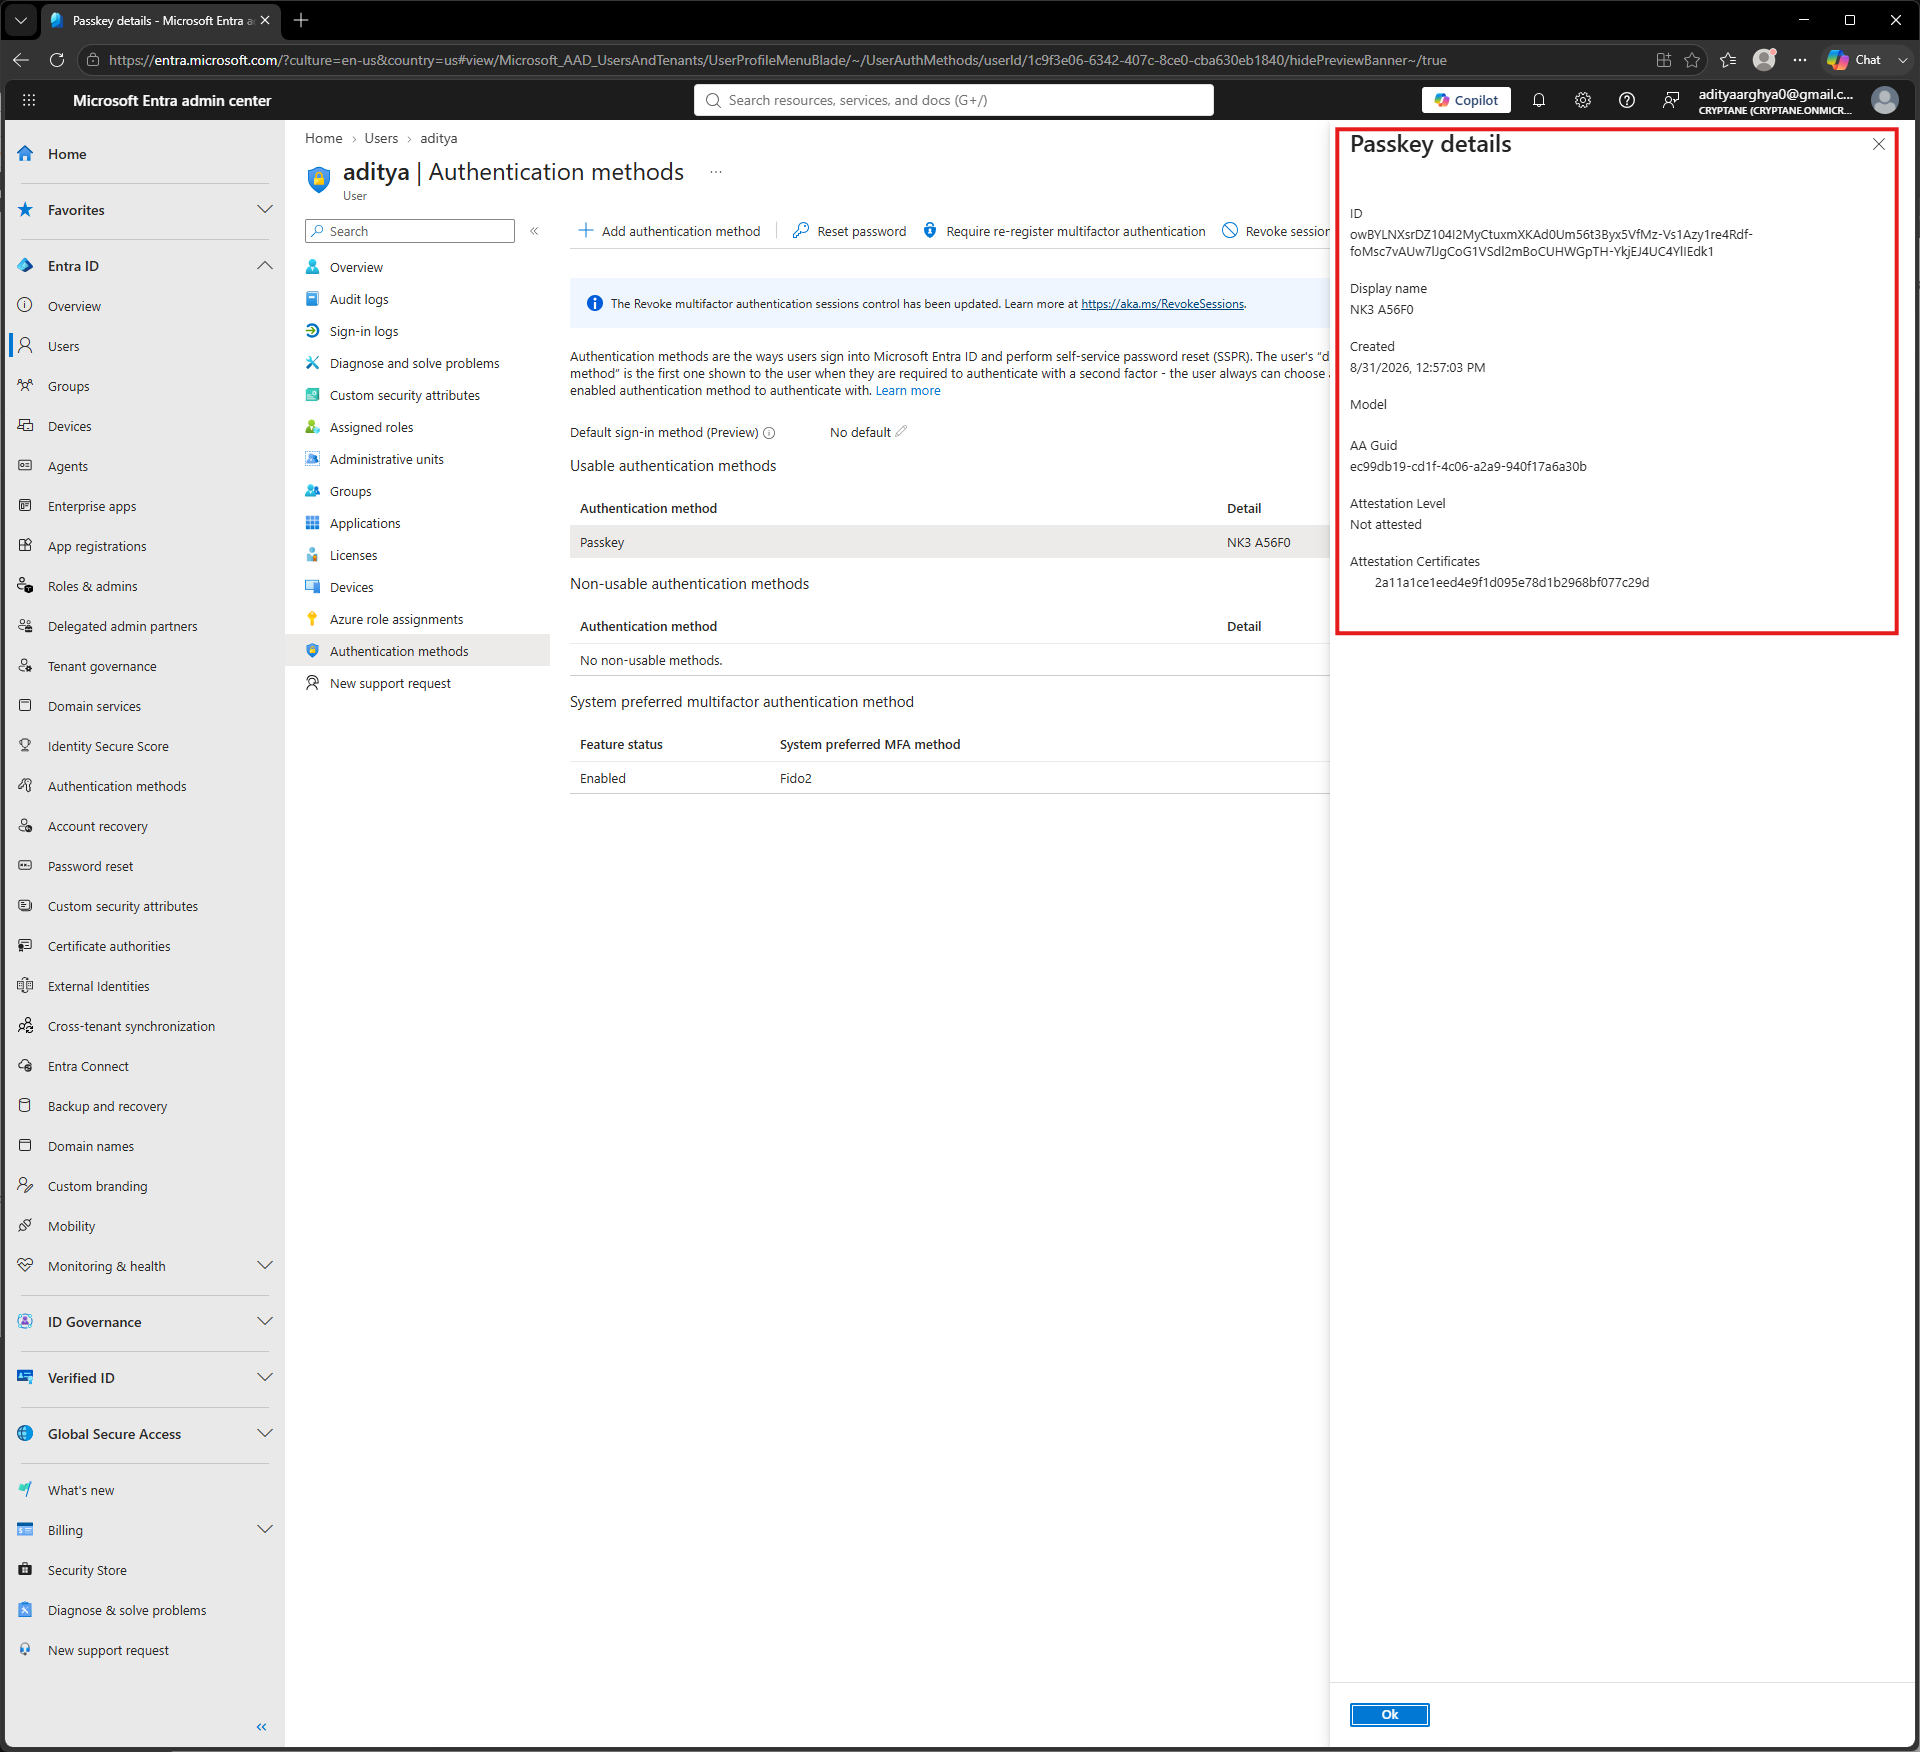
Entra credential for aditya pre-registered on NK3 A56F0 with Credential ID owBYLNXsrDZ104I2MyCtuxmXKAd0Um56t3Byx5VfMz-Vs1Azy1re4Rdf-foMsc7vAUw7lJgCoG1VSdl2mBoCUHWGpTH-YkjEJ4UC4YlIEdk1.
Verification
De gebruiker kan de zojuist aangemaakte Nitrokey gebruiken om in te loggen op zijn Microsoft-account. Volg Voorbeeld van inloggen bij Microsoft met Nitrokey om in te loggen met deze zojuist aangemaakte Nitrokey.
U kunt de toegewezen inloggegevens controleren via het Entra-beheerportaal door de onderstaande stappen te volgen.
Ga naar de optie ‘Gebruikers’ in het linkermenu van het Entra-beheercentrum.
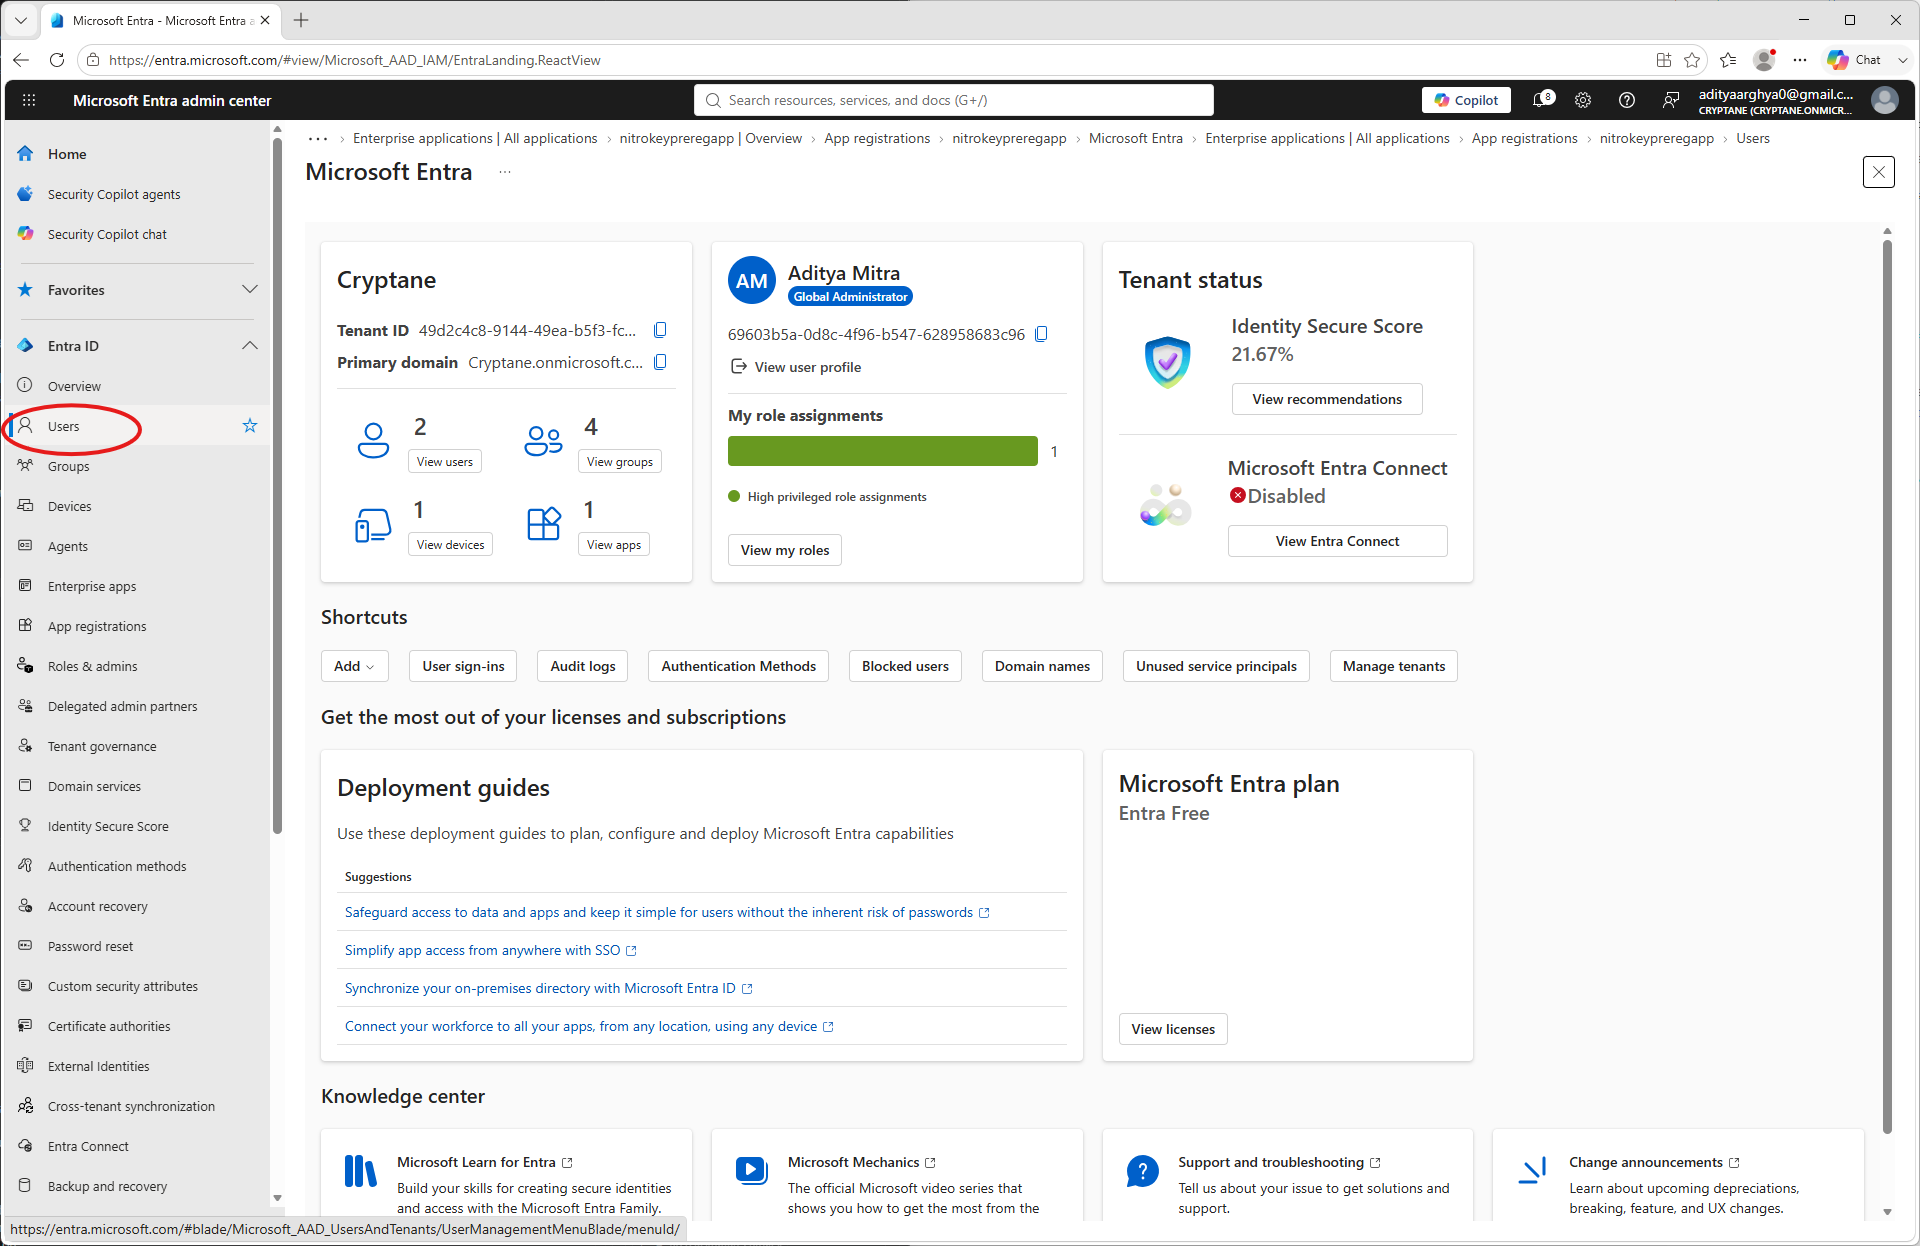
If the user was created with the
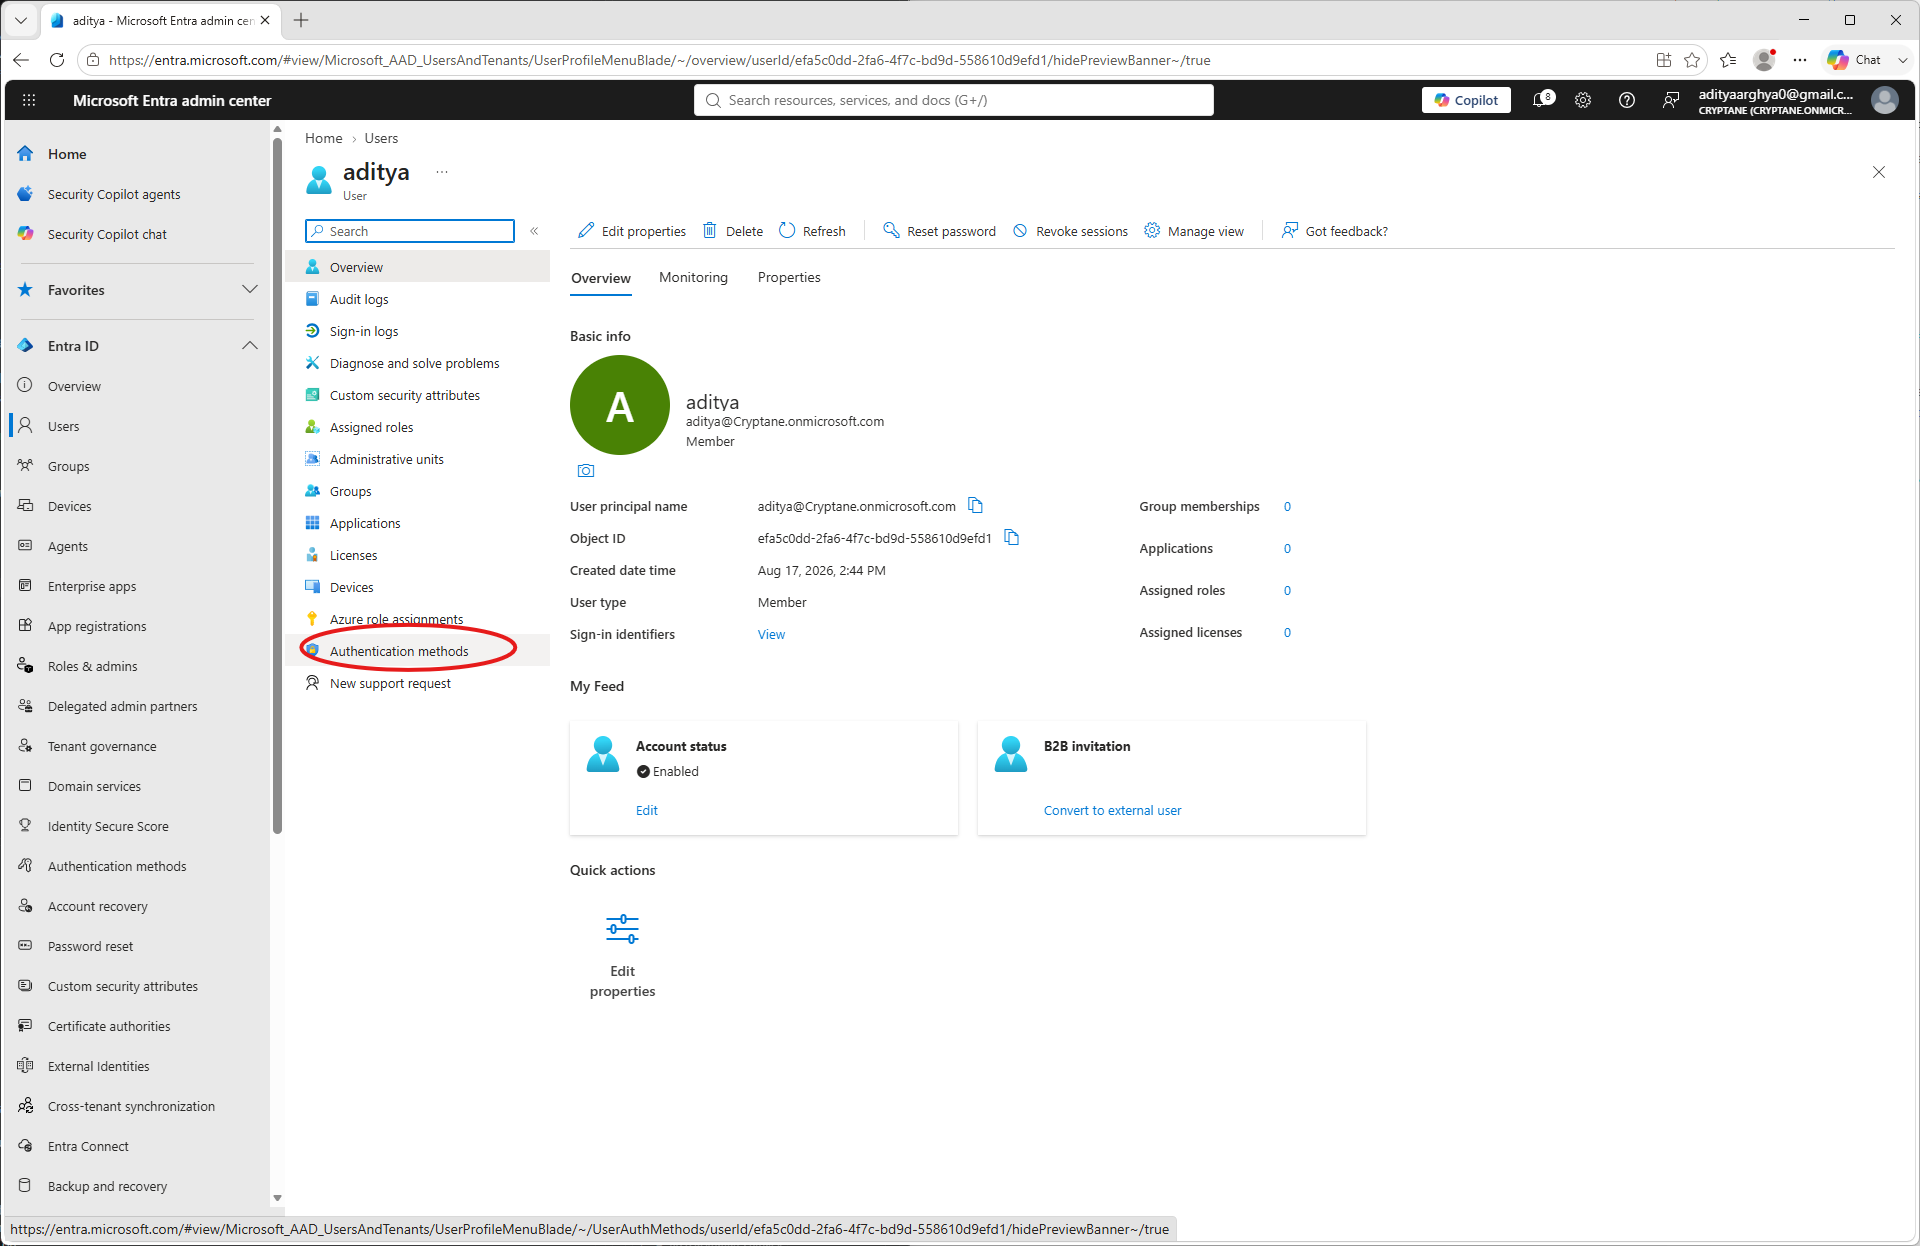
--create-userflag you may be able to find the entry on the list. If it is a pre-existing user, it would also be there. Click on the user to which the credential was enrolled.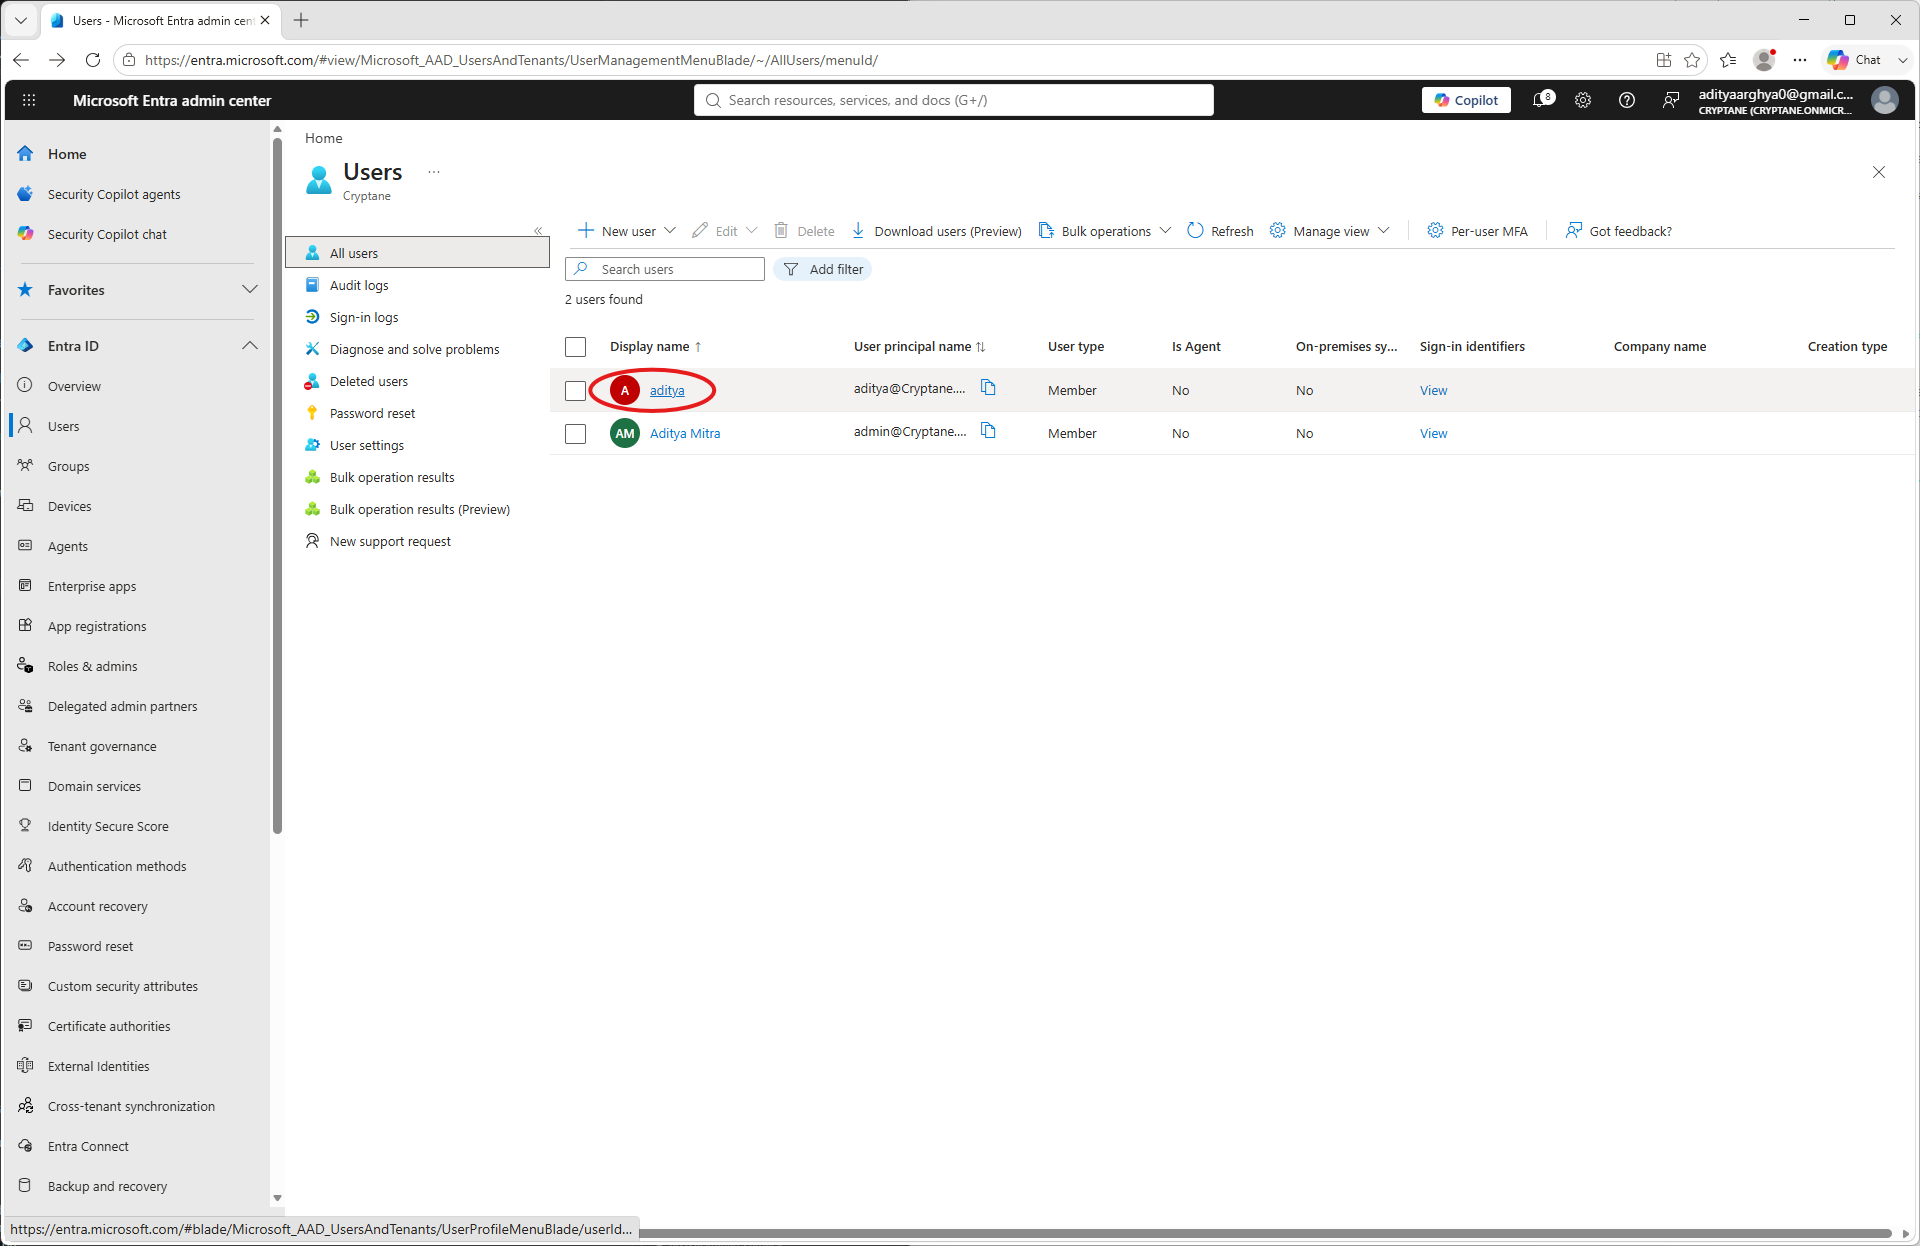
Click on Authentication methods on the user blade.
De geregistreerde inloggegevens, met de eerste 5 tekens van de Nitrokey-UUID, worden weergegeven. U kunt op de drie puntjes klikken en vervolgens op ‘Details weergeven’ om gedetailleerde informatie over de geregistreerde inloggegevens te bekijken.
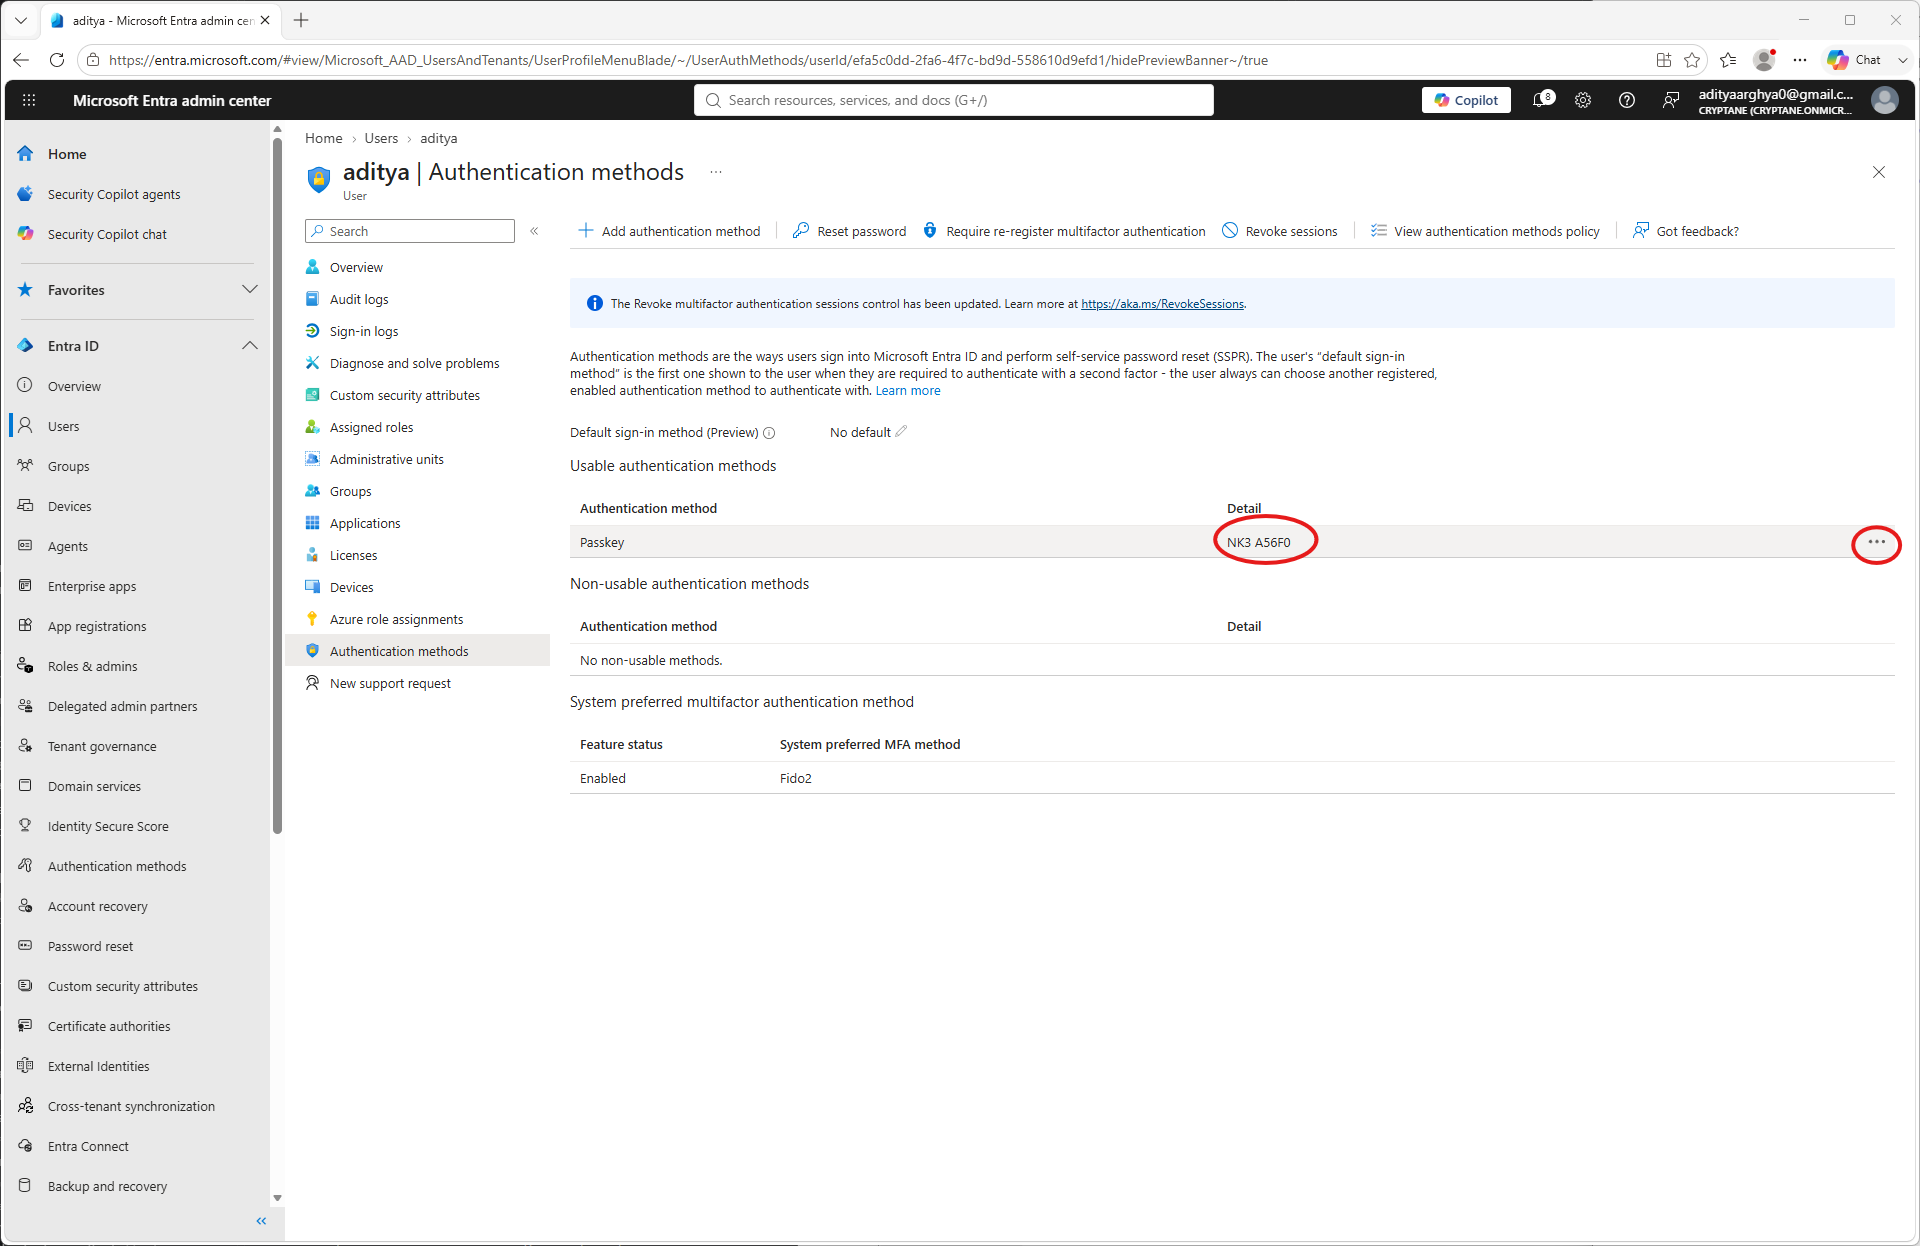
Er zou aanvullende informatie over de referentie te zien zijn. U kunt deze controleren.