ファクトリーリセット
工場出荷時設定へのリセットを行う理由
Your Nitrokey is locked (e.g. due to multiple incorrect PIN entries)
Nitrokeyを紛失した場合(この場合、まず新しいNitrokeyが必要となります。)
You have installed an operating system yourself (e.g. after changing the hard disk)
オペレーティングシステムが起動しない
警告
端末をリセットすると、すべてのデータが失われます。そのため、リセットを実行する前に、データをバックアップしてください。
注釈
バージョン1.4までのファームウェアに限ります
手順
任意のUSBフラッシュドライブをNitroPadに接続します。(セキュリティキーの保存にはUSBメモリーが必要です。)
NitrokeyをNitroPadに接続します。
NitroPadの電源を入れる。
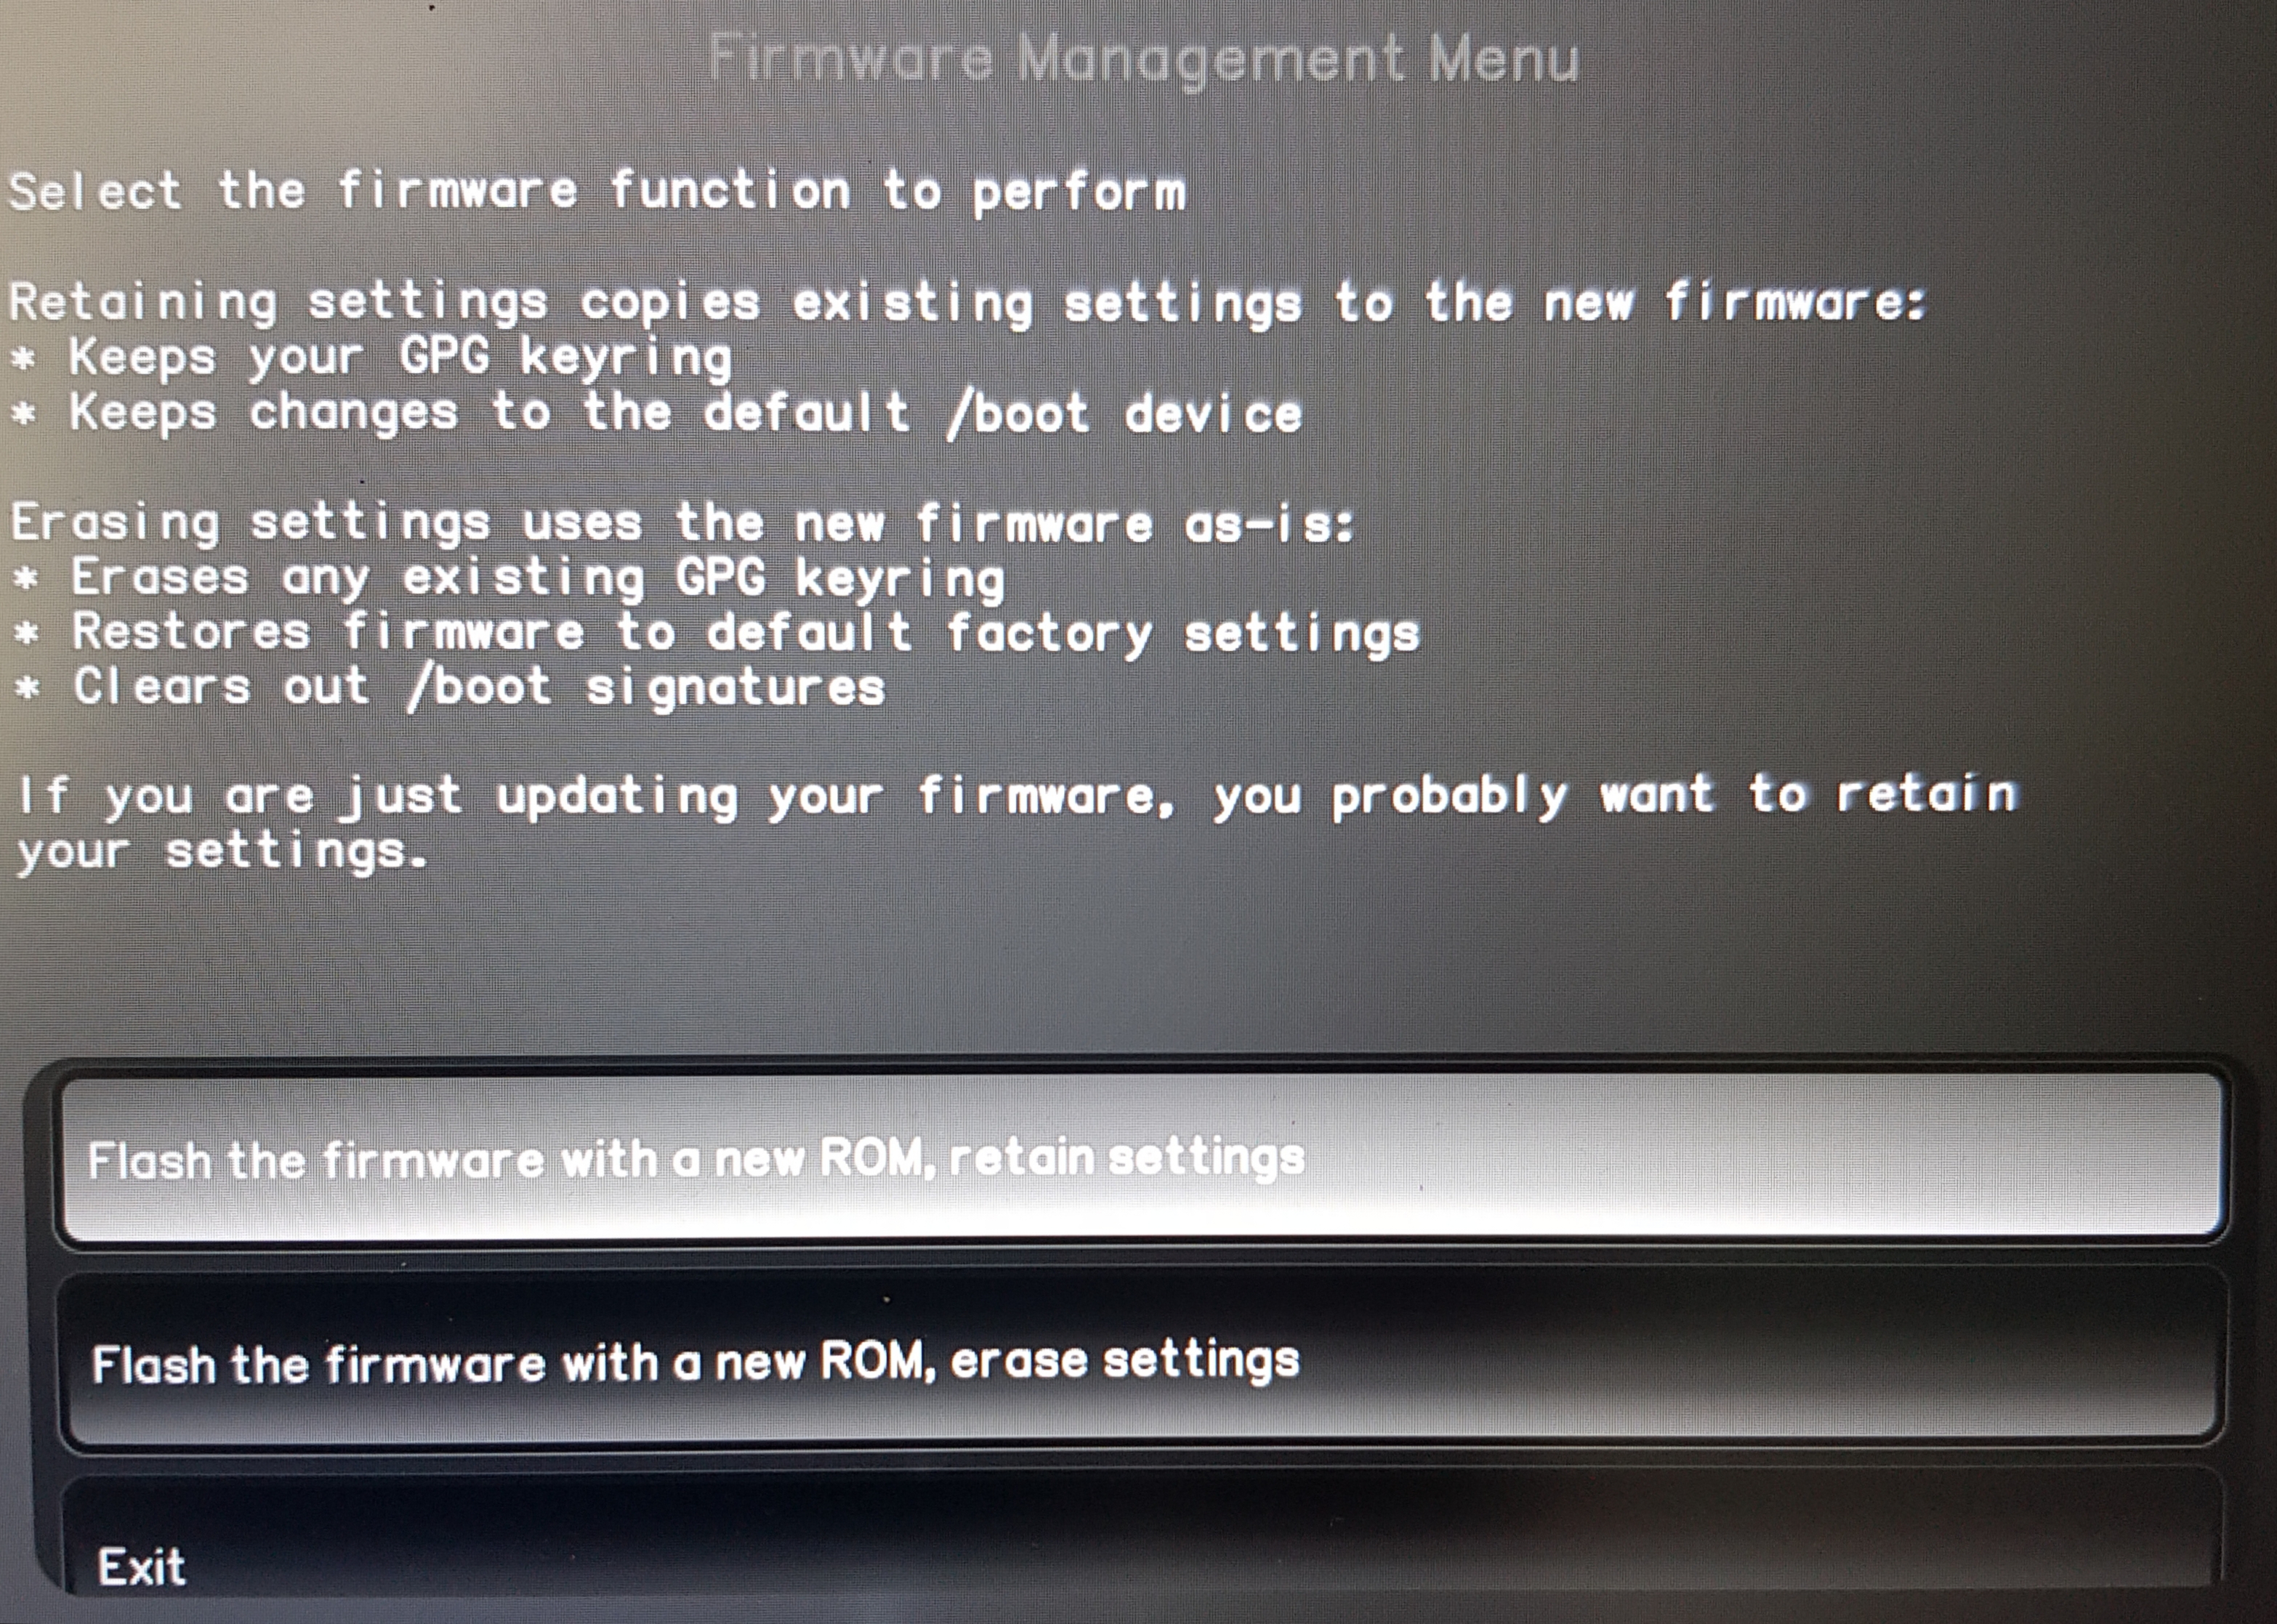
オプション」を選択します。
OEM-Factory Reset "を選択します。
警告
端末をリセットすると、すべてのデータが失われます。そのため、リセットを実行する前に、データをバックアップしてください。
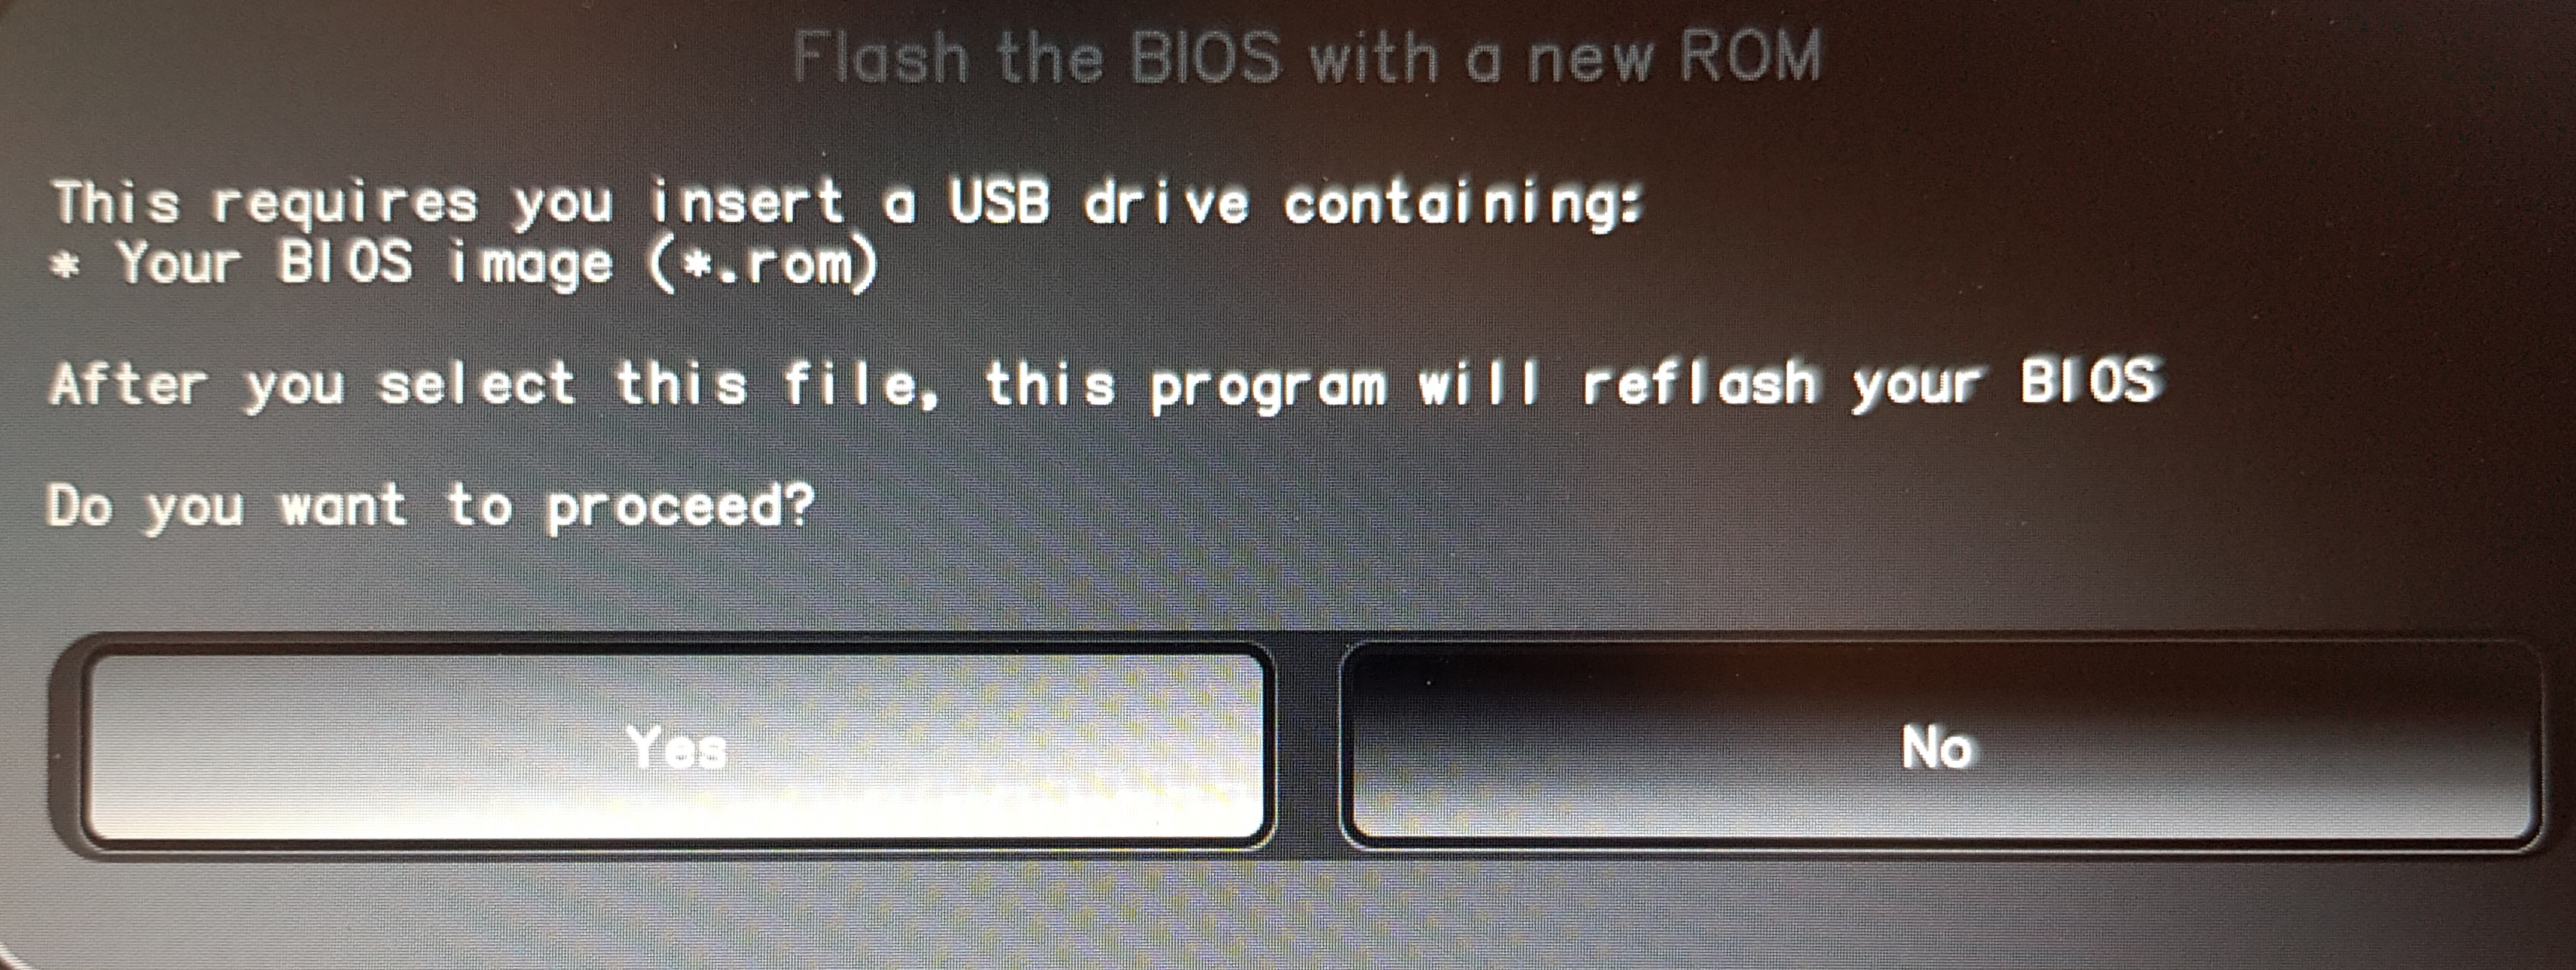
OEM Factory Reset "を "Continue "で確認します。
UserとAdmin/TPMのPINを自分で設定するかどうかを尋ねられます。Enterを押してPINを変更せずに続行します。
続いて、マニュアルのユーザー情報を追加するかどうかを尋ねられます。y」で確認し、名前とメールアドレスを入力します。
Would you like to set a custom password?[y/N]:
Would you like to set custom user Information for the GnPG key?[y/N]: y
Please enter the following Information...

Real name: "your name"
Email adress: "your email-adress"
Comment:

Checking for USB media...

New value of PCR[5]: xxxxxxxxxxxxxxxxxxxxxxxxxxxxxxxxxxxxxxxxxxxxxxxxxxx
[ xx.xxxxxx] sd 6:0:0:0: [sdb] No Caching mode page found
[ xx.xxxxxx] sd 6:0:0:0: [sdb] Assuming drive cache: write through

Checking for GPG Key...

Detecting and setting boot device...

Boot device set to /dev/sda1

Resetting TPM...

Resetting GPG Key...
(this will take a minute or two)
Nitrokey Storage を使用している場合、次にドライブを選択する必要があります。dev/sdb1、/dev/sdc、/dev/sdd1 が表示された場合は、/dev/sdd1 を選択します。dev/sdb1、/dev/sdc1、/dev/sdd が表示されている場合は、/dev/sdb1 を選択します。
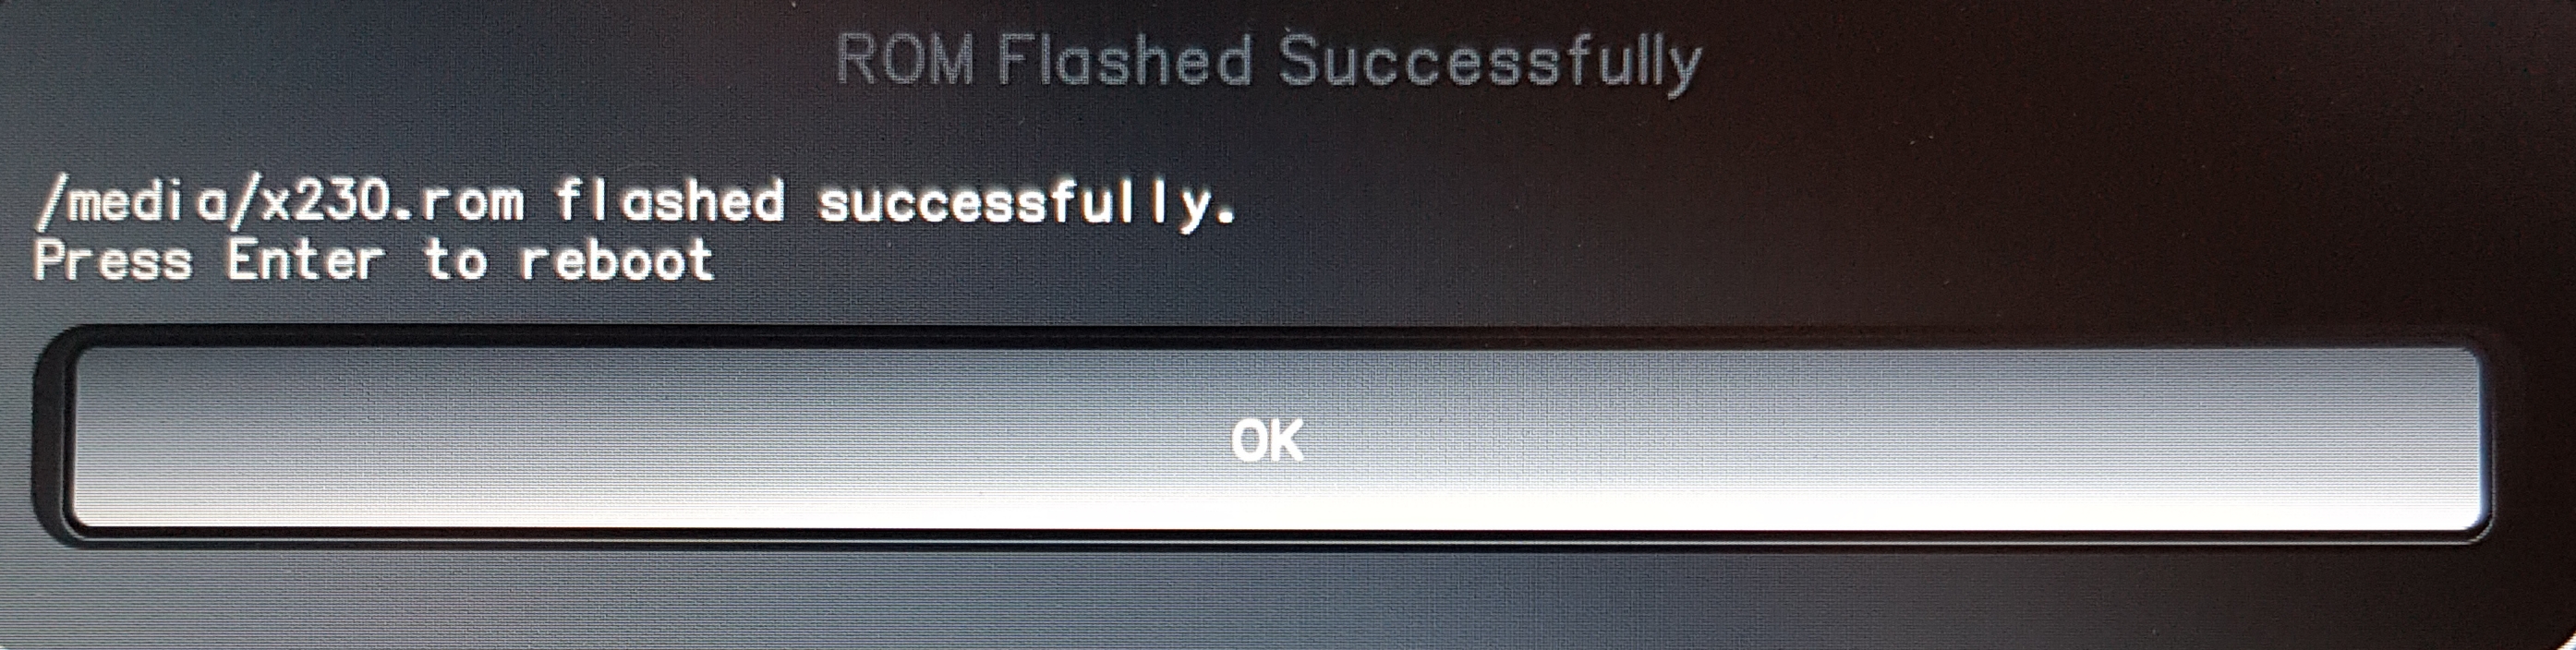
残りの設定は自動的に行われます。その後の再起動を確認します。
再起動後、OTPシークレットを作成する必要があります。Enterキーで処理を確認してください。
新しいOTPシークレットが作成されることを確認します。
プロンプトが表示されたら、Admin PINとTPMのパスワードを入力します。どちらもデフォルトでは「12345678」となっています。
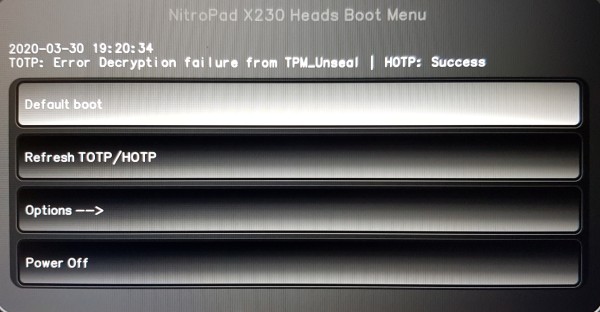
すると、スタートメニューが表示されます。

Enterを押すと「Default Boot」が開始されます。
注釈
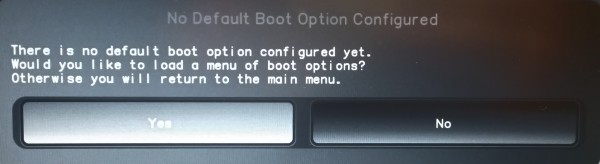
デフォルトが存在しないというメッセージが表示された場合は、「トラブルシューティング」の手順に従ってください。デフォルトのブートメニュー」をご覧ください。
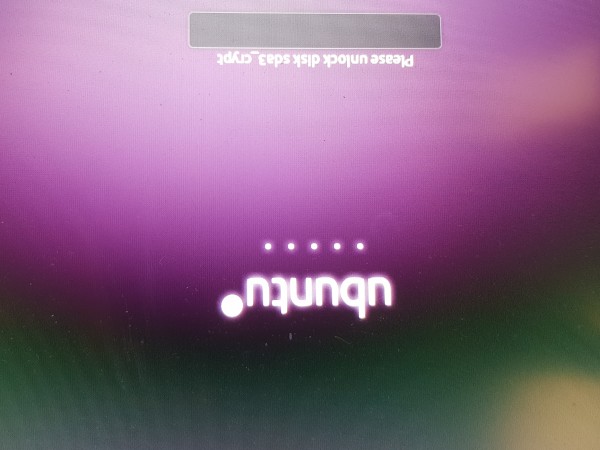
暗号化パスワードが要求されるまでOSが起動したら完了です。
Finally, copy the public PGP key from the data stick to your computer, e.g. to use it for e-mail encryption.