Firmware Update
Use this guide to update the Nitrokey Heads firmware on a NitroPad that already runs Heads. It also applies when an OEM factory reset has been performed but the TPM counter still needs to be reset.
Preparation
Connect the original power adapter and charge the battery above 70%. Keep both the adapter and battery connected throughout flashing and the first restart.
Important
On NitroPad NV41, V54 and V56, use the DC barrel-jack power adapter for updates that synchronize the Embedded Controller (EC) firmware. Do not rely on USB-C charging alone: an EC update can reset the USB Power Delivery controller before the adapter check, causing the update to fail.
Read the Nitrokey Heads release notes for upgrade requirements and model-specific issues. Download the ZIP archive for your exact model:
NitroPad T430:
firmware-nitropad-t430-[version].zipNitroPad X230:
firmware-nitropad-x230-[version].zipNitroPad NV41:
firmware-nitropad-nv41-[version].zipNitroPad NS50:
firmware-nitropad-ns50-[version].zipNitroPad V54:
firmware-nitropad-v54-[version].zipNitroPad V56:
firmware-nitropad-v56-[version].zip
Verify the archive as described below, then copy it to a USB drive. Keep the ZIP archive intact; do not extract it or rename another file to give it a ZIP extension. Select this archive in the Heads update menu.
Back up important data. If disk encryption is enabled, make sure you have the disk recovery passphrase before updating; it may be needed if TPM-based disk unlocking must be reconfigured.
Note
ZIP updates require an installed Heads version that supports them. If the archive is not accepted, or you are upgrading from very old firmware, check the release notes and contact Nitrokey support instead of guessing an upgrade path. If firmware was installed or changed manually, confirm that the BIOS and EC versions are compatible before proceeding. Upstream version numbers do not necessarily match Nitrokey release numbers.
Firmware Signature Check
Download both
sha256sumandsha256sum.sigfrom the same Nitrokey release as the firmware. Place these files and the ZIP archive in one directory on the computer used to download them.Import the signing key identified in the Nitrokey release notes. The releases signed by Markus Meissner use the key available from this keyserver entry. Check the key fingerprint against the release’s signing information.
From that directory, verify the checksum manifest’s signature:
gpg --verify sha256sum.sig sha256sum
The signature must be valid and belong to the expected signing key. Stop if verification fails.
Verify the downloaded archive against the authenticated manifest:
sha256sum --check --ignore-missing sha256sum
Confirm that your model-specific ZIP archive appears in the output with
OK. A valid manifest signature alone does not check the downloaded ZIP. Do not flash a file with a failed or missing checksum verification.
Boot Time After Update
The first restart can take much longer than normal. The EC firmware may be updated during this restart, and the system retrains its memory before Heads appears. The screen can remain completely black for about a minute or longer. More installed RAM can increase the delay; a system with 96 GB may take over two minutes. These timings are examples, not a maximum waiting time. Later starts should be faster once the memory training results are cached.
Warning
Do not interrupt flashing or the first restart because the screen is black. Do not hold the power button, unplug the adapter, disconnect either battery, or perform a reset while the update may still be running. Interrupting a firmware write, including an EC update during restart, can leave the NitroPad unable to start and require external hardware recovery.
A successful flash message does not mean that a subsequent EC update has finished. Keep power connected and wait patiently for Heads to appear. If there is no progress after an extended wait and you are unsure whether the update is still running, contact Nitrokey support before forcing a shutdown.
Procedure
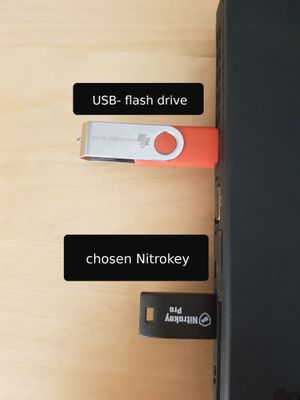
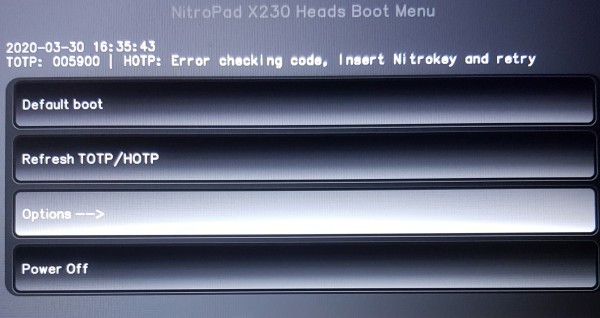
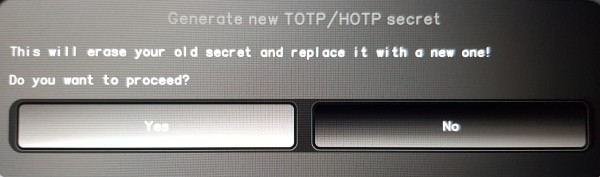
The first two screens below are optional. If they are absent, start at step 3. The screenshots illustrate the menu flow; filenames and screen details may differ in newer releases. Follow the ZIP instructions above.
If the first illustrated error screen appears, select “Ignore error and continue to default boot menu”.
If the second illustrated error screen appears, select “Ignore error and continue to default boot menu”.
Open “Options”.
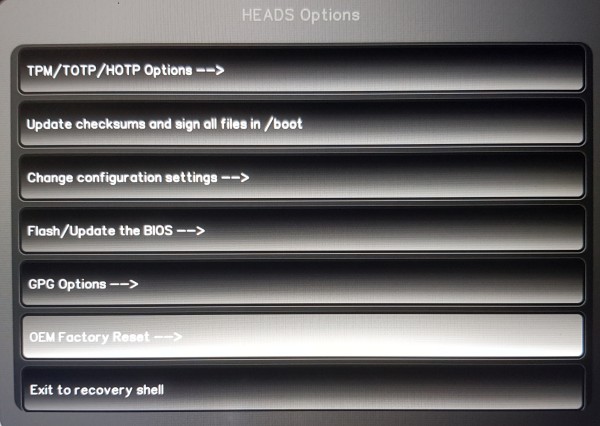
Choose “Flash/Update the BIOS”.
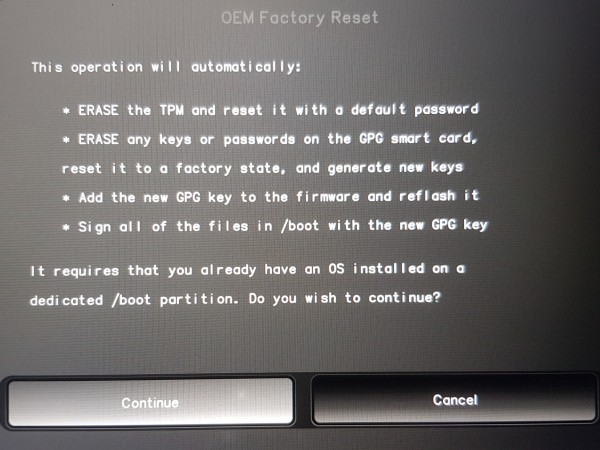
Confirm the first option.
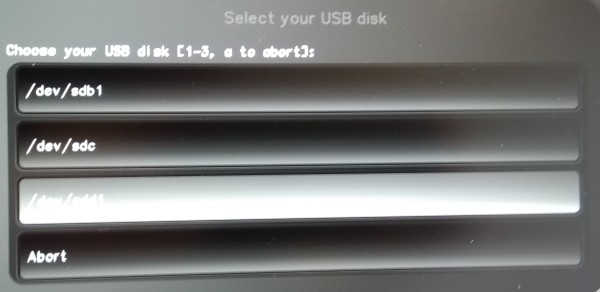
Press Enter to continue.
Select the verified, intact
.ziparchive for your NitroPad model.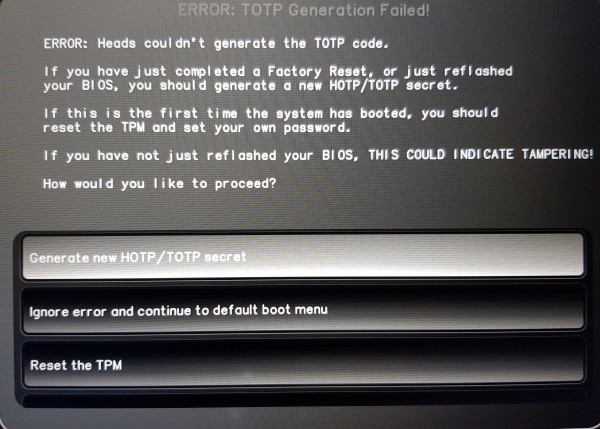
Confirm with Enter and allow flashing to finish. If an error is reported, record its exact text and contact Nitrokey support.
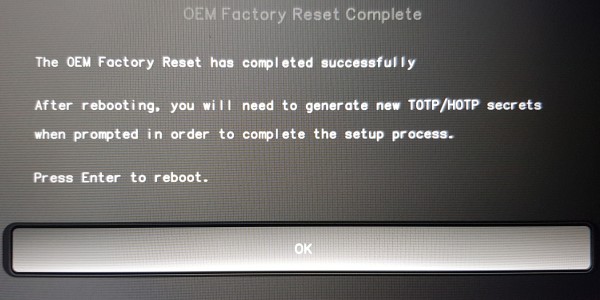
When prompted, press Enter to restart. Keep the power adapter and battery connected, and wait for Heads to reappear even if the screen stays black. Follow Boot Time After Update; do not force a power off.
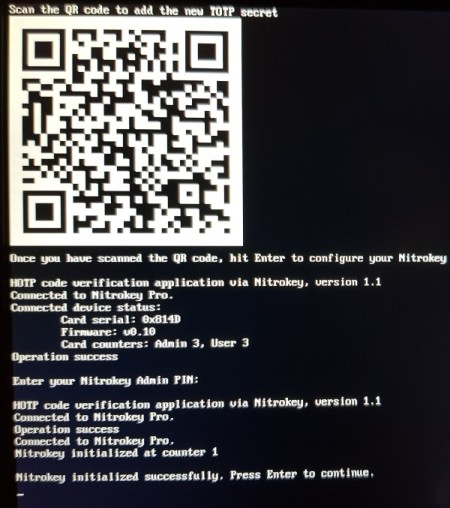
Once Heads has returned, complete the following steps as prompted.
Further Steps
Follow the Heads prompts to reseal secrets and update the TPM Disk Unlock Key
passphrase if one is configured. If ERROR: TOTP Generation Failed! appears,
consult Factory Reset Heads v2.0+ or, for older firmware, Factory Reset.
Use the procedure that matches your Heads version. A TPM factory reset changes
the security configuration; it is not a repair for a NitroPad that cannot power
on.
Note
A persistent hang at the displayed Heads boot splash has been reported for NitroPad NV41. If it remains after the update has completed, contact Nitrokey support for model-specific guidance. Do not apply repeated forced restarts to a black screen during an EC update or memory training, particularly on NitroPad V54 and V56.
Troubleshooting
First identify the symptom: no power or charging indicators, power with a black screen, or Heads starting but the operating system failing to boot. The checks below apply to NitroPad running Nitrokey Heads. Hardware layouts differ between models; use the correct model’s disassembly instructions.
Important
On the first restart after an update, follow Boot Time After Update before attempting troubleshooting. The reset and hardware checks below are only for a device whose update has finished or which support has confirmed is no longer updating.
No Power or Charging Indicators
Check the wall outlet, adapter, cable and DC plug. Inspect the cable and charging socket for damage, debris or a loose connection. Disconnect power before inspecting the socket; do not insert metal objects.
If available, try a known-working, compatible adapter. Match the required voltage, polarity, connector and power rating; do not use an arbitrary laptop adapter. Use the original DC barrel-jack adapter for NV41, V54 and V56 firmware updates, as described in Preparation.
If the battery may be empty, allow at least 30 minutes of charging before trying to start the NitroPad again. If it can start, check the operating system’s battery status to distinguish a missing adapter from a detected adapter that is not charging.
To try a power reset after the update has stopped: turn the NitroPad off, unplug the adapter and remove external USB devices. Hold the power button for 30 seconds, release it, reconnect the adapter and try starting once.
If the problem persists, use the CMOS reset below if you can safely access the connectors, or contact Nitrokey support.
Missing LEDs alone do not establish whether the firmware or hardware is faulty, and do not prove that the SSDs have been damaged. Support may need to check the power circuitry as well as the BIOS and EC firmware.
Power Is Present but the Screen Stays Black
Exclude the normal first-start delay described above and confirm that power and the battery are available.
Once the update is no longer running, test an external display over HDMI. If the external screen works, the internal display or its connection may be the problem. A compatible USB-C display or dock can also help, where supported by the model and firmware. No external picture alone does not prove that the motherboard is faulty.
Try the CMOS reset below.
If you can safely work inside the NitroPad, disconnect the adapter and main battery before reinserting the RAM. With two modules, test one module at a time, reconnecting the battery and adapter for each start. With one module, test the other slot. Allow time for memory training after each change; the hardware troubleshooting guide suggests allowing about 30 minutes for a single-module trial before changing the configuration again.
If there is still no progress, contact Nitrokey support before attempting external firmware recovery or replacing hardware.
Heads Starts but the Operating System Does Not
If the Heads menu is visible, first address any reported TPM, signature or disk unlocking error using the Heads prompts and the matching Nitrokey guide. Check that the SSD is detected and use Default Boot to select the appropriate operating system boot option.
If the operating system or its bootloader is damaged, use its recovery tools. Reinstallation is a last resort after backing up recoverable data; it can erase the drive. Reinstalling an operating system cannot repair a NitroPad that does not power on or cannot reach Heads.
CMOS Reset
A CMOS reset clears stored firmware settings. It does not rewrite corrupted BIOS or EC firmware, and is different from a Heads TPM factory reset.
Ensure that no firmware update is running. Turn off the NitroPad, unplug the power adapter and disconnect external devices.
Open the device according to its model-specific instructions and disconnect the main battery. If you cannot safely identify or access the connectors, ask Nitrokey support to perform the reset.
Disconnect the CMOS battery and leave the adapter, main battery and CMOS battery disconnected for 30 minutes.
Reconnect the CMOS battery and main battery, close the device, then reconnect the adapter. Wait another five minutes before attempting to power on.
Try starting once and allow time for memory training. If the problem remains, stop repeating resets and contact Nitrokey support.
External Firmware Recovery and Support
If the checks above fail, recovery may require externally programming the BIOS and/or EC. These are separate firmware components and must have compatible versions. A CMOS reset or reinstalling the operating system cannot substitute for repairing corrupted firmware.
External BIOS programming, for example with a suitable CH341A setup, is an advanced repair requiring the correct Nitrokey Heads image, chip voltage and connector for the model. Before external BIOS programming, disconnect the adapter, main battery and CMOS battery according to the model’s recovery procedure. EC recovery has its own connection and power requirements; do not apply the BIOS procedure to it. Ask Nitrokey support for the appropriate recovery or repair process before flashing. A hardware fault may instead require component or motherboard repair.
When contacting Nitrokey support, include:
The NitroPad model, serial number and order reference.
The previously installed firmware version, if known, and the selected ZIP filename and release version.
Any error message, whether flashing reported success, and what happened during the first restart, including how long you waited.
The power adapter used, battery condition, LEDs and fan behaviour.
The troubleshooting steps already attempted.
Reference Guides
The Heads update and first-start guidance above is based on the upstream Heads update guide and the platform-specific Heads update notes. Firmware downloads for this procedure come from the Nitrokey releases linked in Preparation.
The hardware checks are adapted for NitroPad with Nitrokey Heads from these guides. Use the Heads-specific instructions on this page for boot selection, security prompts and firmware recovery: