Recuperação do sistema
The following describes the recovery process for the NetHSM system software. These instructions are only applicable if the API is inoperable, e.g. not responding to API requests. In the case of an operable API perform a factory reset instead. Follow the instructions precisely to prevent any accidental deletion of data.
Importante
A recuperação do sistema só funciona se a tabela de partições GUID (GPT) e as próprias partições no disco não estiverem corrompidas. Uma corrupção pode ser indicada pela seguinte mensagem durante o arranque.
Booting 'NetHSM automatic boot (USB or primary system)'

GRUB: No valid configuration found on (usb0).
GRUB: No valid configuration found on (ahci0,gpt1).

GRUB: Booting failed. System will switch off in 10 second.
Perguntas frequentes (FAQ)
The system recovery can be performed as follows.
Transfira a imagem do instalador que termina com …installer.img.zip a partir da página de transferência privada fornecida.
Importante
Descarregue a imagem do instalador da mesma versão que estava instalada no momento da corrupção. Não é suportado um downgrade ou uma atualização que salte versões.
Descompacte a imagem do instalador.
Grave a imagem do instalador numa unidade flash USB. Para isso pode utilizar a ferramenta gráfica balenaEtcher. No Linux pode também utilizar a ferramenta de linha de comandos dd. Ignore qualquer aviso de que está a faltar uma tabela de partições.
Connect the USB flash drive with any USB port of the NetHSM.
Nota
Algumas unidades USB são incompatíveis com o NetHSM. Isto faz com que o NetHSM não as reconheça como um suporte de arranque. No caso de o NetHSM não arrancar a partir da unidade USB ligada, tente um modelo de unidade USB diferente.
Optionally: Connect a keyboard and monitor with the NetHSM.
Make sure the system is turned off, but connected to power.
Turn the NetHSM on by pressing the power button on the front.
Now the software is going to be installed. Wait for ca. one minute until the NetHSM shuts down. Optionally, if you have a monitor connected: When you see the boot menu, select NetHSM automatic boot (USB or primary system) in the first menu and then NetHSM Software Installer in the second menu.
Aviso
NÃO selecione
NetHSM Factory Reset - DELETES ALL DATA!no menu. Isto irá limpar irrecuperavelmente os dados no disco.
Download the installer image ending with
installer.img.zipfrom the provided private download page.Importante
Descarregue a imagem do instalador da mesma versão que estava instalada no momento da corrupção. Não é suportado um downgrade ou uma atualização que salte versões.
Certifique-se de que o sistema está desligado, mas ligado à corrente, e que o botão de alimentação na parte posterior está ligado.
Connect the BMC network port with a network cable.
Veja a imagem abaixo para identificar a porta de rede BMC.
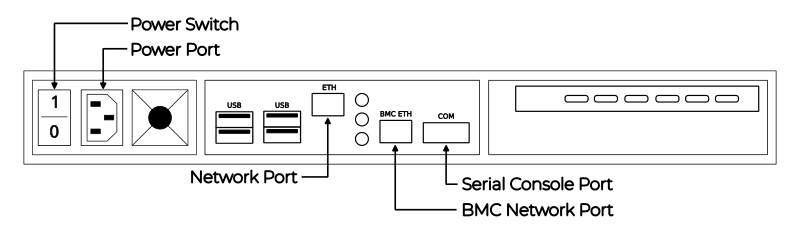
Parte de trás do servidor
Por padrão, o BMC aguardará a atribuição de um endereço com o DHCP. Se o DHCP não estiver disponível, o endereço local do link pode ser determinado com o Nmap. O comando
nmap <network-in-cidr-notation> -p 80 --openretornará uma lista de hosts com a porta 80 aberta.Abra o site da BMC em um navegador da Web, usando o endereço IP determinado na etapa anterior. Para fazer login, as credenciais padrão são o nome de usuário
bmc_admine a senha8mCU$3r0nE.Importante
Caso encontre um erro de login não autorizado na interface da Web do BMC, pode ser três dos seguintes problemas.
Nome de utilizador ou palavra-passe errados.
Durante a reposição de fábrica, o BMC gera um novo certificado TLS. Alguns navegadores da Web falham com erros de conexão quando o certificado é alterado enquanto a mesma janela permanece aberta. Feche a janela do navegador da Web e abra uma nova.
Por vezes, o software BMC apresenta o problema de não aceitar um cookie de sessão mais antigo que ainda se encontra na cache do navegador Web. Limpe a cache do navegador Web e tente novamente.
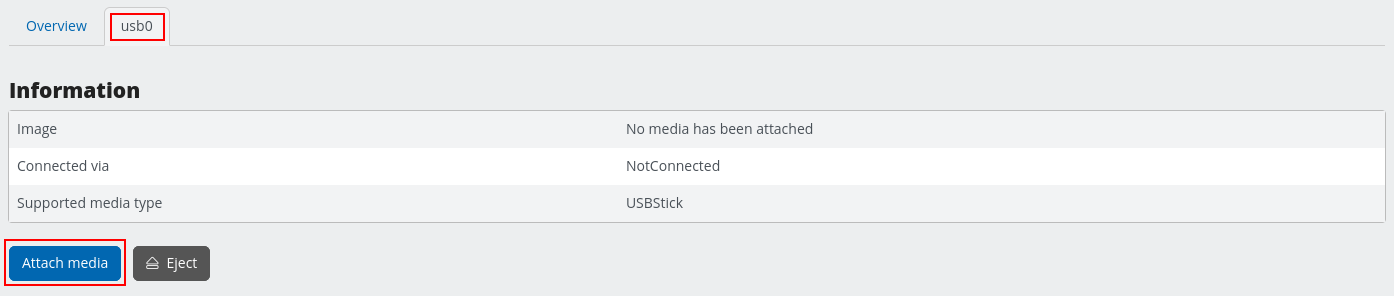
Montar a imagem do instalador descarregada clicando no menu da esquerda em FRU: Hermes CFL (with TPM) Nitrokey Config seguido de Virtual media no submenu. No meio, abra o separador usb0 e clique no botão Attach media.
Para mais pormenores, consultar <x id=»21»></x>esta documentação <x id=»41»></x><x id=»107»></x>.
Na caixa de diálogo de abertura, escolha Transmitir ficheiro local através do browser como o método de transferência ** . Clique no botão Browse… e escolha a imagem do instalador descarregada. Confirme a operação com o botão Submit.
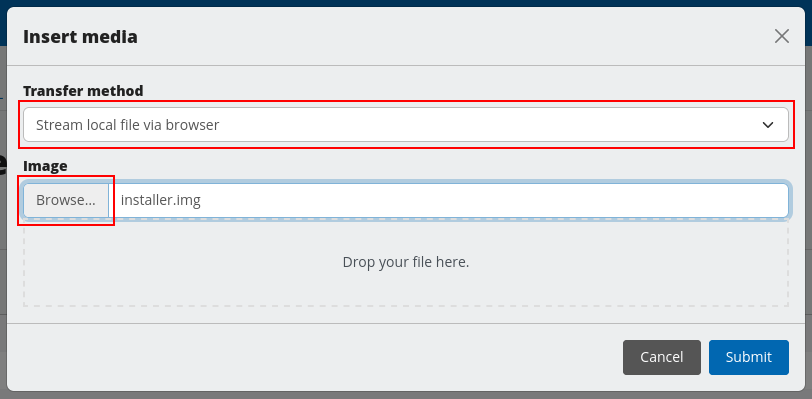
Menu BMC para selecionar a imagem USB
No menu da esquerda selecione FRU: Hermes CFL (com TPM) Nitrokey Config, e depois Remote KVM.
No meio, clique no botão Abrir uma janela KVM remota flutuante, no canto superior direito da caixa de saída VGA.
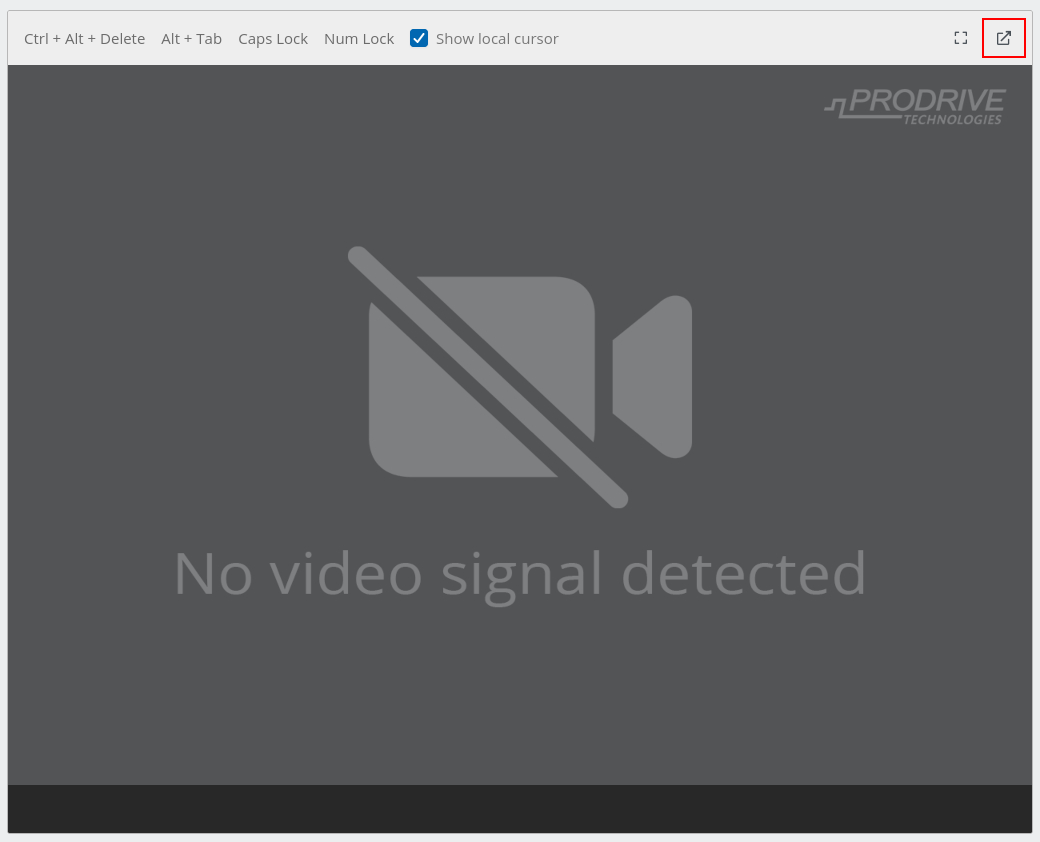
Vista da consola BMC KVM
Esta janela mostrar-lhe-á a saída gráfica do instalador do NetHSM. Mantenha esta segunda janela aberta juntamente com a janela principal do BMC.
Mudar para a vista Visão geral no topo do menu à esquerda.
Na caixa Override Boot Device, selecione USB_BMC-virtual_media no menu pendente junto a Select a Boot Device.
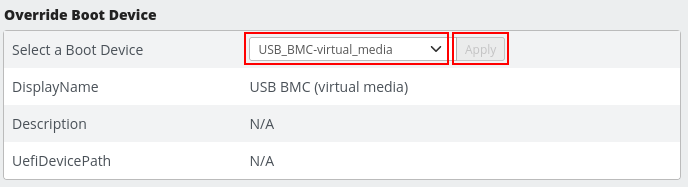
Definição do dispositivo de arranque BMC
Na caixa com o título FRU: Hermes CFL (with TPM) Nitrokey Config, selecione On no menu pendente junto a Power. Confirmar com o botão Apply.
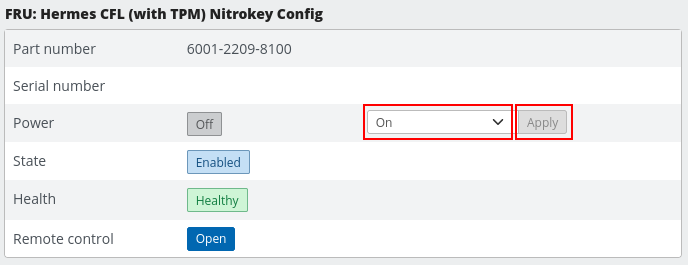
Configuração de arranque do BMC
Na janela anteriormente aberta Remote KVM pode agora ver o assistente de instalação.
A janela KVM mostra agora o diálogo de arranque. Confirme a seleção de
NetHSM automatic boot (USB or primary system)com a tecla Enter.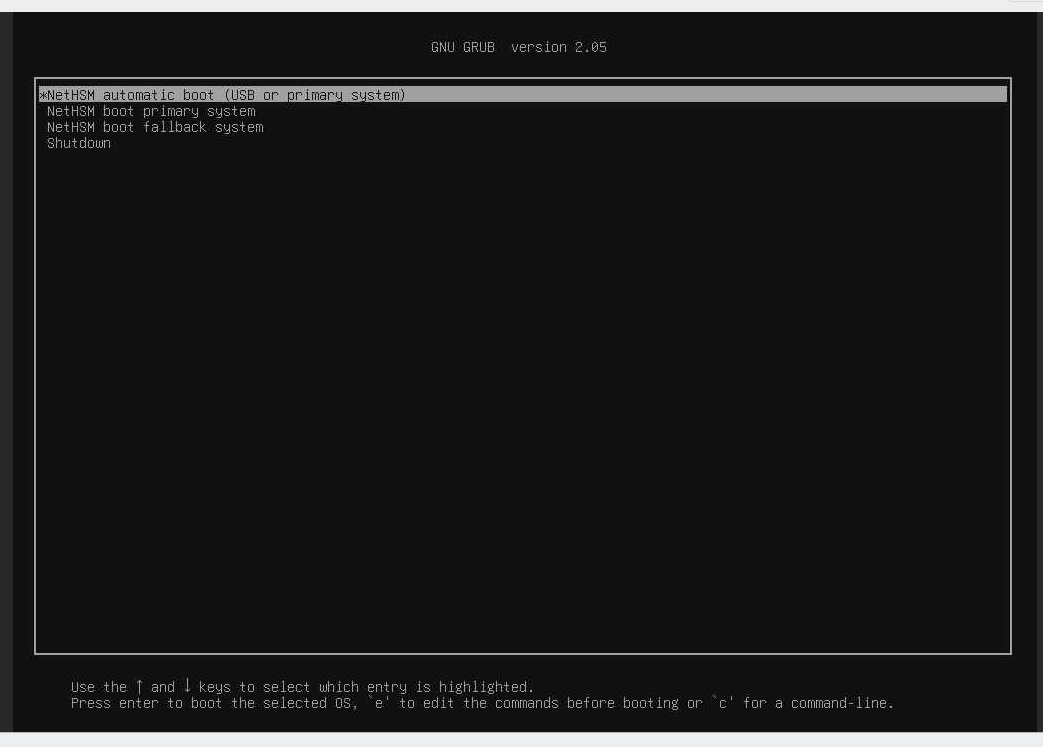
Seleção de arranque NetHSM na consola BMC KVM
No diálogo seguinte, confirmar a seleção de
NetHSM Software Installercom a tecla Enter.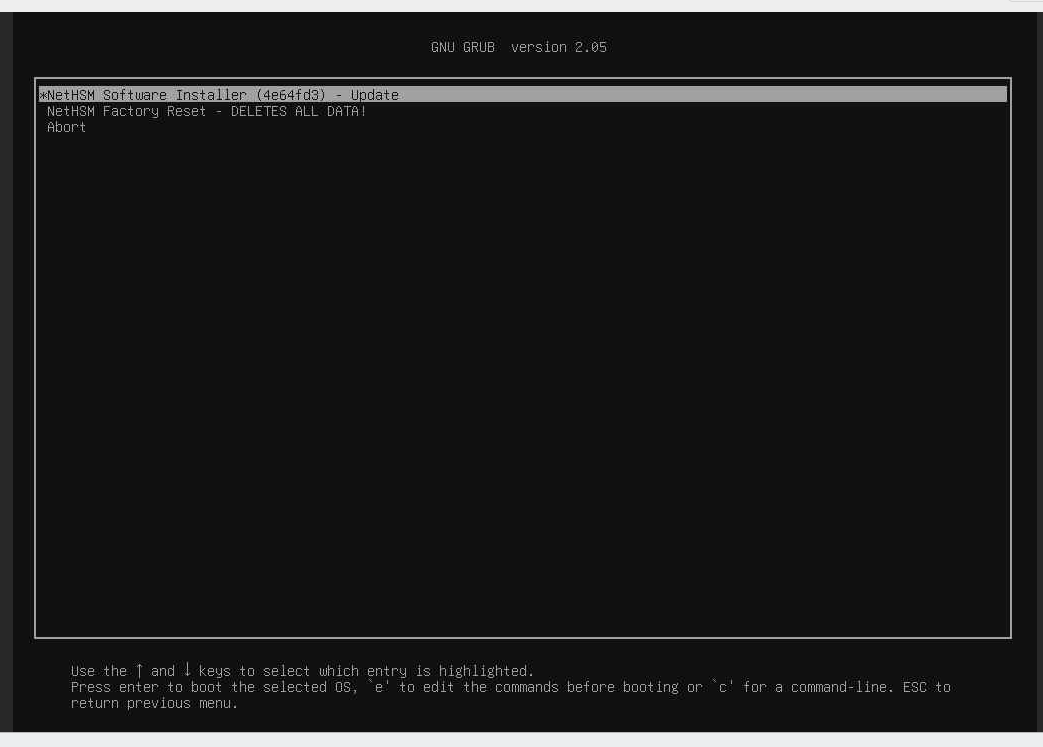
Seleção do instalador NetHSM na consola BMC KVM
Aviso
NÃO selecione
NetHSM Factory Reset - DELETES ALL DATA!no menu. Isto irá limpar irrecuperavelmente os dados no disco.
O instalador do NetHSM instala o software do sistema e desliga-o.