Replace Internal Hard-Drive
Warning
Please do this only, if you know what you are doing. By modifying the NextBox you void your warranty for at least the hardware of the NextBox. These steps are generally not covered by the support, you are modifying your NextBox at your own risk!
Prerequisites
Linux(-like) operating system
2.5’’ hard-drive with a max height of 15mm, most are 7mm
A user which can acquire root-rights using
sudoThe following commands must be available:
sudo,parted,mkfs.ext4,bashAt least a basic understanding about mounting / unmounting and shell-scripts (execution)
Phillips Screwdriver
Set up the ssh-access on your NextBox
Warning
The script which is used will acquire root rights to wipe the hard-drive you pass to the script. Be extremely careful to pass the correct device to the script, if you pass your system partition, this script will destroy your runnning OS! Any data on the passed hard-drive will inevitably be deleted!
Hint
Read the following steps completely and thoroughly before executing them, if you do not understand what a certain step means this might be an indication that you should not do this by yourself.
Prepare New Hard-Disk
Get your
nextbox.conffile from your original hard-disk using ssh, it is located on your NextBox inside the/srv/nextboxdirectorySave your
nextbox.confon your computerGet the following script: https://raw.githubusercontent.com/Nitrokey/nextbox/master/assembly/simple_prepare_harddrive.sh
Make the script executable:
chmod +x simple_prepare_harddrive.shConnect your new hard-disk to your computer
Determine your hard-disk’s device name (e.g.,
/dev/sdb) and make sure none of its partitions are mountedWarning
Again: think at least twice about the following step. Make sure you are referring to the correct hard-drive device (and NOT a partition, means
/dev/sdb1is wrong). The script will decline to do the operation on/dev/sdaas there are good chances this might be your system hard-disk, if you really need this you can comment out lines 23-26 inside the script.Run the script using the device name you have determined. Once prompted for your sudo-password please provide it to allow r/w access to the hard-drive:
$ ./simple_prepare_harddrive.sh <device-name>
Replace
<device-name>with the respective device name, for example/dev/sdb.Watch the script’s output for any errors, there should be none
At the end of the script you will be asked to mount the created partition and copy over the
nextbox.conf(to/nextbox) you copied in step 1. and 2., unmount the partition and you have successfully prepared your new hard-drive.
Replacement Guide
Inside the NextBox Nextcloud App go to “System Settings” and switch it off your NextBox using the “Poweroff” button
Once the Status LED is shortly off (not entirely, thus very dark) and the Ethernet port LEDs are off you can unplug all cables from your NextBox
Unscrew all 8 Phillips screws
Carefully remove the top-cover (as vertical as possible) first
Again carefully, vertically remove the bottom cover, now you see the so-called bridge
Unfold the USB-to-SATA cable and put the NextBox bridge upside down onto a electronics friendly surface like a desk as shown in the following image
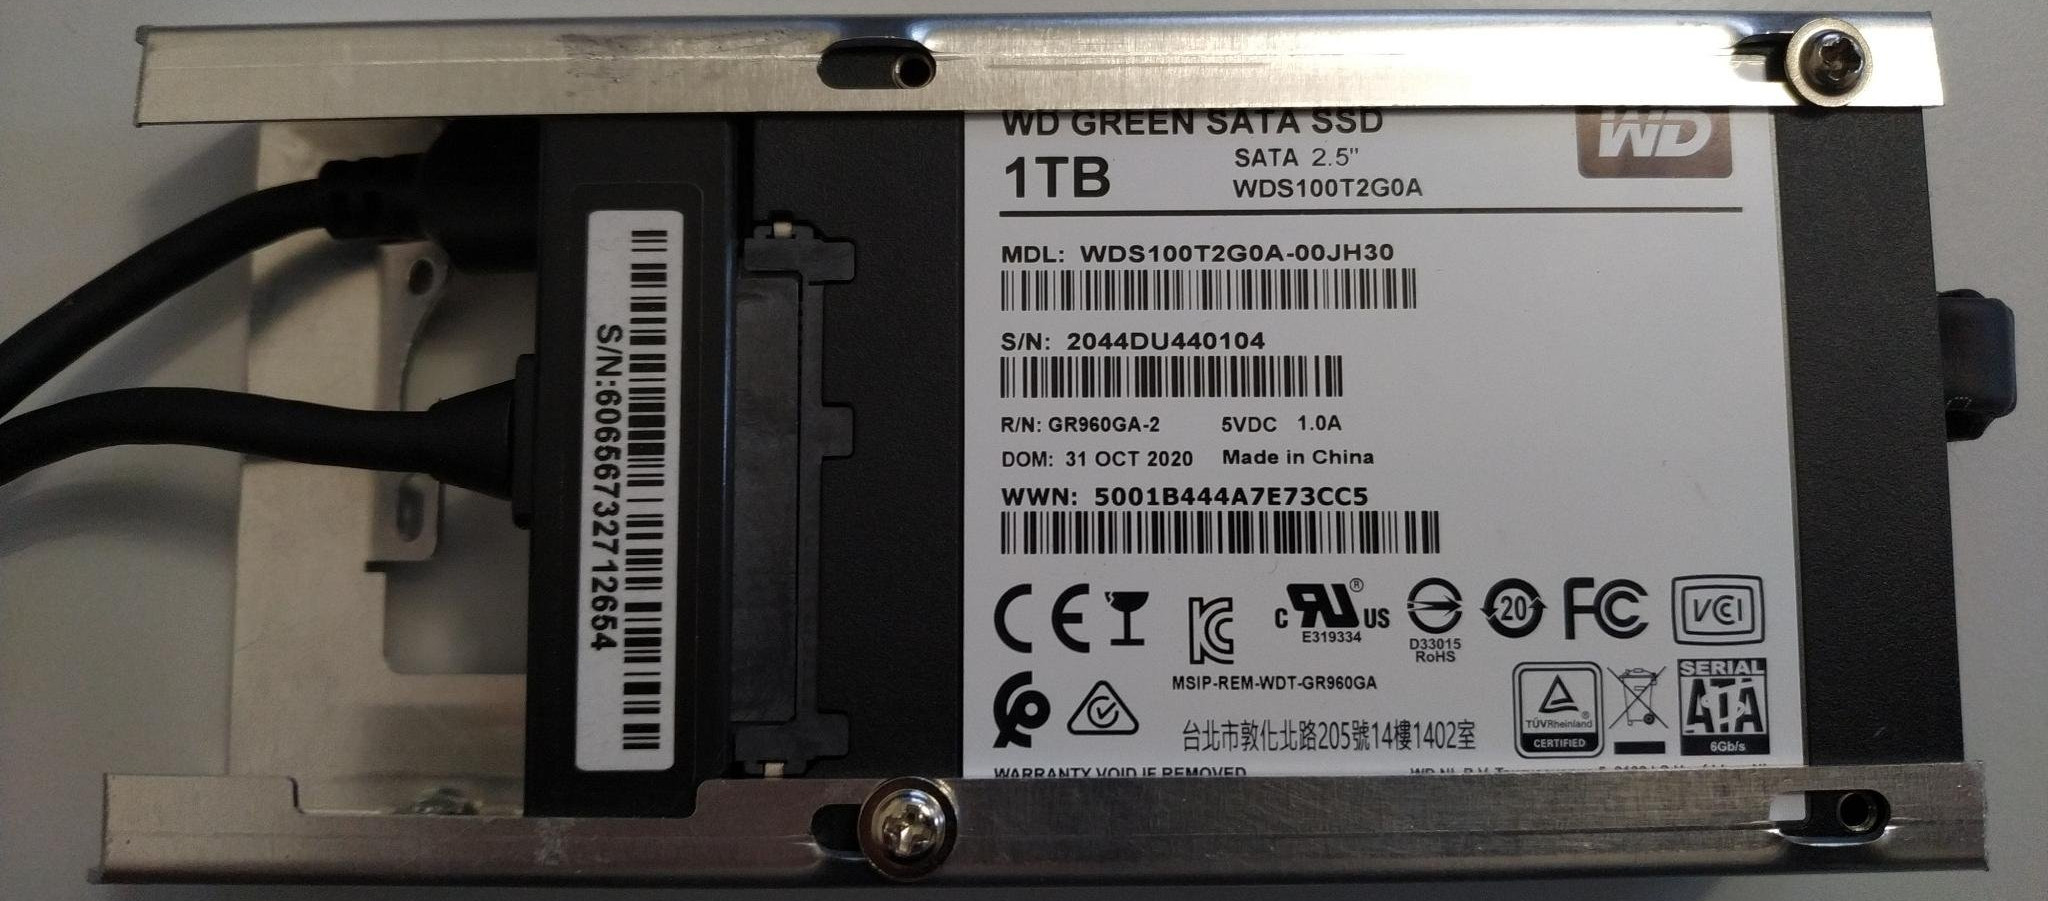
Unscrew the Phillips screws holding the hard-disk in position (the amount of screws may differ, depending on your hard-disk type) shown in the following image:
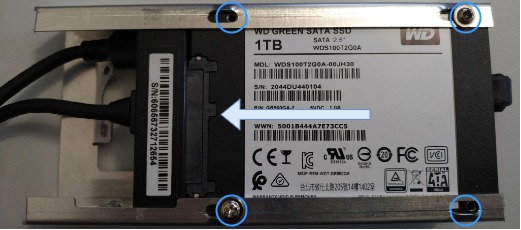
Once the screws are removed, push the hard-disk carefully towards the direction shown in the image above. Do not push it towards the other direction, you might damage the USB cable.
Remove the USB-to-SATA cable from the hard-drive
Warning
Avoid disconnecting the male-female USB connector to not change the position and bending of the cable. If you have to: be careful to keep the force as small as possible onto the 90° part of the USB extension cable.
Connect your previously prepared new hard-drive
Carefully slide your new hard-drive into the bridge and fix it into the right position using the previously removed screws
Fold the USB-to-SATA cable (in circles) into the open space behind the hard-disk.
Finally assemble your NextBox again in reverse order using steps 5. to 3.
On first boot after the assembly, give the NextBox enough time to boot and get all necessary packages from the internet. Make sure you have ethernet connected. You should expect a changing status LED (yellow shall be first) quite fast (less than 2 minutes). If the status LED does not change at all, it is likely that there is something wrong with your hard-drive wiring or contents.