Nitrokey Provisioning for Entra ID
Compatible Nitrokeys |
|||||||
|---|---|---|---|---|---|---|---|
✓ active |
✓ active |
⨯ inactive |
⨯ inactive |
⨯ inactive |
⨯ inactive |
⨯ inactive |
⨯ inactive |
The Nitrokey 3 and Nitrokey Passkey support provisioning credentials for Microsoft Entra for seamless employee on-boarding in enterprise scenarios.
Setup
A Microsoft Entra Application is required to allow for programmatic registration of user credentials. Here we offer you the guide to set up the same provided you have appropriate privileges for the same.
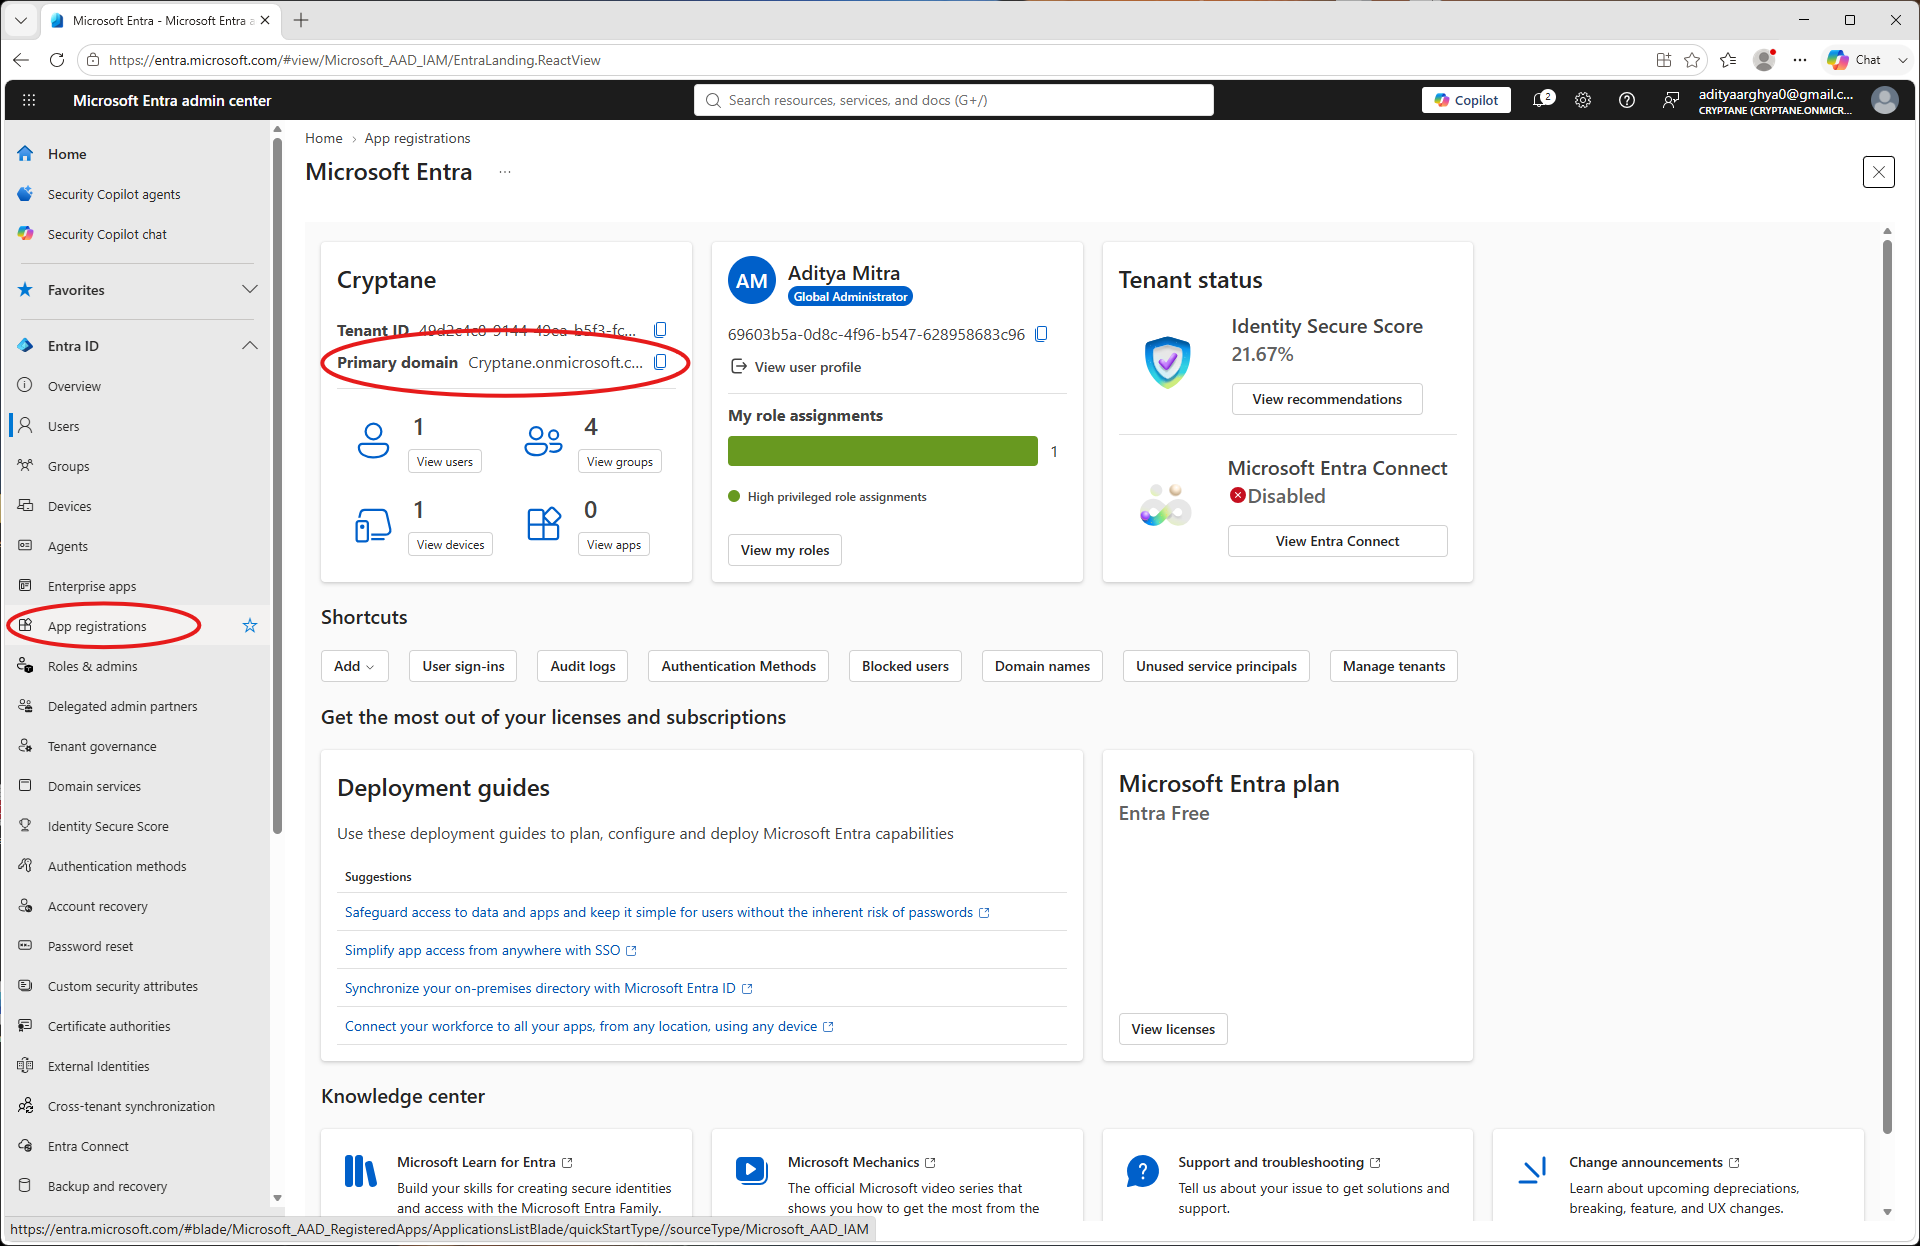
Login to Entra Admin portal. Take a note of the primary domain which you will need later. Go to App Registrations on the left blade.
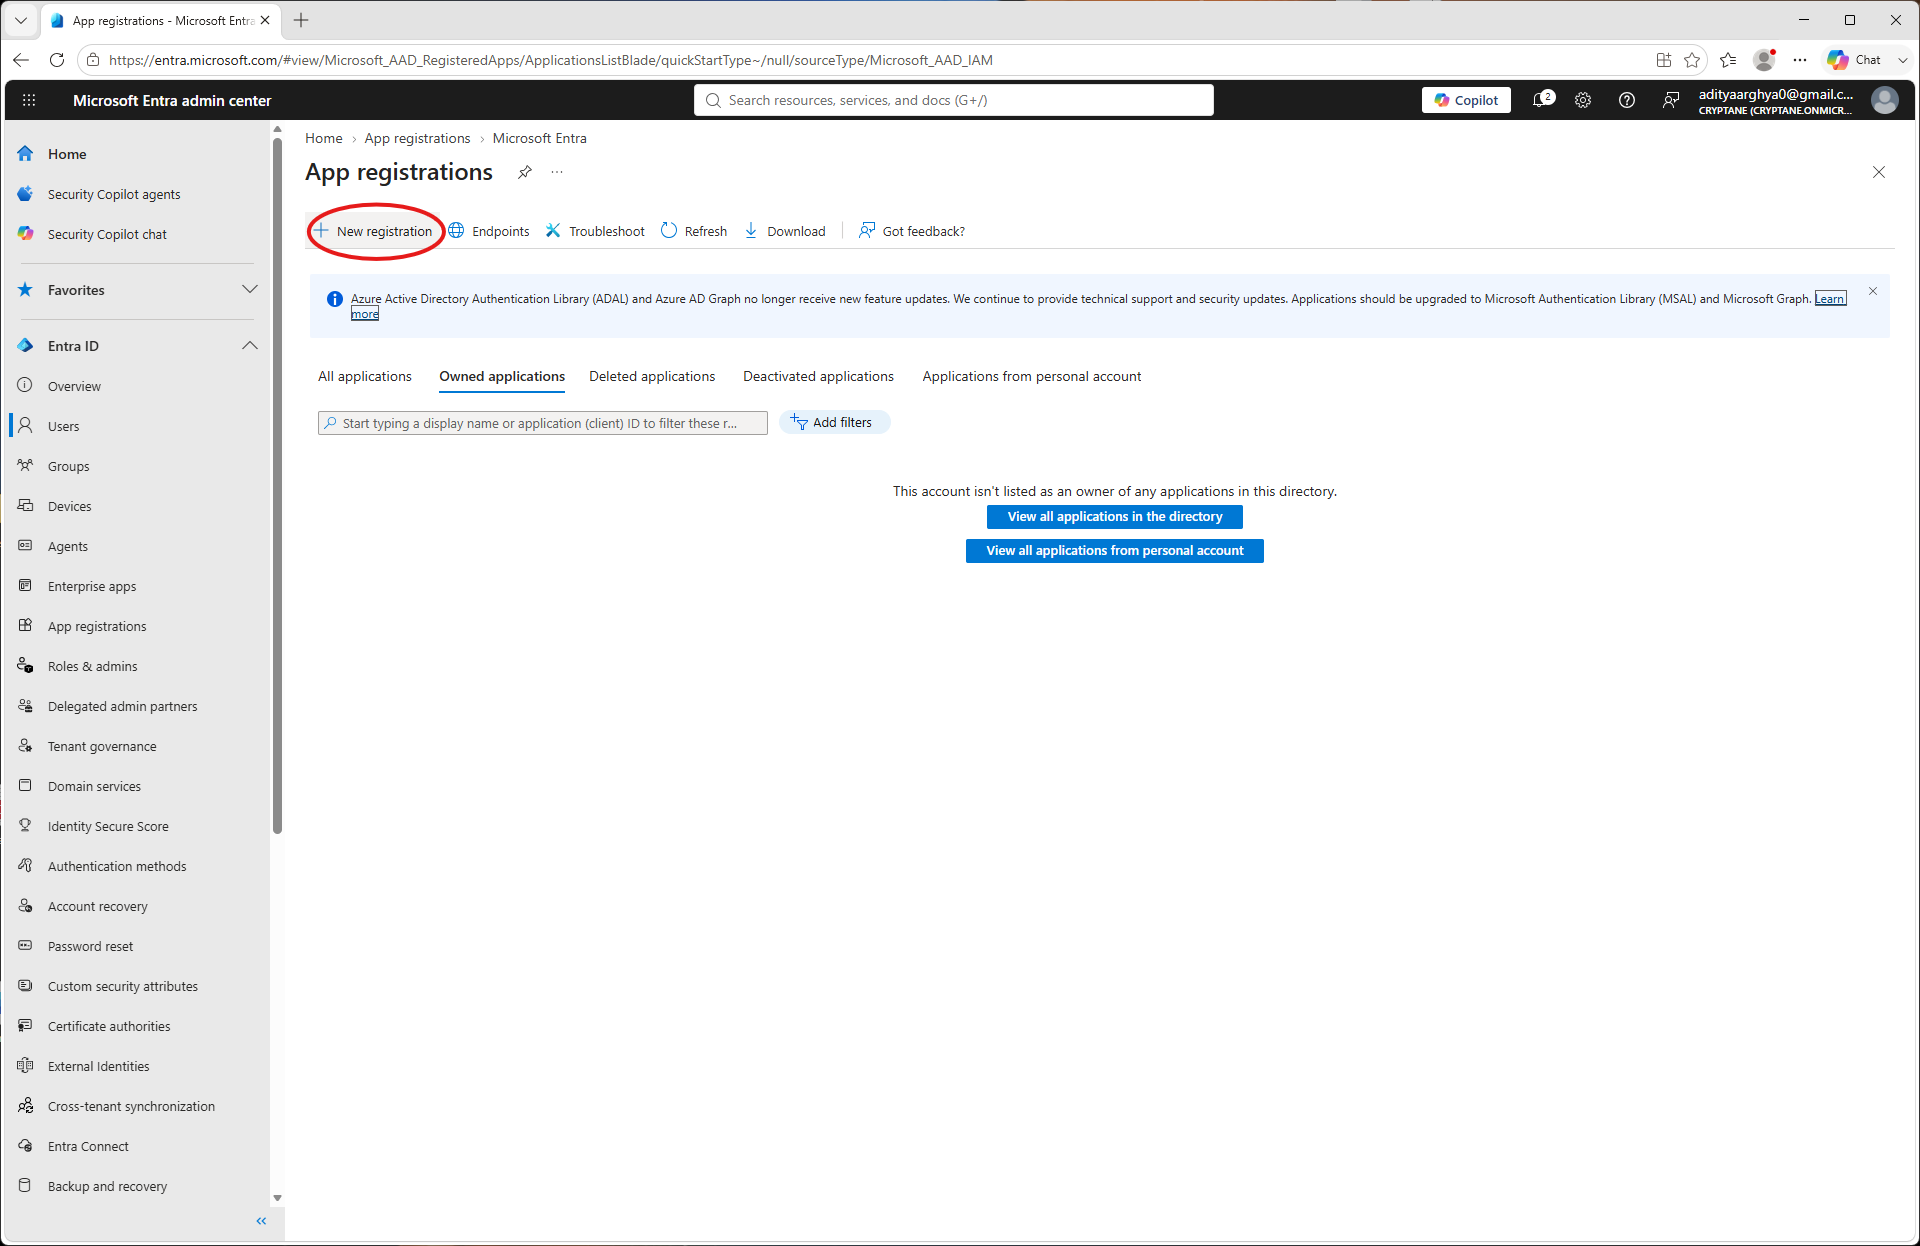
Select New registration.
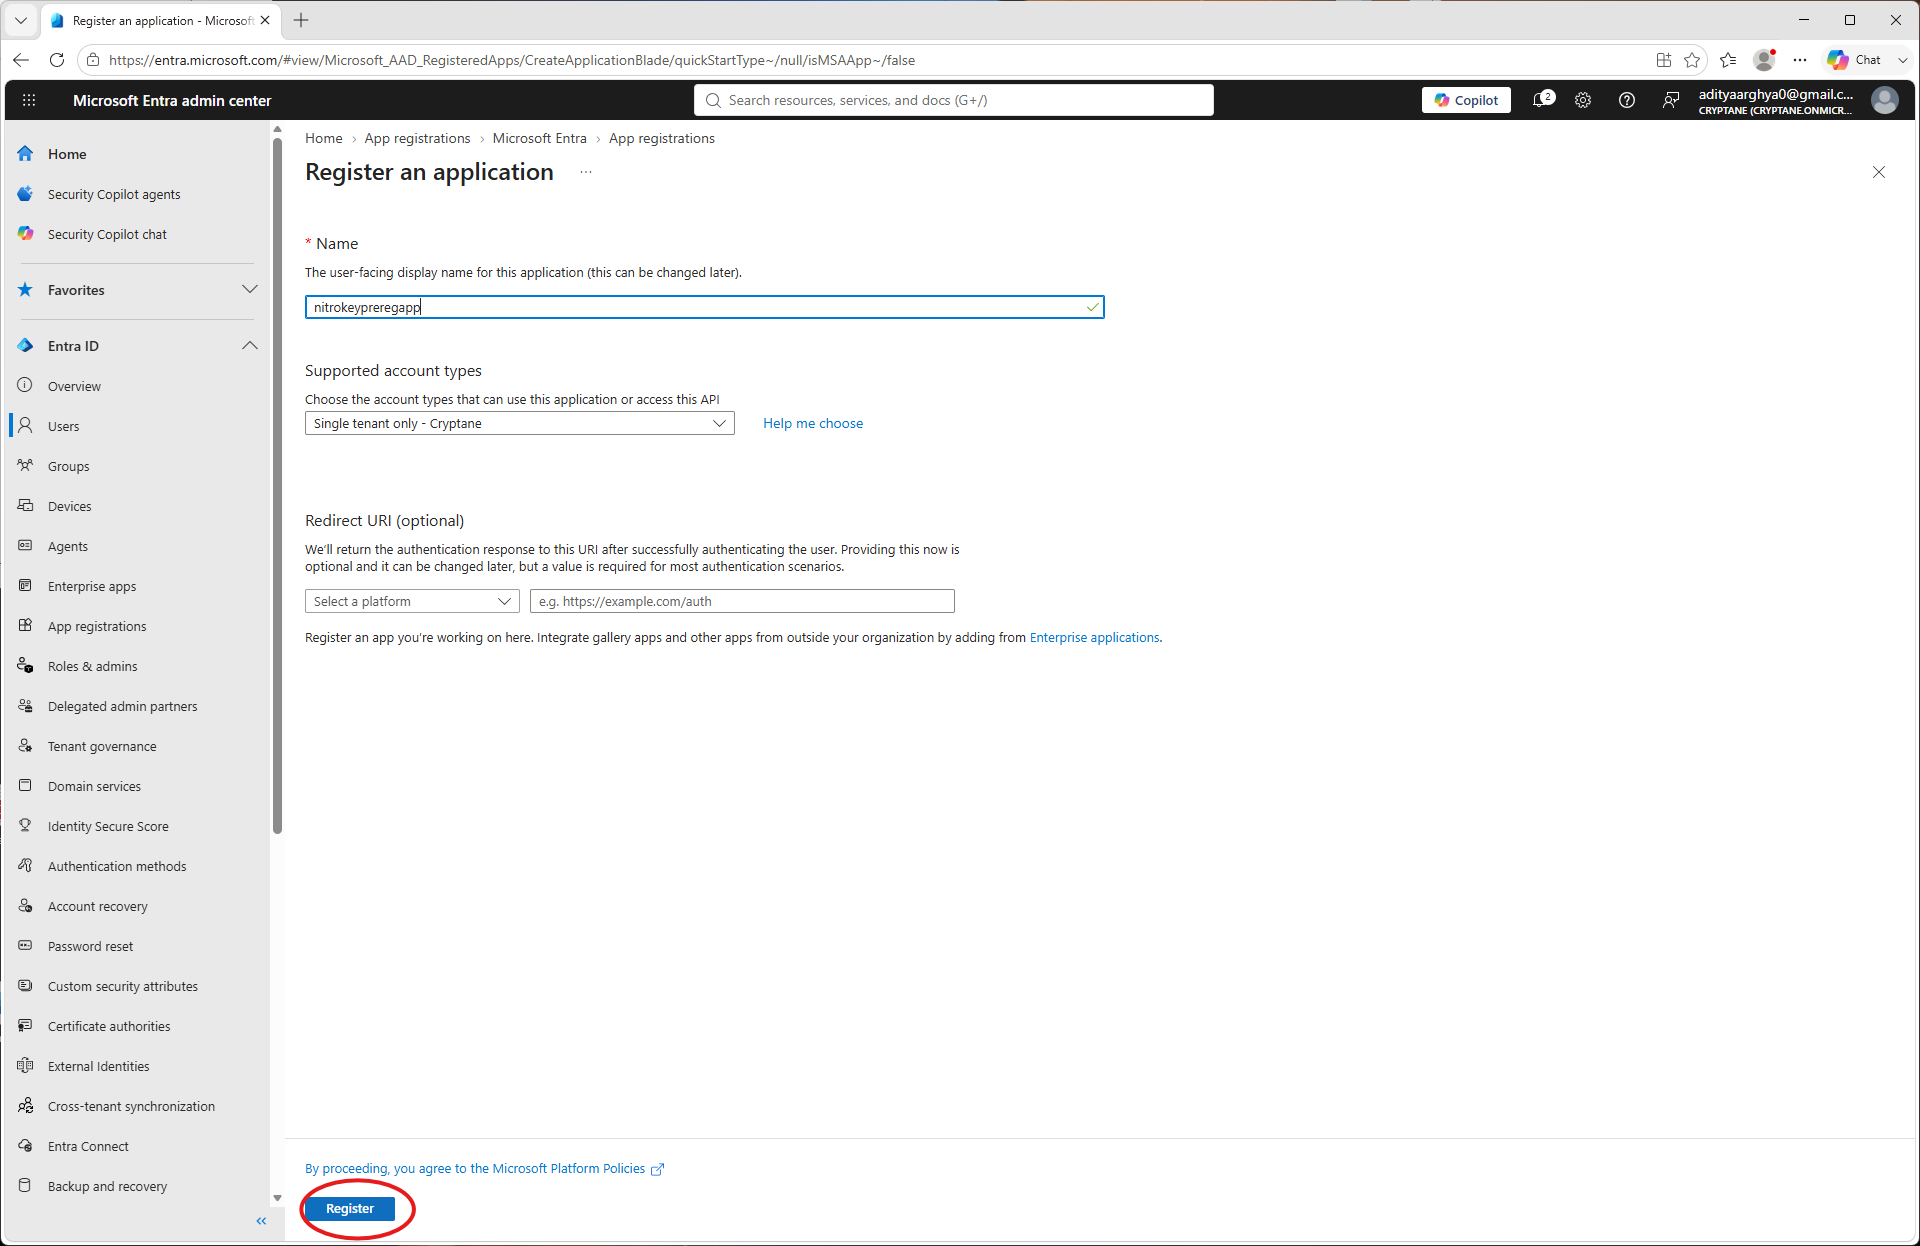
Create a new app and set a name. Click on ‘Register’.
Take a note of the Client ID and Tenant ID here. You will need it later. Go to API Permissions on the app blade.
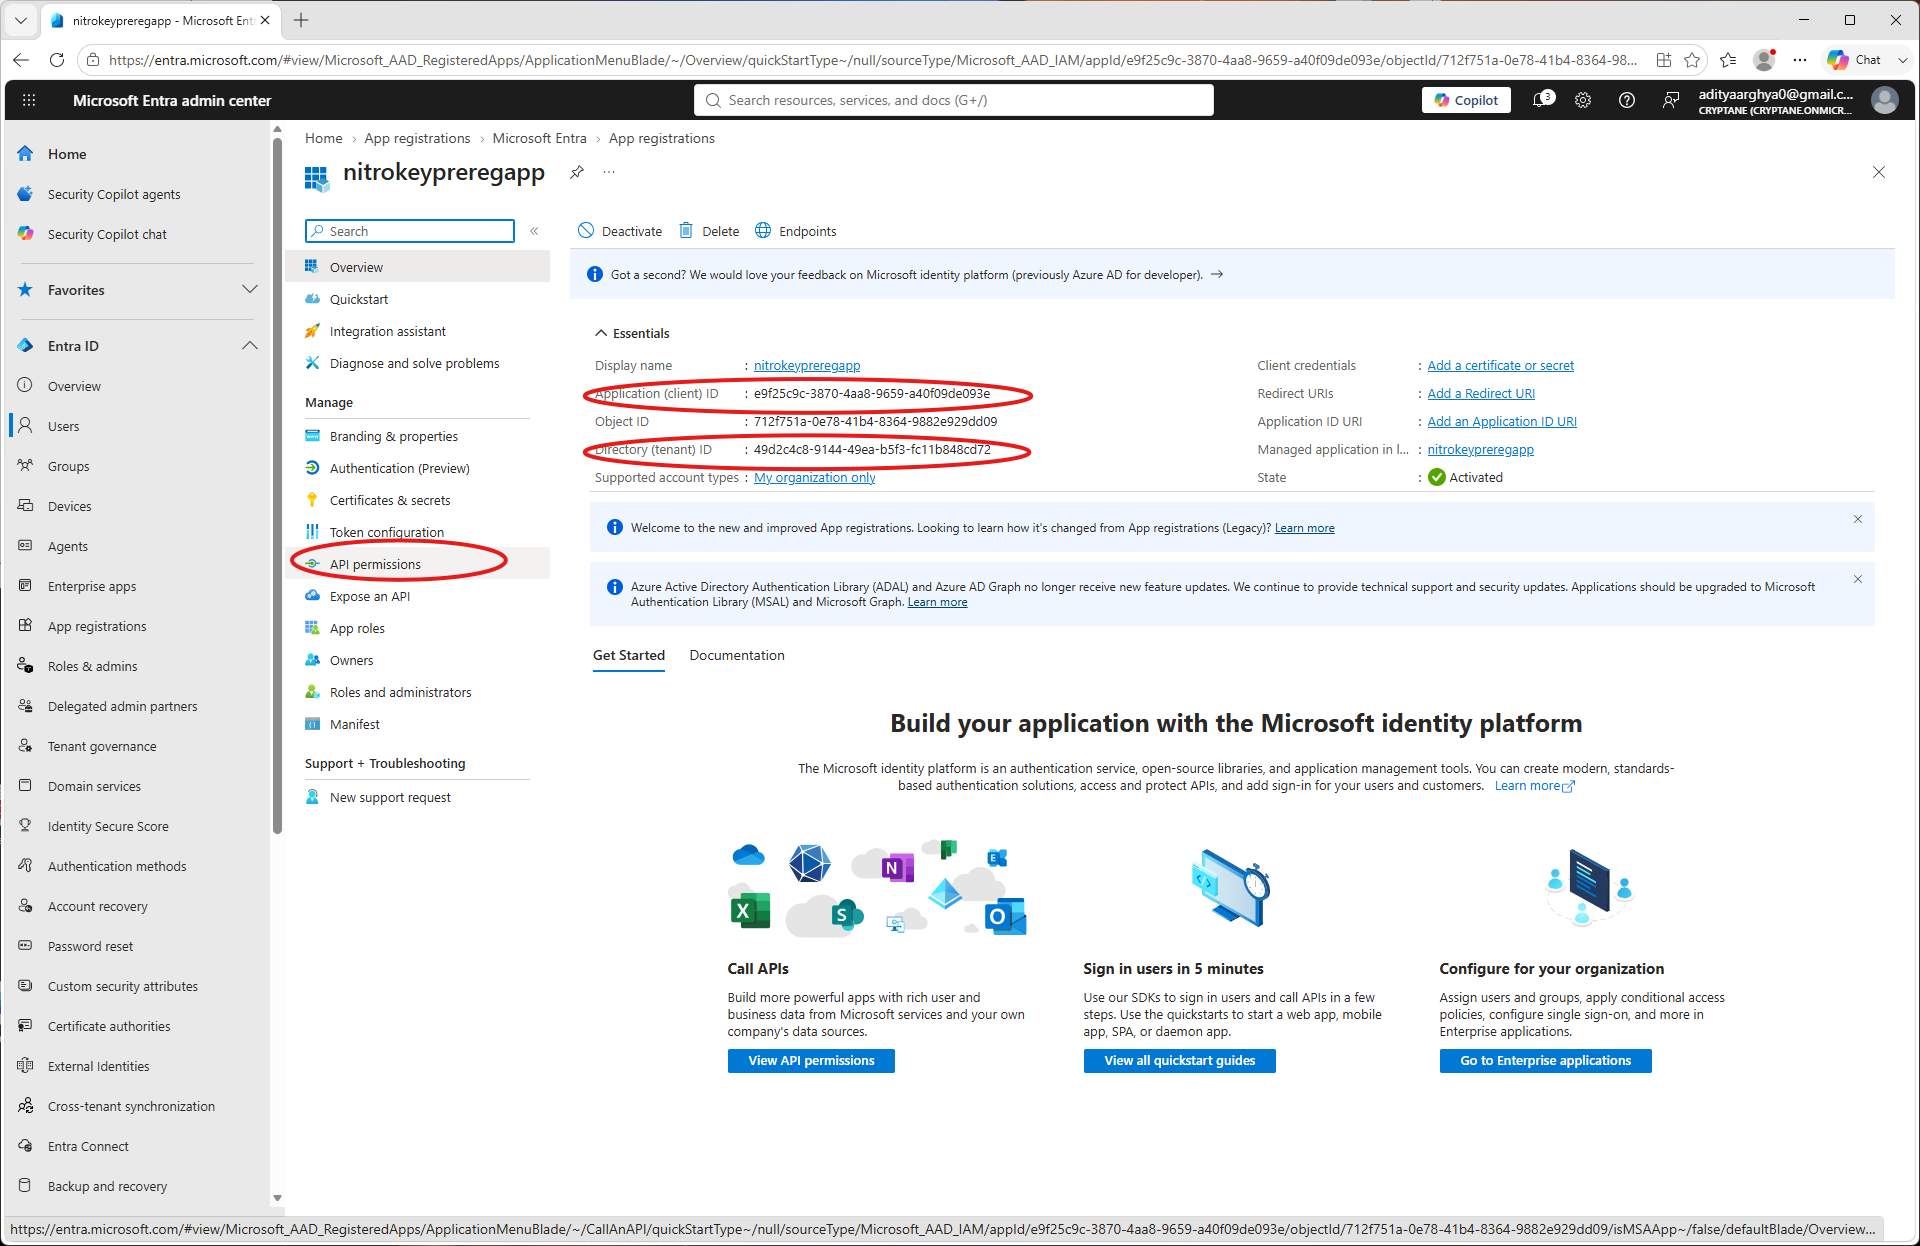
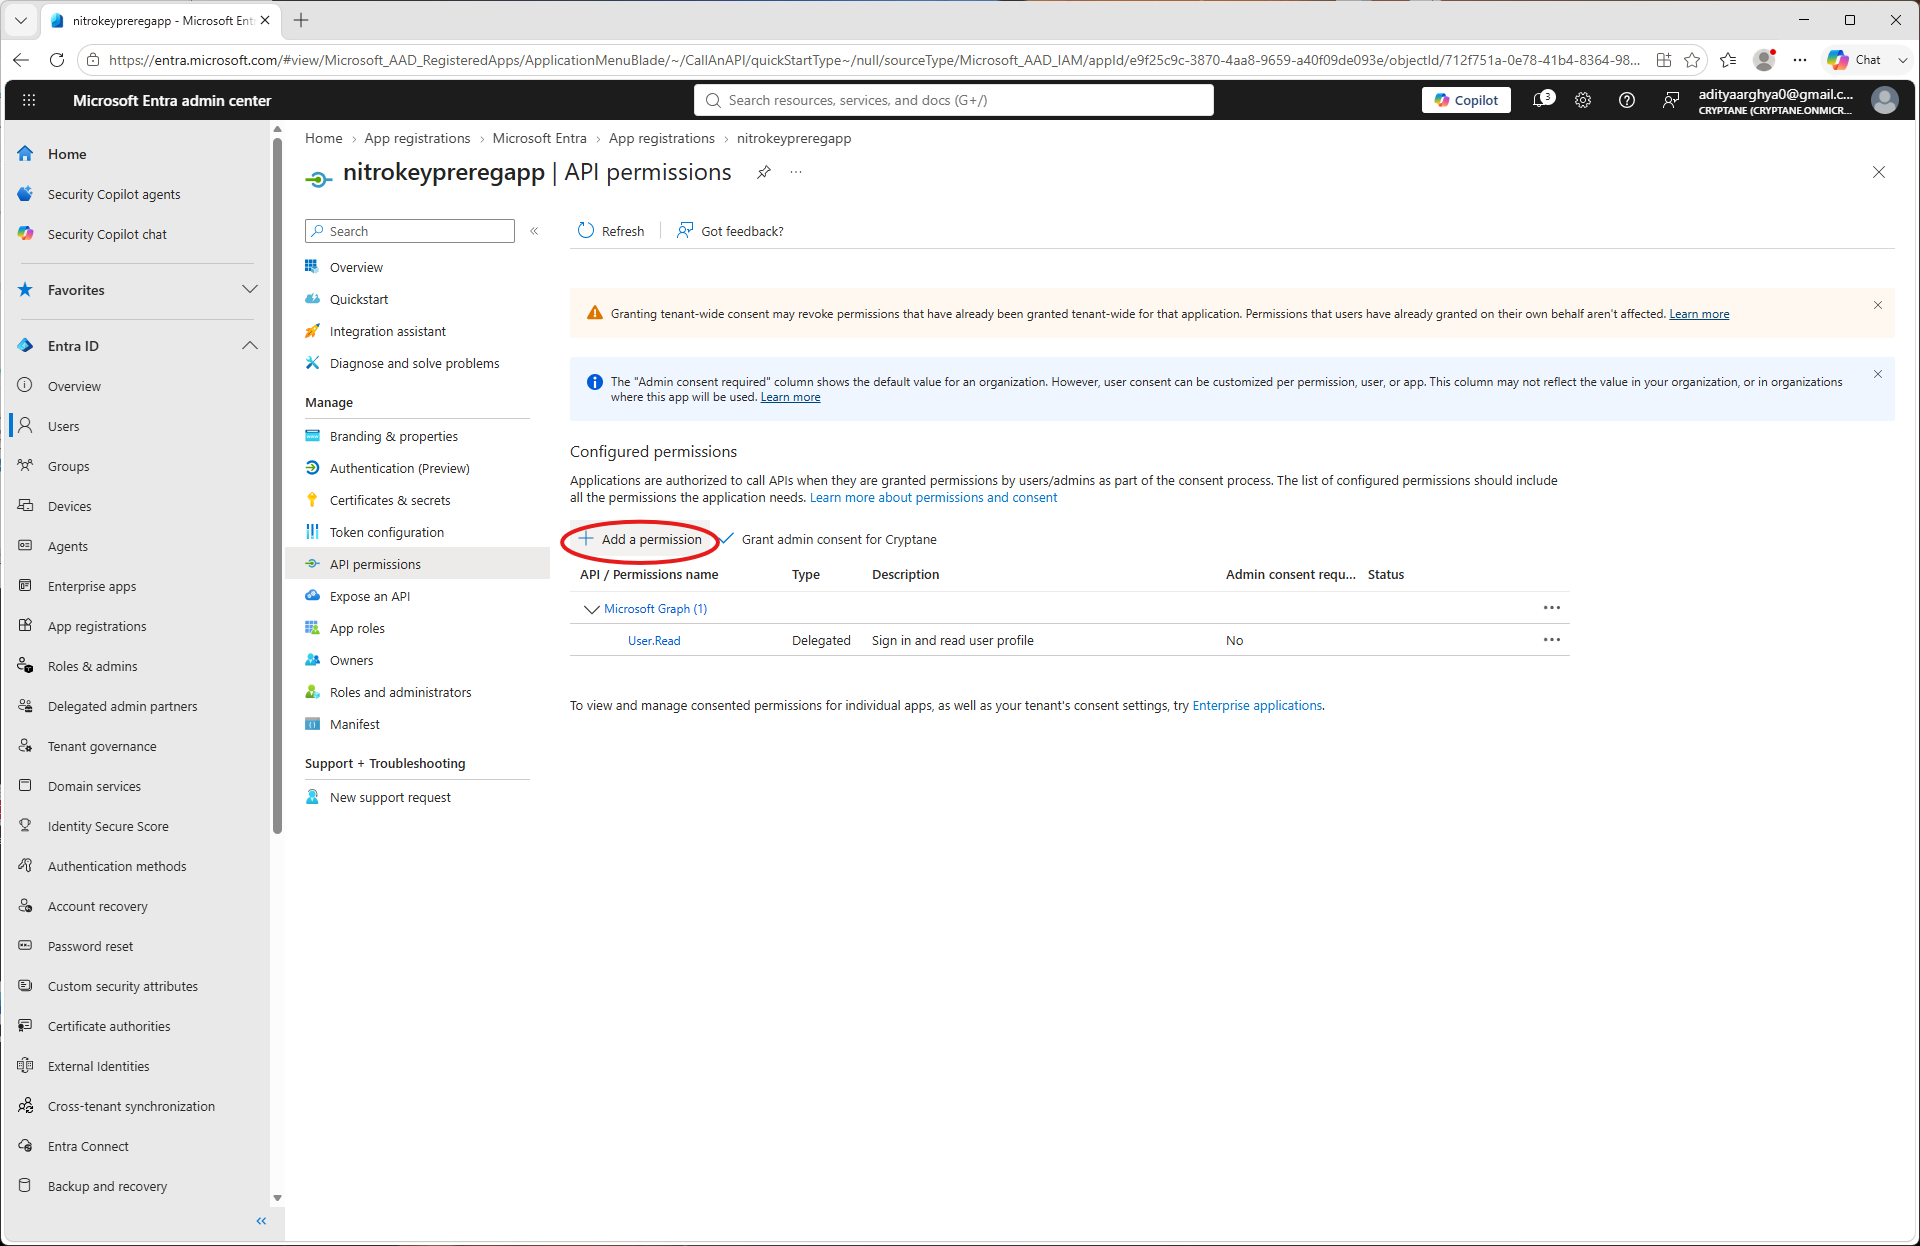
Click on Add a permission.
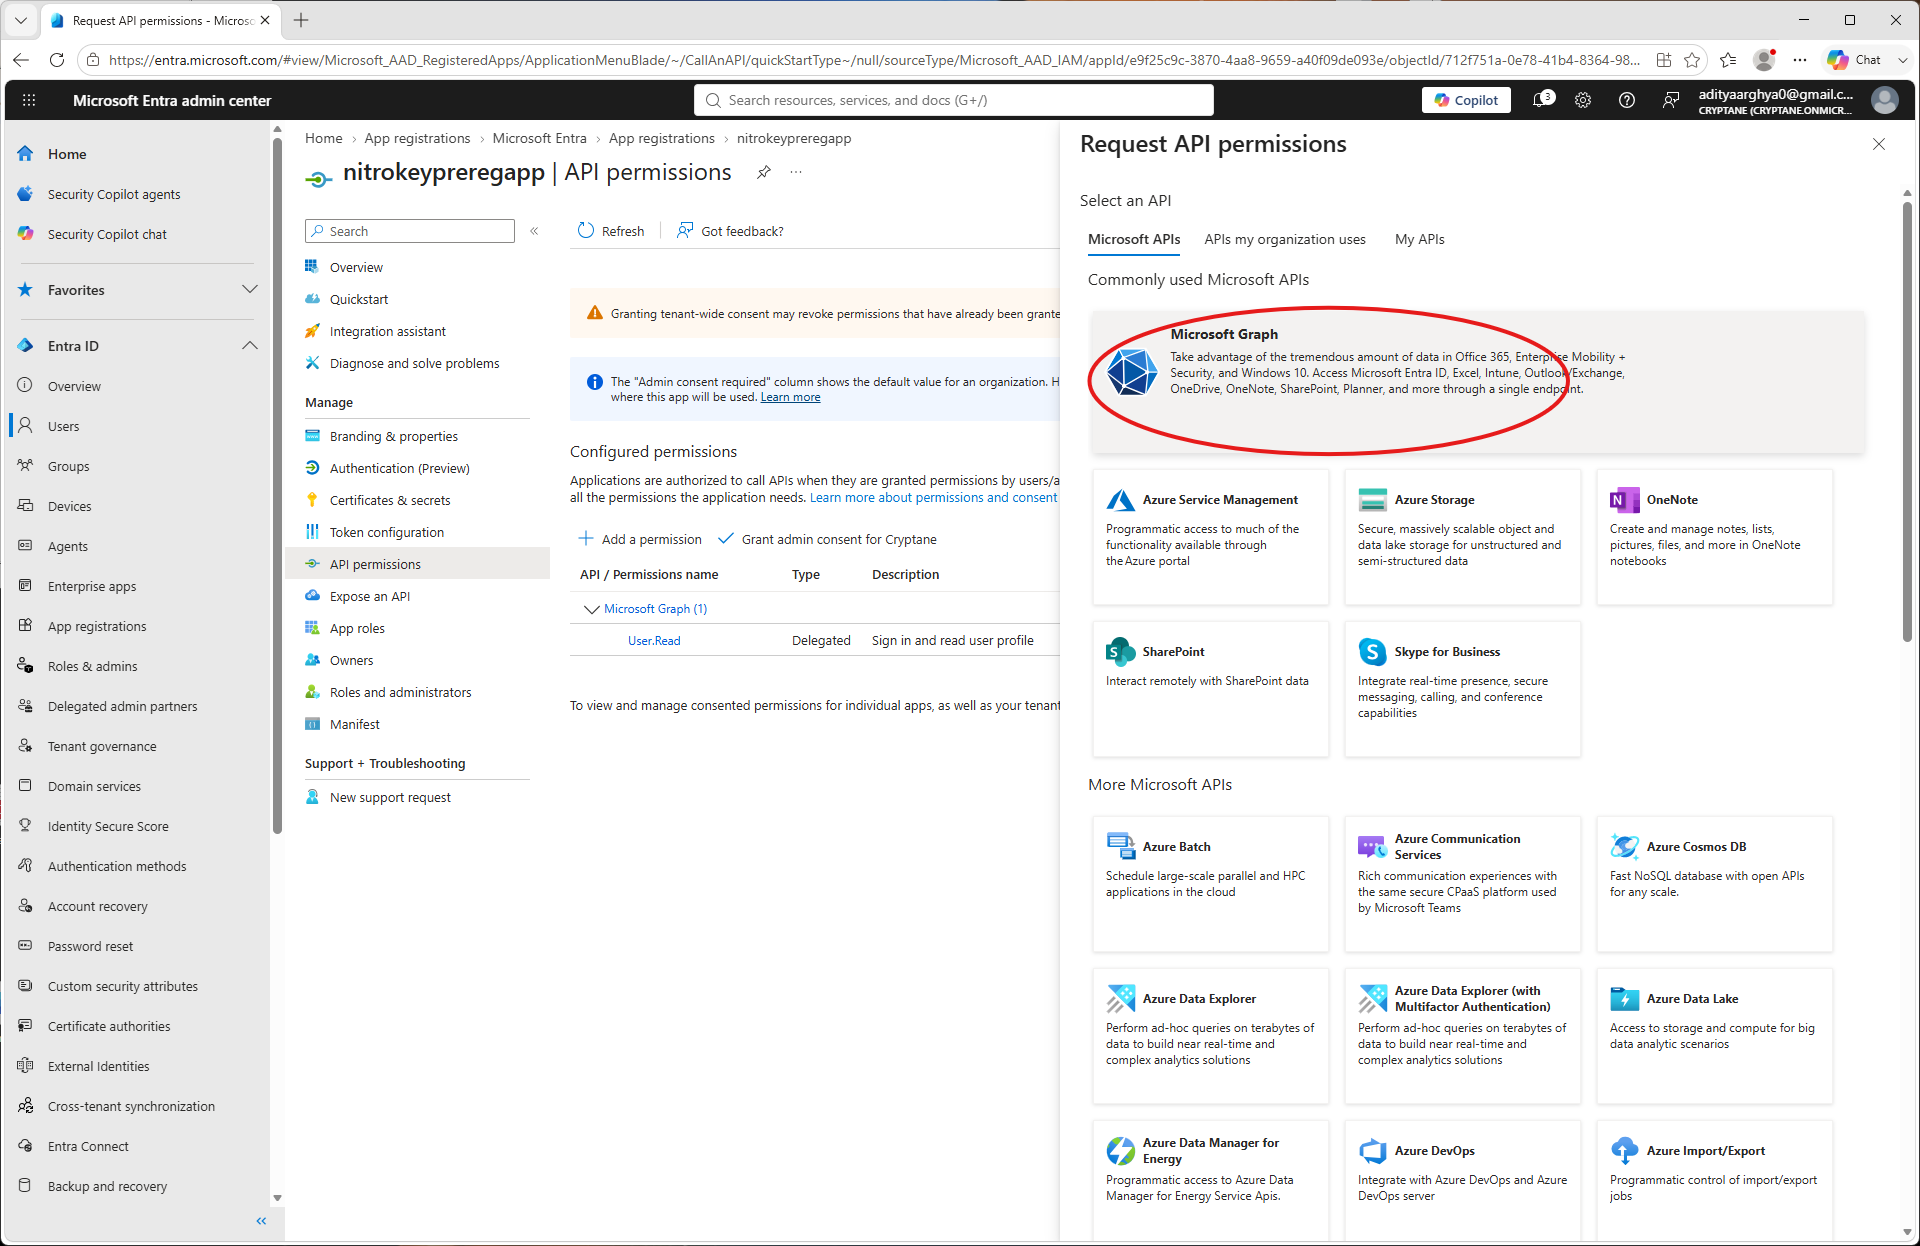
Select Microsoft Graph.
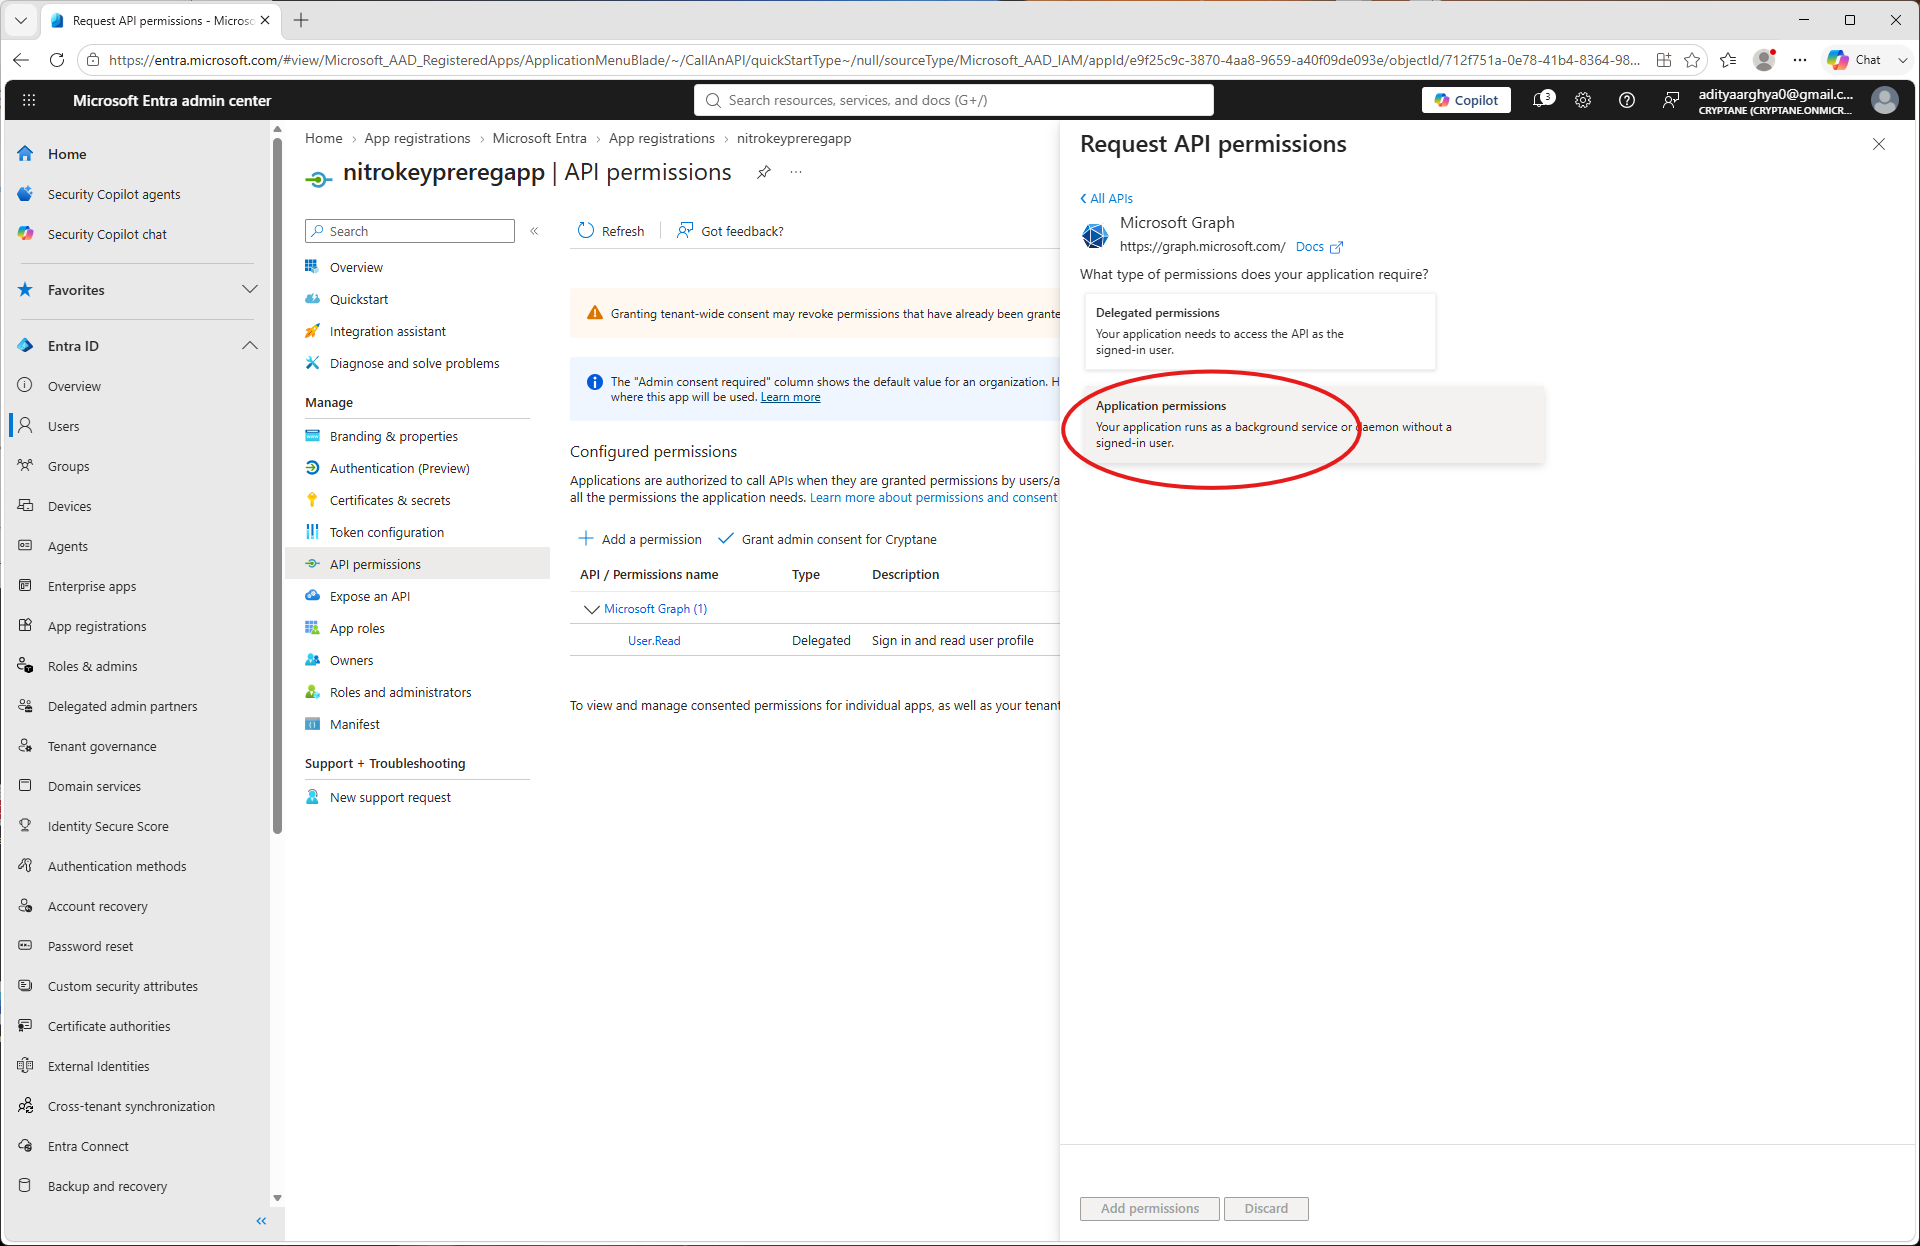
Select Application Permissions.
Search for
UserAuthenticationMethod.ReadWrite.Alland select it.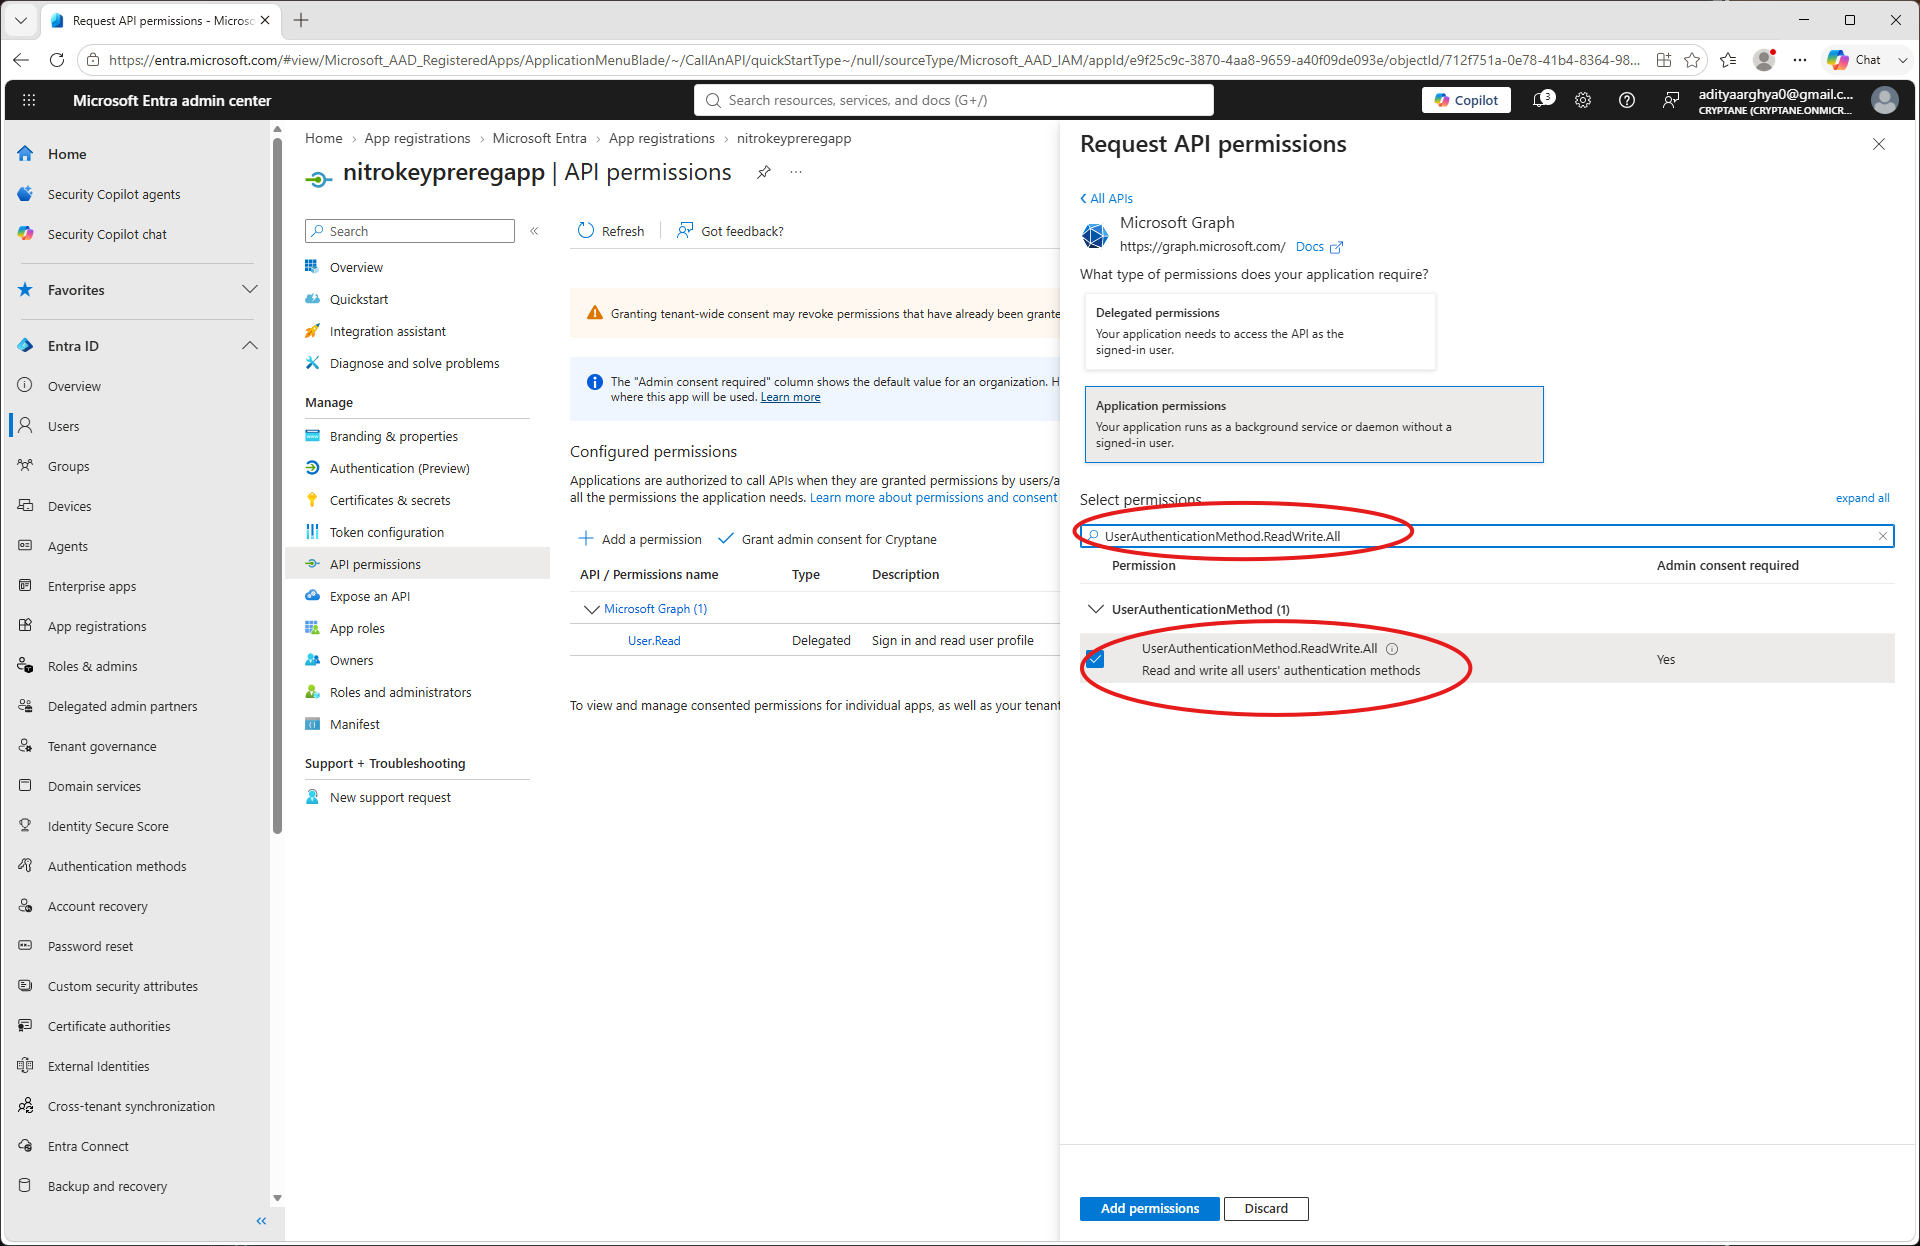
Search for
User.ReadWrite.Alland select it (Only if you want to be able to create users frompynitrokey). Click on the Add Permissions button.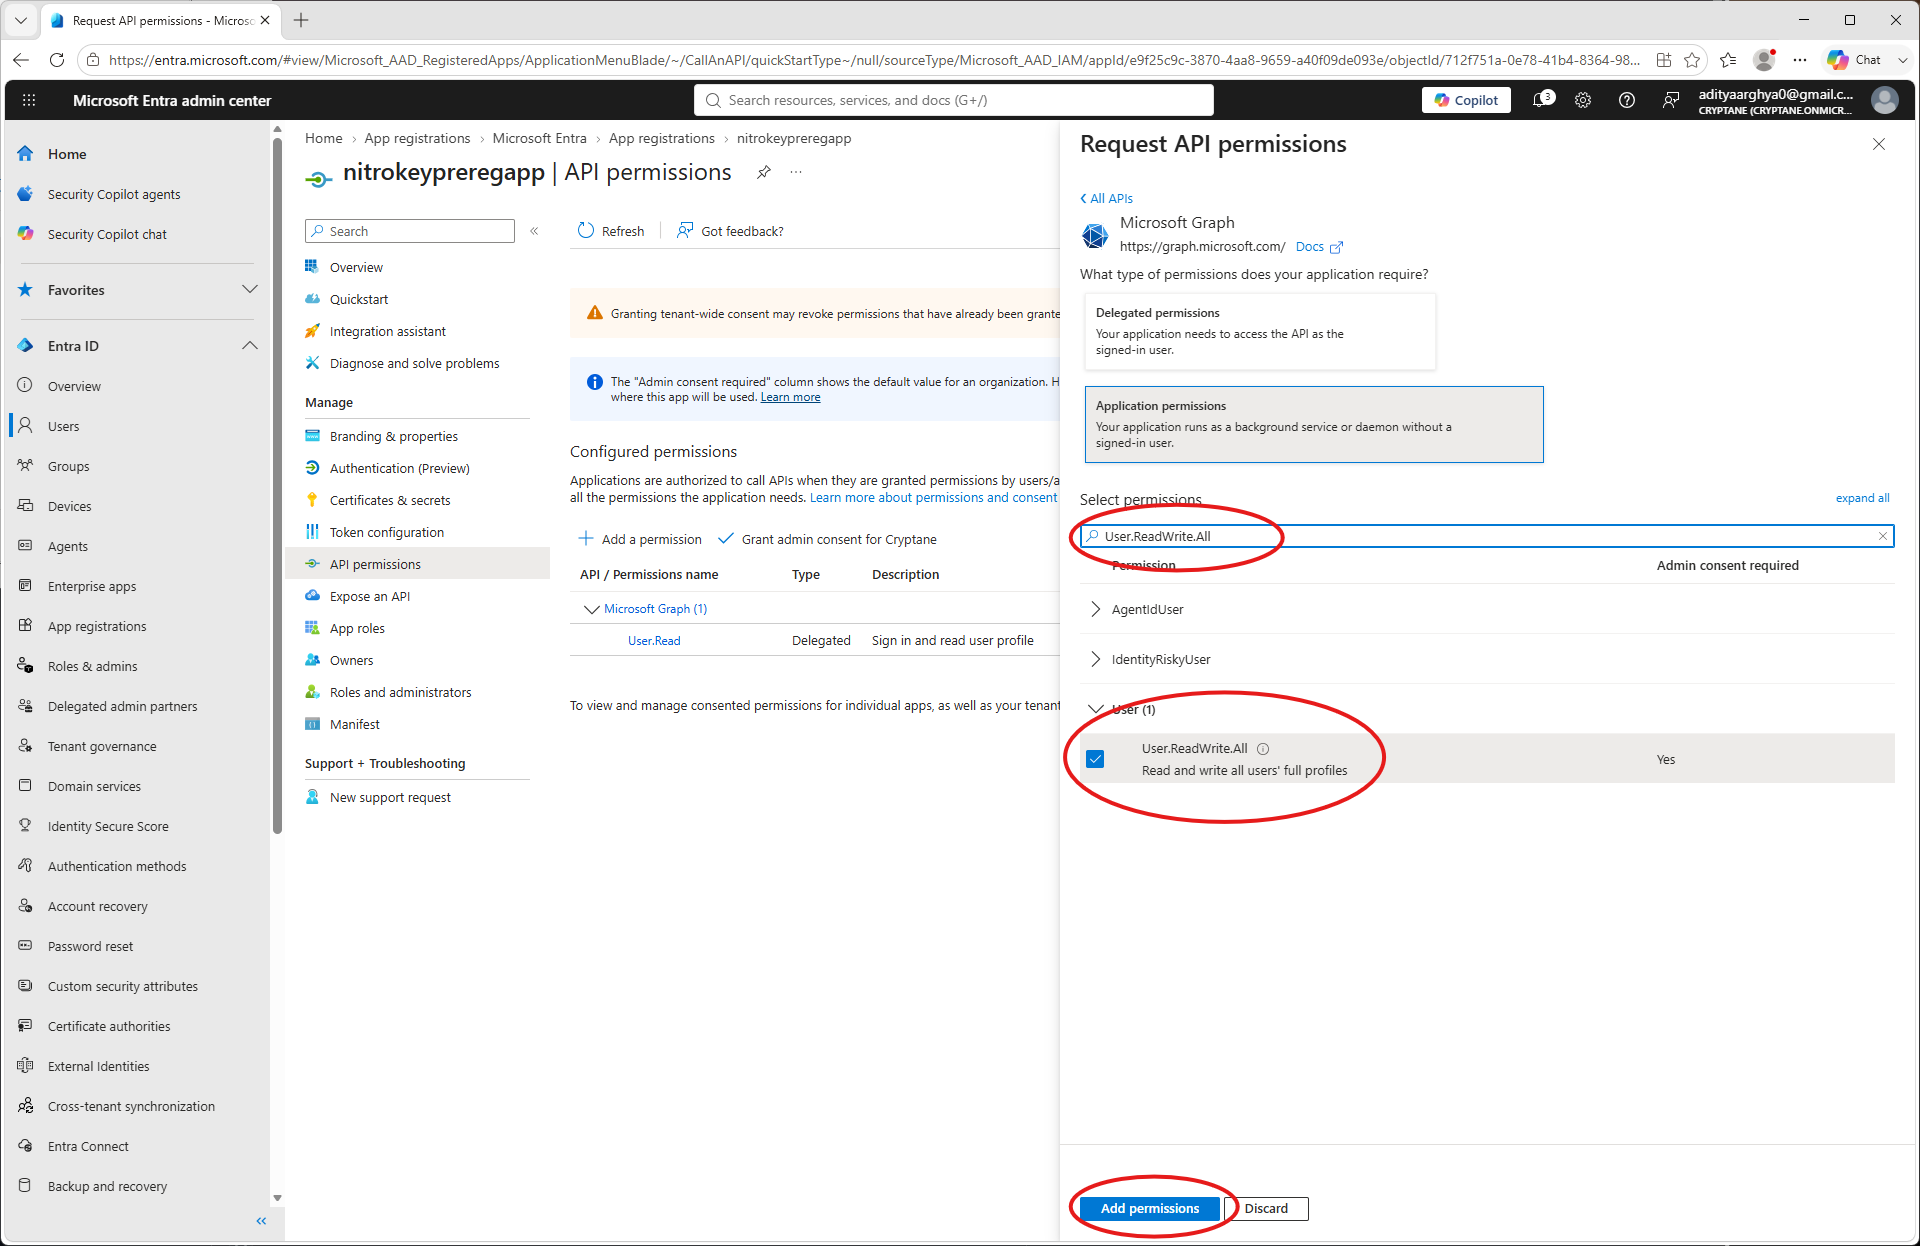
Verify the Granted permissions.
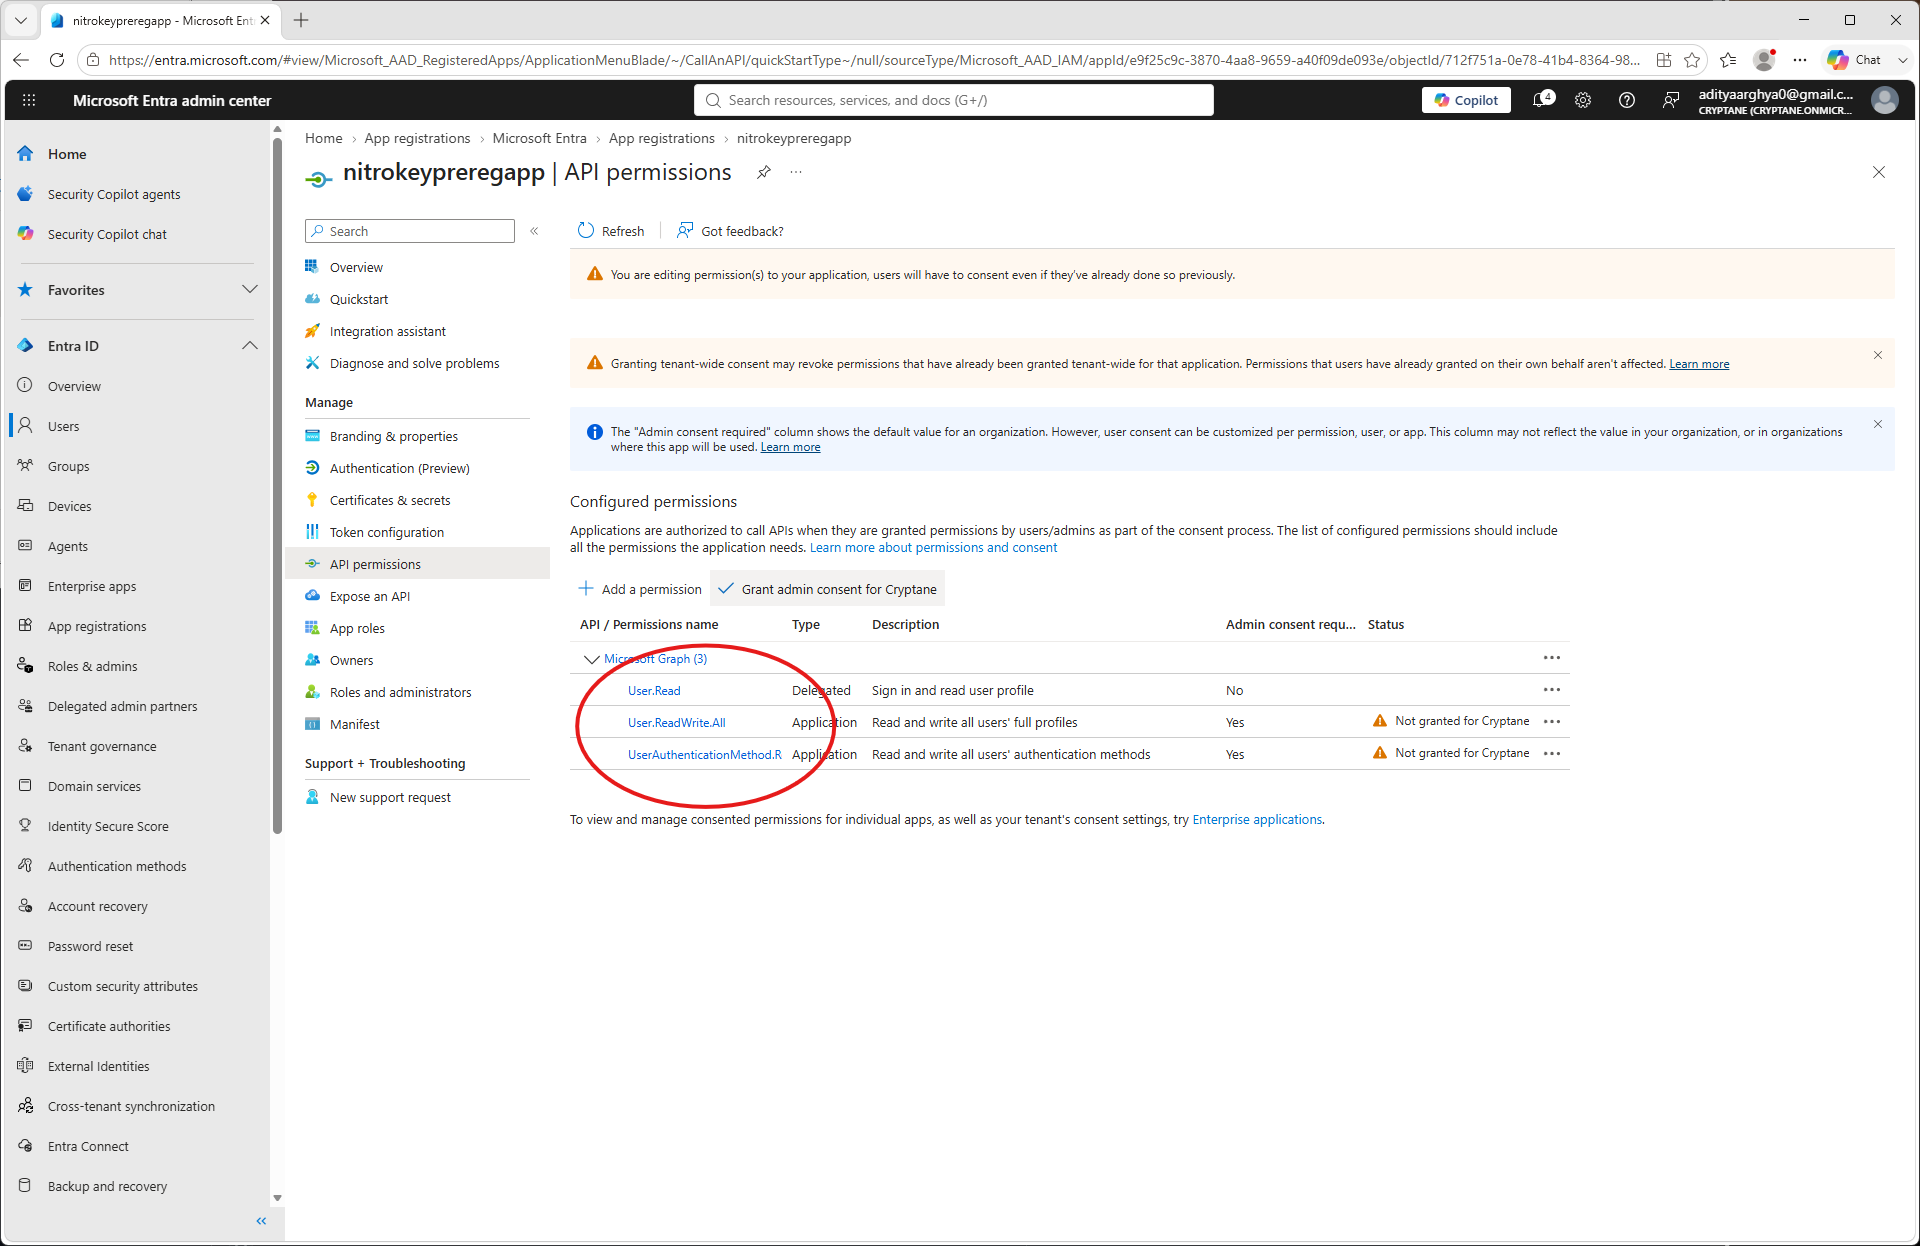
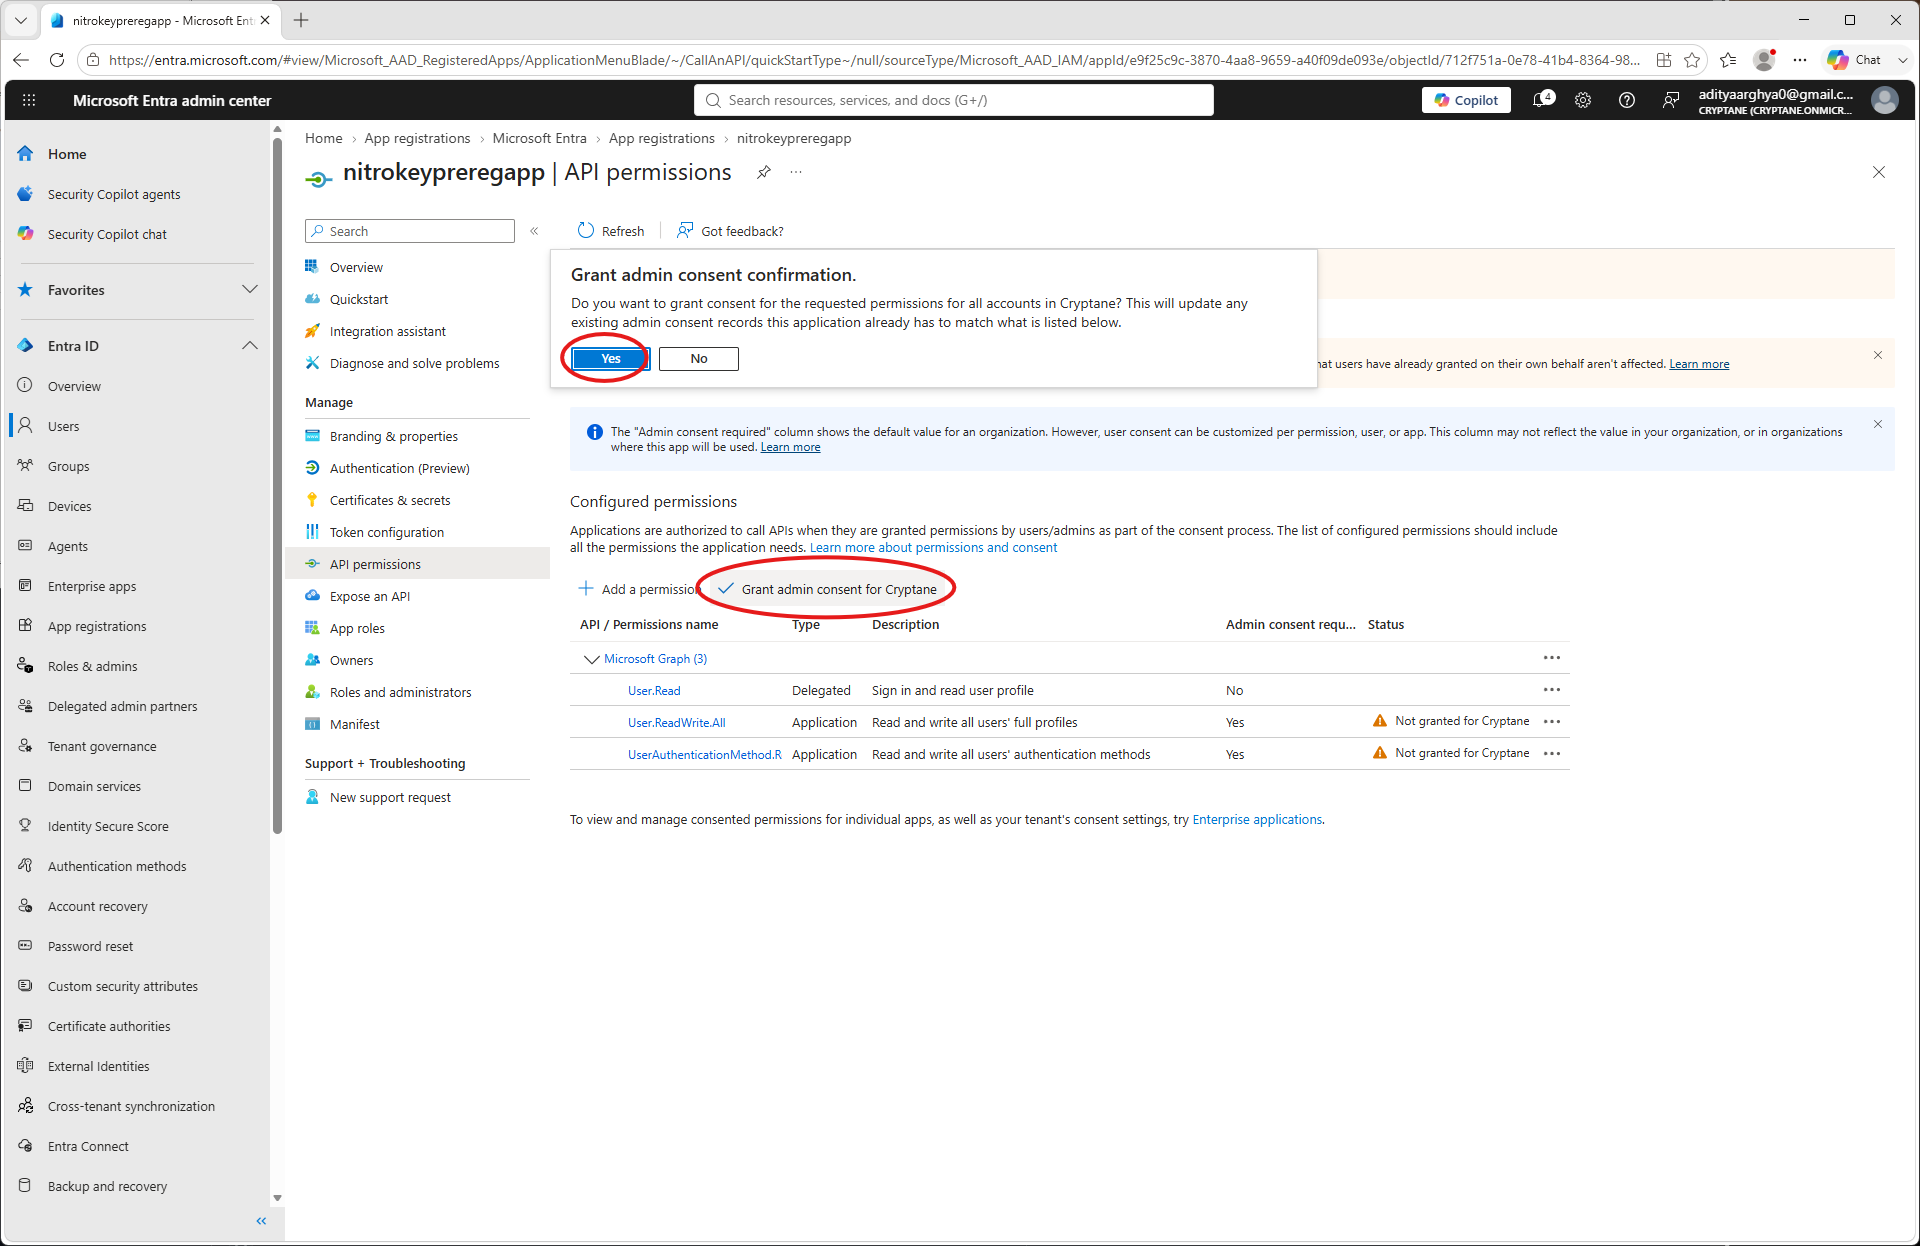
Click on Grant admin consent and approve it.
Go back to the app home and select Certificates and secrets from the left blade
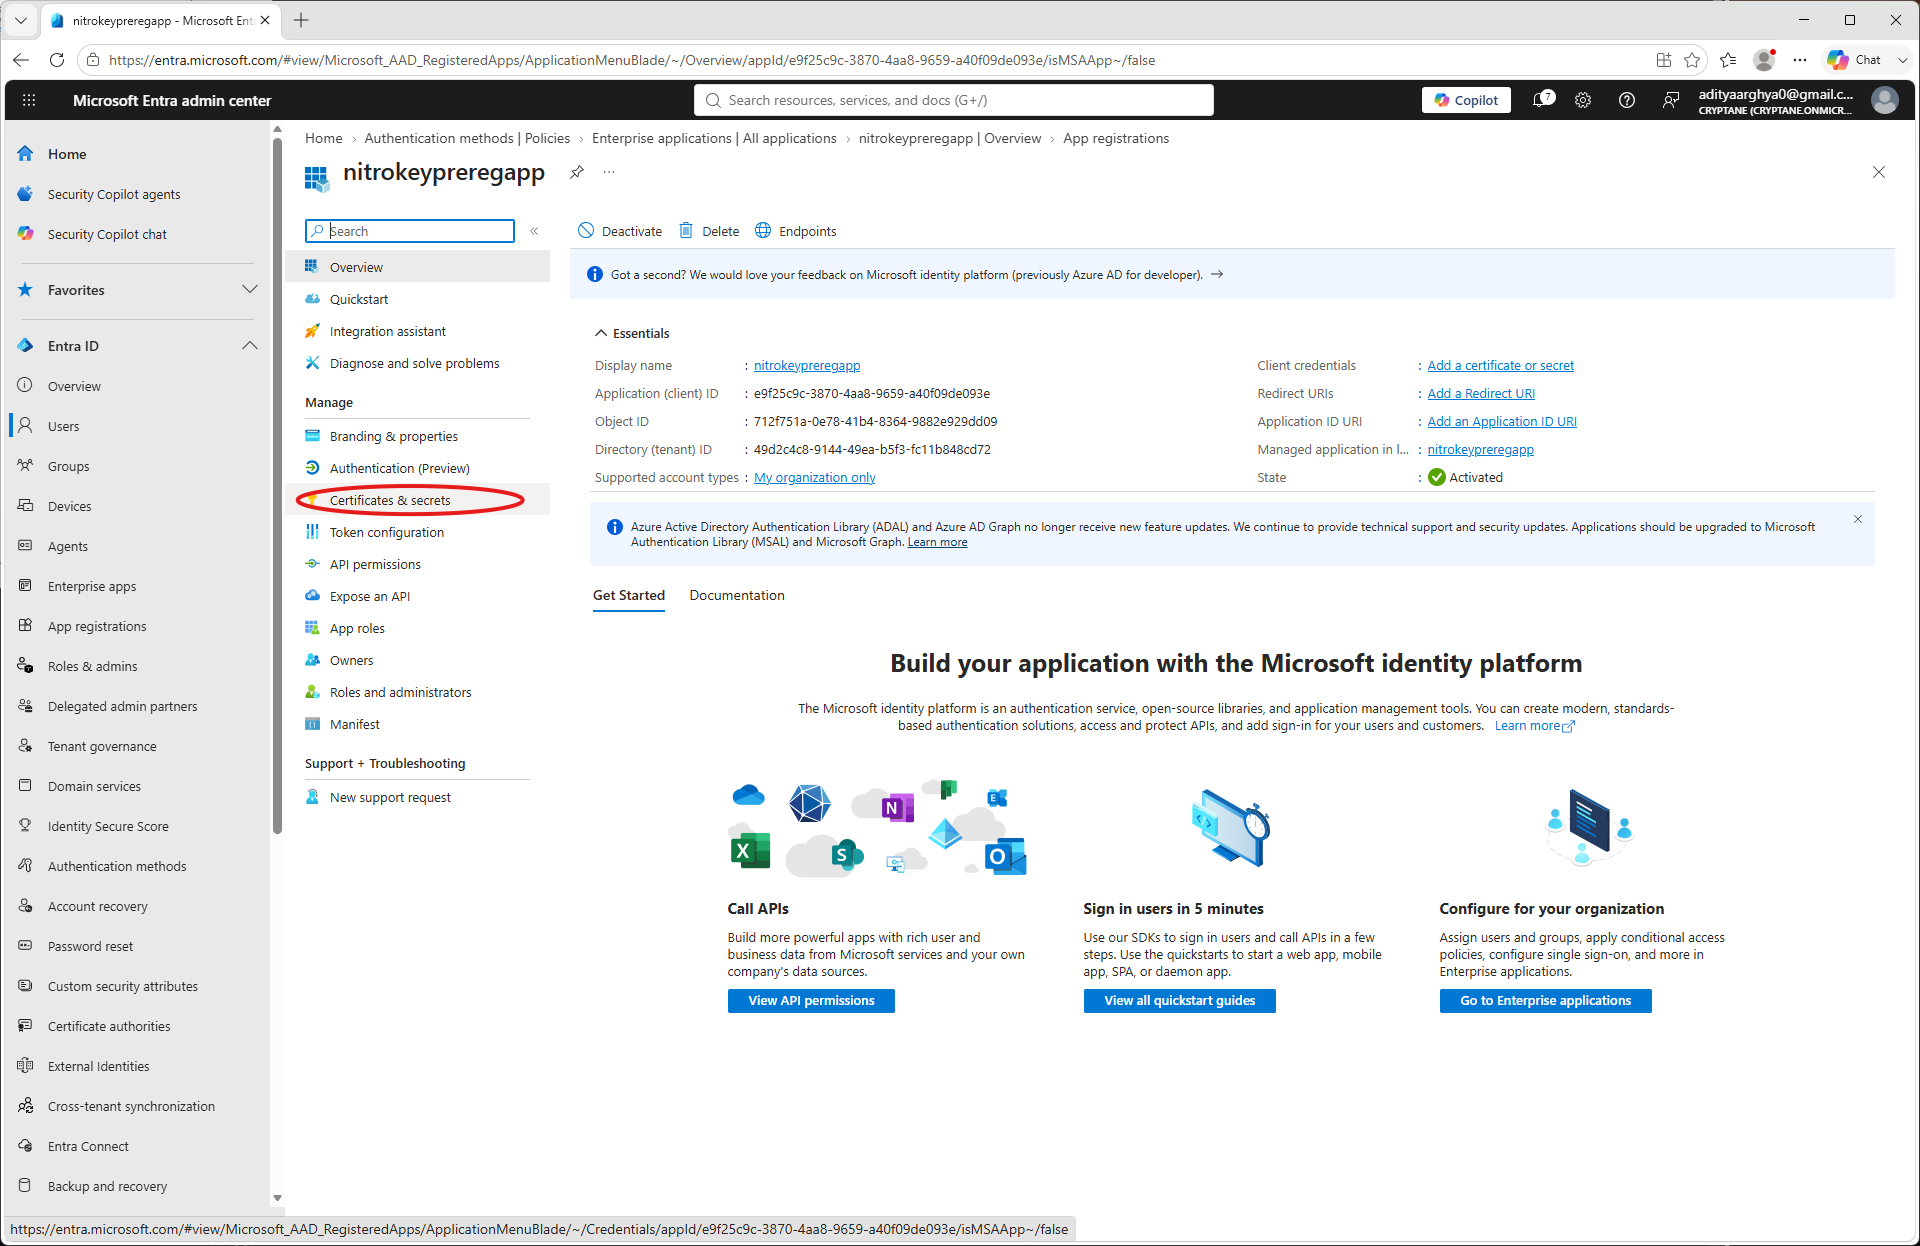
Click New Client secret
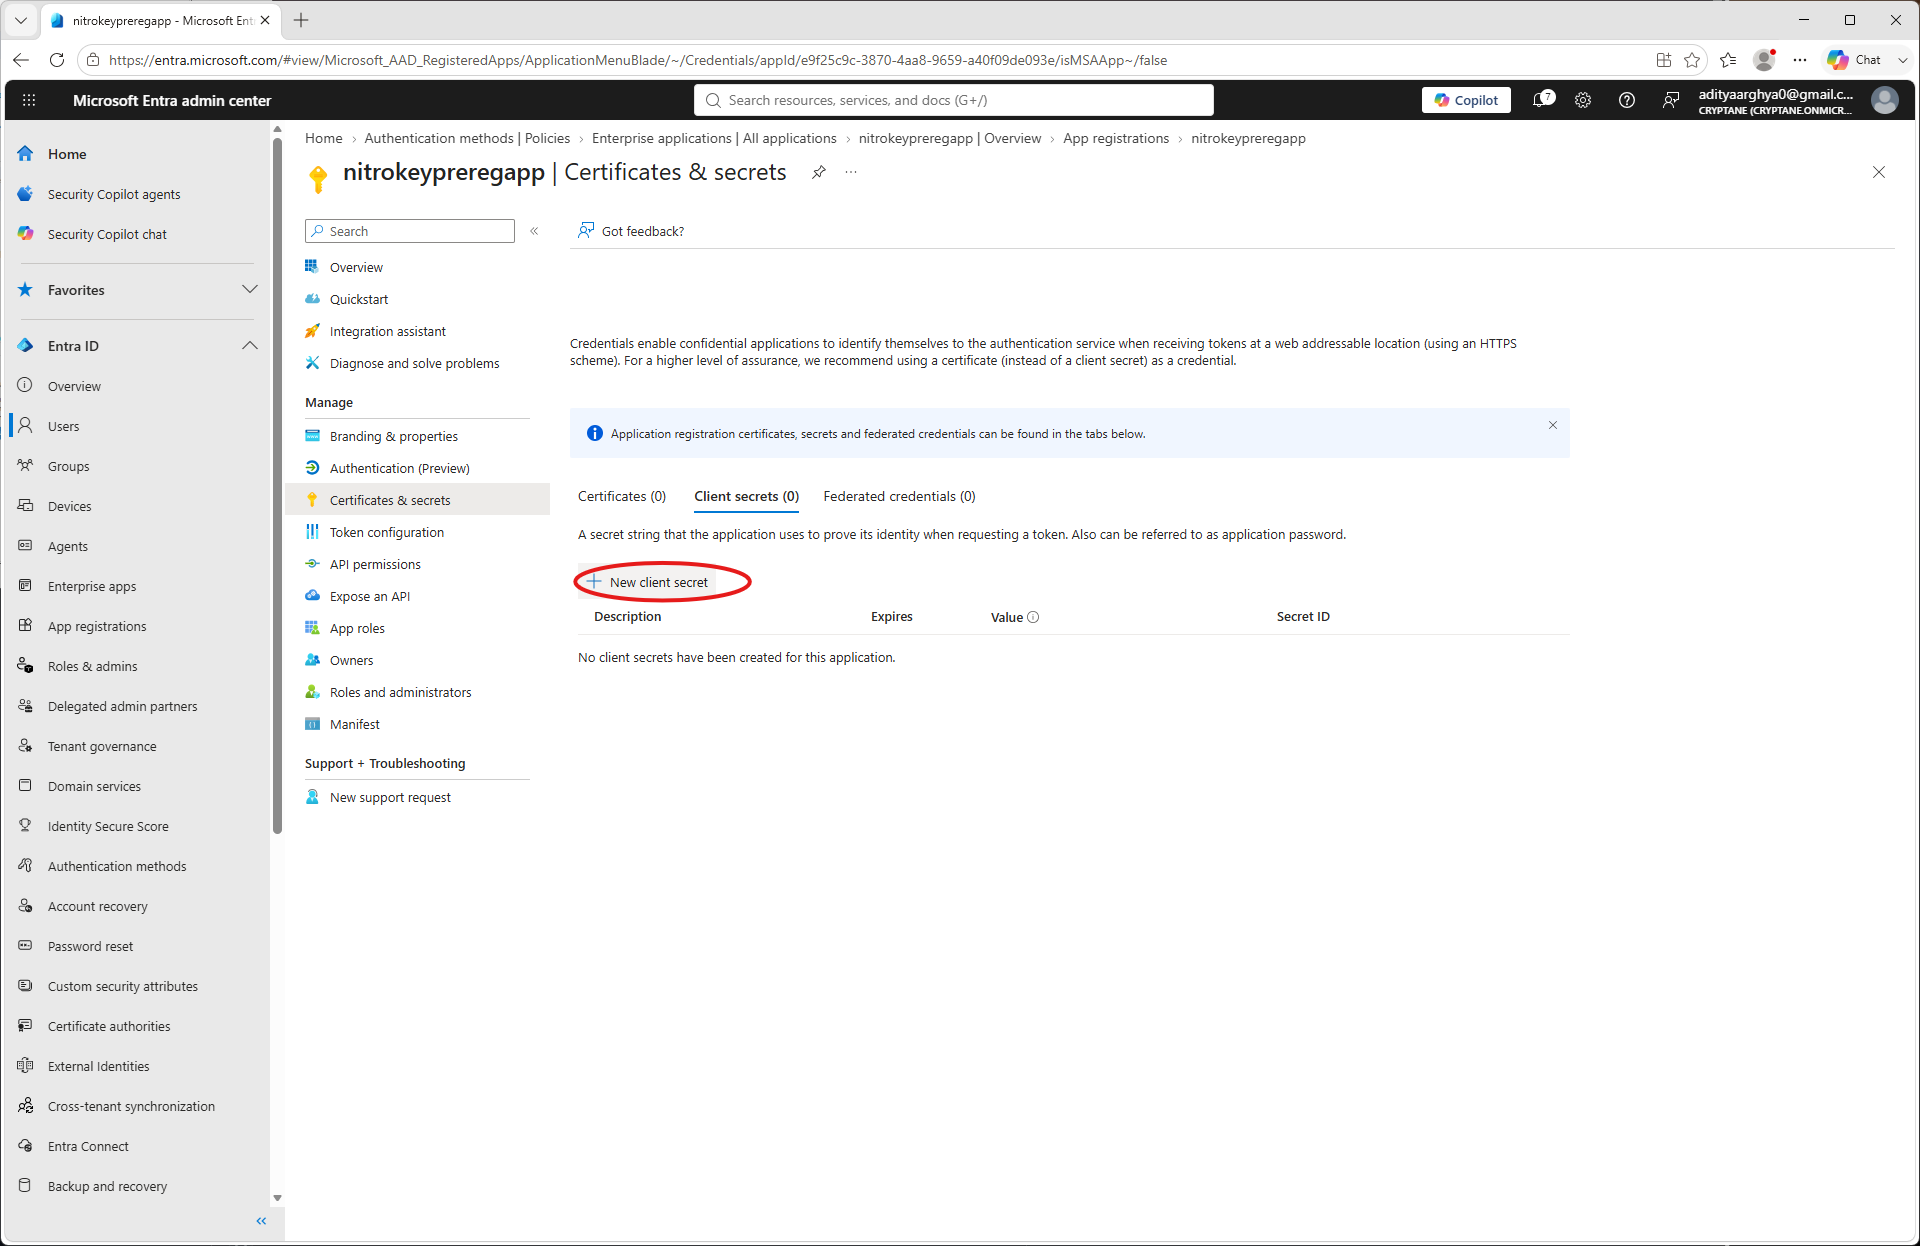
Add a name and expiry, followed by clicking Add
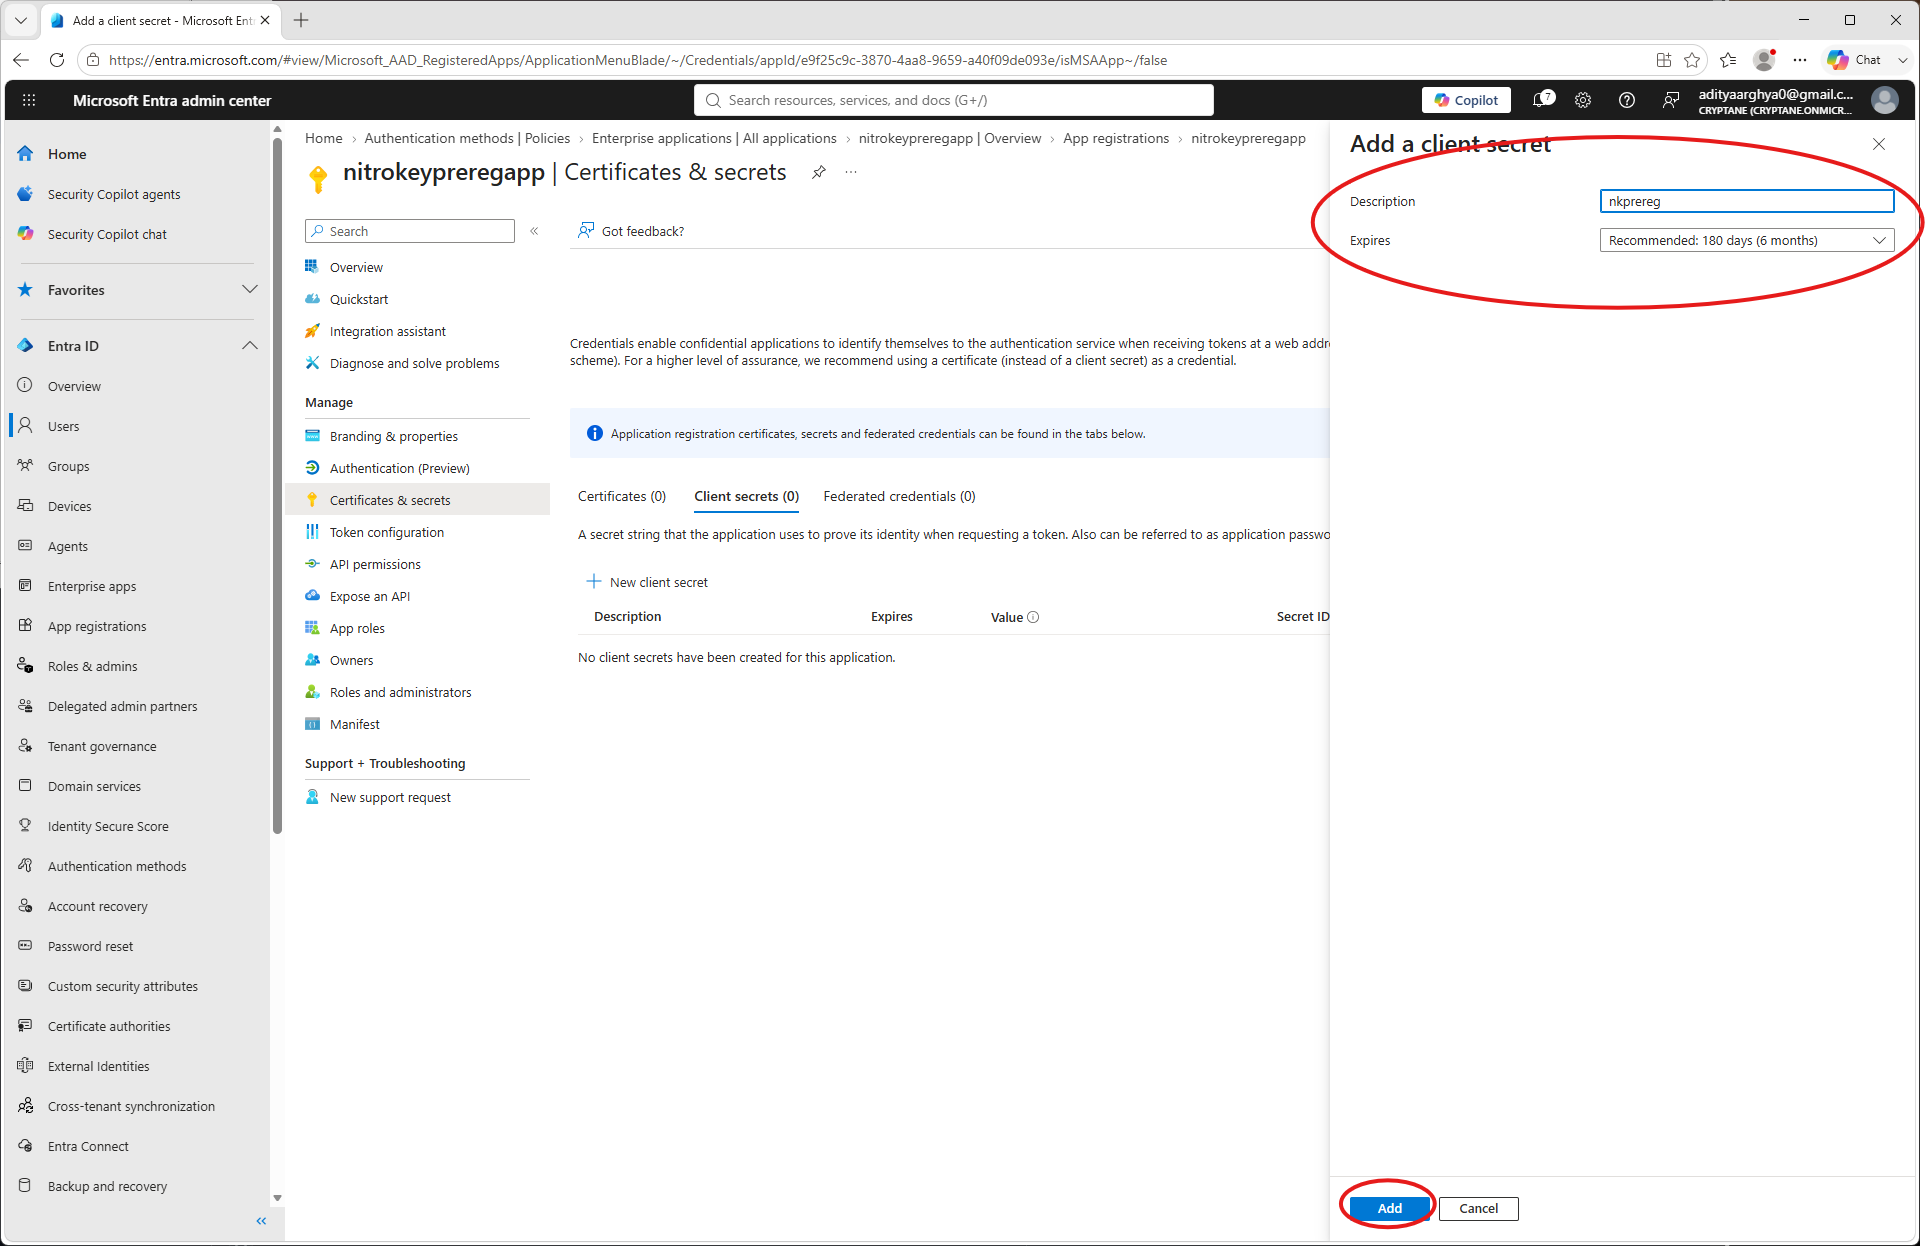
Make a note of the Client Secret (You will not be able to view it later.)
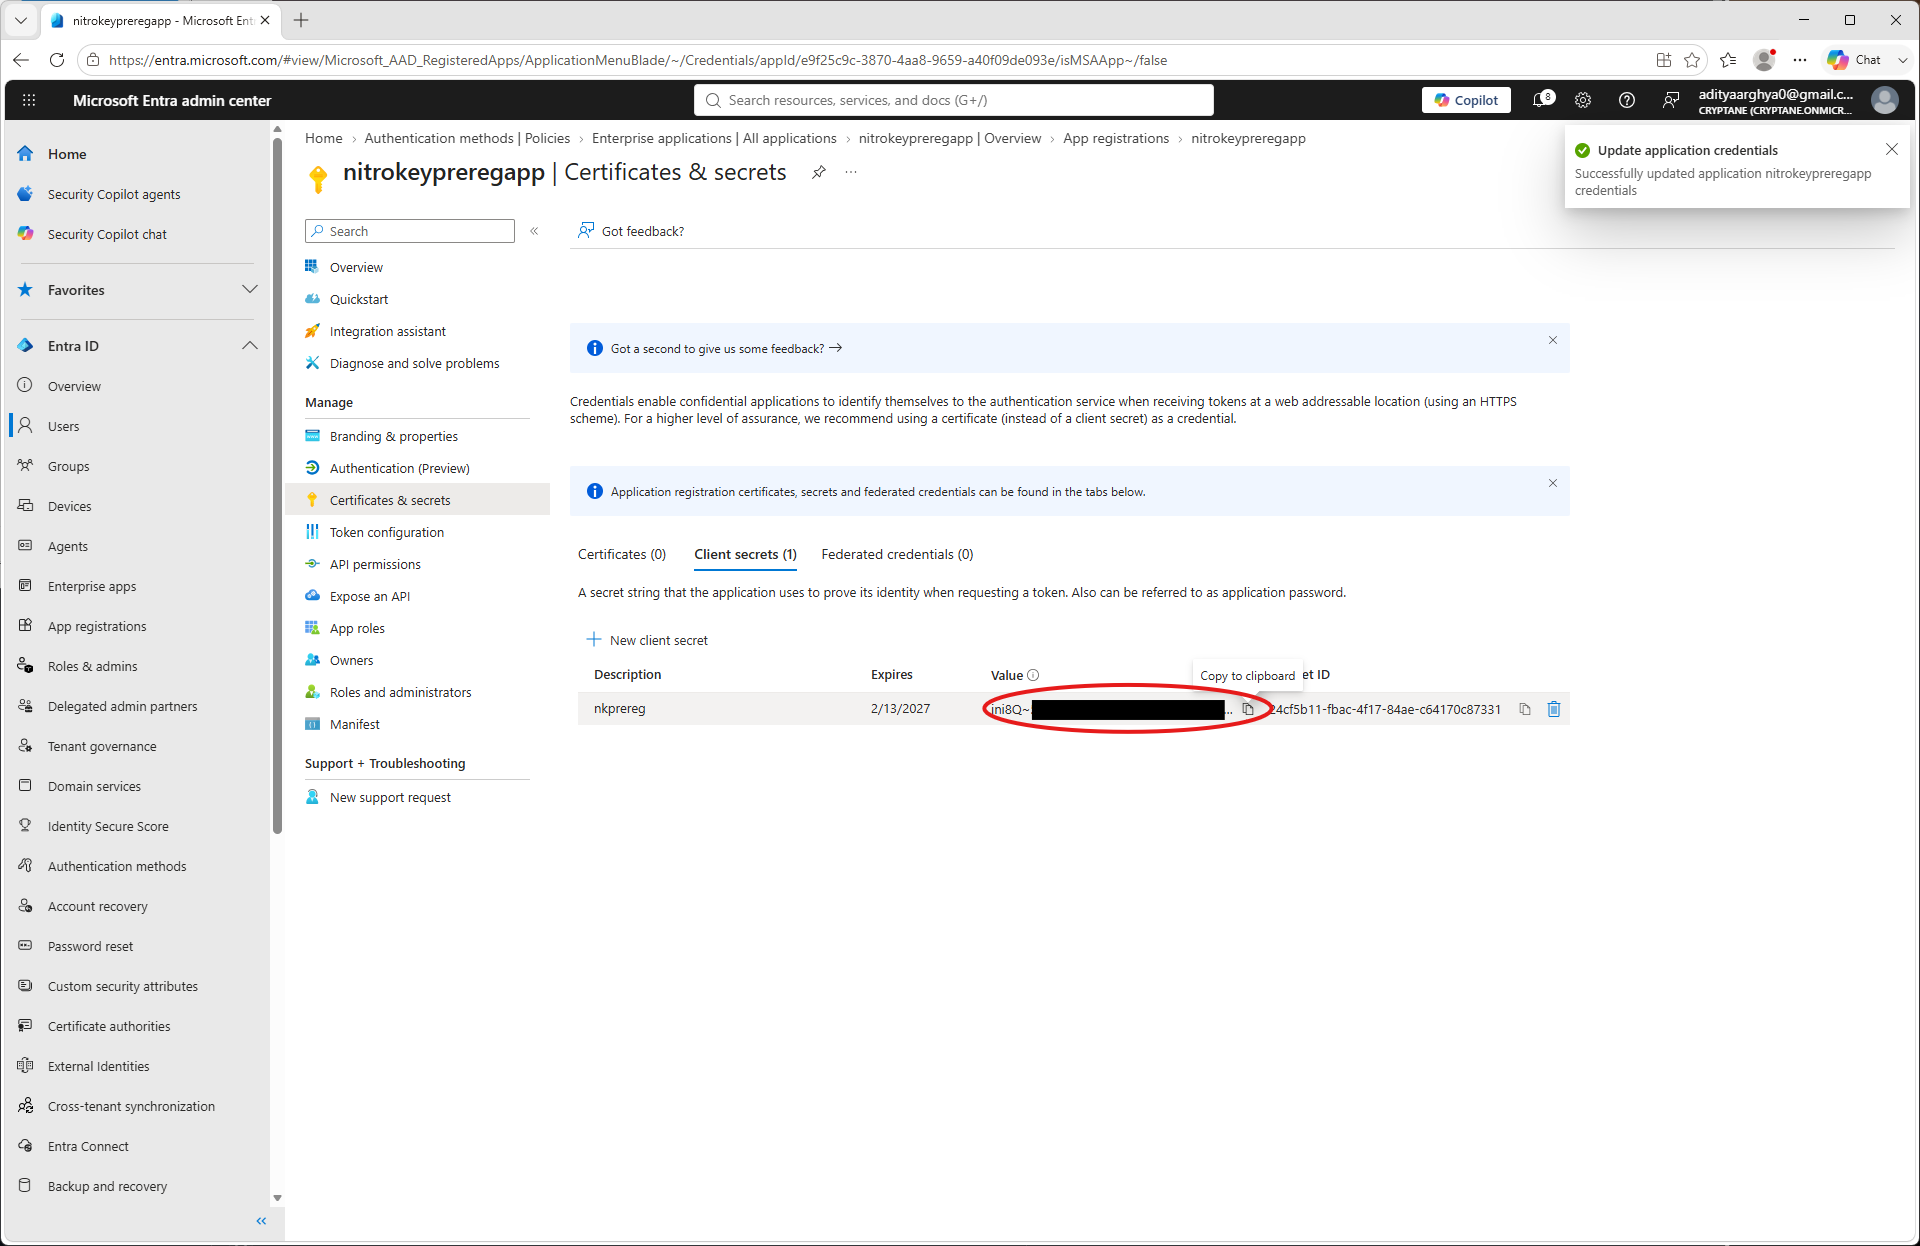
Click on Authentication methods from the left blade.
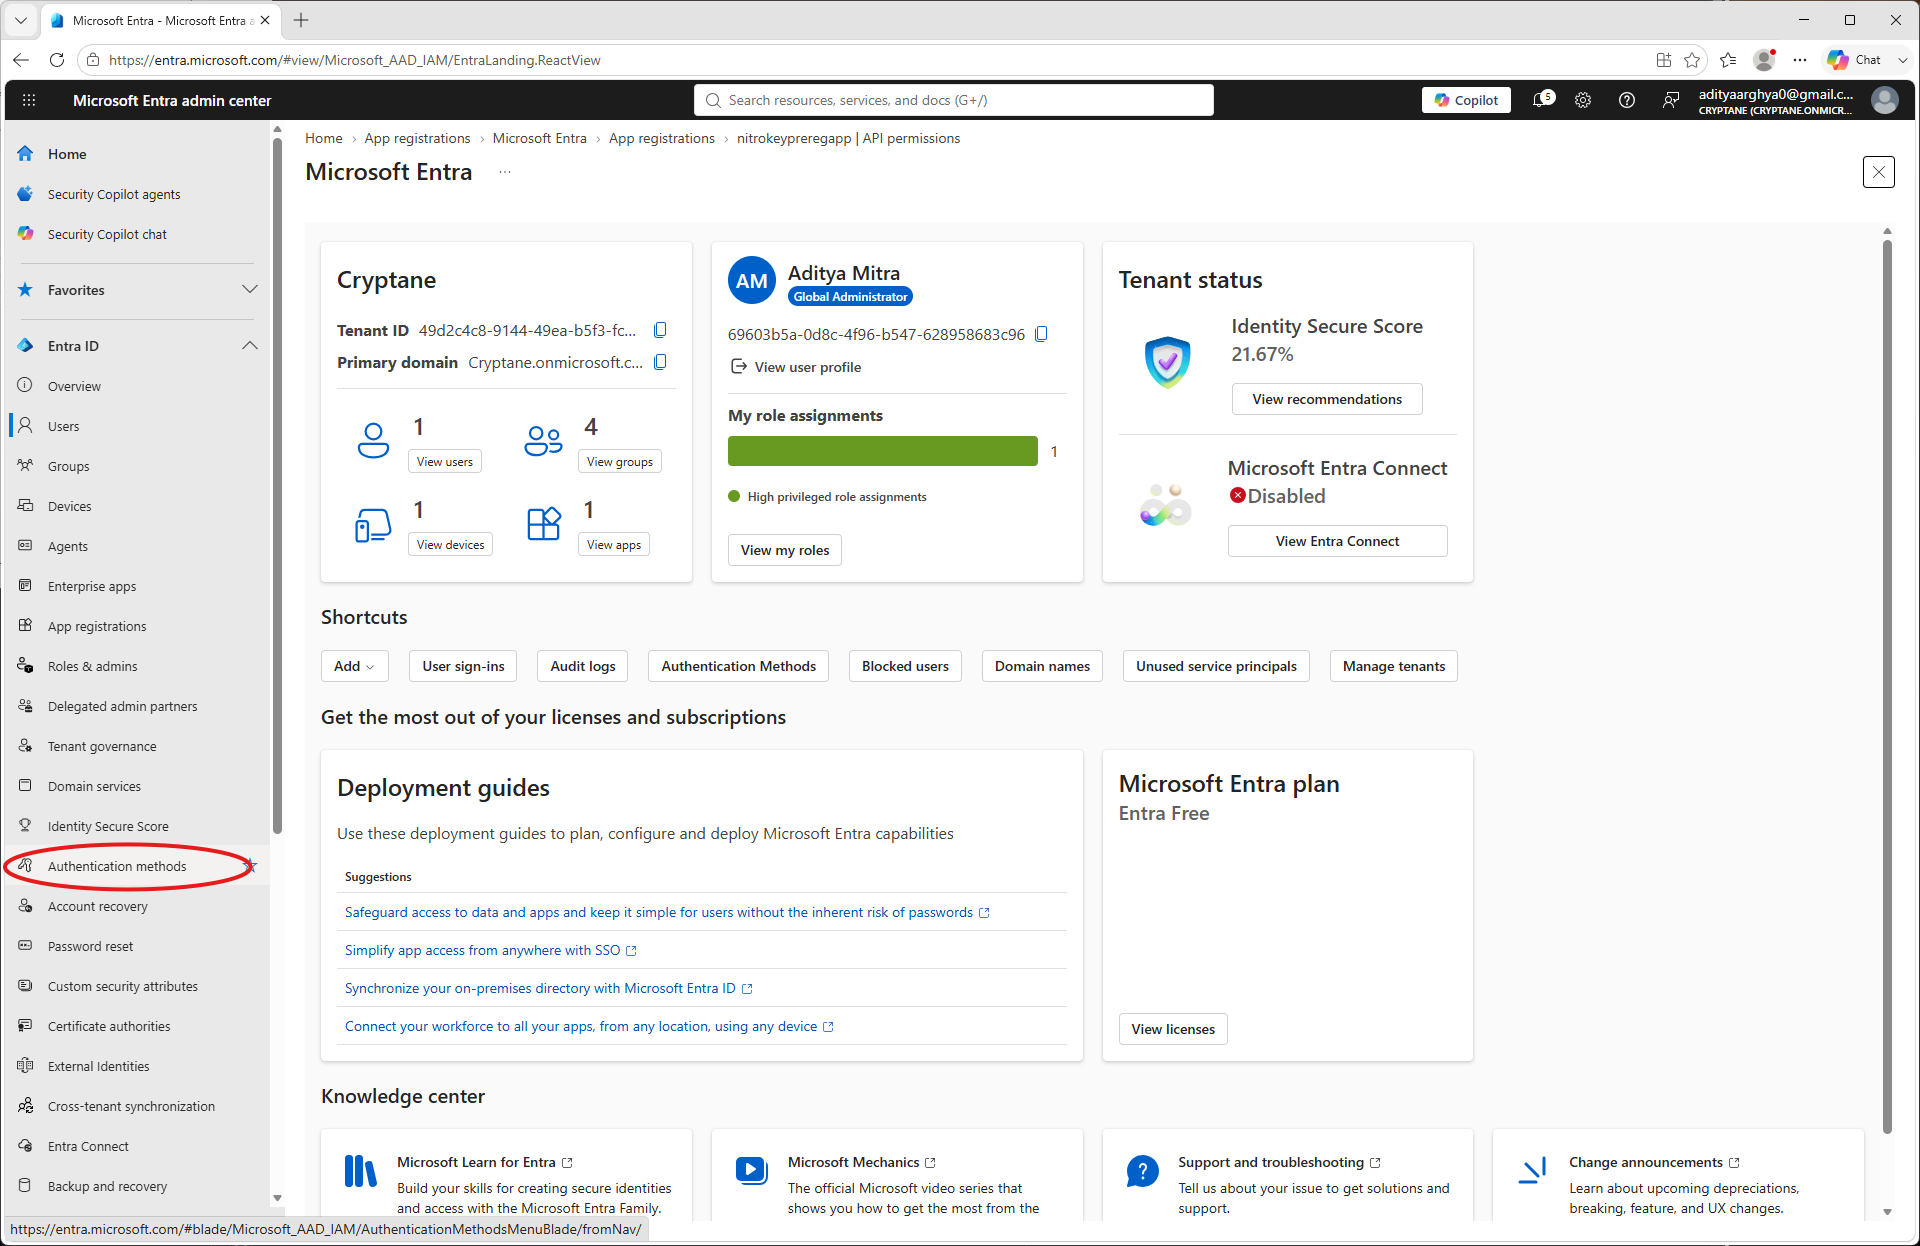
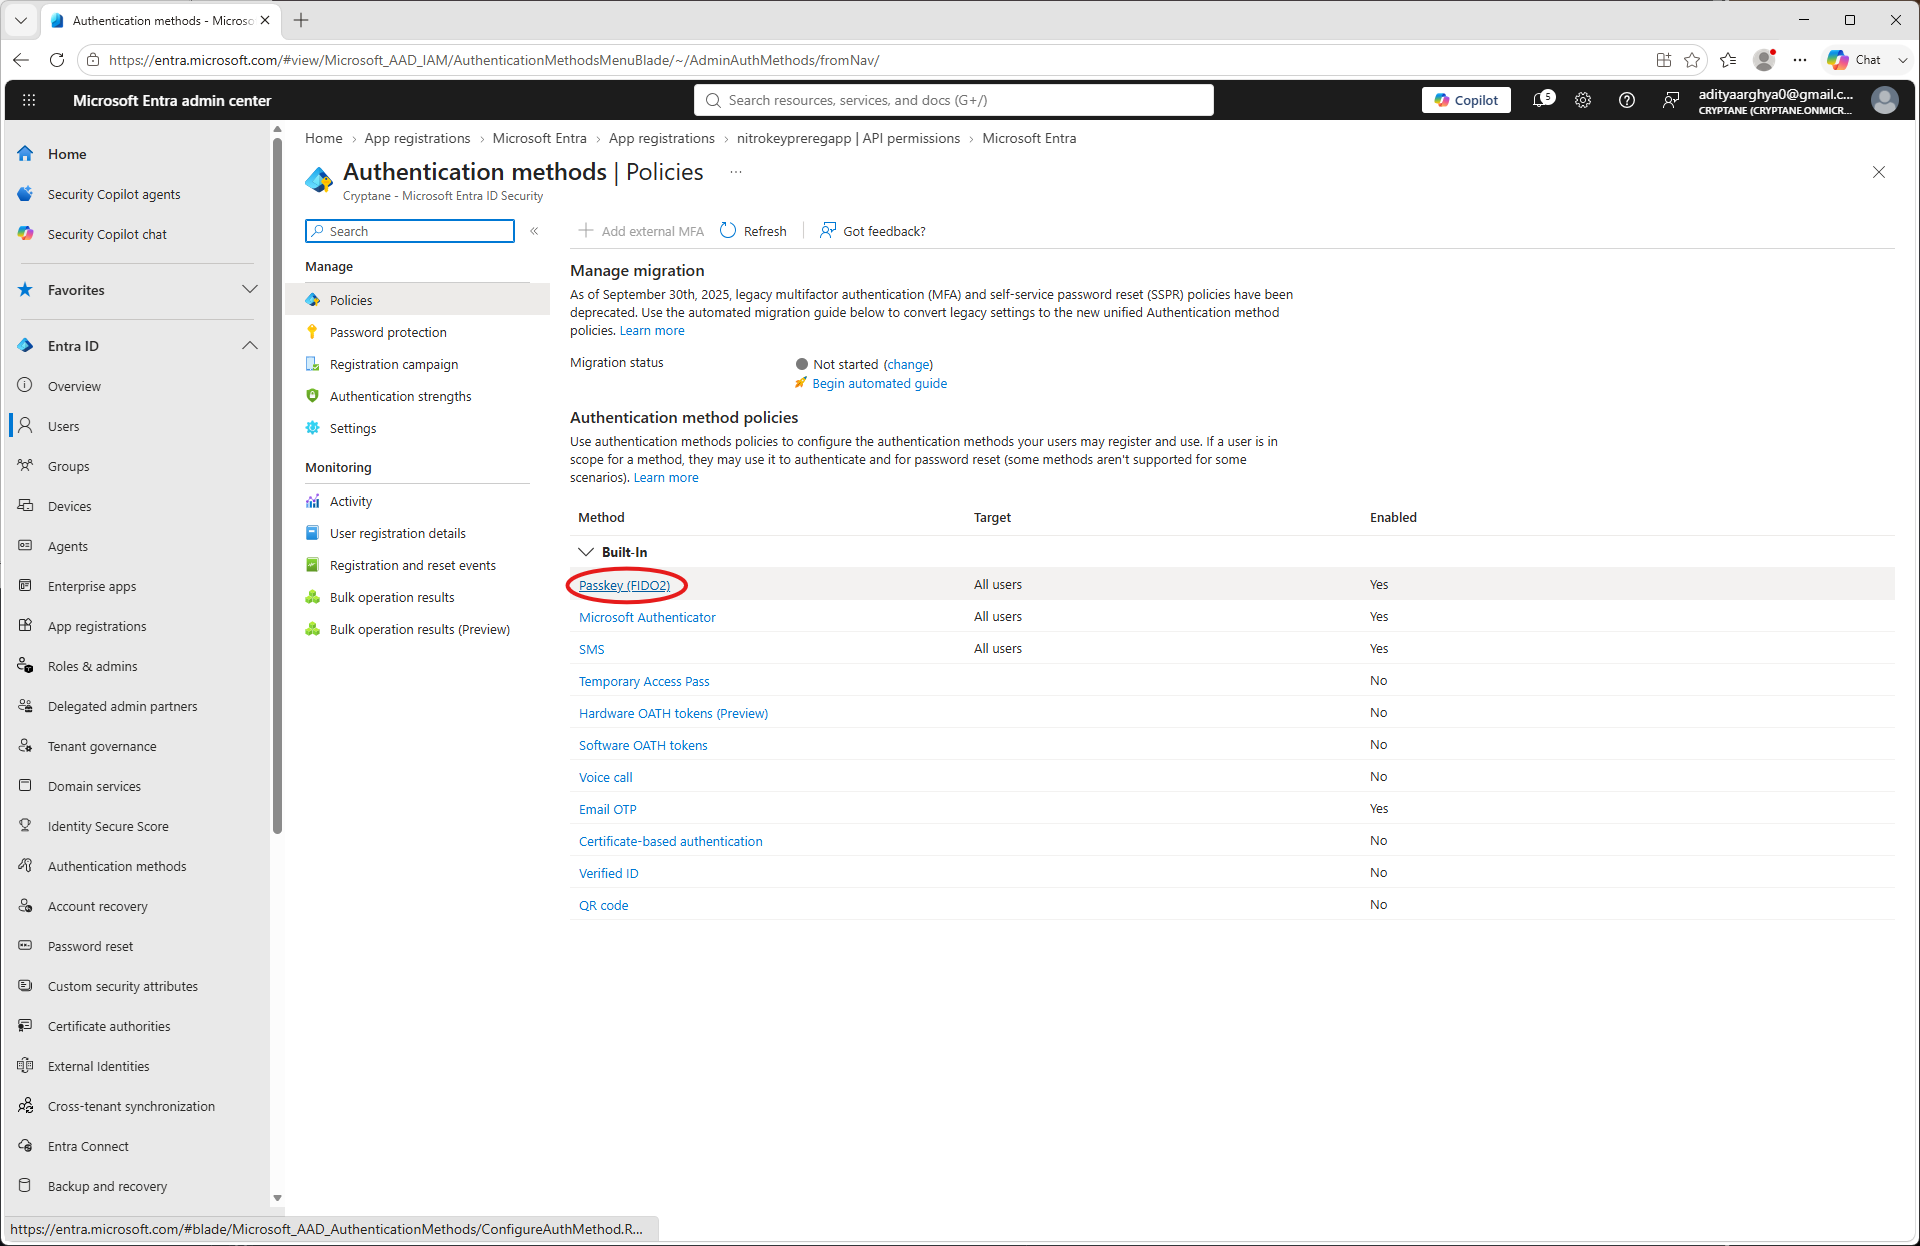
Select Passkey (FIDO2).
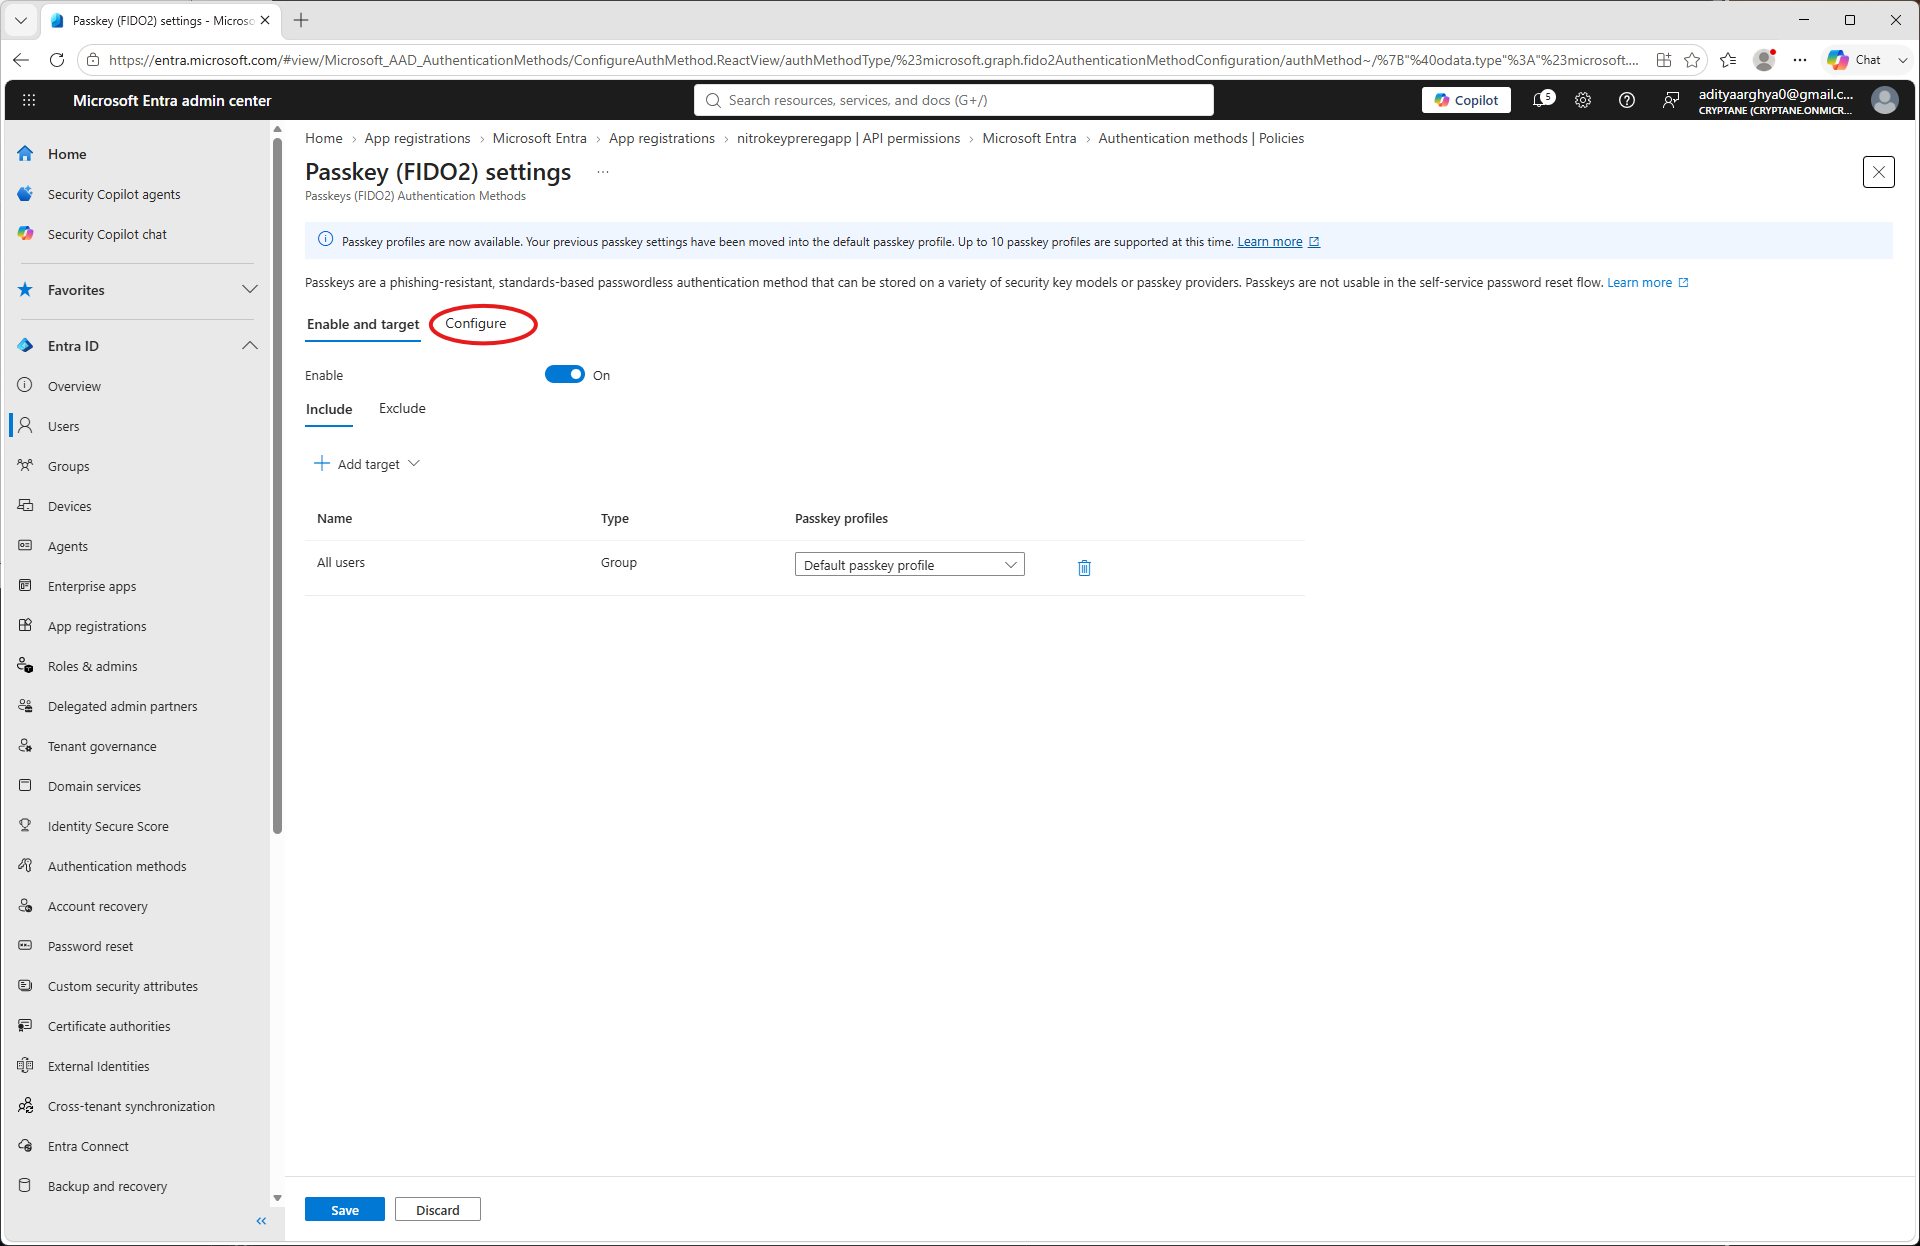
Click on the Configure tab.
Click on Default Passkey profile
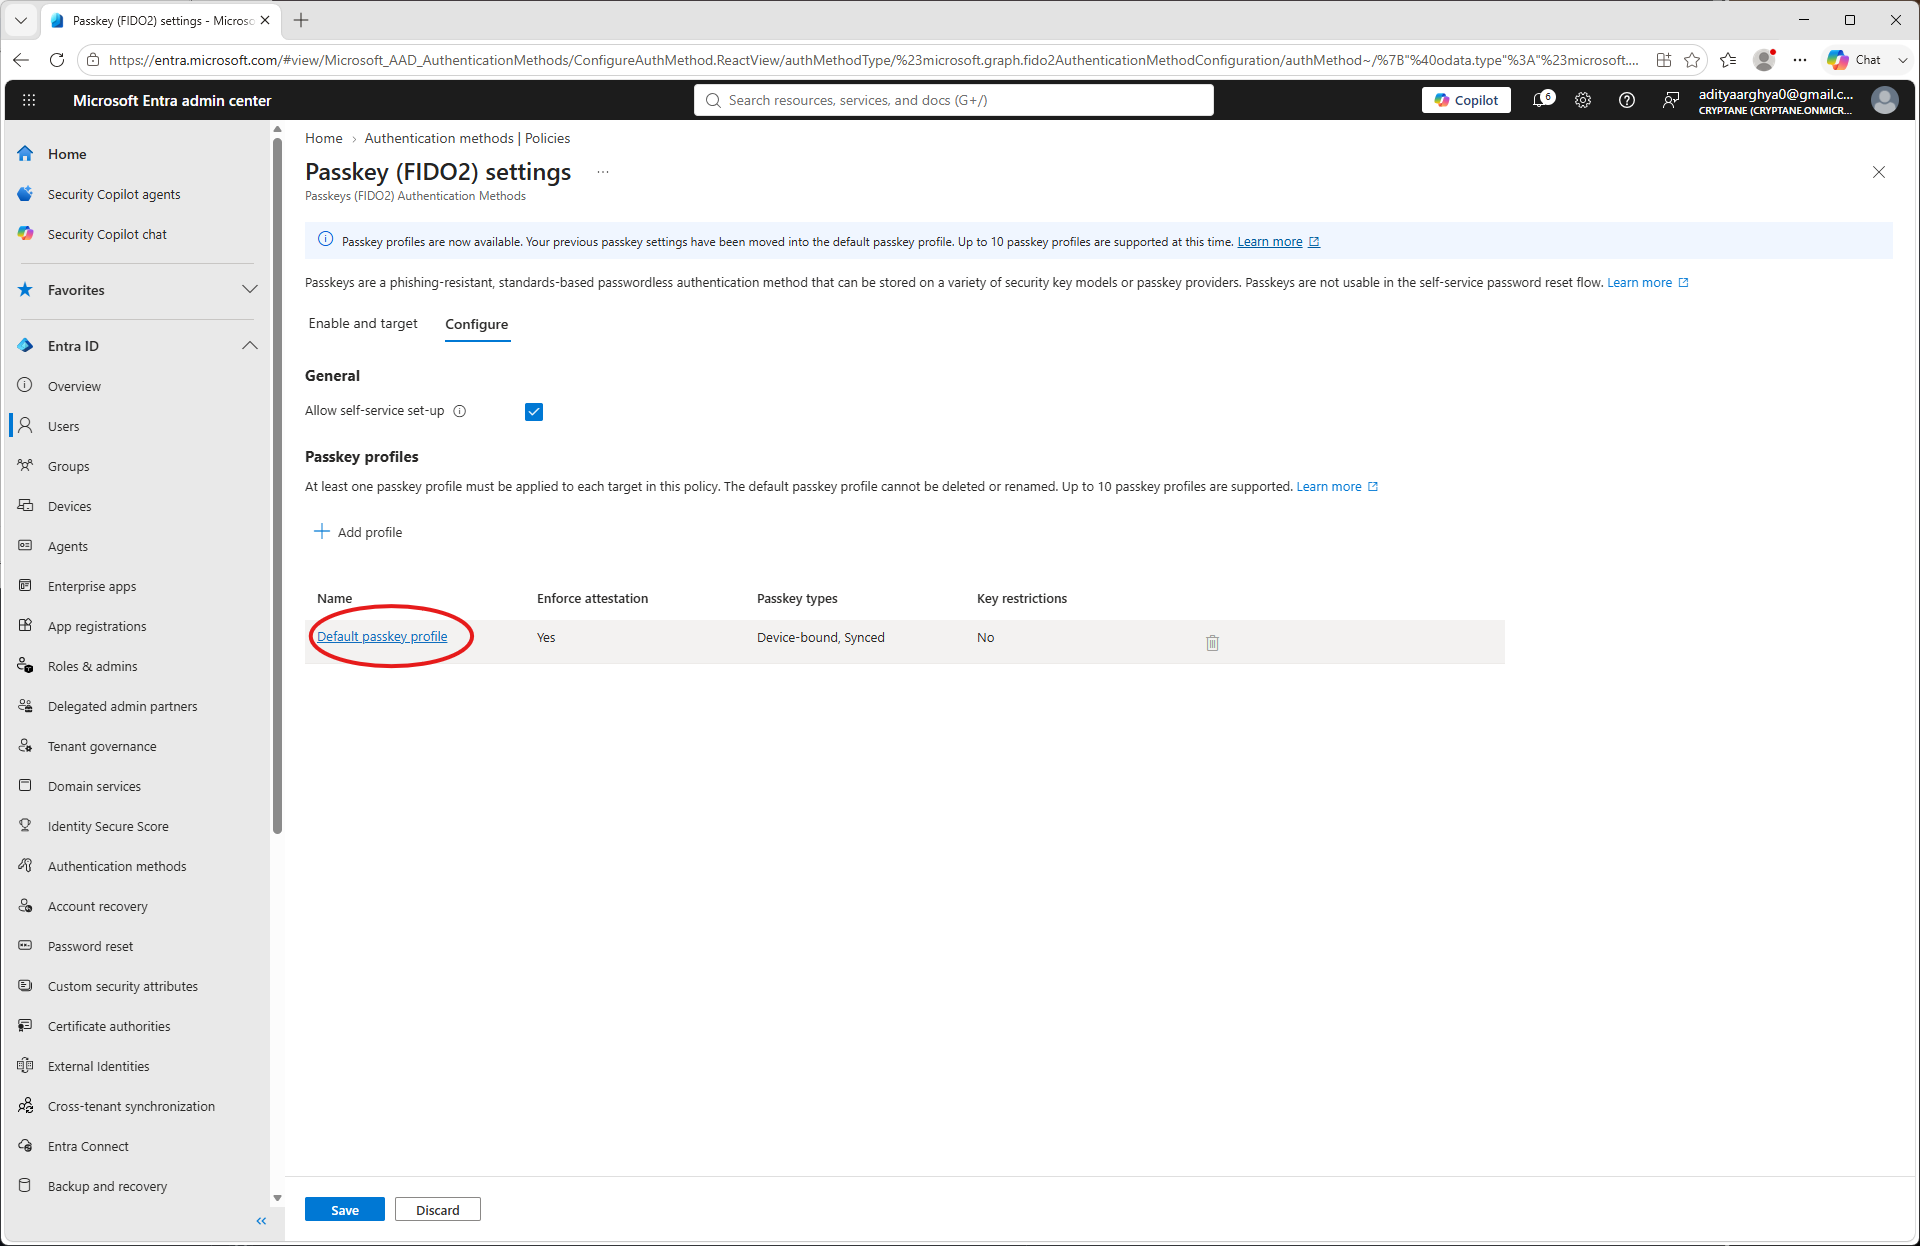
Uncheck Enforce Attestation (Only if you are using a Nitrokey that does not have a FIDO Alliance certification. At the time of writing this document, only the Nitrokey 3A Mini has this certification.)
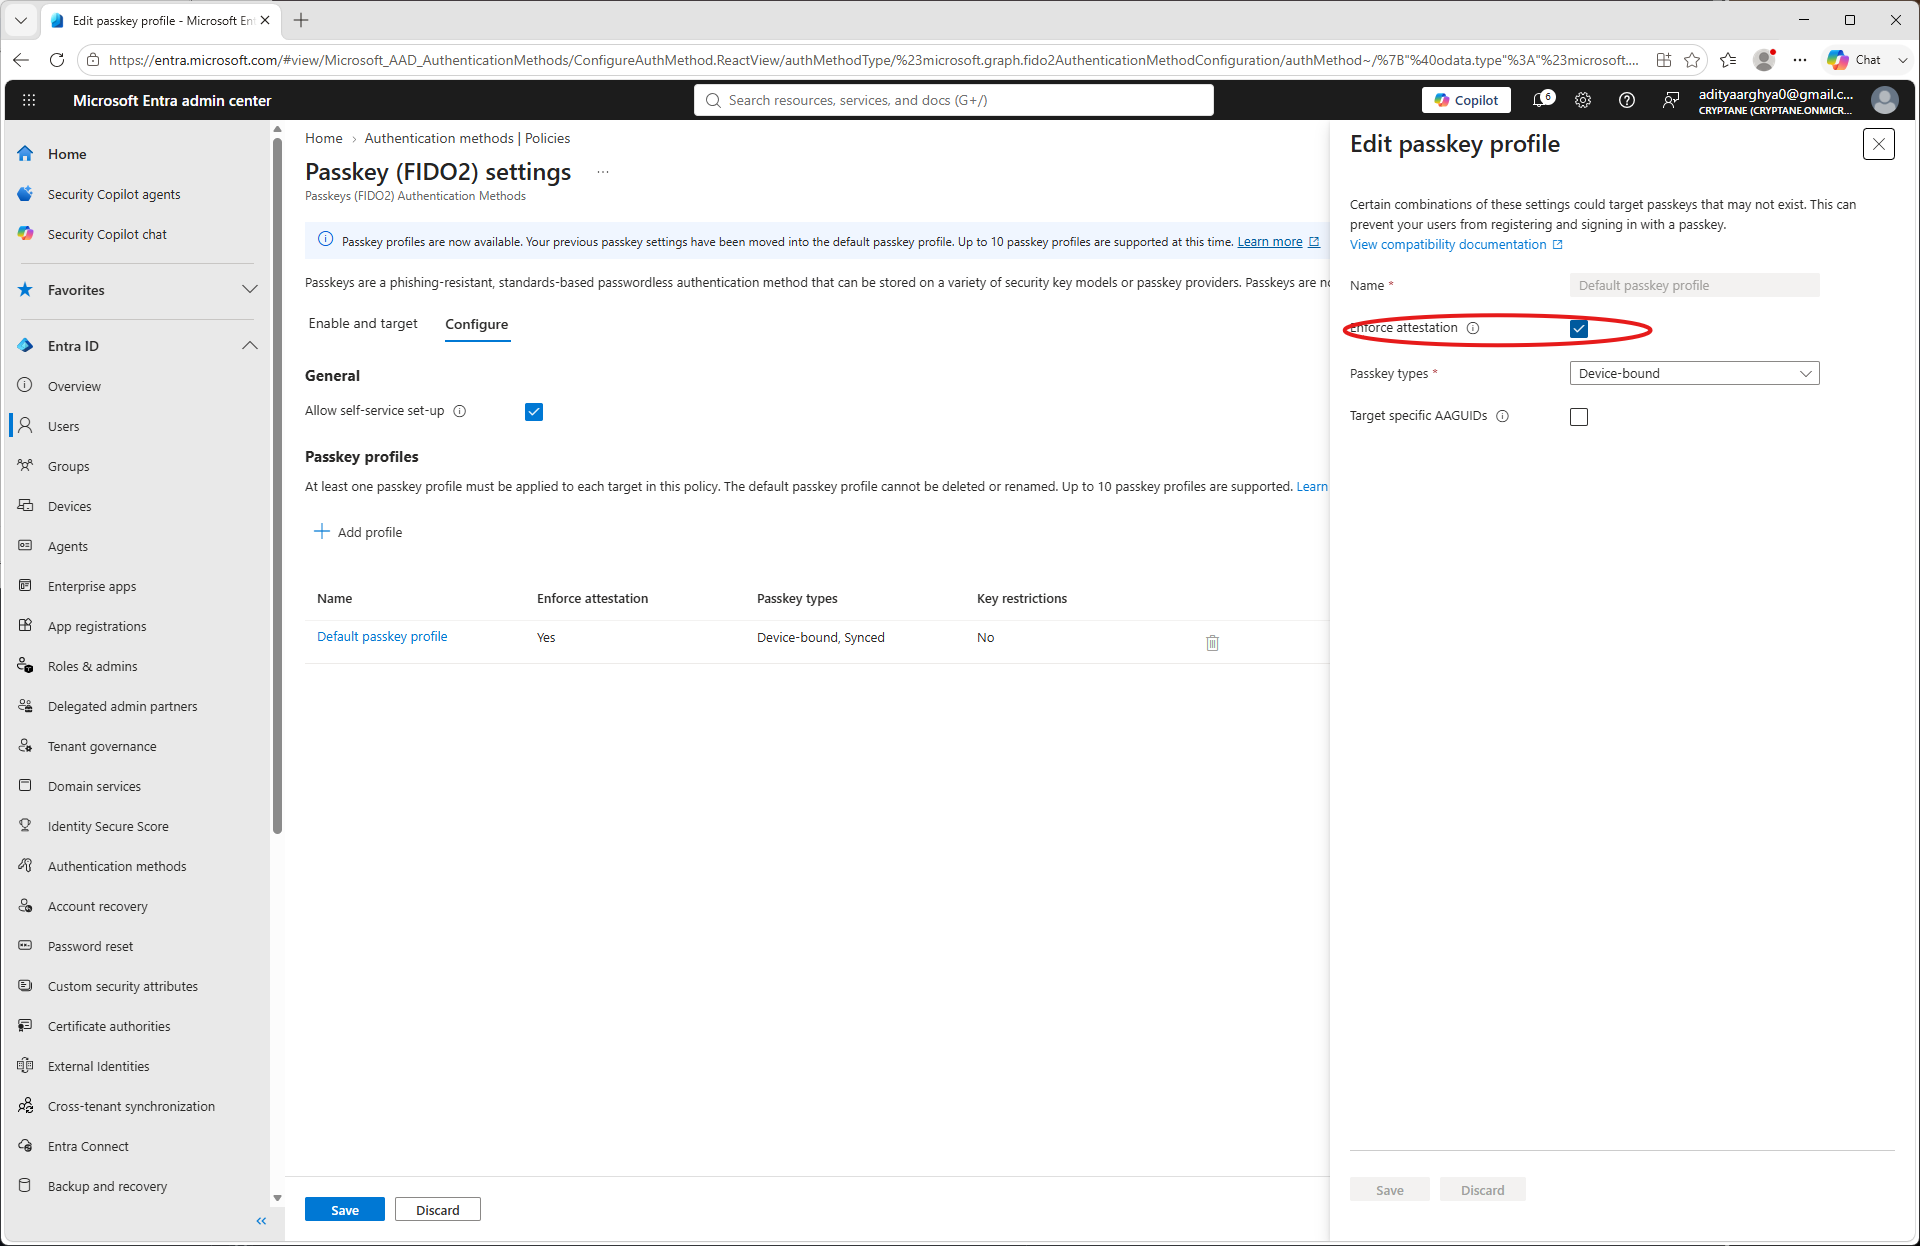
Click Save.
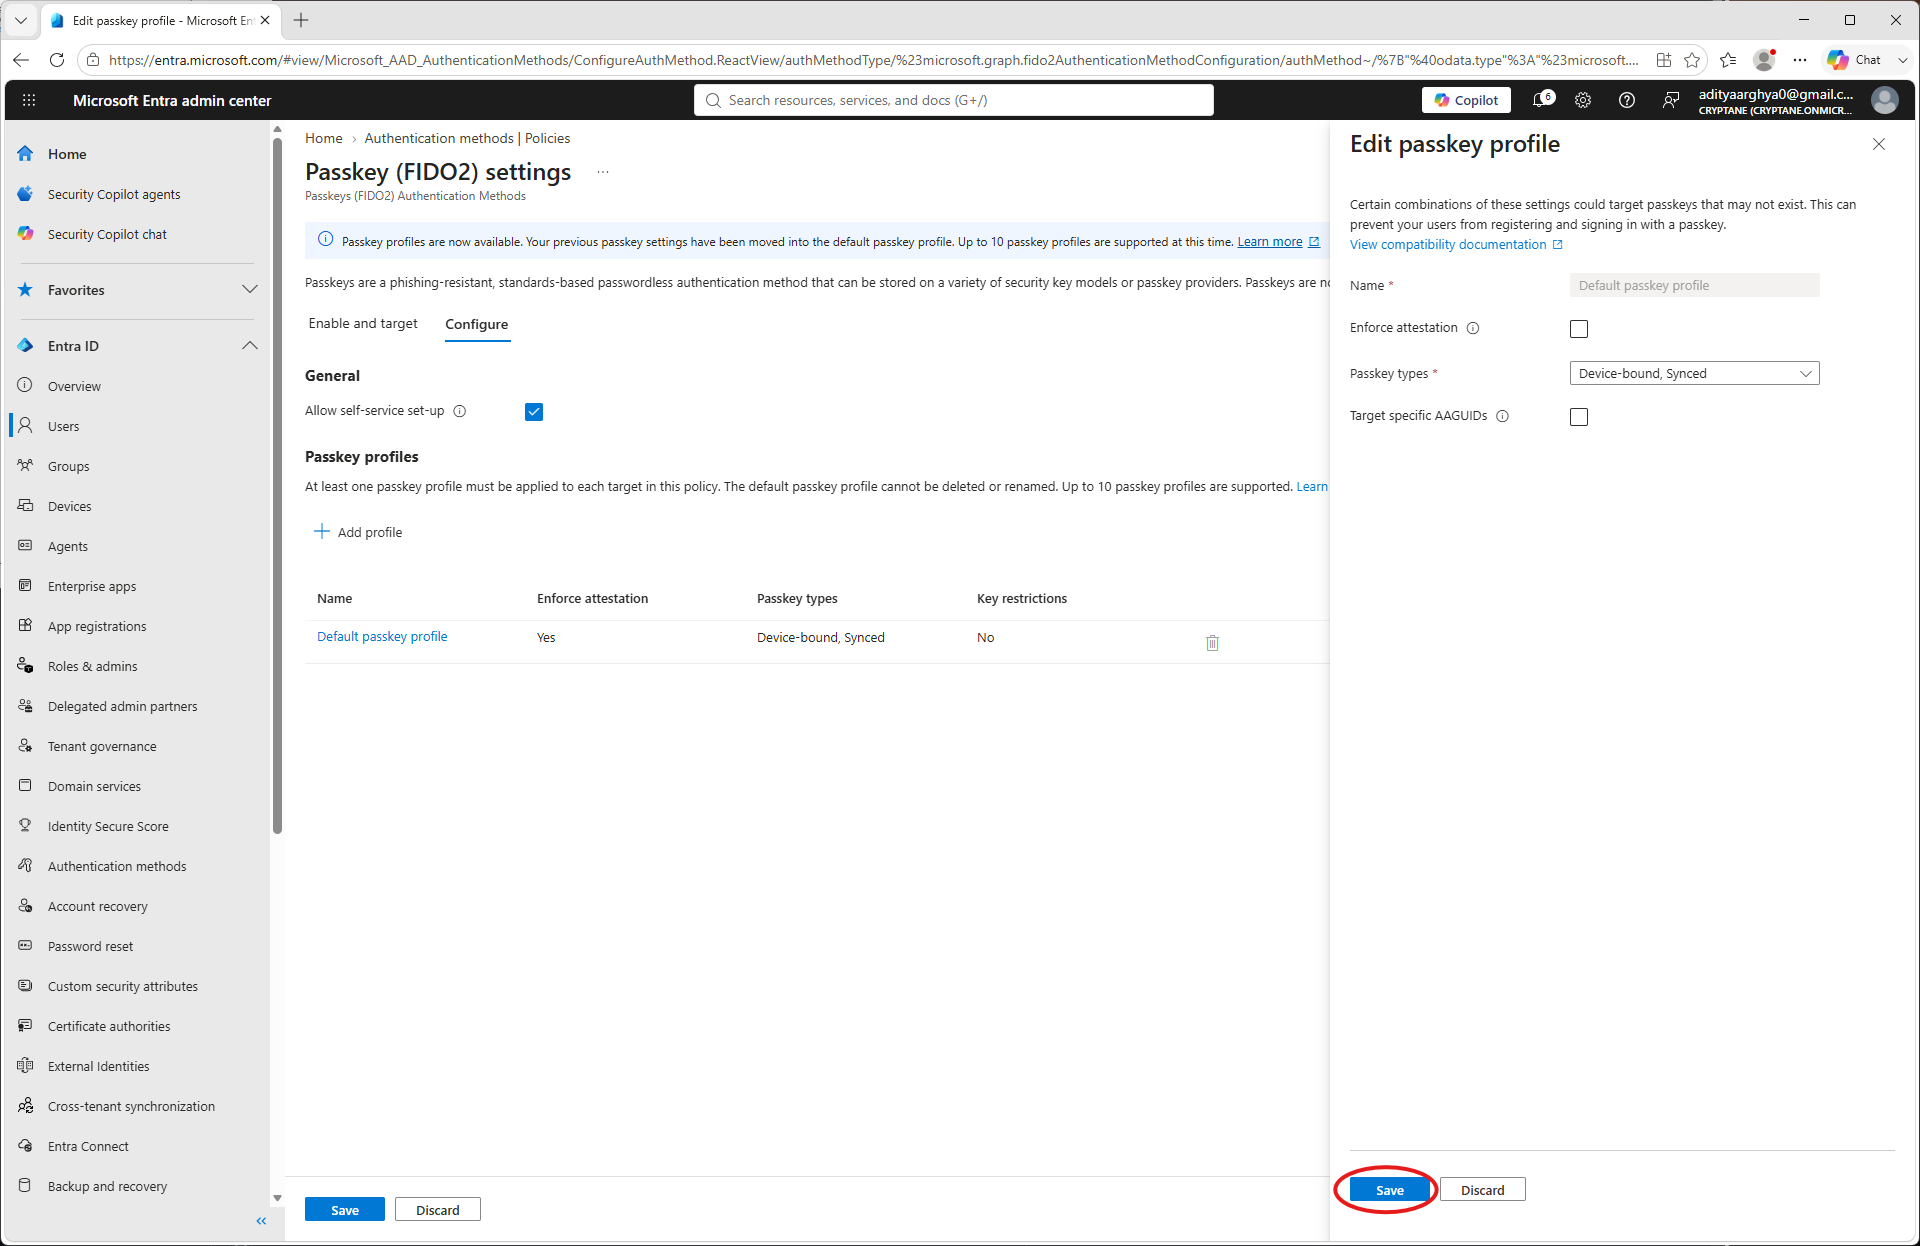
You have taken note of the Tenant ID, Client ID, Client Secret and Primary Domain as a part of the process. Make a
config.jsonfile with the information. An example is shown below.{ "tenant": "49d2c4c8-9144-49ea-b5f3-fc11b848cd72", "client": "e9f25c9c-3870-4aa8-9659-a40f09de093e", "secret": "************************************", "domain": "Cryptane.onmicrosoft.com" }
Usage
You may use the pynitrokey utility to provision a Nitrokey for an user in your tenant.
nitropy fido2 provision-credential entra -c config.json <username> --create-user
Here the <username> could be the Email ID of the user (User principal in terms of Microsoft) or a part of it till before the @ sign.
The --create-user flag directs the tool to create the user if it does not exist in the Entra Tenant.
$ nitropy fido2 provision-credential entra -c config.json aditya --create-user
Command line tool to interact with Nitrokey devices 0.12.3
Warning: It is recommended to execute nitropy with admin privileges to be able to access Nitrokey 3 and Nitrokey FIDO 2 devices.
Waiting 5 secs for Graph API to update
User aditya created on Entra
Enter PIN:
Touch your authenticator device now...
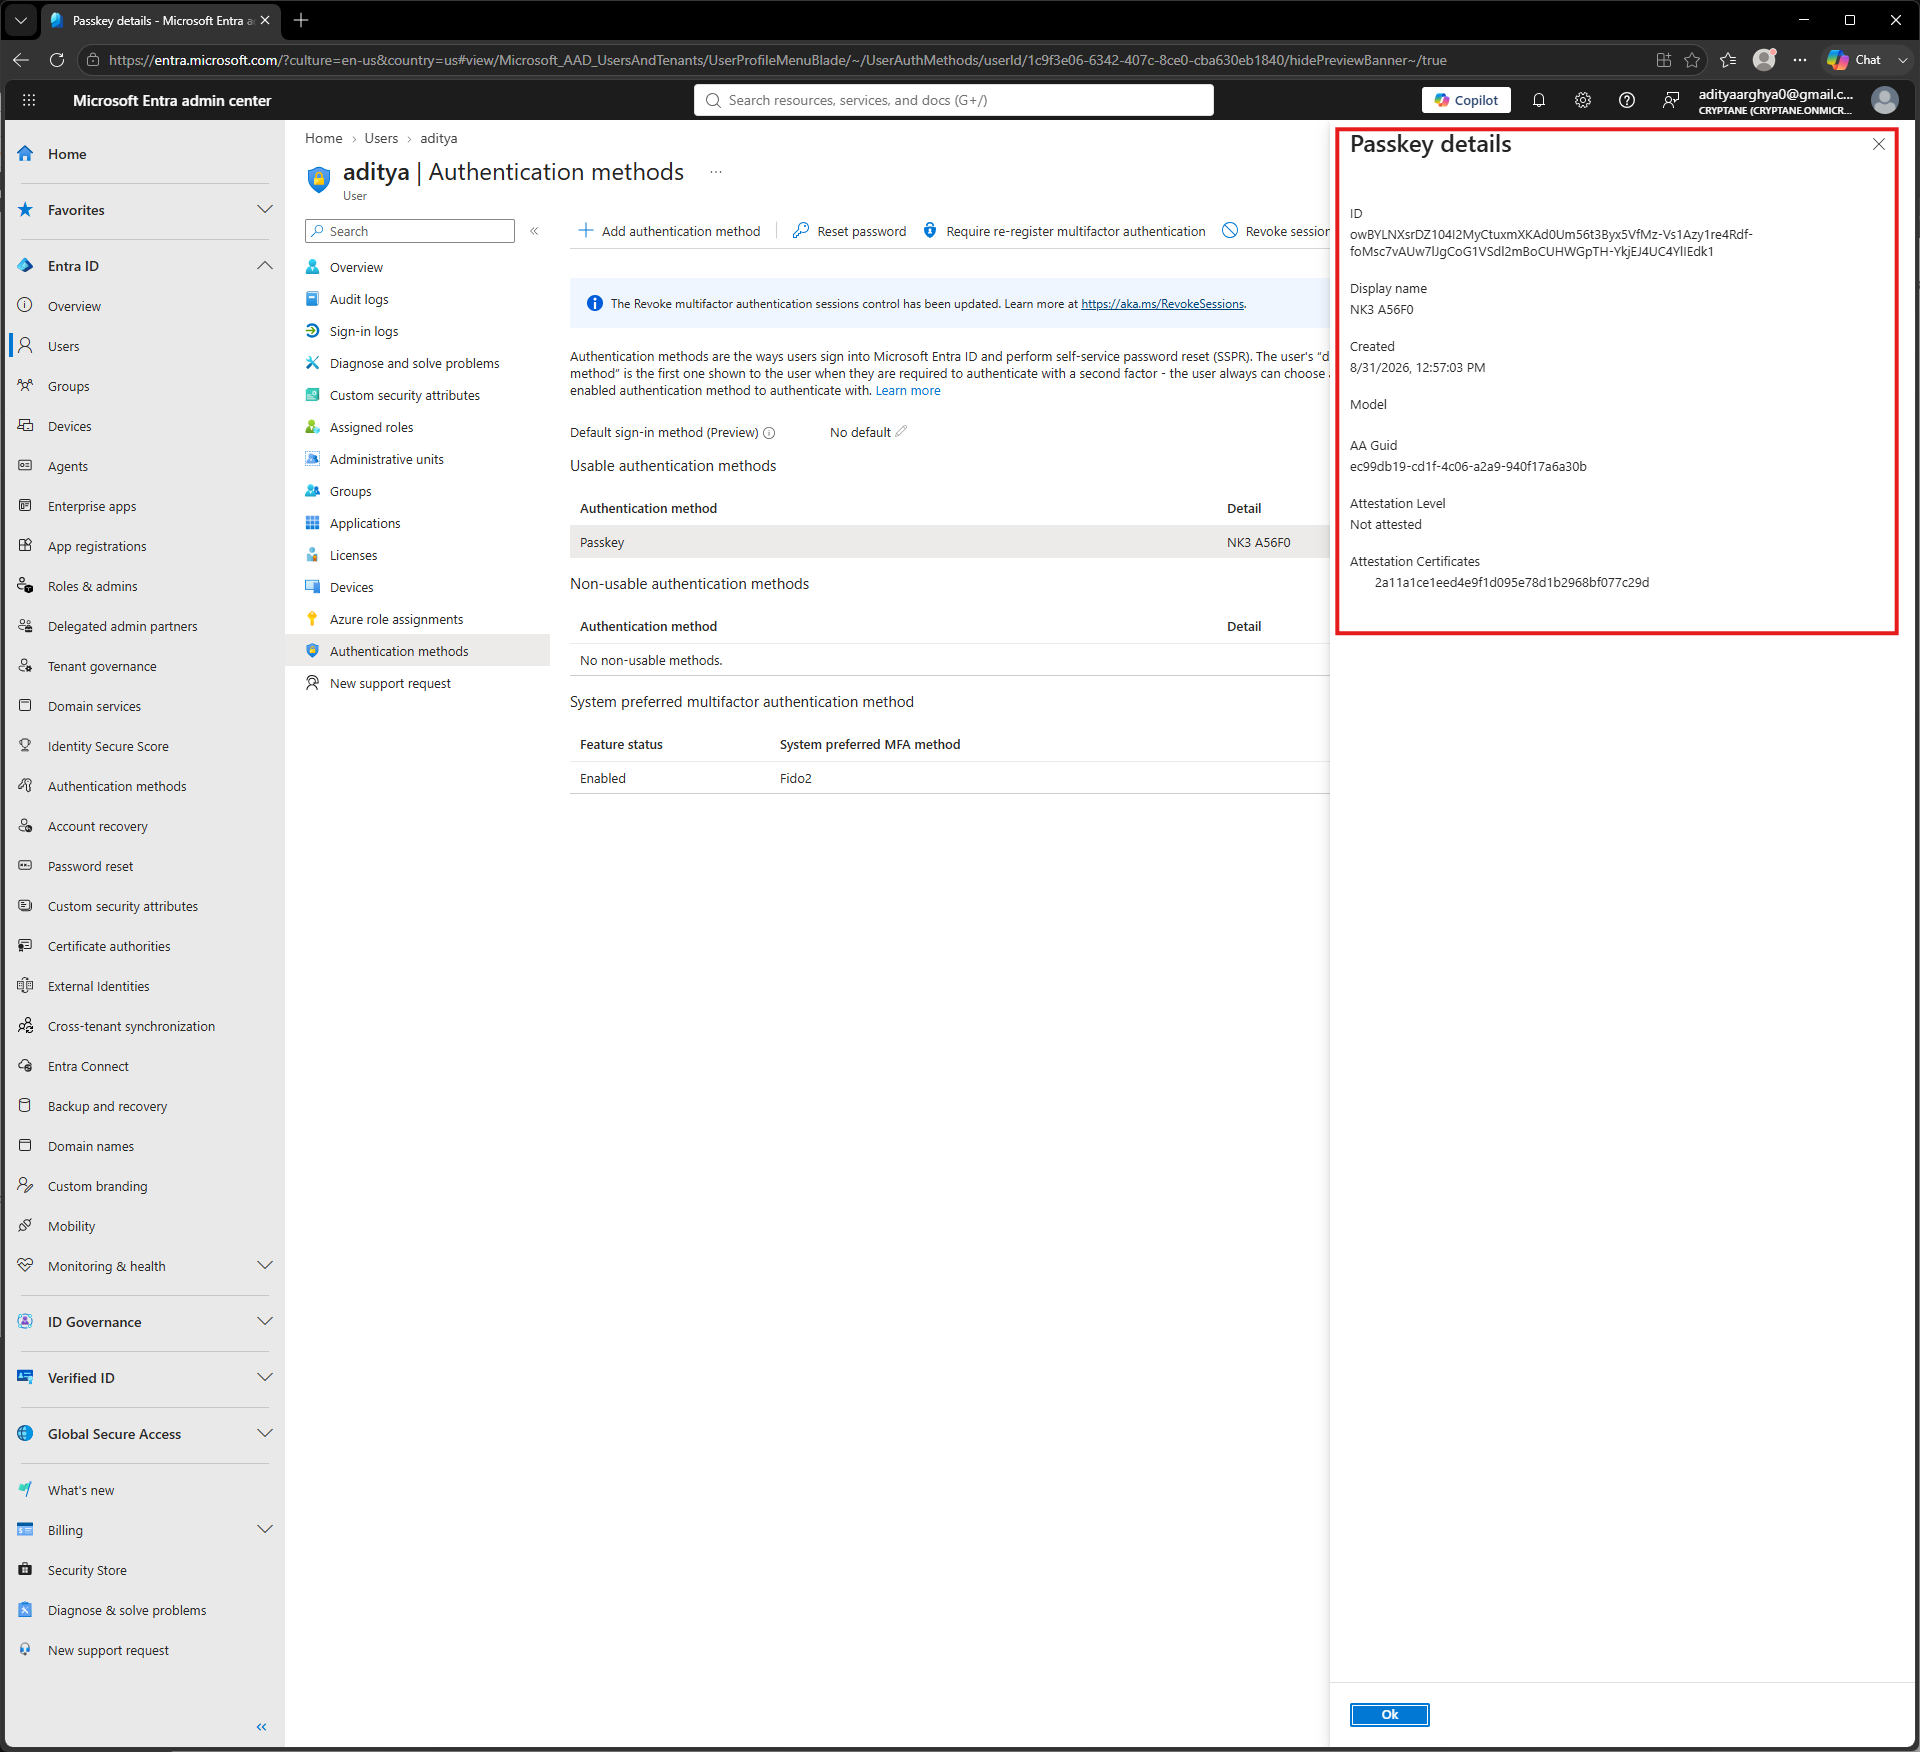
Entra credential for aditya pre-registered on NK3 A56F0 with Credential ID owBYLNXsrDZ104I2MyCtuxmXKAd0Um56t3Byx5VfMz-Vs1Azy1re4Rdf-foMsc7vAUw7lJgCoG1VSdl2mBoCUHWGpTH-YkjEJ4UC4YlIEdk1.
Verification
The user may use the newly provisioned Nitrokey to login to his Microsoft account. Follow Sample login to Microsoft with Nitrokey for signing in with this newly provisioned nitrokey.
You may verify the provisioned credential from the Entra admin portal following the steps.
Go to the Users option from the left blade on Entra admin center.
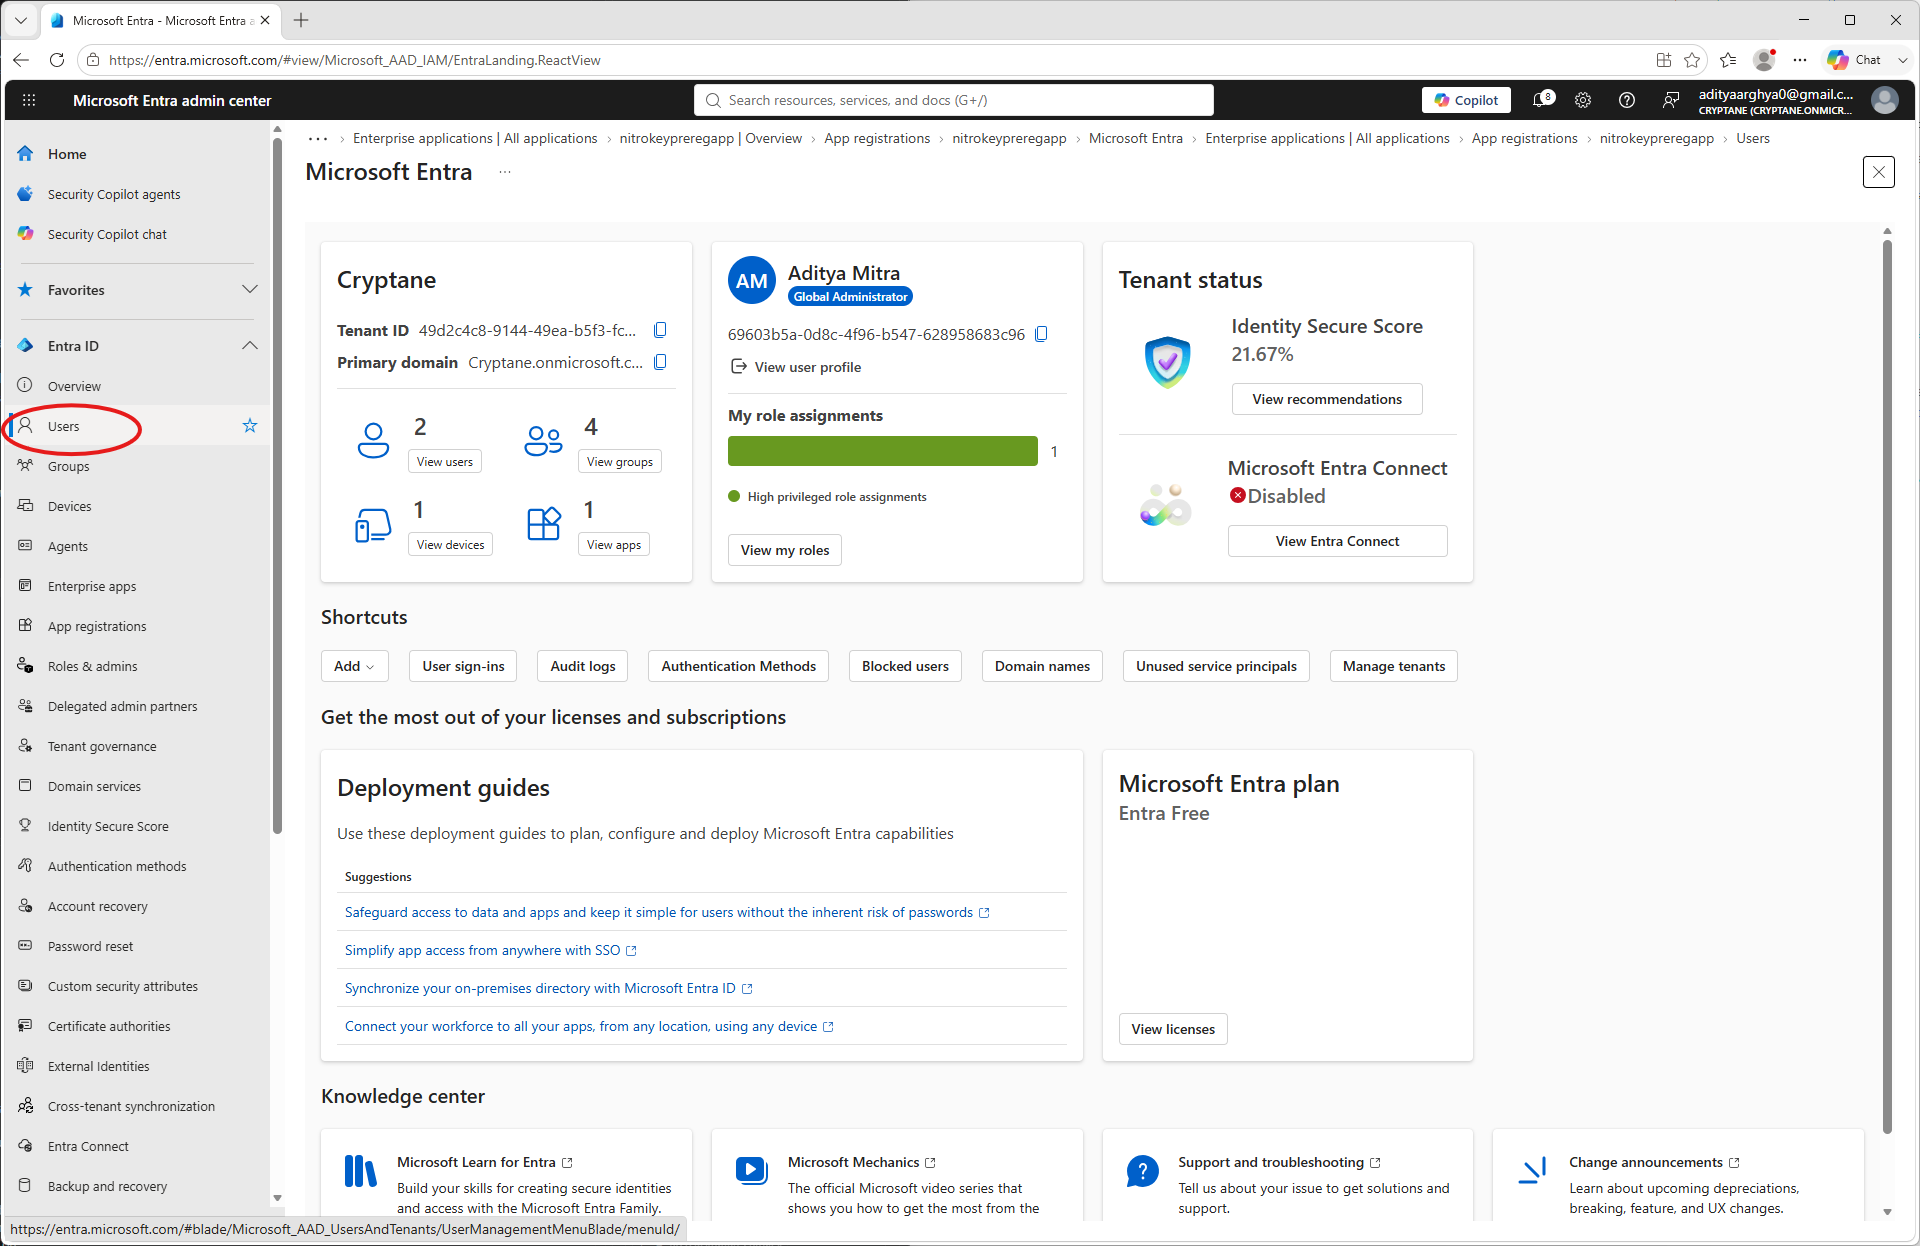
If the user was created with the
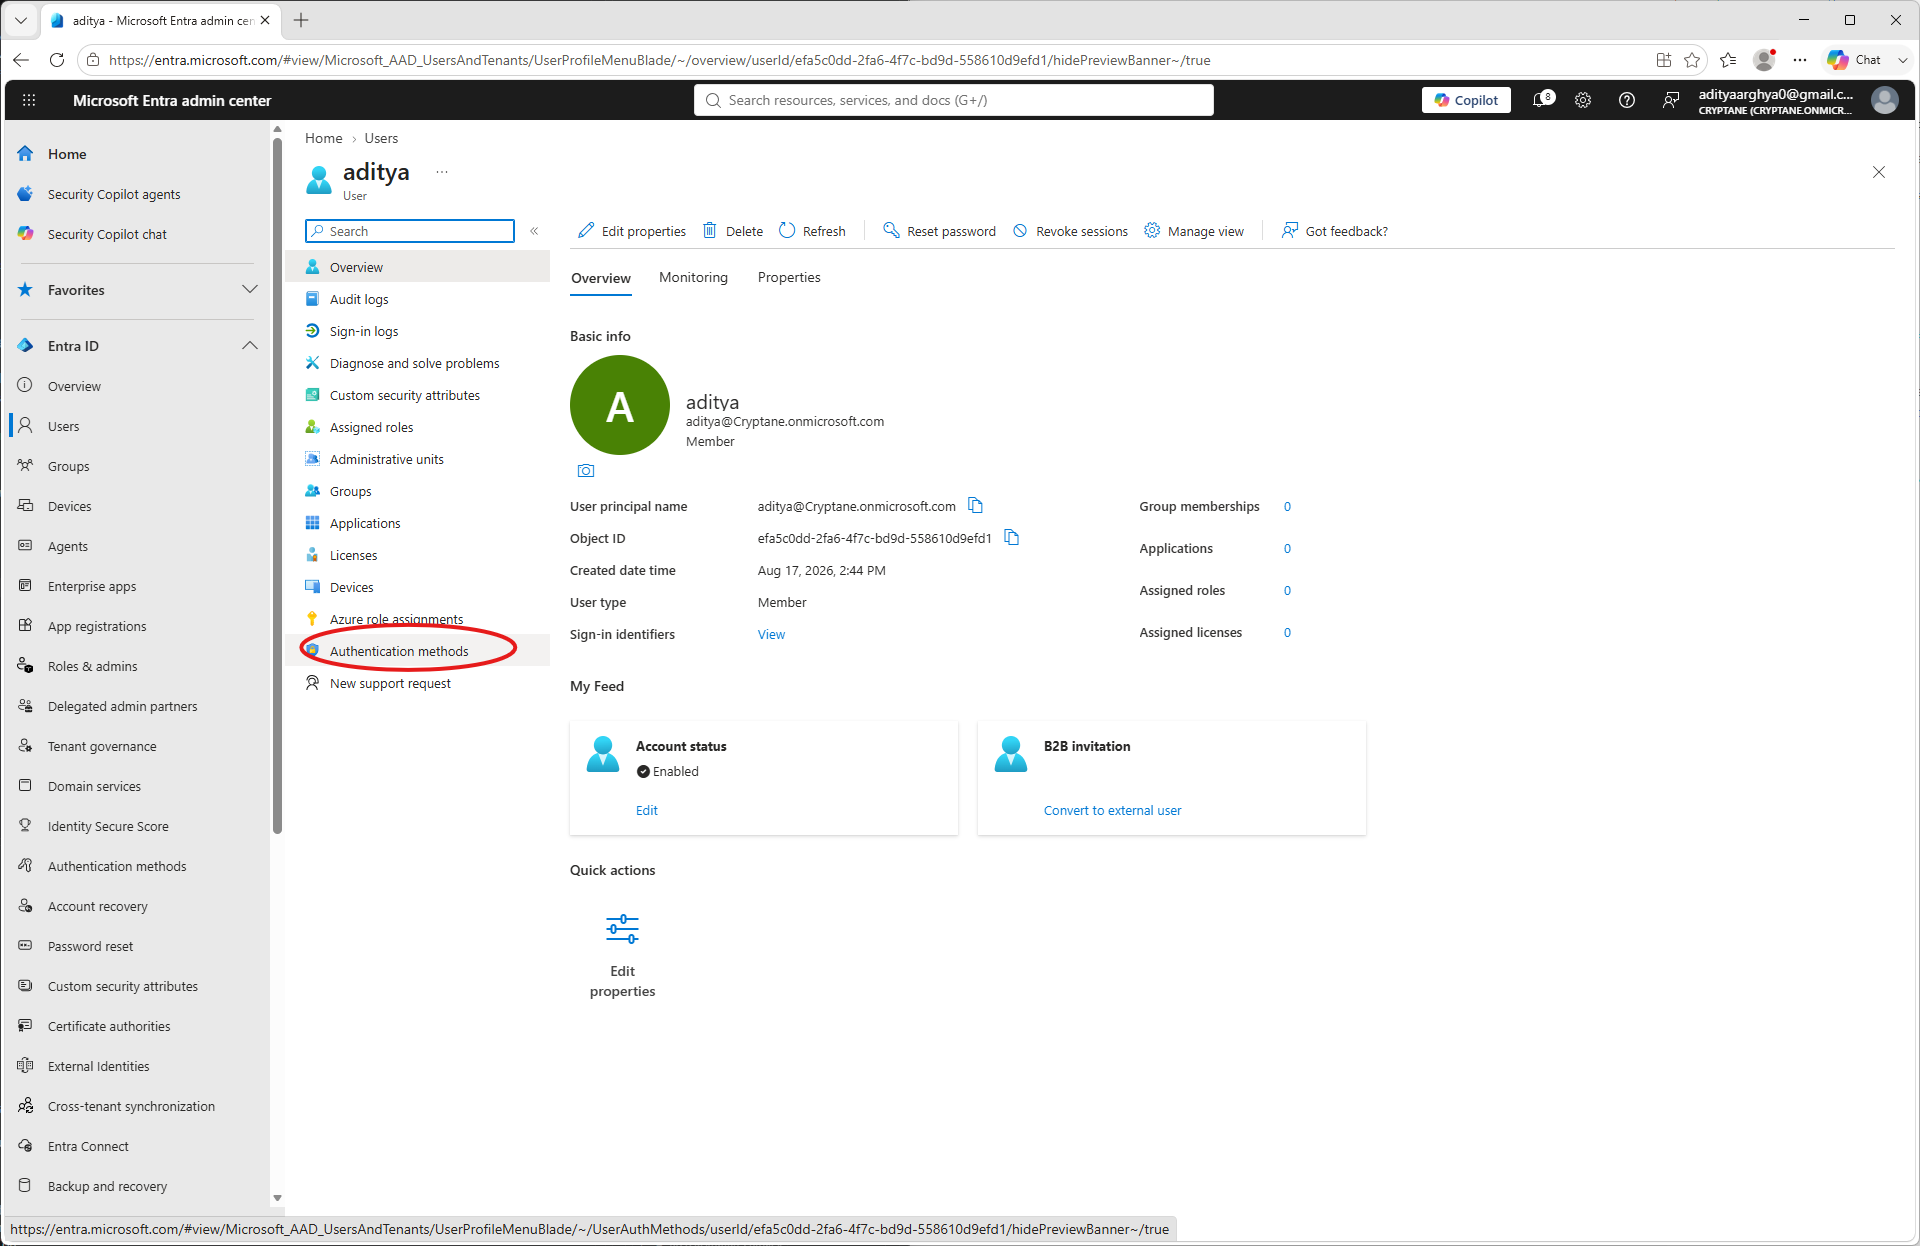
--create-userflag you may be able to find the entry on the list. If it is a pre-existing user, it would also be there. Click on the user to which the credential was enrolled.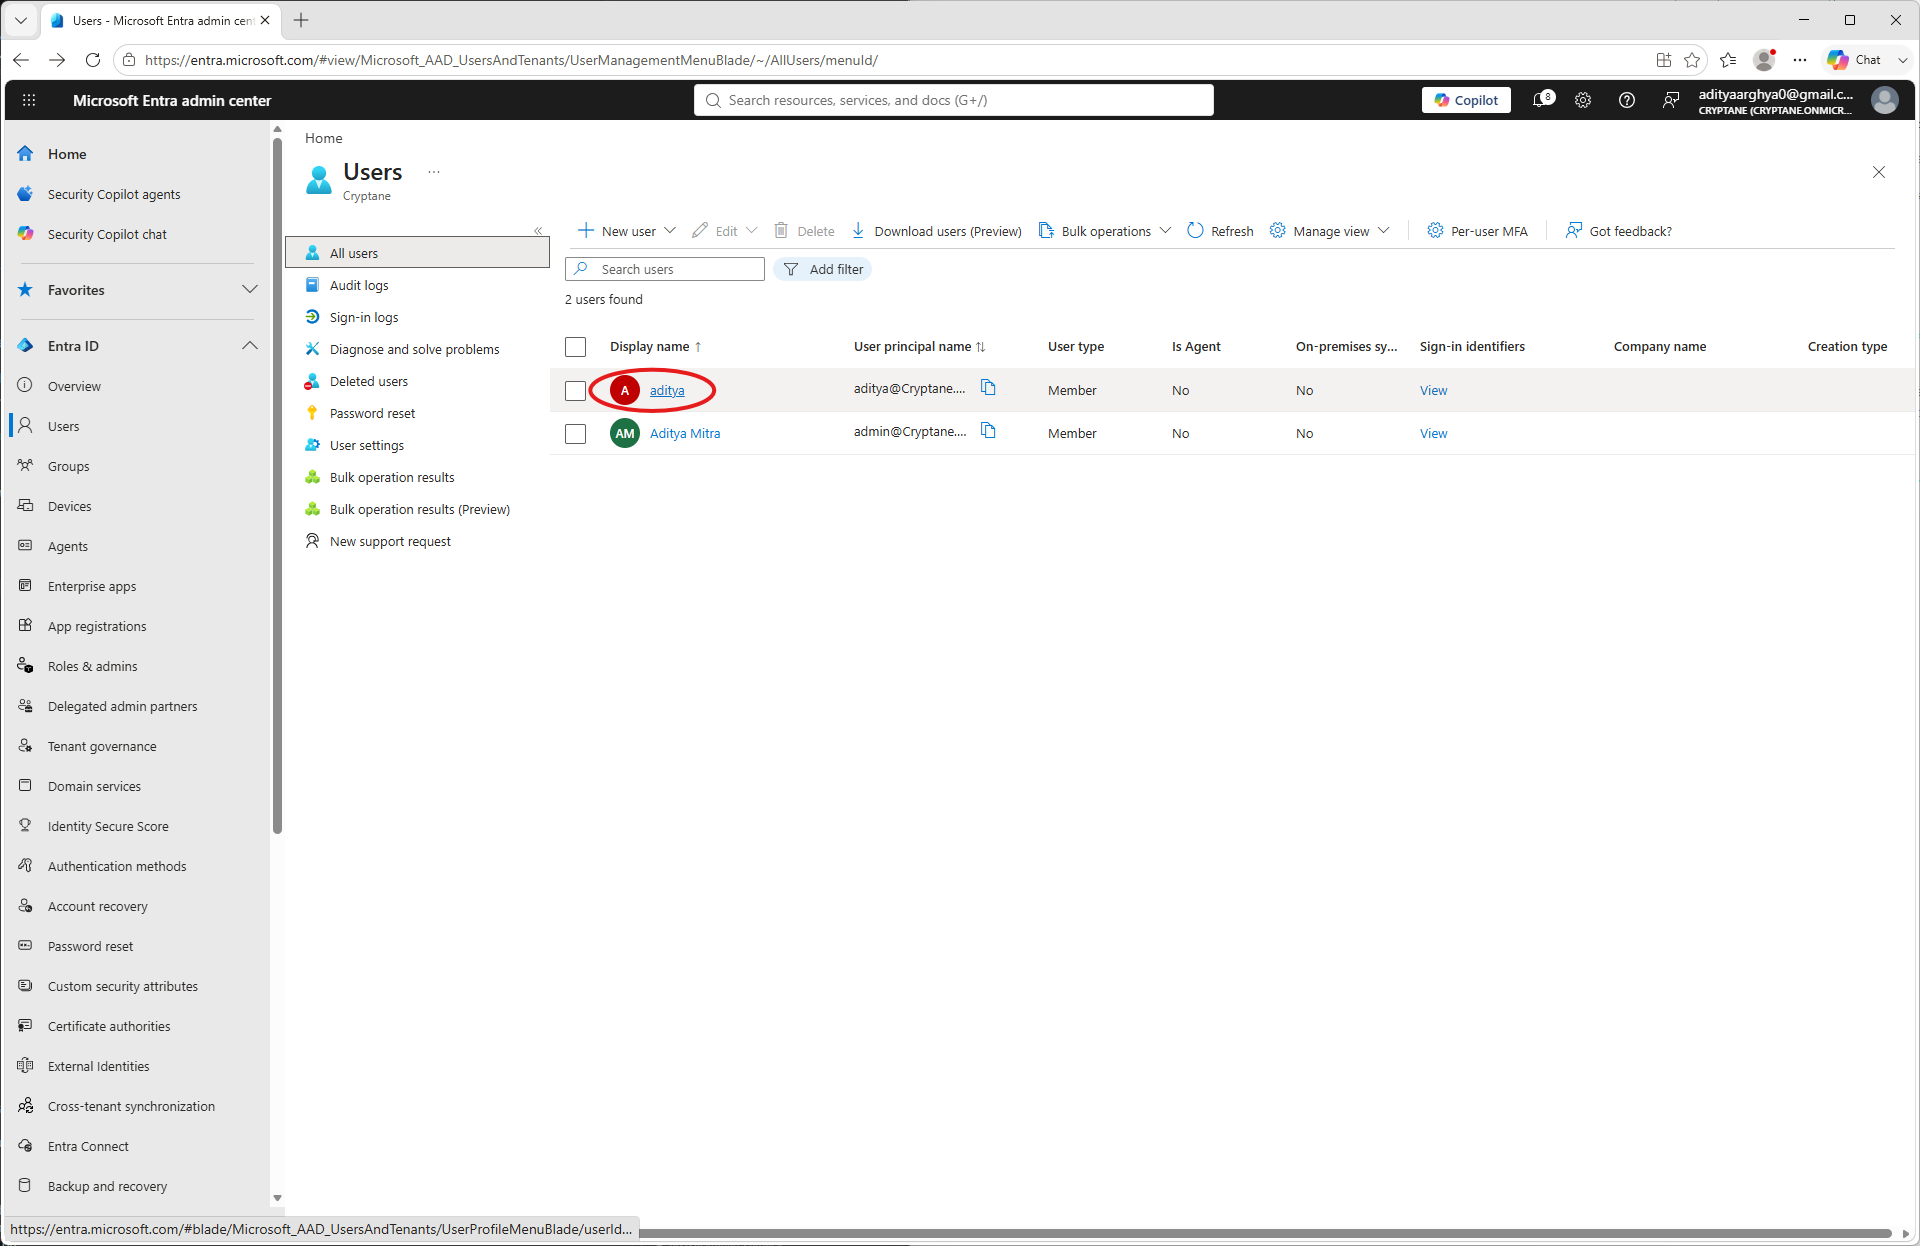
Click on Authentication methods on the user blade.
The enrolled credential with first 5 characters of the Nitrokey UUID would be visible. You may click the triple dots and then on View details to see detailed information about the enrolled credential.
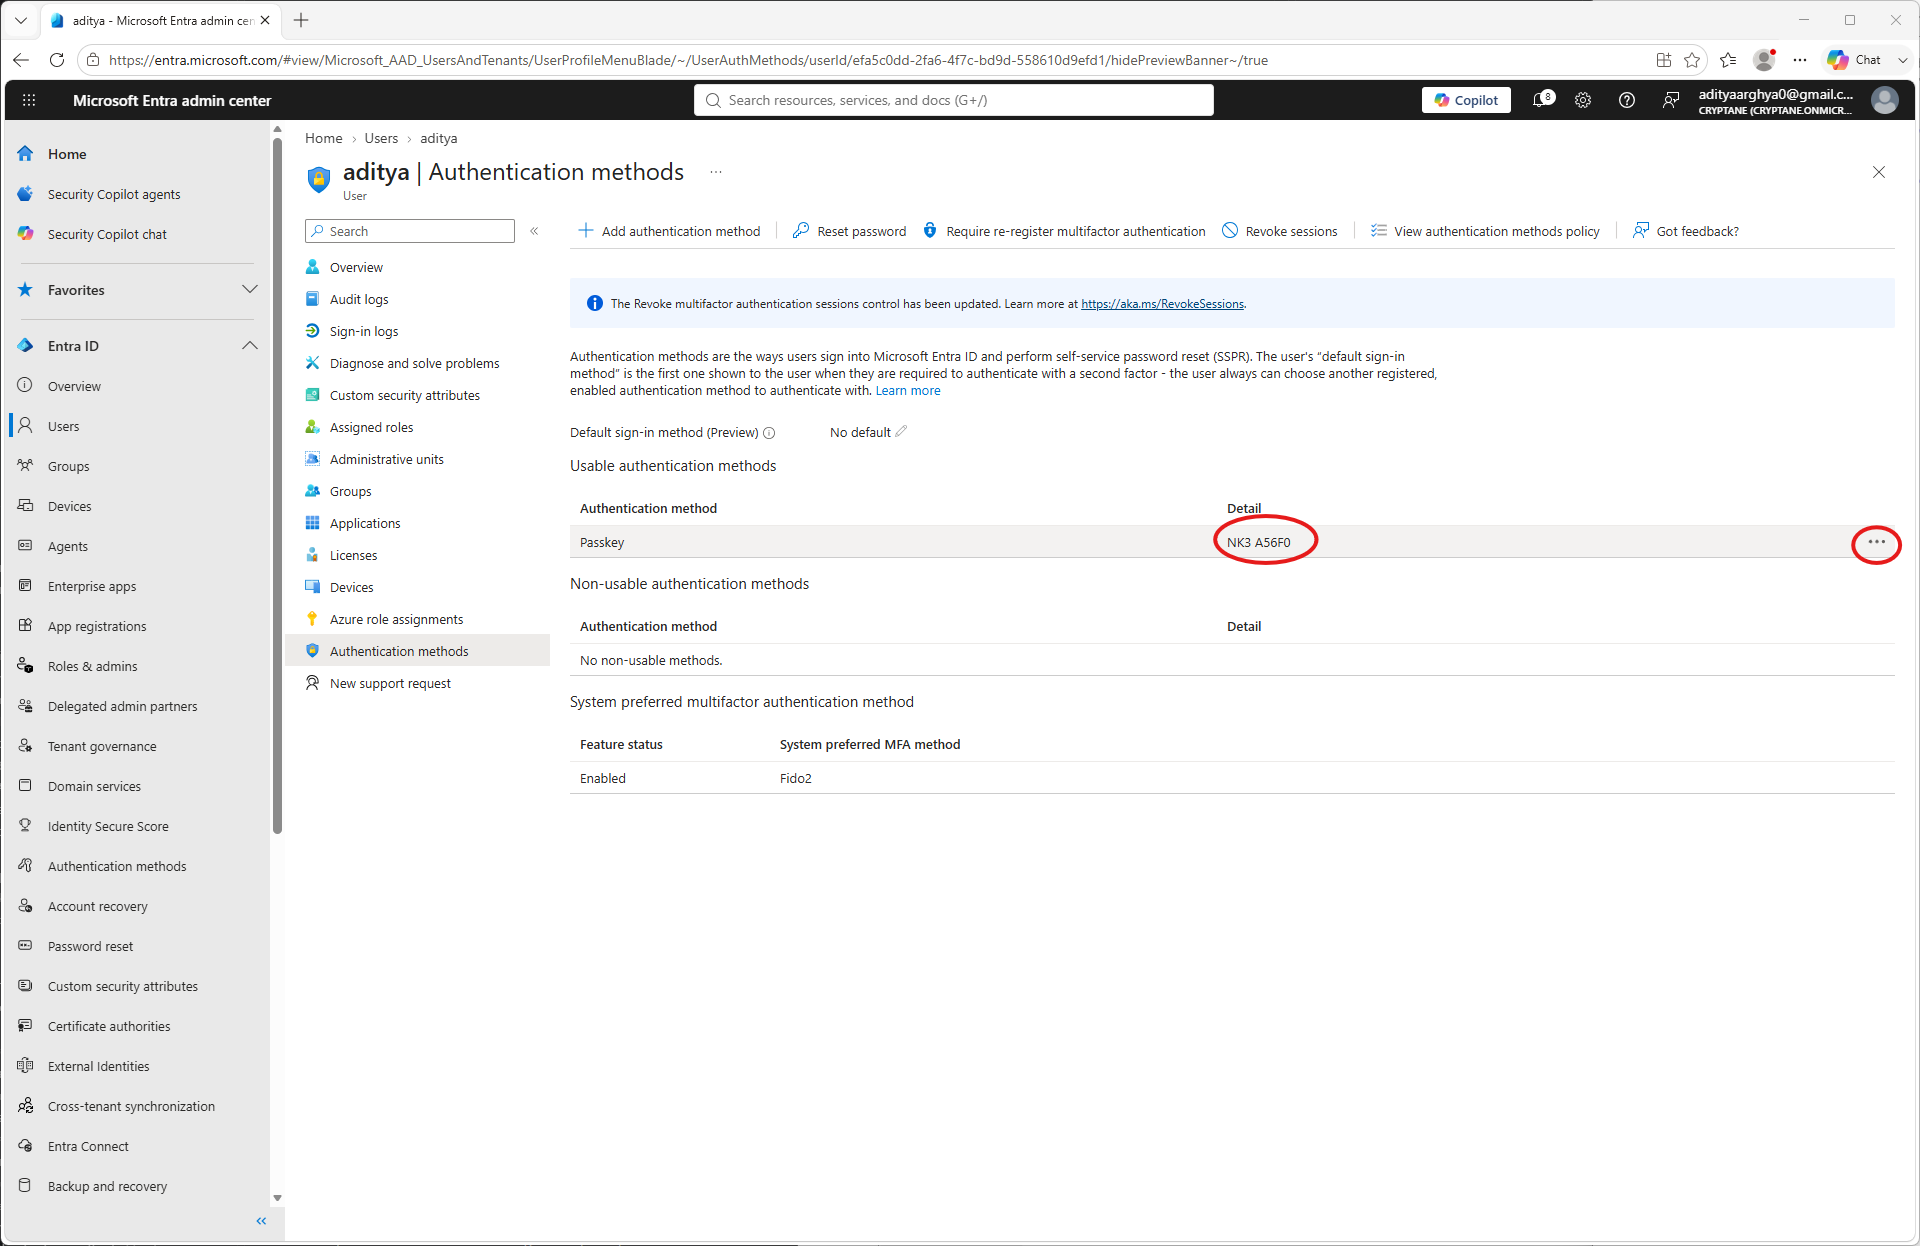
Additional information about the credential would be visible. You may validate the same.