Namestitev nitropija v operacijskem sistemu Windows
Opomba
Na splošno sta podpora za sistem Windows in namestitveni program eksperimentalna - uporabljajte ju previdno.
Opomba
Če v svojem sistemu že uporabljate Python in poznate ukazno vrstico, lahko nitropy namestite s pipxom, glejte Namestitev nitropy s pipxom.
Using our Release
Prenesite najnovejšo
.exedatoteko iz izdaje.Odprite ukazno konzolo v skrbniškem načinu (Windows 10: pritisnite desni miškin gumb na meniju Start in v meniju izberite „Windows PowerShell (Admin)“).
Change to the directory of the
.exe(something likecd C:\Users\YOURUSER\Downloads)Izvedba
nitropy-VERSION.exe
Opomba
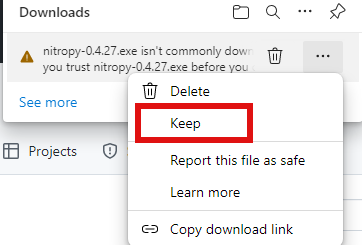
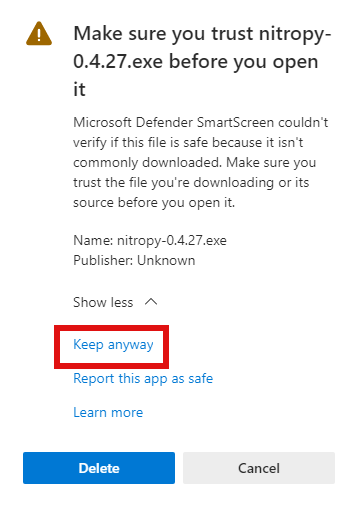
If you’re using Microsoft Edge, the downloaded
.exemight be marked as „untrusted“ by Windows. To mark it as trusted anyway, click the three dot on the right of the warning, then „keep“, then „show more“ and finally „keep anyway“.
Opomba
Brez skrbniških pravic nitropy morda ne bo mogel komunicirati z napravo.
Using WinGet
If you don’t have WinGet installed on your system you can download and install it from here.
Odprite program PowerShell in zaženite ta ukaz:
winget install --id=NitrokeyGmbH.Nitropy -eZaprite program PowerShell in ga ponovno zaženite.
You can find information about our package here.
Znane težave
Podpora za Nitrokey Start pod Windows 10 ne deluje brez namestitve knjižnic libusb (treba opisati)
Namestitveni program ne odstrani prejšnje namestitve (ročno jo odstranite z nastavitvami -> programi in aplikacije).