Getting Started
To access the OpenPGP smart card of the Nitrokey, install the package libccid. On Debian/Ubuntu based Distributions type in terminal: sudo apt-get update && sudo apt-get install libccid For Fedora please refer to this guide.
Once you plug in the Nitrokey, your computer will start the Keyboard Setup Assistant. Don’t run through this assistant but exit it right away.
Connect your Nitrokey to your computer and confirm all dialogs so that the USB smart card device driver gets installed almost automatically. Windows may fail to install an additional device driver for the smart card. Its safe to ignore this warning.
Download and start the Nitrokey App.
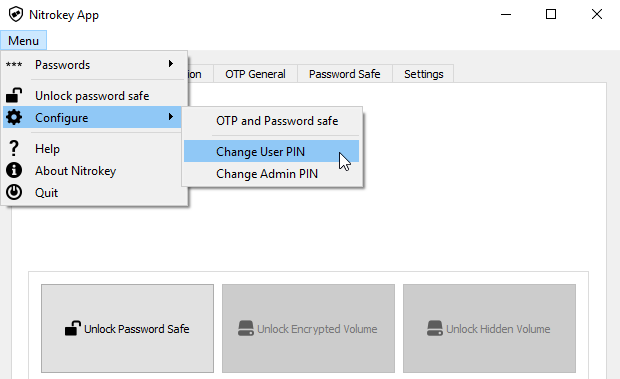
Use the Nitrokey-App to change the default User PIN (default: 123456) and Admin PIN (default: 12345678) to your own choices.

Your Nitrokey is now ready to use.
Note
For some Versions of MacOS it is necessary to install custom ccid driver (for information see here), but in general MacOS should have the driver onboard.
For many use cases described, it is necessary to have either OpenPGP or S/MIME keys installed on the device (see below).
Tip
Note: For many use cases described, it is necessary to have either OpenPGP or S/MIME keys installed on the device (see below).
Key Creation with OpenPGP or S/MIME
There are two widely used standards for email encryption. While OpenPGP/GnuPG is popular among individuals, S/MIME/x.509 is mostly used by enterprises. If you are in doubt which one to choose, you should use OpenPGP.
To learn more about how to use OpenPGP for email encryption with the Nitrokey, please refer to chapter OpenPGP Email Encryption.
To learn more about how to use S/MIME for email encryption with the Nitrokey, please refer to chapter S/MIME Email Encryption.