QubesOS
Note
Аудиопортът (жак) на NitroPad T480s не работи автоматично. За да изберете ръчно свързаните слушалки, инсталирайте програмата pavucontrol и изберете свързаните слушалки в менюто Output Devices (Изходни устройства).
Проверка на запечатан хардуер
If you have ordered the unit with the option “sealed screws and sealed bag”, please verify the sealing before unpacking. If you do not know what this means, skip this section.
Процедура за сигурно стартиране
Преди първото стартиране трябва да се запознаете с Процедура за сигурно стартиране.
Започване на работа
След покупката паролите са зададени по подразбиране и трябва да бъдат променени от вас:
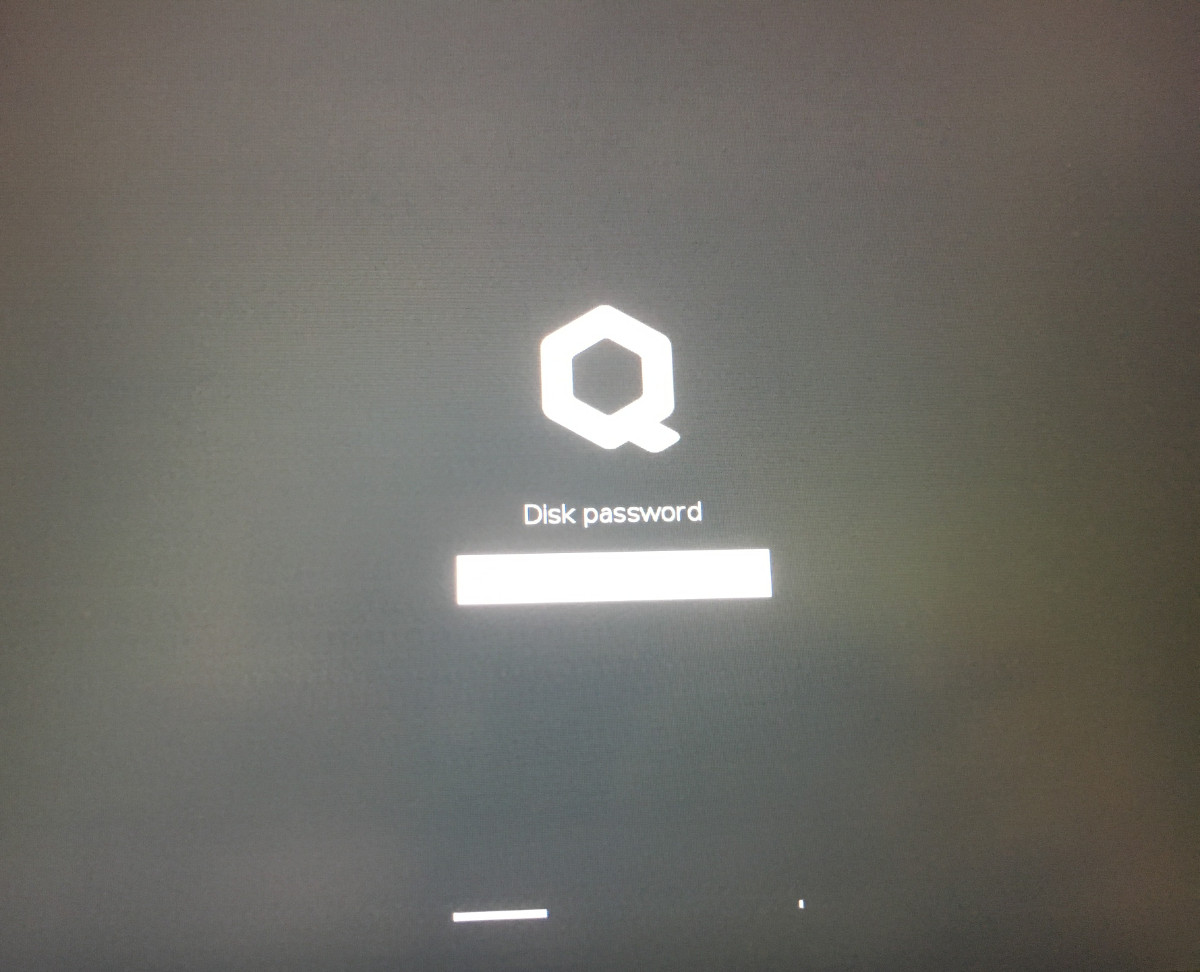
Натиснете Enter („Default Boot“) след стартиране на системата, при условие че NitroPad не е показал никакви грешки и Nitrokey свети в зелено (вж. по-горе).
Next, the system will prompt you to enter the passphrase to decrypt the hard disk. The passphrase is initially „12345678“.
След това системата ще ви насочи към процеса на създаване на потребителски акаунт. След това трябва да сте стартирали успешно системата и вече да можете да я използвате нормално.
Open the pre-installed Nitrokey App and change the PINs of your Nitrokey as described here.
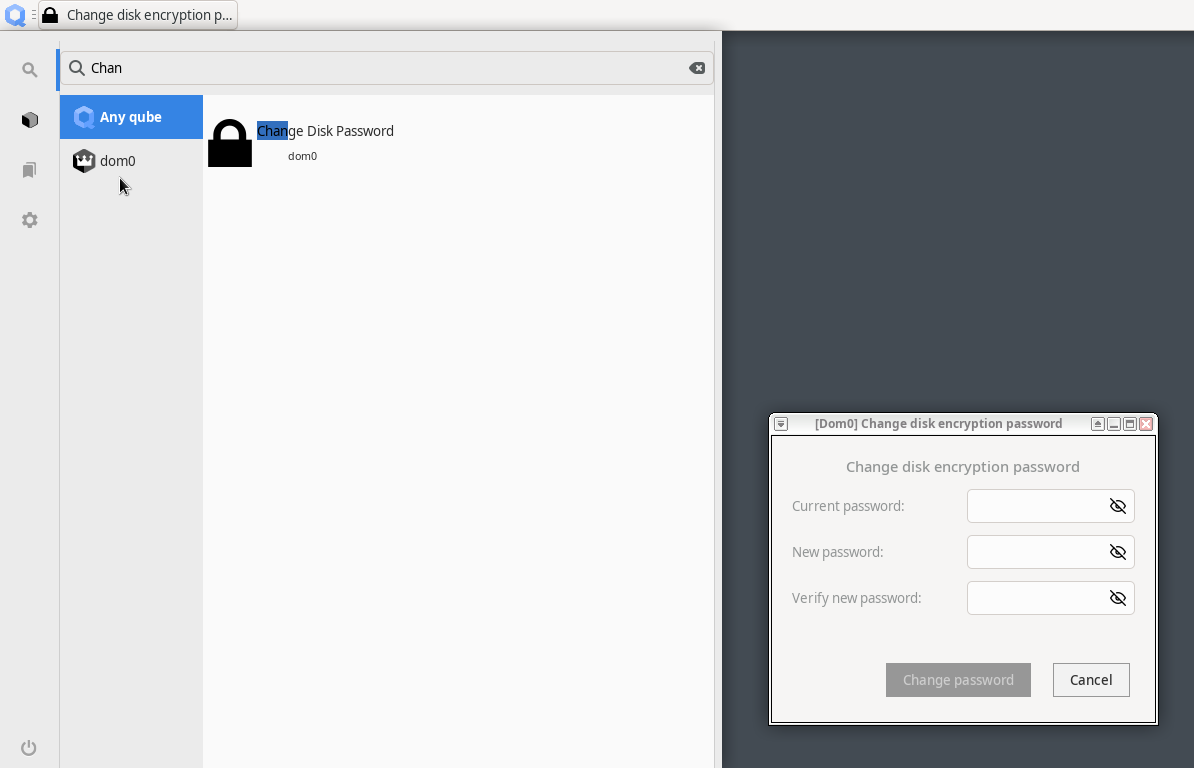
Променете паролата за криптиране на твърдия диск, като потърсите в менюто Qubes „Change Disk Passwort“ (Промяна на паролата на диска). Тази парола е различна от паролата на потребителския ви акаунт.
NitroPads се доставят с най-новото инсталационно изображение от Qubes OS, което трябва да се актуализира след инсталирането, тъй като не съдържа всички последни поправки на сигурността. За да актуализирате, използвайте мениджъра за актуализации, както е описано в Qubes Documentation.
Note
Специално за NitroPad V54 инсталационното изображение на Qubes 4.2.3 съдържа грешка, която ограничава използването само на най-високата резолюция на екрана. Това се отстранява, след като актуализирате dom0 и рестартирате.
Поведение след актуализация на системата
The NitroPad and NitroPC firmware checks certain system files for changes. If your operating system has updated important components, you will be warned the next time you boot the NitroPad or NitroPC. This could look like this, for example:
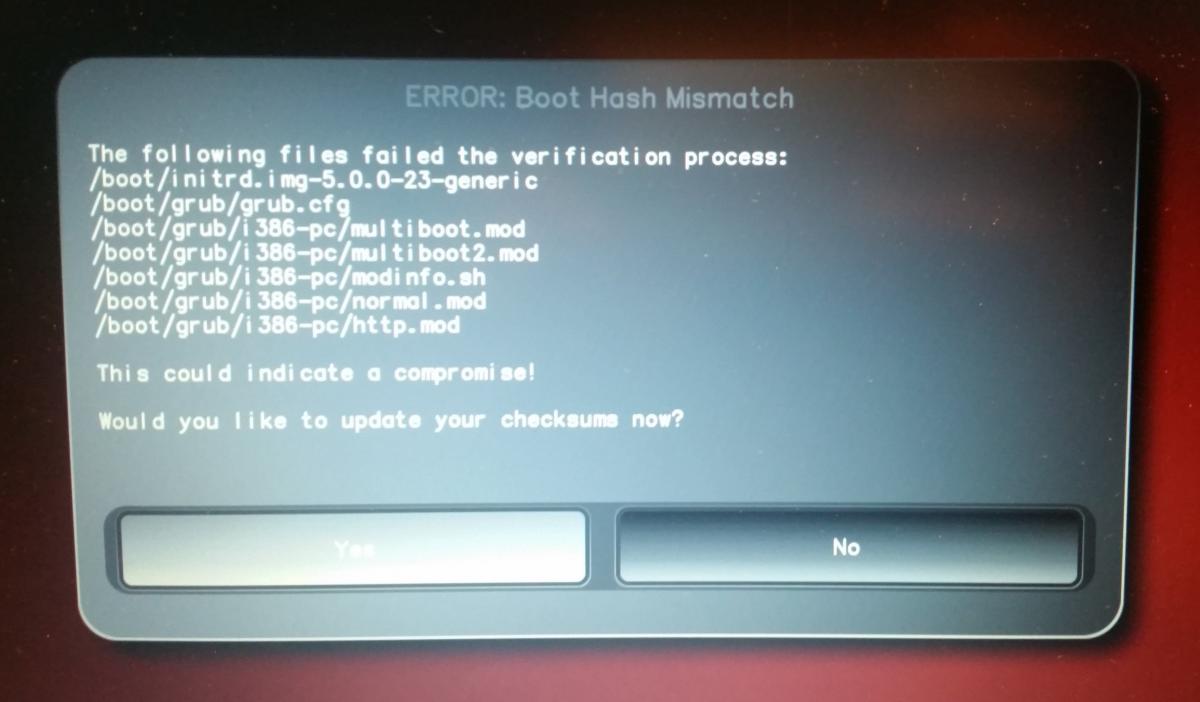
That’s why it’s important to restart your NitroPad or your NitroPC under controlled conditions after a system update. Only when the new status has been confirmed can you leave the device unattended again. Otherwise, you will not be able to distinguish a possible attack from a system update. Detailed instructions for a system update can be found here.
Failed to Start Load Kernel Modules
По време на зареждането на системата се изписва грешката „Failed to start Load Kernel Modules“. Това е известен проблем, който не е критичен и може да бъде пренебрегнат.