Firmware Update
This guide describes how to update the Heads firmware of the NitroPad.
These instructions are relevant in the following cases:
You want to update the Heads firmware.
You have already performed an OEM factory reset, but the TPM counter has not been reset.
Preparation
Connect your NitroPad to a power plug and load its battery to over 70%
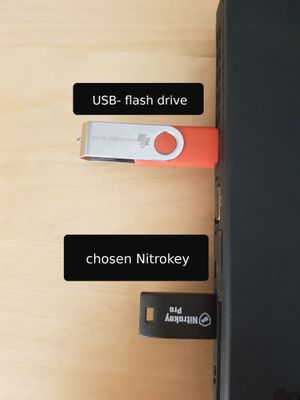
Download the latest firmware and store it on a USB drive. For the:
NitroPad T430:
firmware-nitropad-t430-[version].npfNitroPad X230:
firmware-nitropad-x230-[version].npfNitroPad NV41:
firmware-nitropad-nv41-[version].npfNitroPad NS50:
firmware-nitropad-ns50-[version].npf
Firmware Signature Check
To verify the firmware follow these steps:
Download sha256sum.sig and store it
Download and import Markus Meissners gpg key
Verify the signature:
gpg --verify sha256sum.sig sha256sum
You expect an output like this one:
gpg: Signature made Wed 05 Jul 2023 04:30:34 PM CEST
gpg:                using RSA key C7E32619E2F71736F5910BB144CB2D868DD16BDA
gpg: Good signature from "Markus Meissner <meissner@nitrokey.com>" [ultimate]
gpg:                 aka "Markus Meissner <coder@safemailbox.de>" [ultimate]
This verifys the file.
Procedure
This is the actual update procedure. Usually the first two screens will not be shown - in that case please start from step 3.
(Optional screen) Select “Ignore error and continue to default boot menu”.
(Optional screen) Select “Ignore error and continue to default boot menu”.
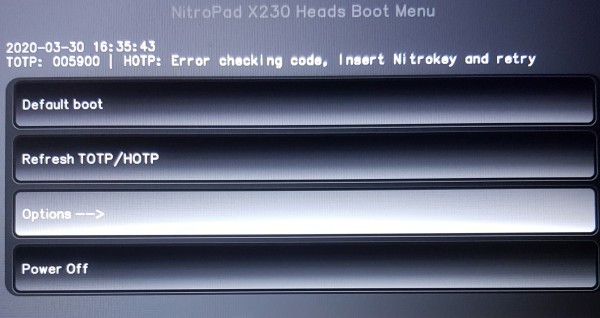
Go to “Options”.
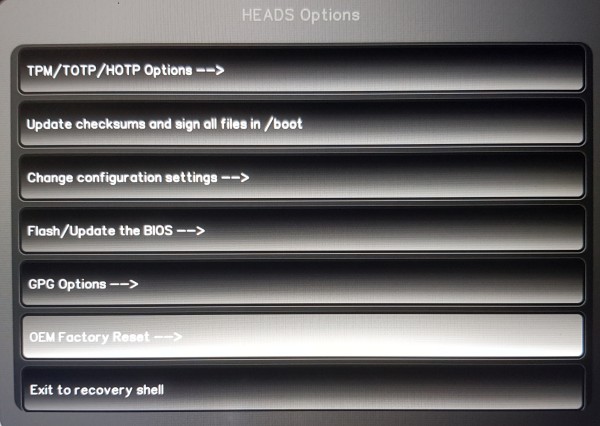
Select “Flash/Update the BIOS”.
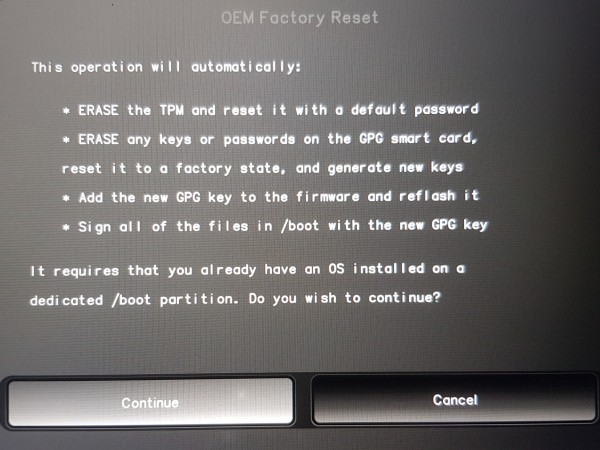
Please confirm the first option.
Confirm the process with Enter.
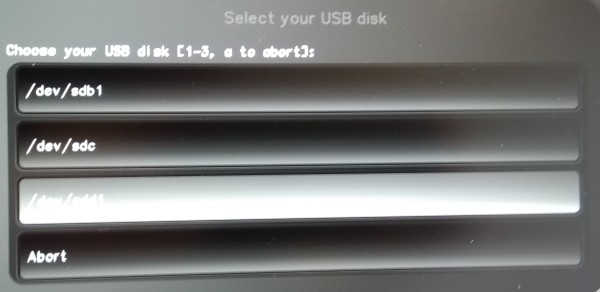
Select the desired .npf file.
Confirm the process with Enter.
Confirm the restart with Enter.
You have successfully updated your firmware!
Further steps
Hint
There is a known issue with the NV41 that it can get stuck after the update in the boot splash(heads takes longer then 30s to get up). This solves it self after max 5 restarts (pressing the power button short). If not please contact our technical support.
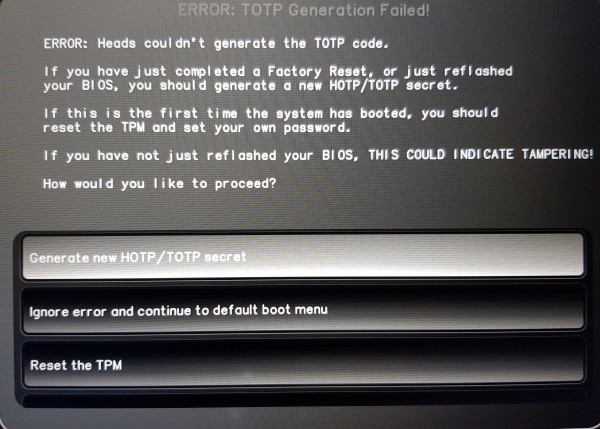
In case
ERROR: TOTP Generation Failed!screen will show up, please follow the instructions for Factory Reset (on the left side menu), starting from step